Table of Contents
There are a lot of websites on the internet, still, people want to create more. A lot of methods are also available for creating them, WordPress is one of them, or we can say “it is the popular one“. So, today we are going to learn about “Set-up WordPress on aws with EC2 and Amazon RDS“.
Before going further, let us understand about “WordPress“, “what is it, how it works, what are its key components“:
It is written in “PHP Programming Language“, which is used for web development, especially for back-end related tasks. Now, say you have written something in “HTML + CSS + PHP” and named the file as “test.php“, then there are two things possible:
- All the “CSS + HTML + PHP” code is in the single “test.php” file
- All the “CSS, HTML, PHP” code is written in separate files, say “test.css“, “test.html“, “test.php“
As of now, all the things combined only creates “Static Pages“, but what if we want some functionality like -> “User is asked to provide some details, and after submitting them, a new page should be provided to the user“
In that case, we need “a Database (MySQL)” where we can store the submitted details and then process those details, in return after processing we will provide a new page.
So, now we have a total of 4 components:
HTML + CSS + PHP + MySQL
Now that we know what components make the basic functionality of “WordPress“, it is time to look up how we can “set-up WordPress on aws with EC2 and Amazon RDS“
So, we have divided the deployment in two “AWS Services“:
- Amazon EC2 = For storing the “WordPress Code“
- Amazon RDS = For storing the “Database“
So, the following post is going to be “divided” into two steps:
- Step 1 = Specifying how to place the WordPress Code on Amazon EC2 Instance
- Step 2 = How to create an “Amazon RDS” database instance
Step 1: Create an EC2 instance
We have skipped a few steps before one shown in the screenshot below if you are completely new to “Amazon AWS” and do not even know how EC2 instances are created on AWS, then follow the following post -> How to create an EC2 instance
Configure Instance
In this, we are using a “Bootstrap script” for creating the “EC2 instance“, to learn more about it, follow -> How To Use Bootstrap Scripts With EC2 Instance
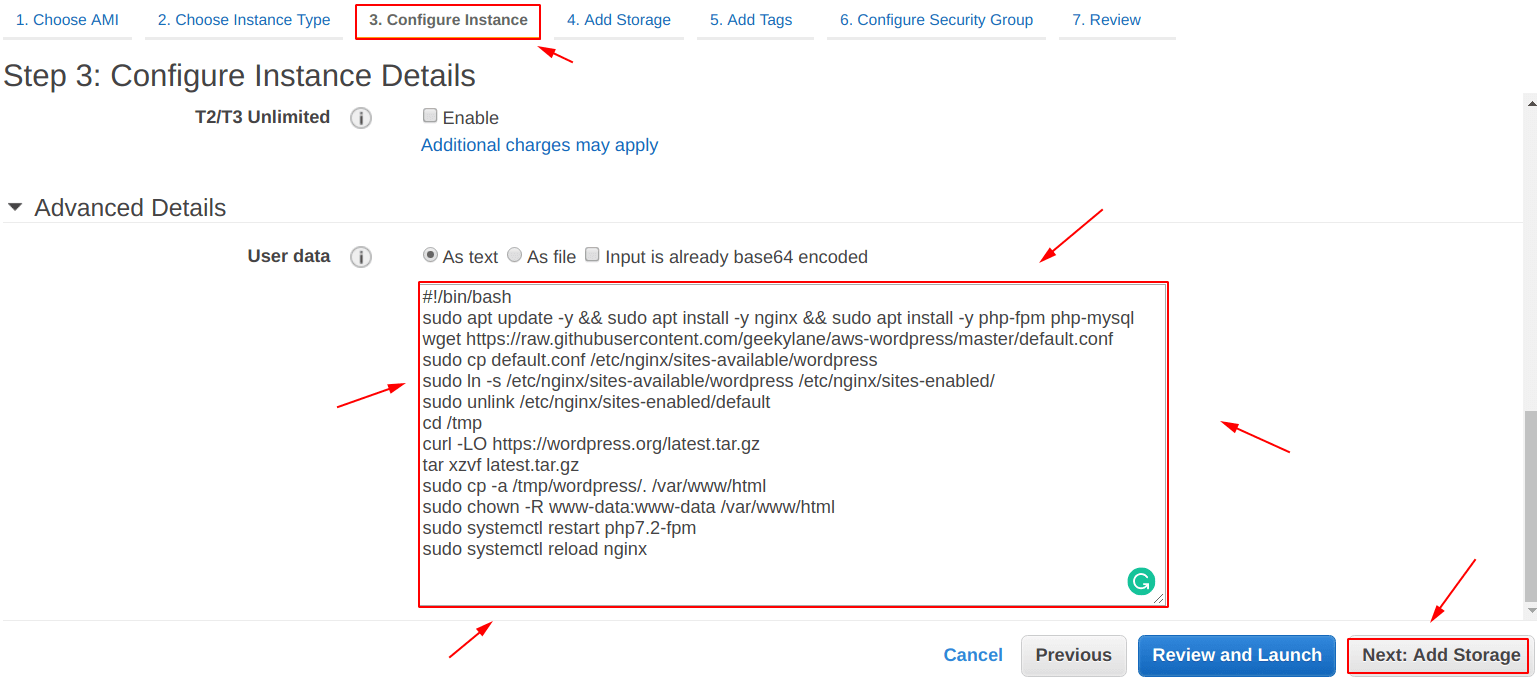
Line 1 = #!/bin/bash
Line 2 = sudo apt update -y && sudo apt install -y nginx && sudo apt install -y php-fpm php-mysql
Line 3 = wget https://raw.githubusercontent.com/geekylane/aws-wordpress/master/default.conf
Line 4 = sudo cp default.conf /etc/nginx/sites-available/wordpress
Line 5 = sudo ln -s /etc/nginx/sites-available/wordpress /etc/nginx/sites-enabled/
Line 6 = sudo unlink /etc/nginx/sites-enabled/default
Line 7 = cd /tmp
Line 8 = curl -LO https://wordpress.org/latest.tar.gz
Line 9 = tar xzvf latest.tar.gz
Line 10 = sudo cp -a /tmp/wordpress/. /var/www/html
Line 11 = sudo chown -R www-data:www-data /var/www/html
Line 12 = sudo systemctl restart php7.2-fpm
Line 13 = sudo systemctl reload nginx
Explanation of the code/script used as a bootstrap above:
Line 1 = It tells that this script should always run with “bash shell“
Line 2 = Update the server/system and then install “nginx“, “php-fpm“, “php-mysql“
Line 3 = Download a preconfigured “default.conf” file for “nginx” (we have created this for much smoother deployment and automation)
Line 4 = Copy the downloaded “default.conf” to specific directory, and rename as “wordpress“
Line 5 = Create a “symbolic link” of “wordpress” configuration file, inside the “/etc/nginx/sites-enabled/” directory
Line 6 = Unlink the “Old” configuration file
Line 7 = Change the current directory to “/tmp” directory
Line 8 = Download the latest version of “wordpress” using the “curl” command
Line 9 = Extract the downloaded wordpress package using the “tar” command
Line 10 = Copy all the extracted contents to the main nginx root directory “/var/www/html“
Line 11 = Change the ownership of “/var/www/html” recursively to “www-data“, under this user, the nginx server operates
Line 12 = Restart the “php7.2-fpm” service, this handles all the dynamic content of php
Line 13 = Finally, reload the “nginx” web server
Configure Security Group
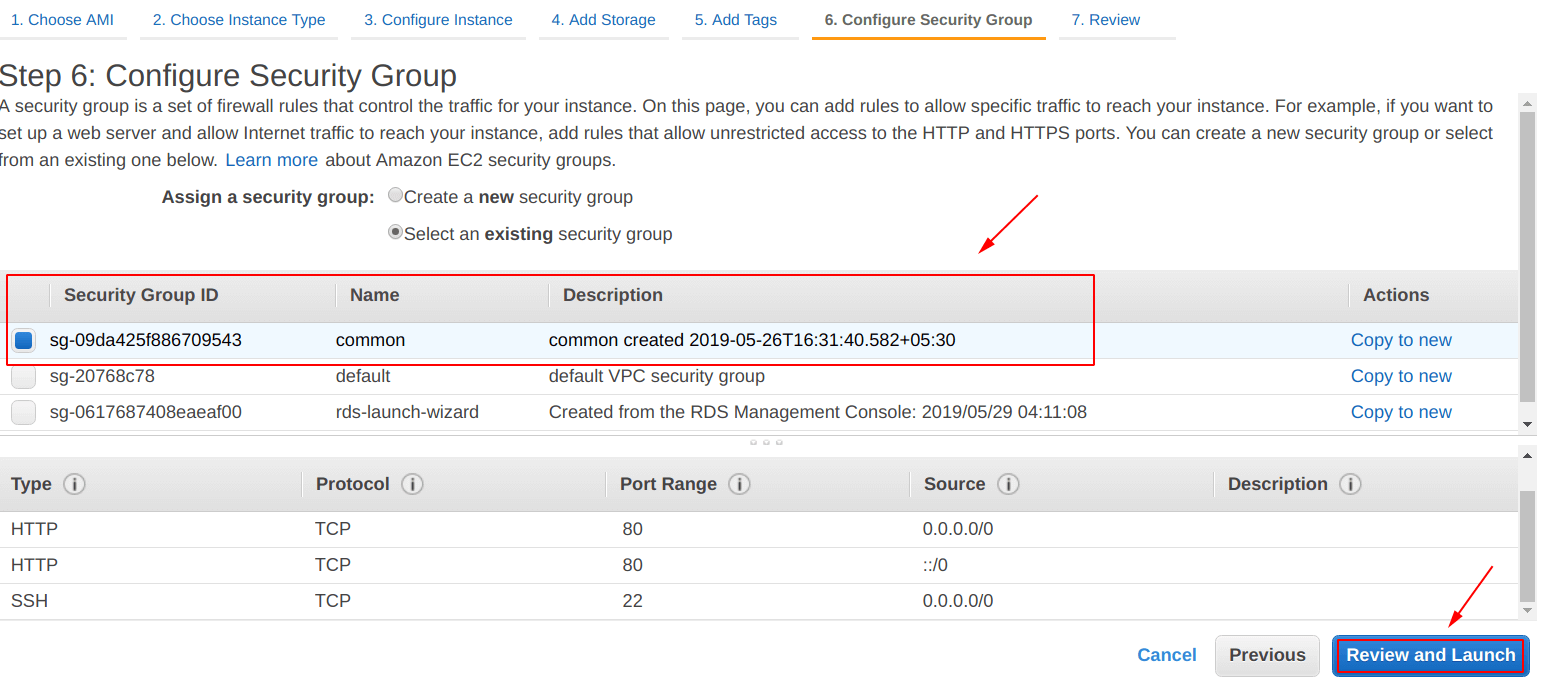
Also, we have to create a security group, as shown below, the security group has the following “inbound rules“:
- HTTP = TCP = 80 = 0.0.0.0/0
- HTTP = TCP = 80 = ::/0
- SSH = TCP = 22 = 0.0.0.0/0
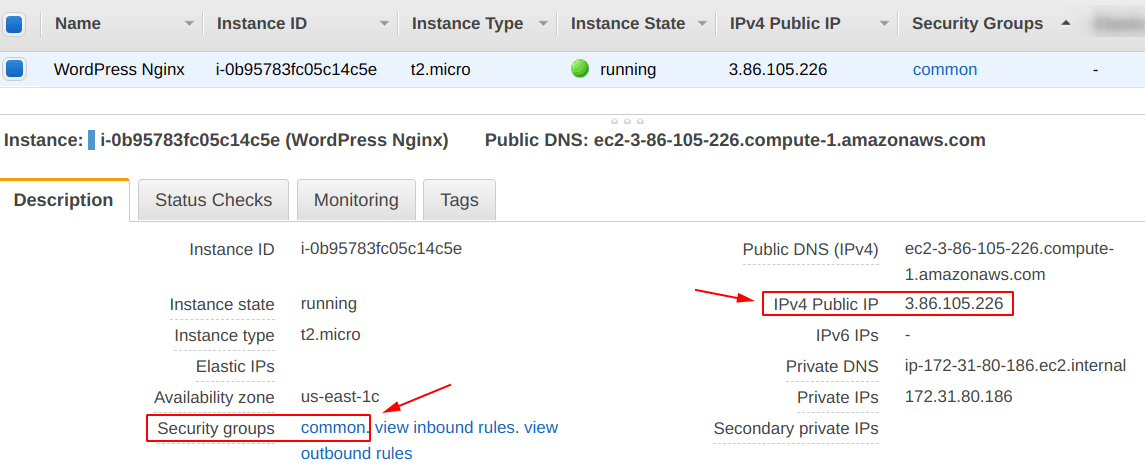
After creating the “EC2 instance” with the settings specified above, copy the “IP Address” that instance and paste it into the “browser” as shown below.
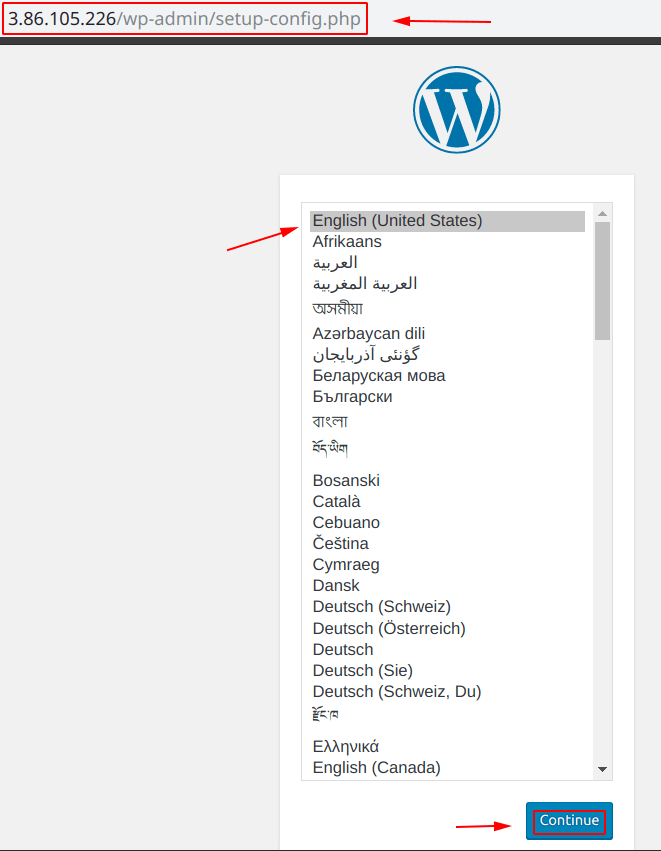
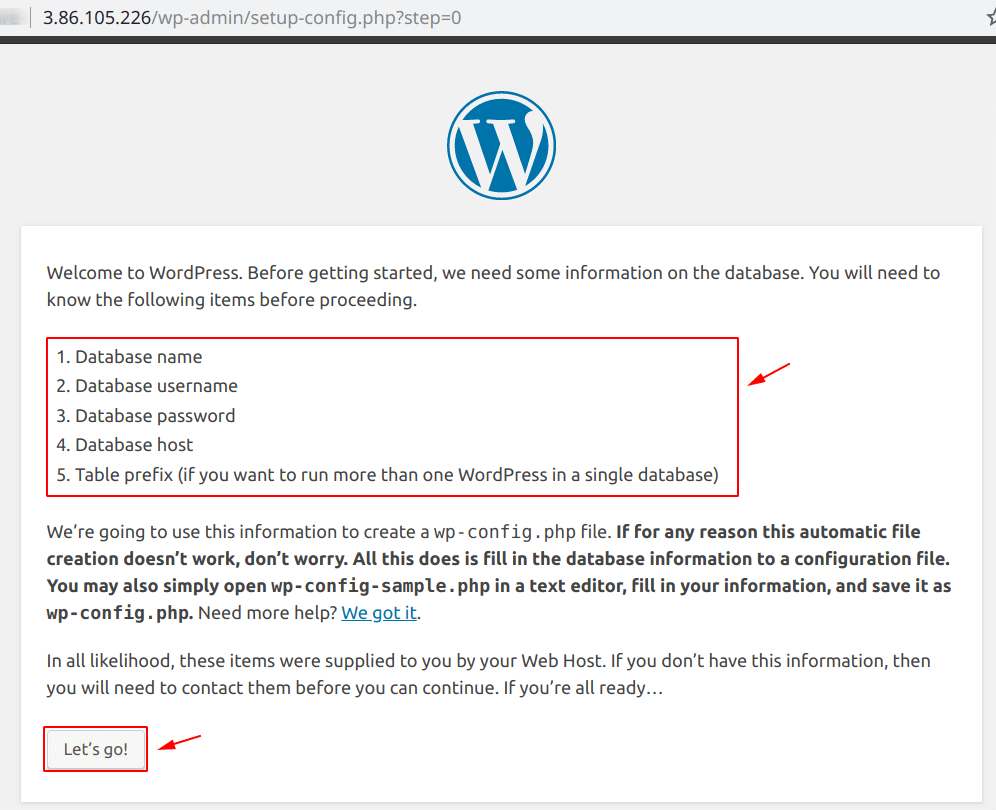
During the “set-up“, you will be shown a screen similar to the one shown below and asked for the details.
These are the details for the “Database“, as of now we have no database created, so we have to create one and we are going to create a database on “Amazon RDS“.
Step 2: Create an Amazon RDS database Instance
Before going further, make sure you read -> Create an MYSQL Database on Amazon RDS
Connectivity & Security
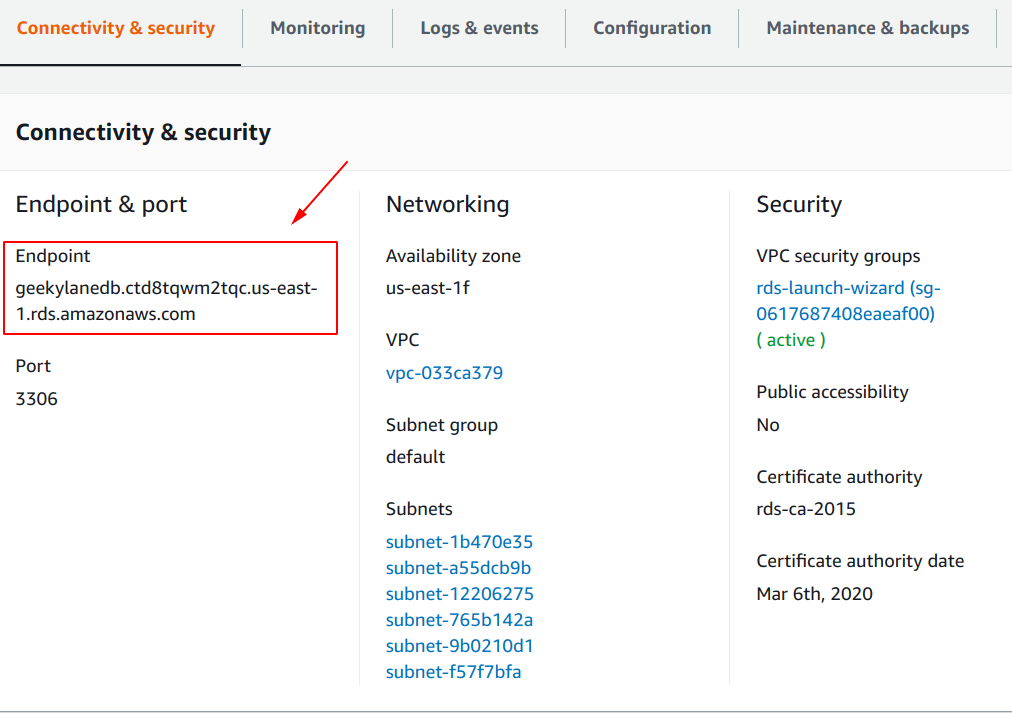
We have to note the “Endpoint” of the “Amazon RDS” instance, as shown below.
This is going to be used as the connector point to the “MySQL” from the “WordPress“.
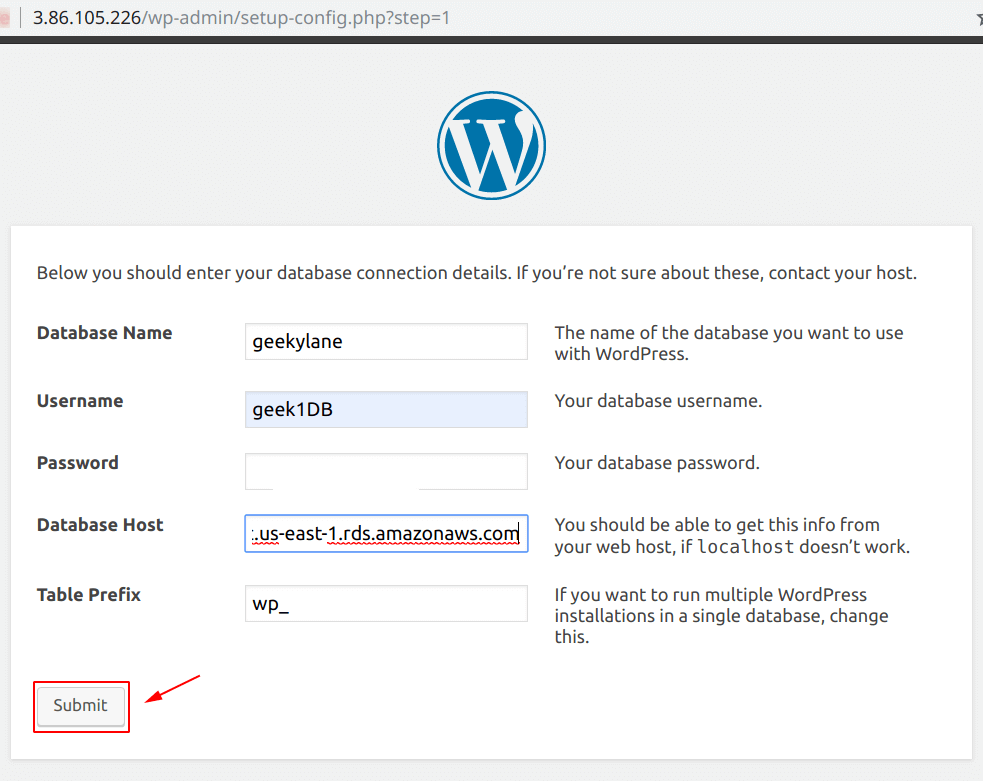
After noting the details from above, we have to provide them on the following screen:
- Database Name = The name that you have used during the “Amazon RDS” instance creation
- Username = The name of the database user
- Password = Password for the database
- Database Host = This is where we have to specify the “Endpoint” of our “Amazon RDS” instance
- Table Prefix = What prefix do your database tables should have
After providing all the details, click on the “Submit” button.
Step 3: Allow traffic from “EC2 Instance” to “Amazon RDS Instance”
Now, this is the last step of the post. In this, we have to create an inbound rule for the “Amazon RDS” security group, which allows the traffic coming from “EC2 instance created in Step 1” to “Amazon RDS instance created in Step 2“.
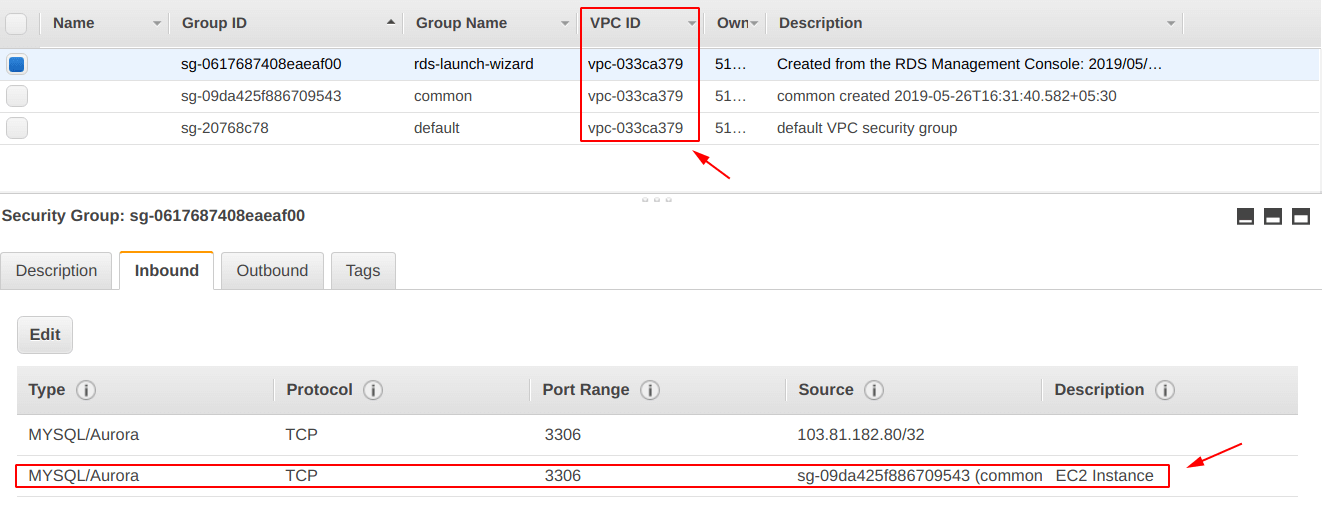
Note: Make sure you “allow traffic from EC2 instance to RDS instance” before clicking on the “Run the installation” button as shown in the screenshot below.
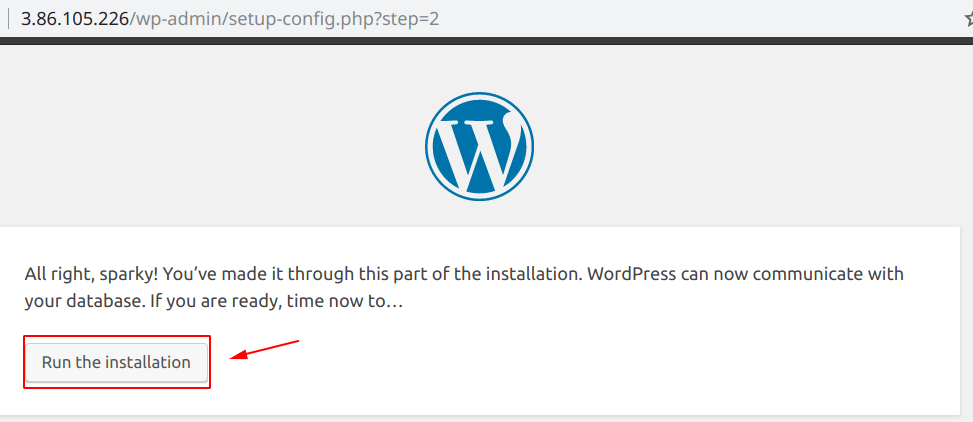
WordPress “Welcome Screen”
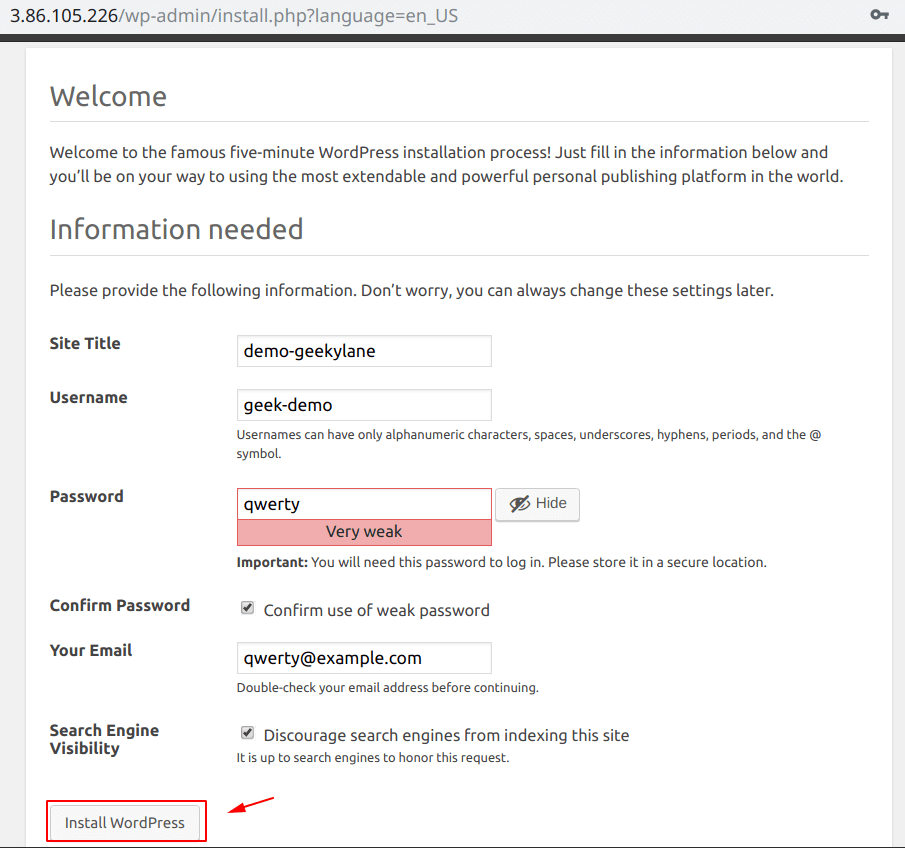
Now that our WordPress is set-up completely, it is time to install it, as shown below.
After filling up all the details, click on the “Install WordPress” button.
And after that, you will be seeing a screen similar to the one shown below, click on “Login“.
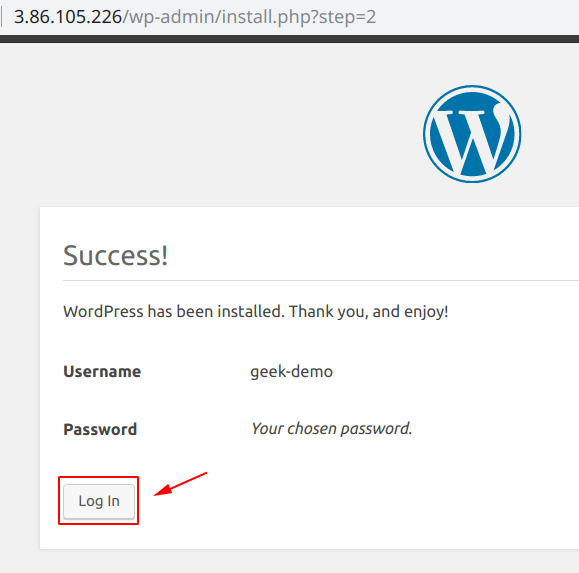
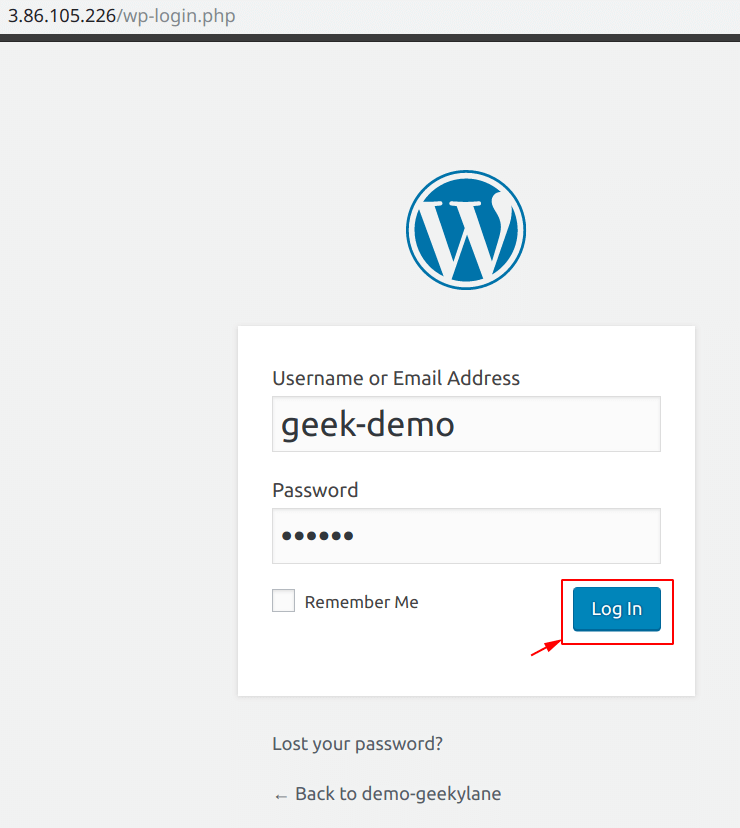
You will be prompted to the “Login” screen, here you can provide your credentials and access the “WordPress Dashboard“.
WordPress Dashboard
Conclusion “WordPress with EC2 and Amazon RDS”
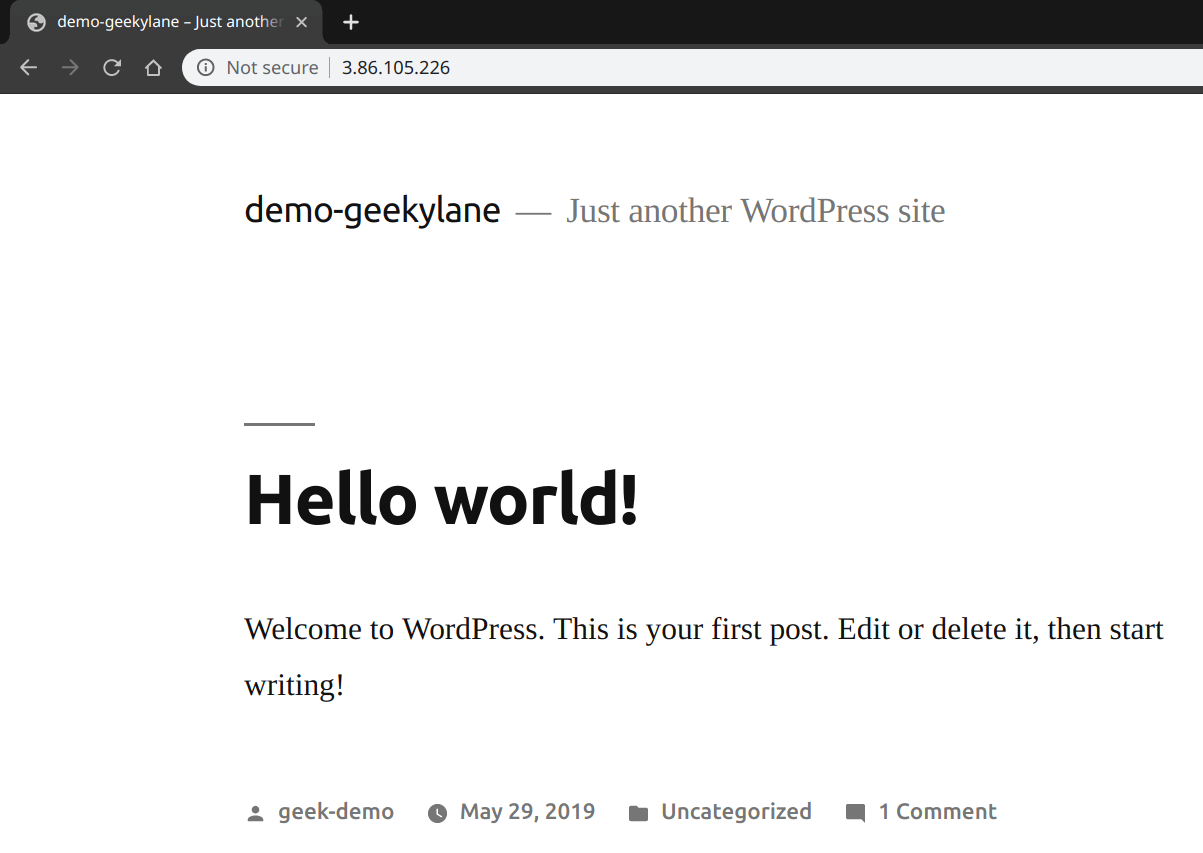
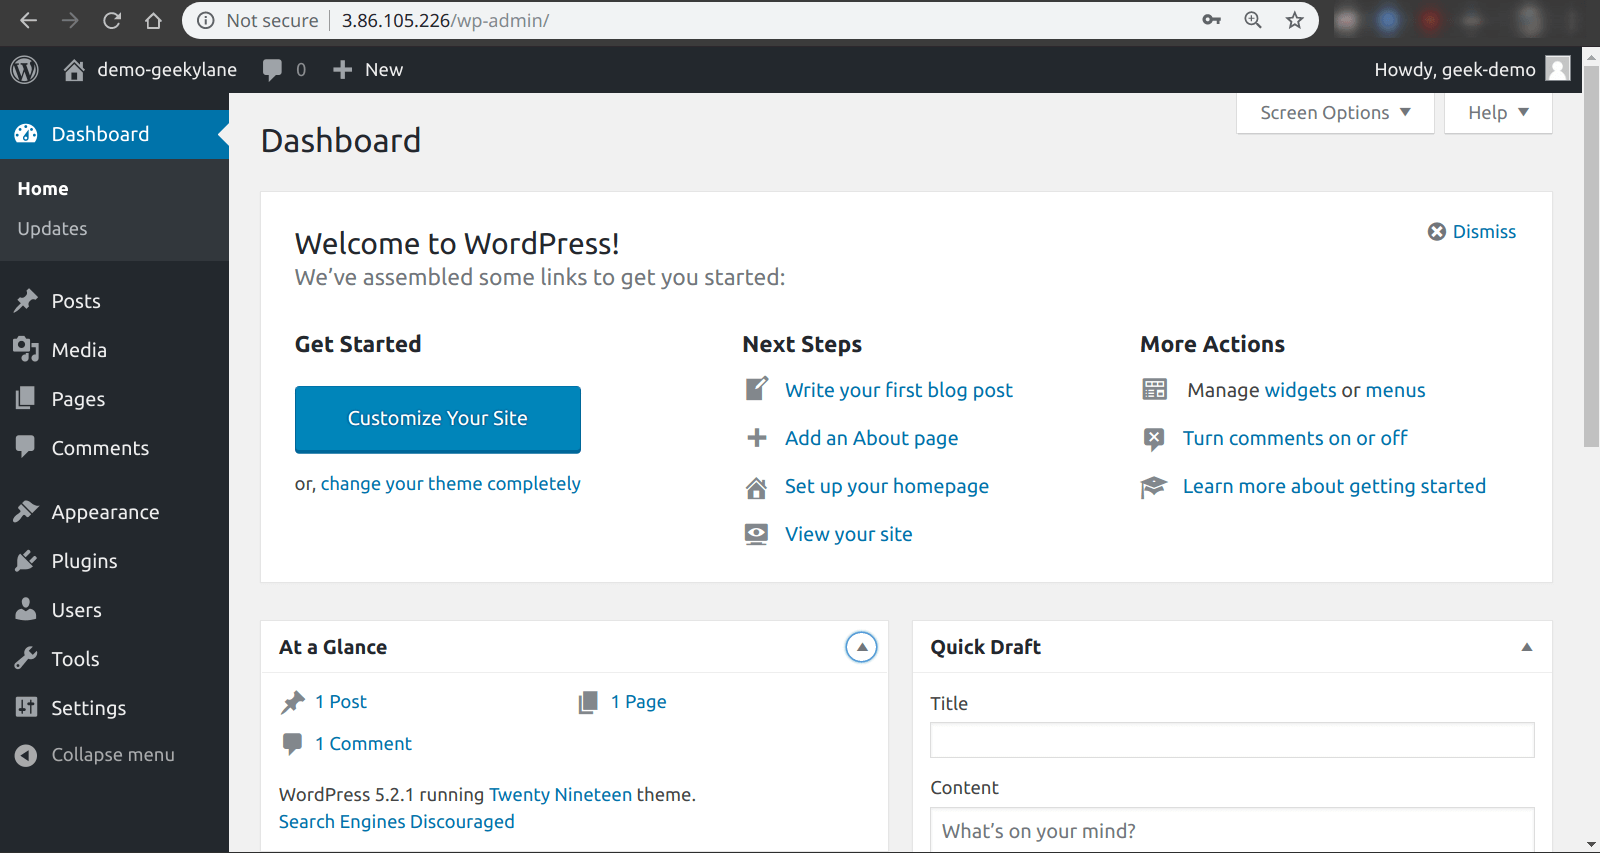
The following screen is the end result of the complete post.
