Table of Contents
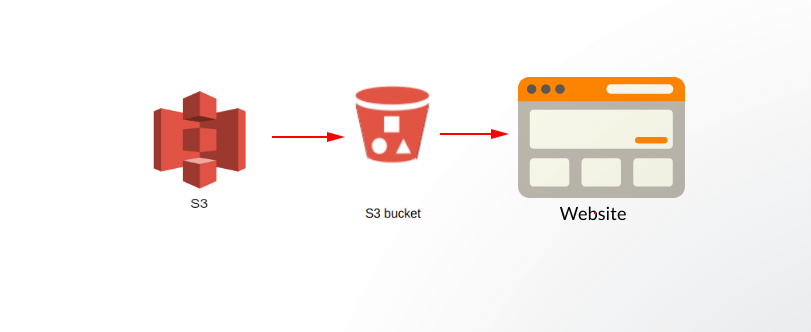
Today we are going to learn about “creating a static website using s3 bucket”. Because there are times when we just want to deliver a static web page to the users, then, in that case, using “S3 buckets” is a good choice available on Amazon AWS.
Question: Why only a “static website“?
Answer: As of now, all alone the Amazon’s S3 service will only allow the static content, but it can be further used with other AWS services in order to deliver dynamic content as well, we are going to discuss that in future posts.
Step 1: Create an S3 bucket
We have already created an S3 bucket with the name “geekylane-website“.
If you do not know or want to know more about creating S3 buckets, follow -> How to create an S3 bucket on AWS?

Step 2: Create files – to be delivered by S3 bucket
File we are about to create and upload:
- index.html = main web page
- geekylane1.jpg = going to be referenced via “index.html“
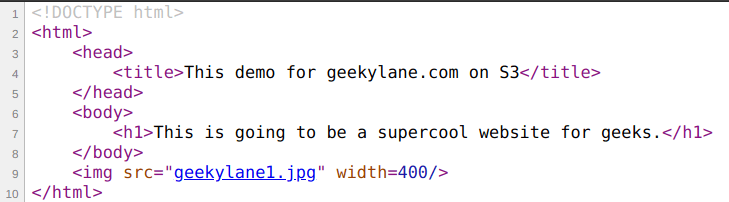
Firstly, we have written the following code for our “index.html“.
Secondly, following is our “geekylane1.jpg” file.

Step 3: Upload Files
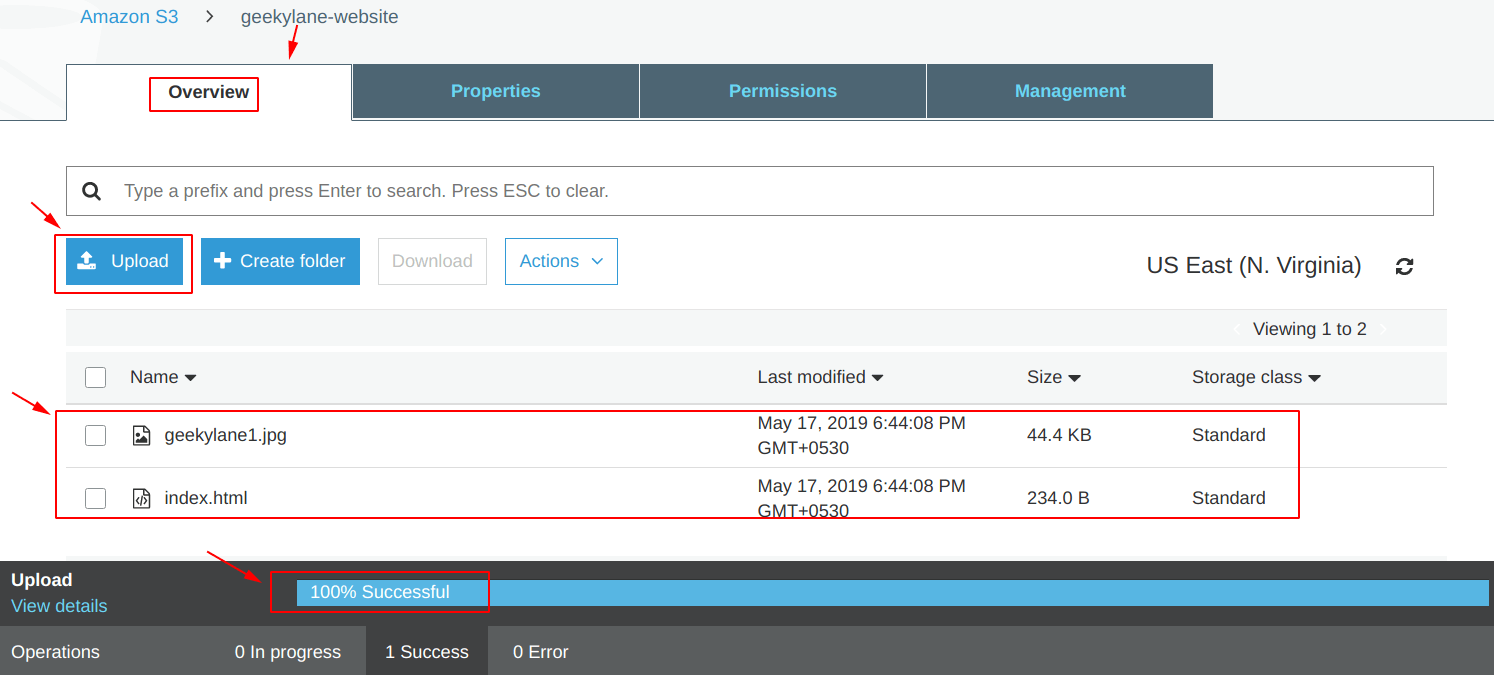
The files which we have in the “Step 2“, it is time to upload them our “geekylane-website” S3 bucket. We have already uploaded both the files, as shown below.
Step 4: Access Files
Now, it is time to access the files which we have uploaded in the “Step 3“.
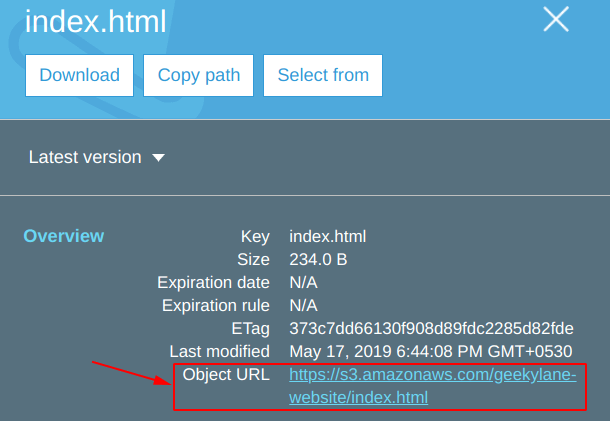
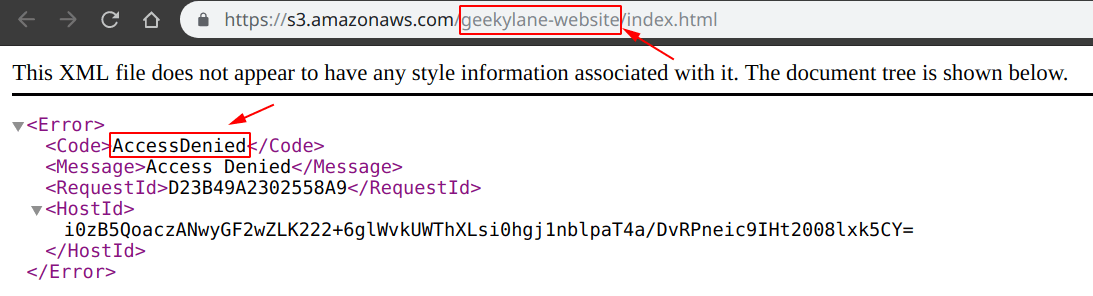
In order to access a particular object (file) stored in an S3 bucket, we have to copy the “Object URL“, for reference check below.
Question: Wait! What? it is showing “AccessDenied” Error? Why?
Answer: It is showing Error because we have not made the objects public.
Step 5: Make S3 Objects Public
Because we want to access the files which we have uploaded in “Step 3” via a web-browser. We have to make the objects stored in the bucket (geekylane-website), public.
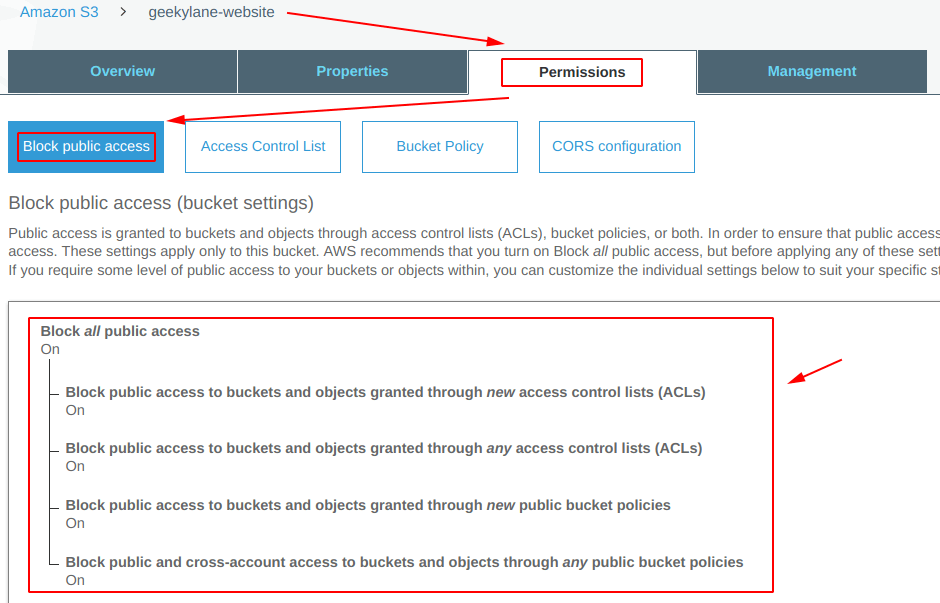
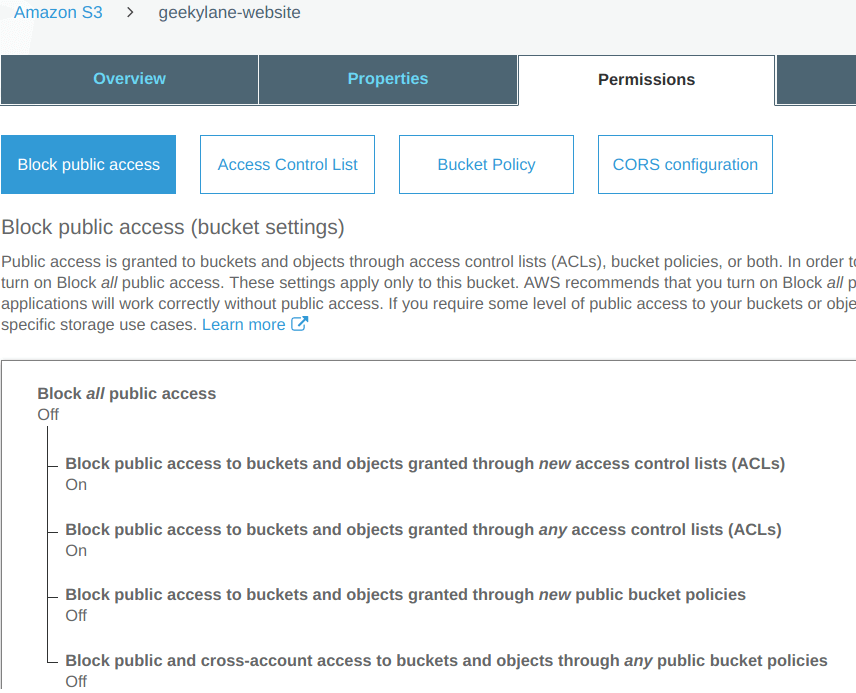
In order to do that, we have to change the “block public access” settings.
The following picture is the default settings for the “block public access“, you can see that all types of access via “ACLs” or “bucket policies” are blocked.
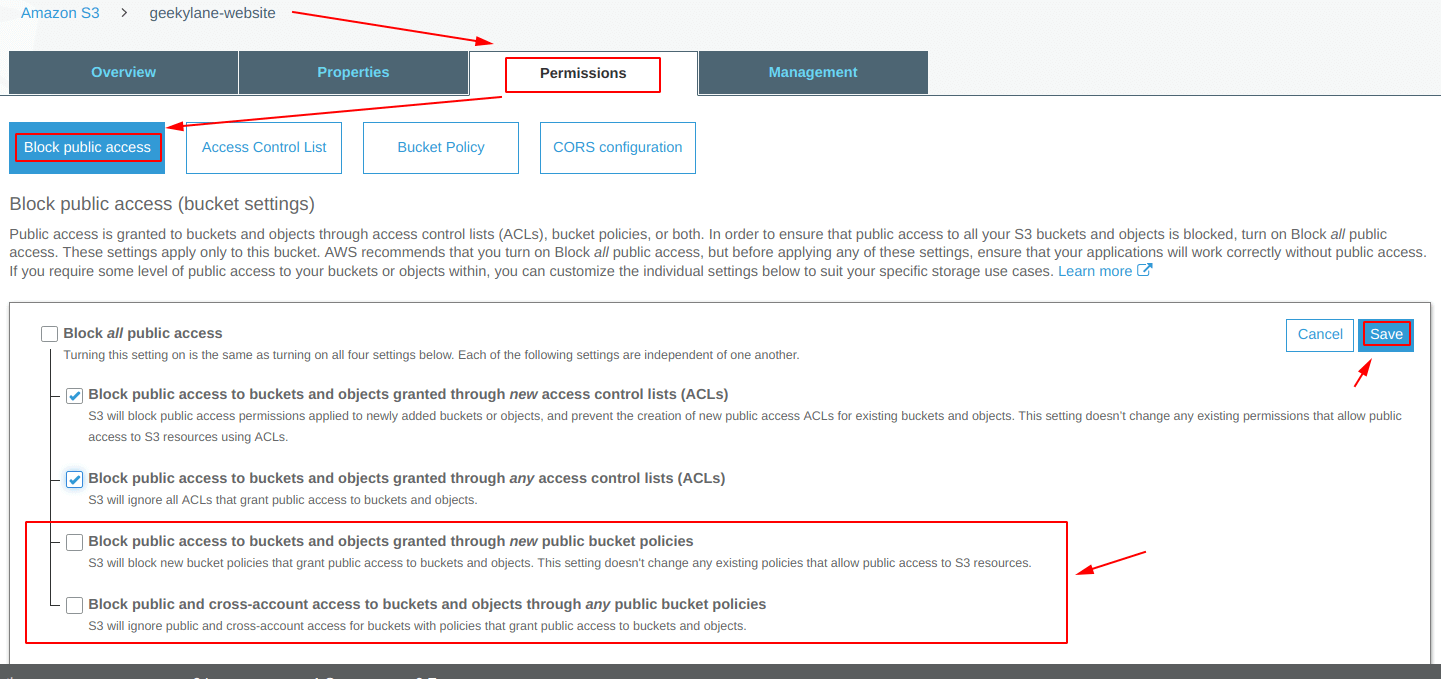
We have to alter/change the settings as the picture below, we have unblocked the public access to the S3 buckets and its objects granted through the bucket policies.
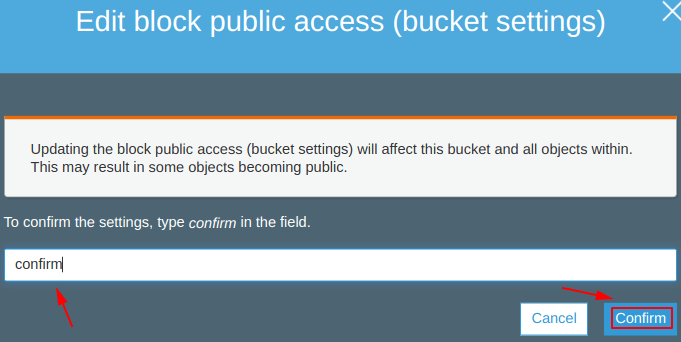
After that, we will be asked for a final confirmation, as shown below, simply type “confirm” and hit “Confirm“.
Our final permissions will look like shown below.
Step 6: Set-up Bucket Policy
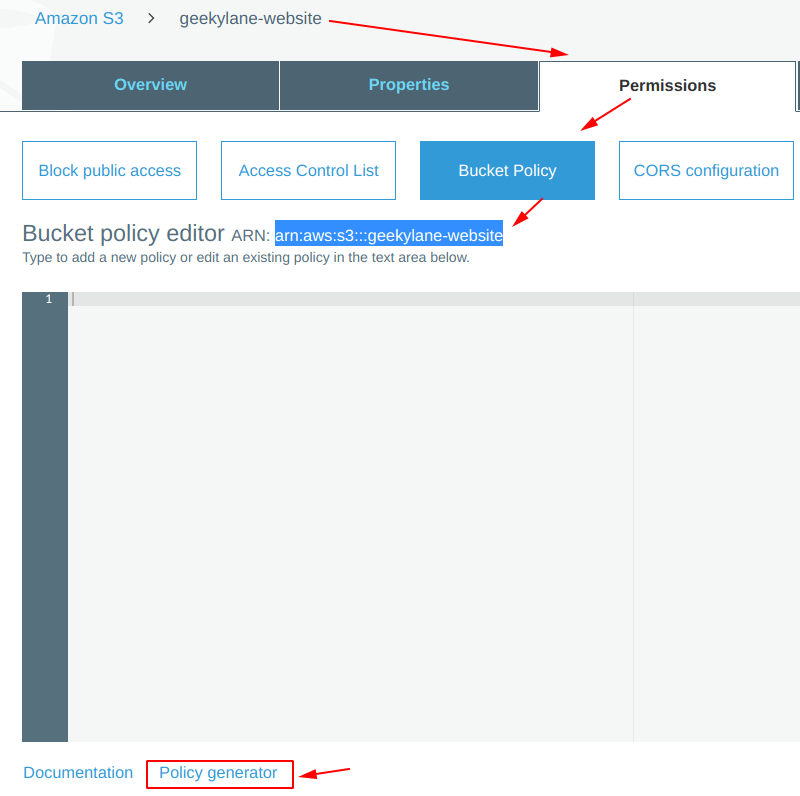
First of all, we have to copy the “ARN” number for the bucket, this number is going to be different in your case, so do make a note of that.
And in order to generate a “bucket policy“, select the “policy generator” on this from the bottom, for reference check the screenshot below.
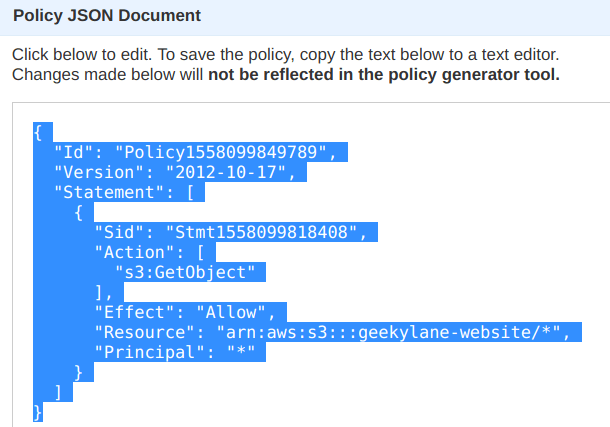
Create a statement as follows, using the policy generator.

After creating a statement, as shown above, generate a bucket policy, and you will be seeing something similar to the “JSON” document shown below.
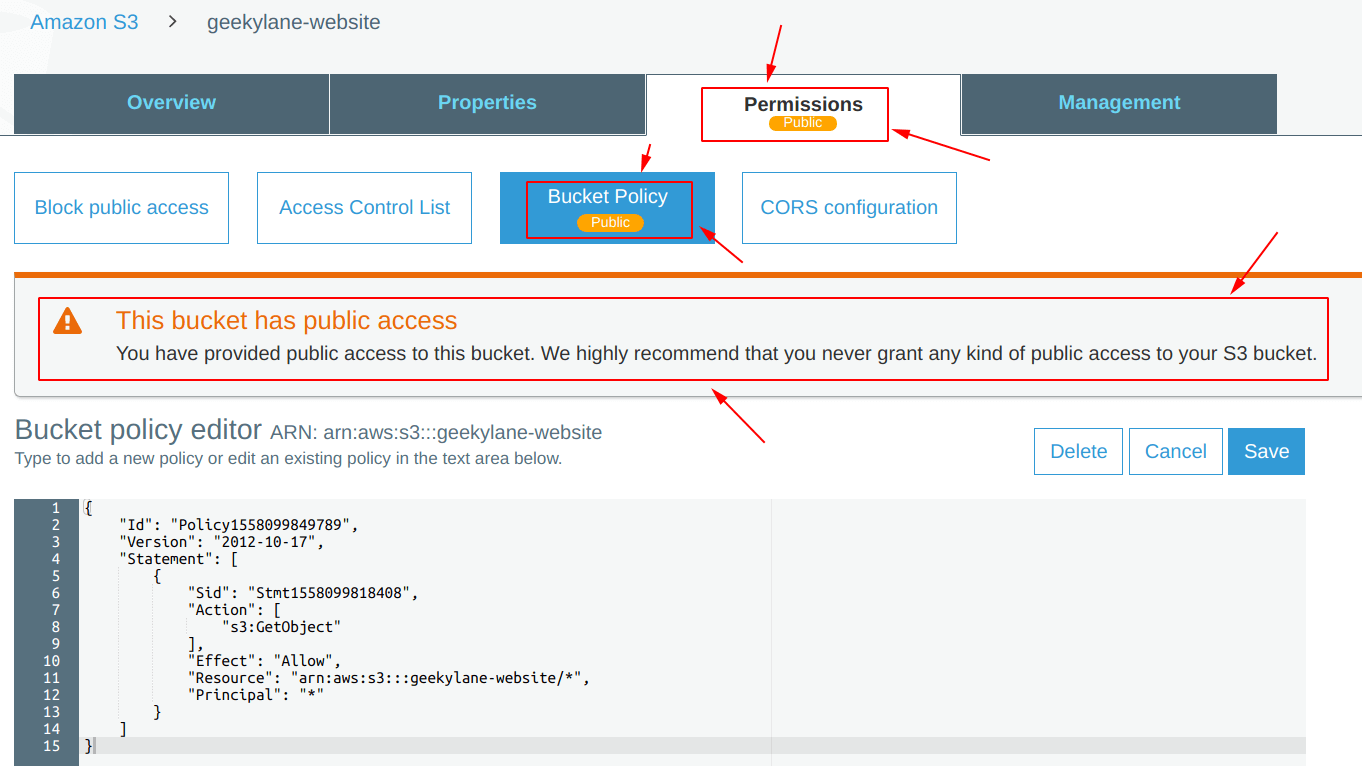
After that, copy the “JSON” code generated above and paste it under the “Bucket Policy” section of an S3 bucket, in our case we have pasted it under “Permissions” of our “geekylane-website“, which we have created in the “Step 1“.
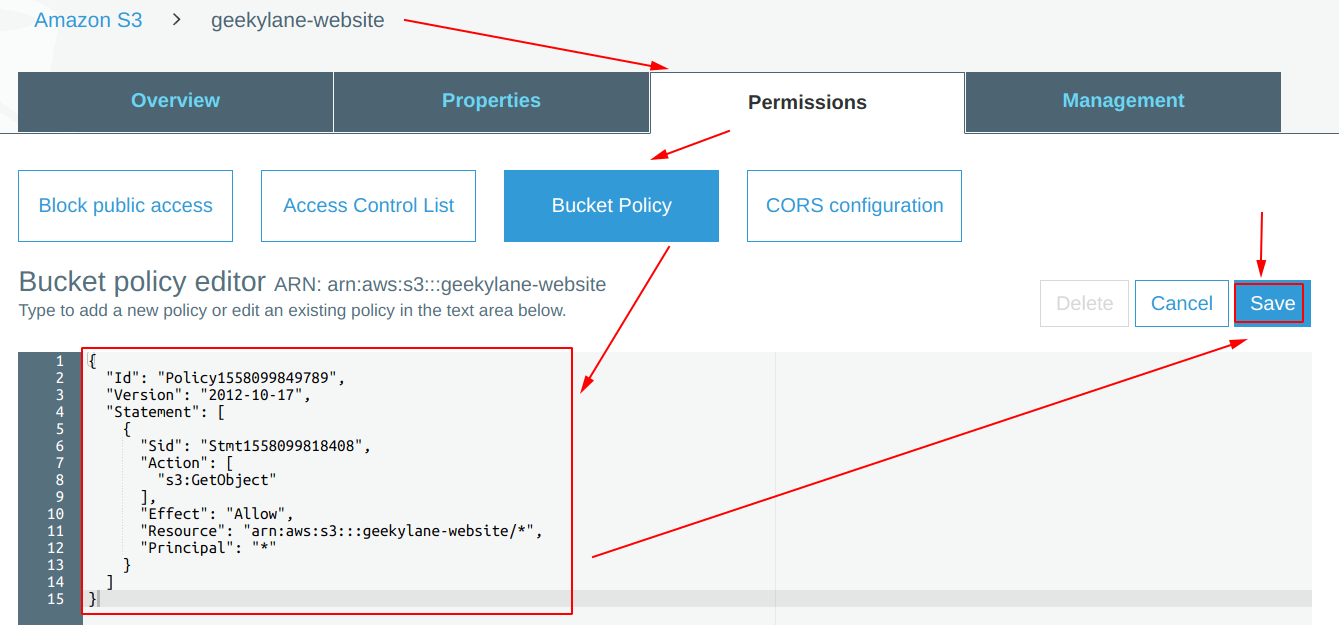
Finally, you will be seeing a message like -> “This bucket has public access” and a “Public” icon with “yellow color” on the “permissions tab” and on the “Bucket Policy” tab, as shown in the image below.
To learn more about S3 bucket Permissions, follow -> S3 Bucket Policy
Step 7: Try Accessing the File Again
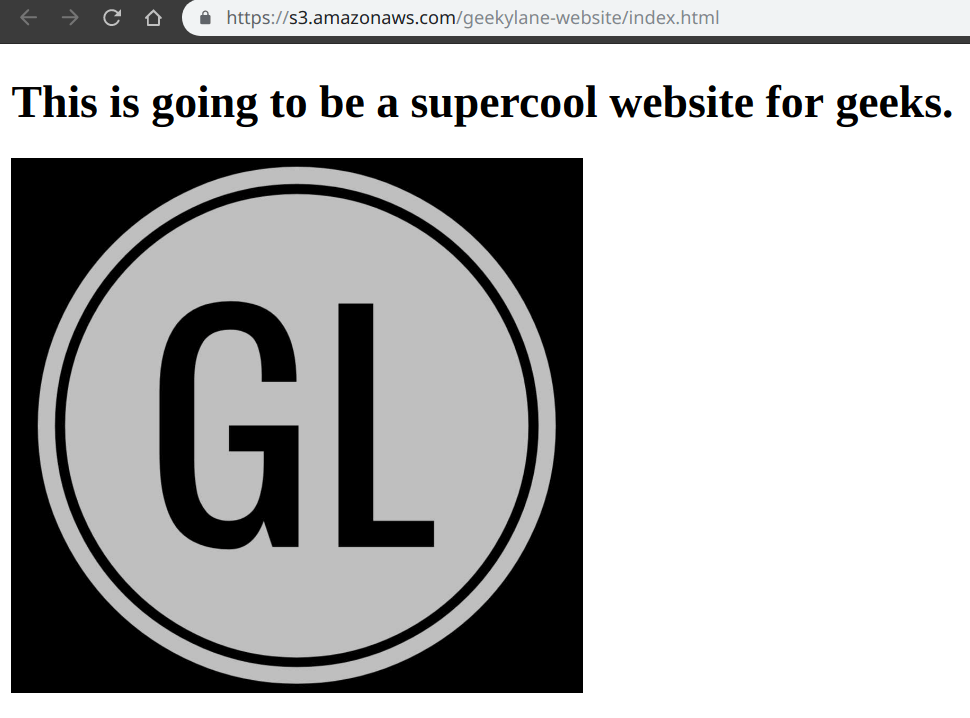
It is time to access the “objects” stored in the S3 bucket again after updating the appropriate permissions. In our case, we have to access the “index.html“, and from the picture below we can confirm that the S3 bucket is working as the content holder for our “static website” and it is also showing other referenced elements like “geekylane1.jpg” file.
Conclusion for “Static Website Using S3 Bucket”
We have already tried accessing the “index.html” file in “Step 4” but it has shown an “AccessDenied” error and in order to solve that, we have made the S3 bucket “geekylane-website” public in “Step 5“, after that we have set up appropriate access permissions on the “geekylane-website” using the “Bucket Policies” in “Step 6“. Finally, our “static website using S3 bucket” is accessible in the “Step 7“.
More on S3: