
Table of Contents
When it comes to mind about AWS, its S3 bucket service is one of the largest and durable platforms on earth. It stands for “Simple Storage Service (S3)“, and today we are going to learn about the same. We will be looking at how to “create an S3 bucket on AWS” step-by-step.
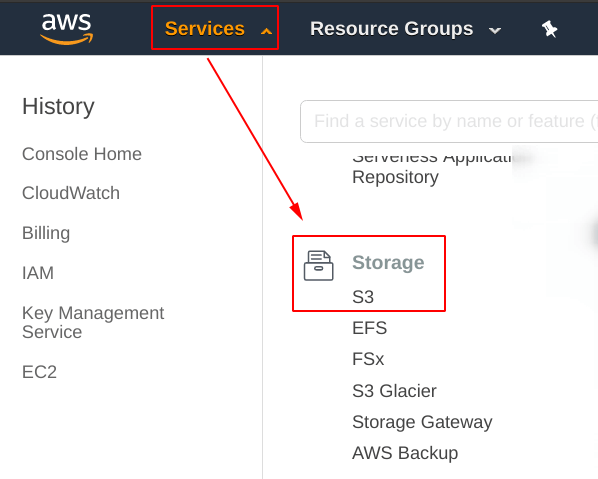
Step 1: Select the S3 service from aws dashboard
From the AWS dashboard, search for the “S3” under “Services” menu, and select it. For reference, look at the picture below.
Step 2: Create S3 bucket
After getting into the “S3 dashboard“, click on the “+ Create bucket” icon, as shown in the screenshot below.
After clicking the button mentioned above, you will be seeing a screen like this on your dashboard.
On this screen, we have set the following details:
- Bucket name = “practice-geekylane”
- Region = US East (N. Virginia)
- Copy settings from an existing bucket = Leave Blank as of now
Note: The “bucket name” have to unique on your side because it is going to be a real DOMAIN NAME.
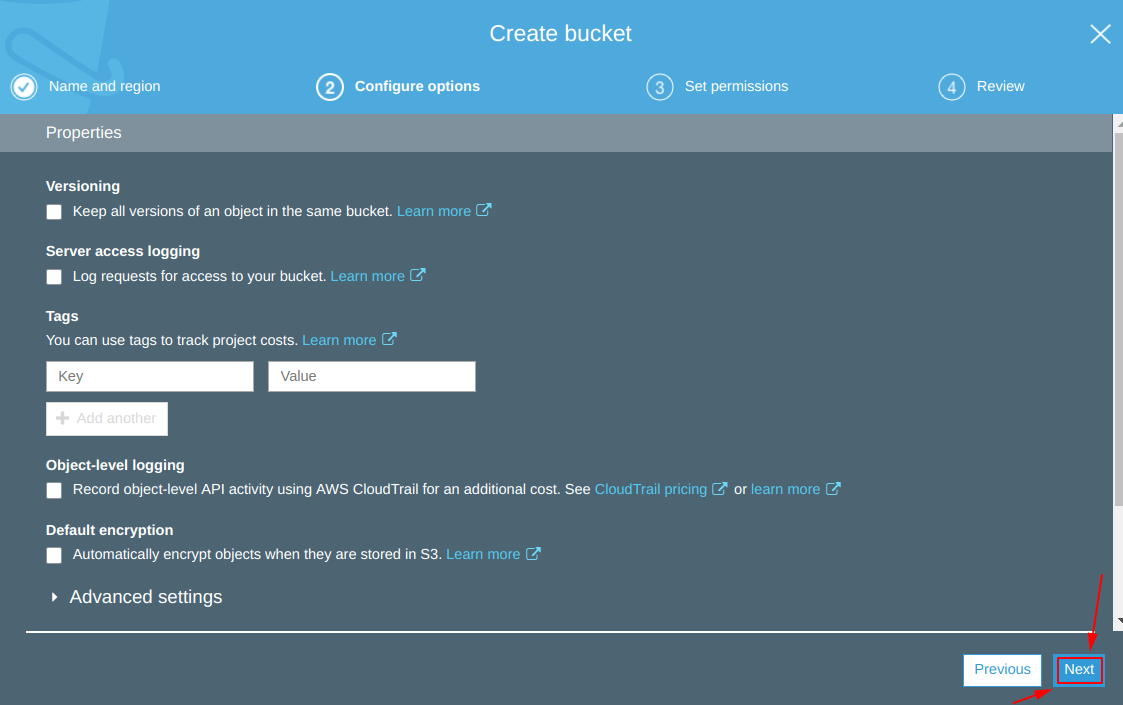
After filling up the details, click on “Next“.

Now, you will be seeing a window like this, on this, do not change any options, leave it as they are already.
Question: Why we are not changing anything here?
Answer: Because we are going to change these later in this post.
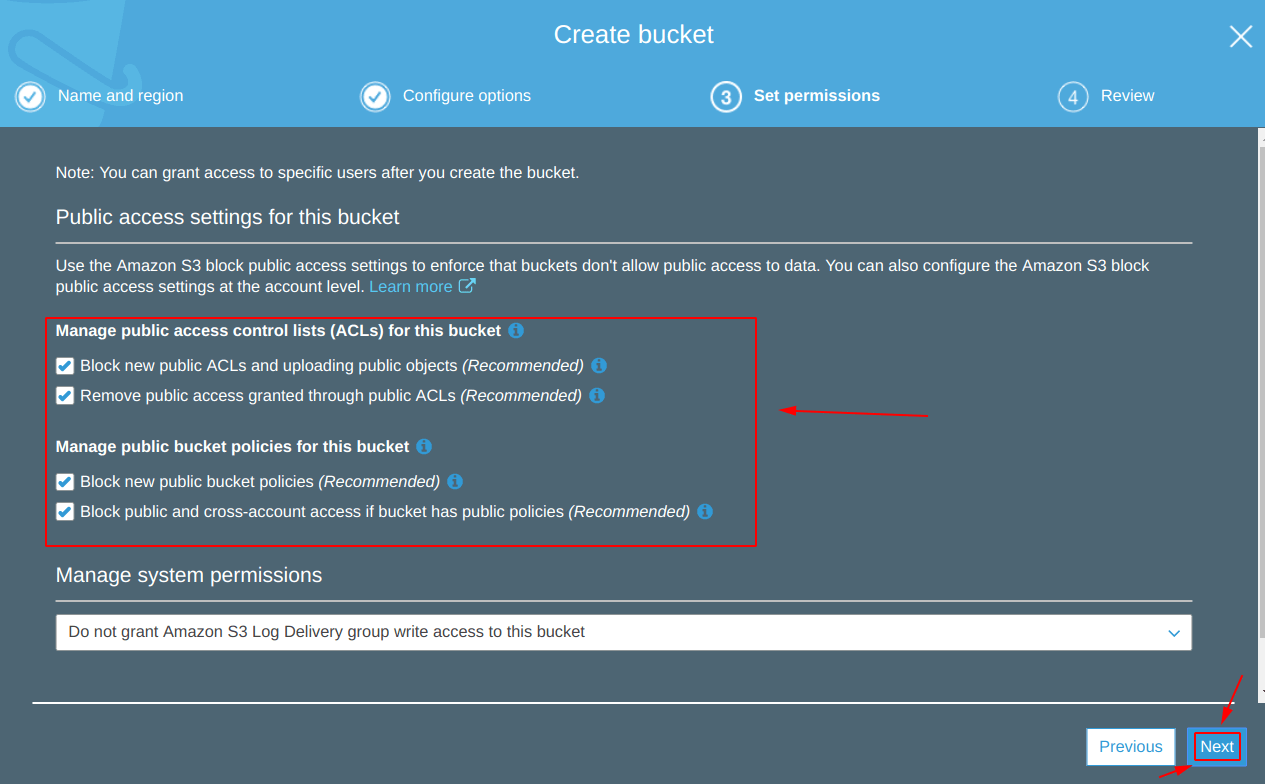
Now, you will see a “set permissions” screen,, leave it as it is.
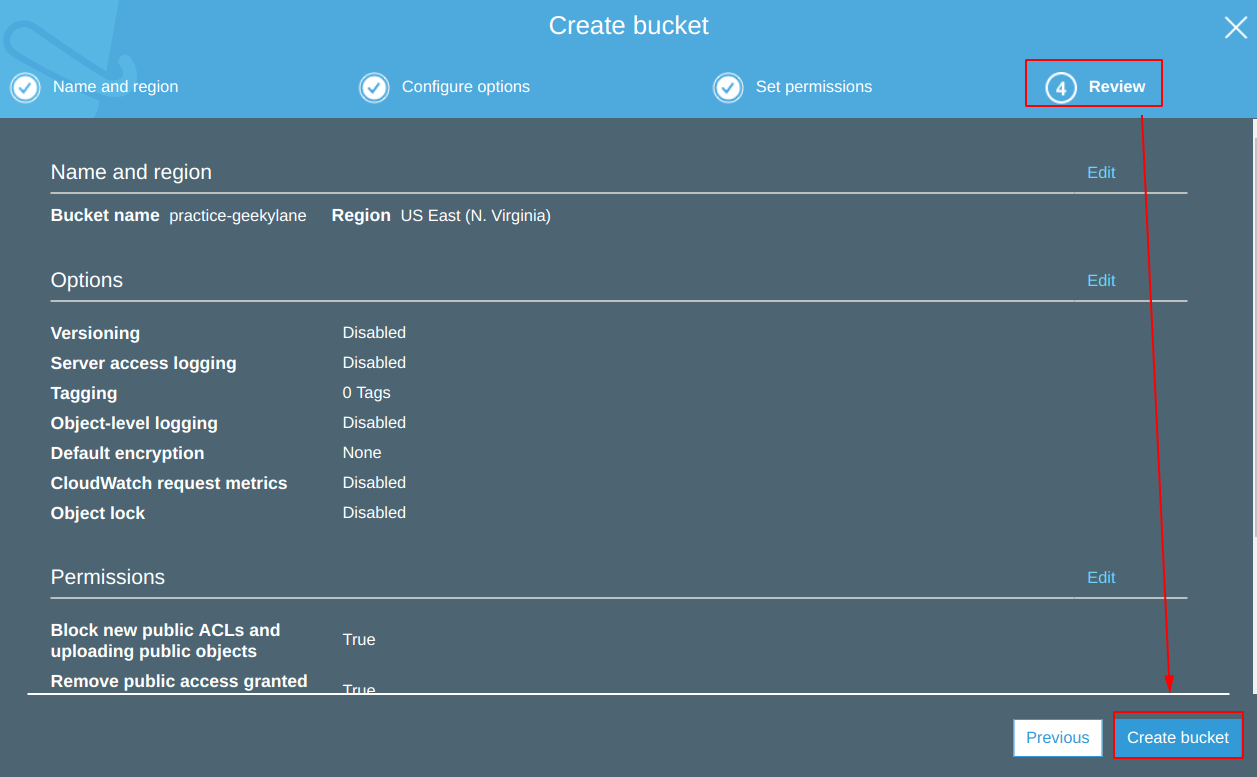
Before proceeding further, you will see a “Review” screen as shown below. After cross-checking the details we have set so far for our “practice-geekylane” bucket, click on the “Create bucket” icon.
Step 3: Upload files to S3 bucket
Now that our “practice-geekylane” bucket is successfully created, we are now going to add some data to it.
Question: What is the meaning of “Adding data to the S3 bucket“?
Answer: It means that we are now going to upload some files (referred to as data) to our newly created “practice-geekylane“.
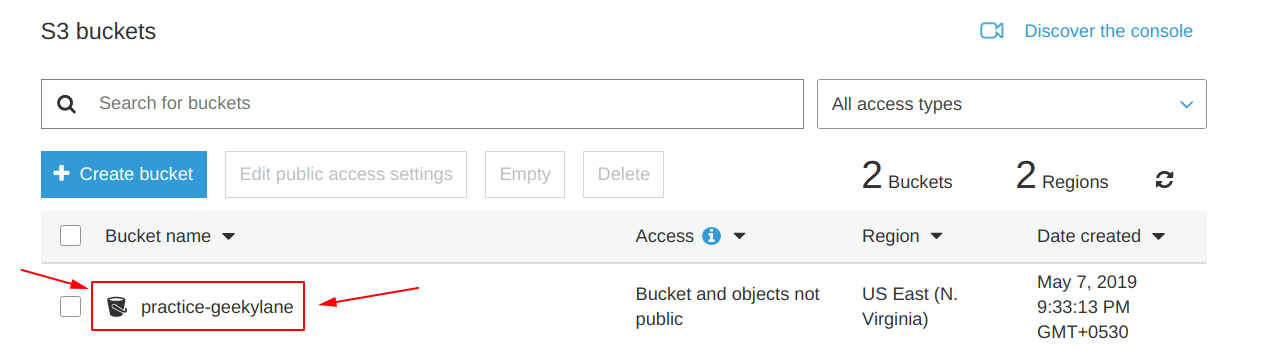
In order to add data to “practice-geekylane“, click on the bucket name as shown in the image below.
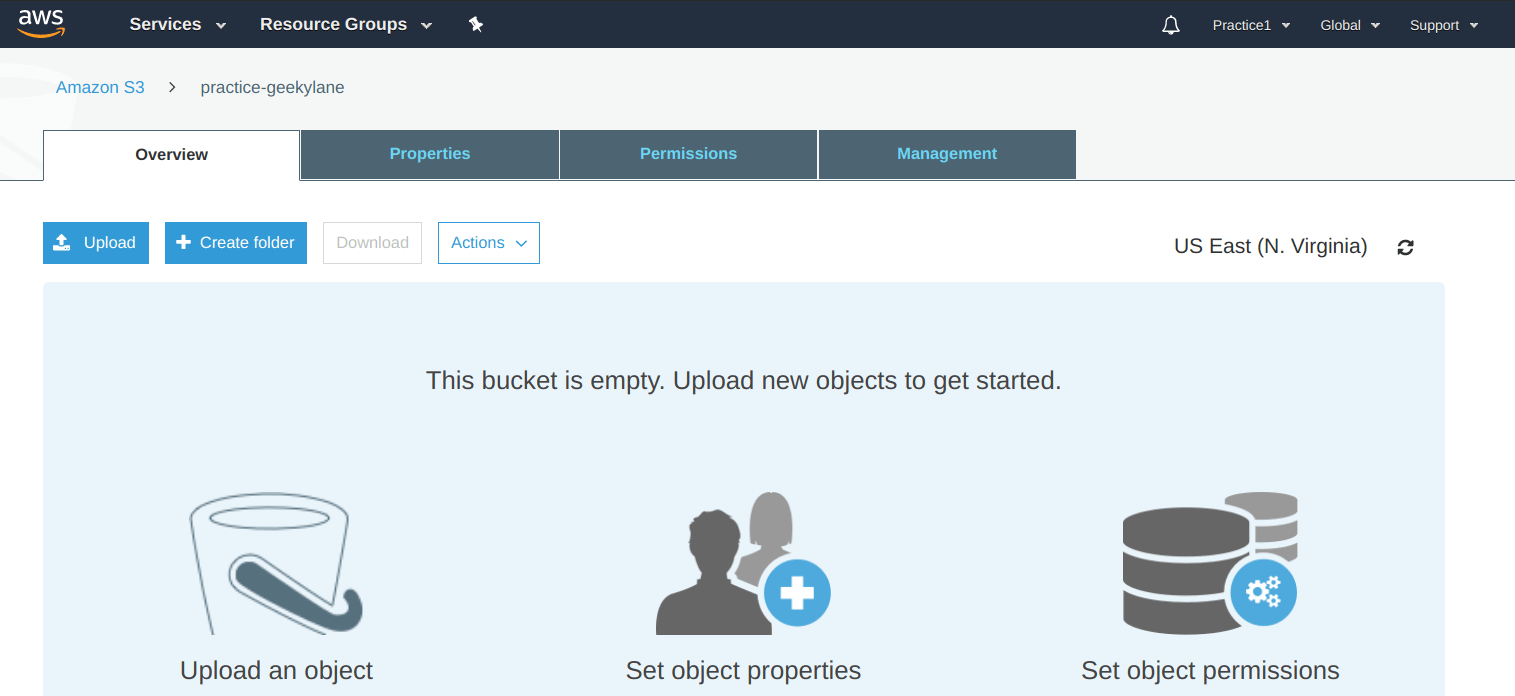
After clicking there, a screen like shown below is going to be there on your side as well.
From this screen, click on the “Upload” button, and you will be prompted to your OS’s “File Manager” from there, navigate to the file which you want to upload to your S3 bucket.
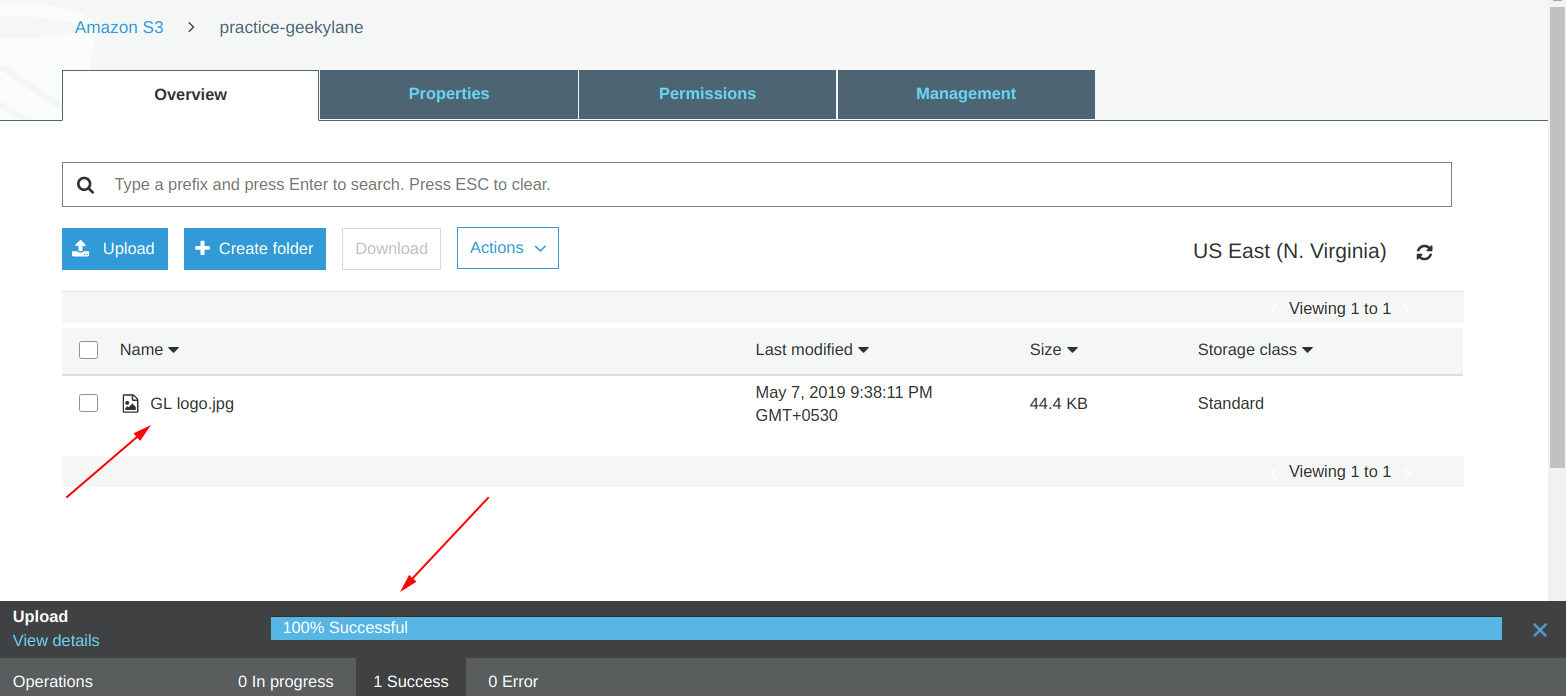
We have selected and uploaded a file named “GL logo.jpg“, from the picture below you can see.
After selecting the file from your system, click on the “Upload” button as shown in the screenshot.
Confirmation, in your case also you will be seeing a “100% Successful” message like shown in the picture below.
Step 4: Access the file stored in an S3 bucket
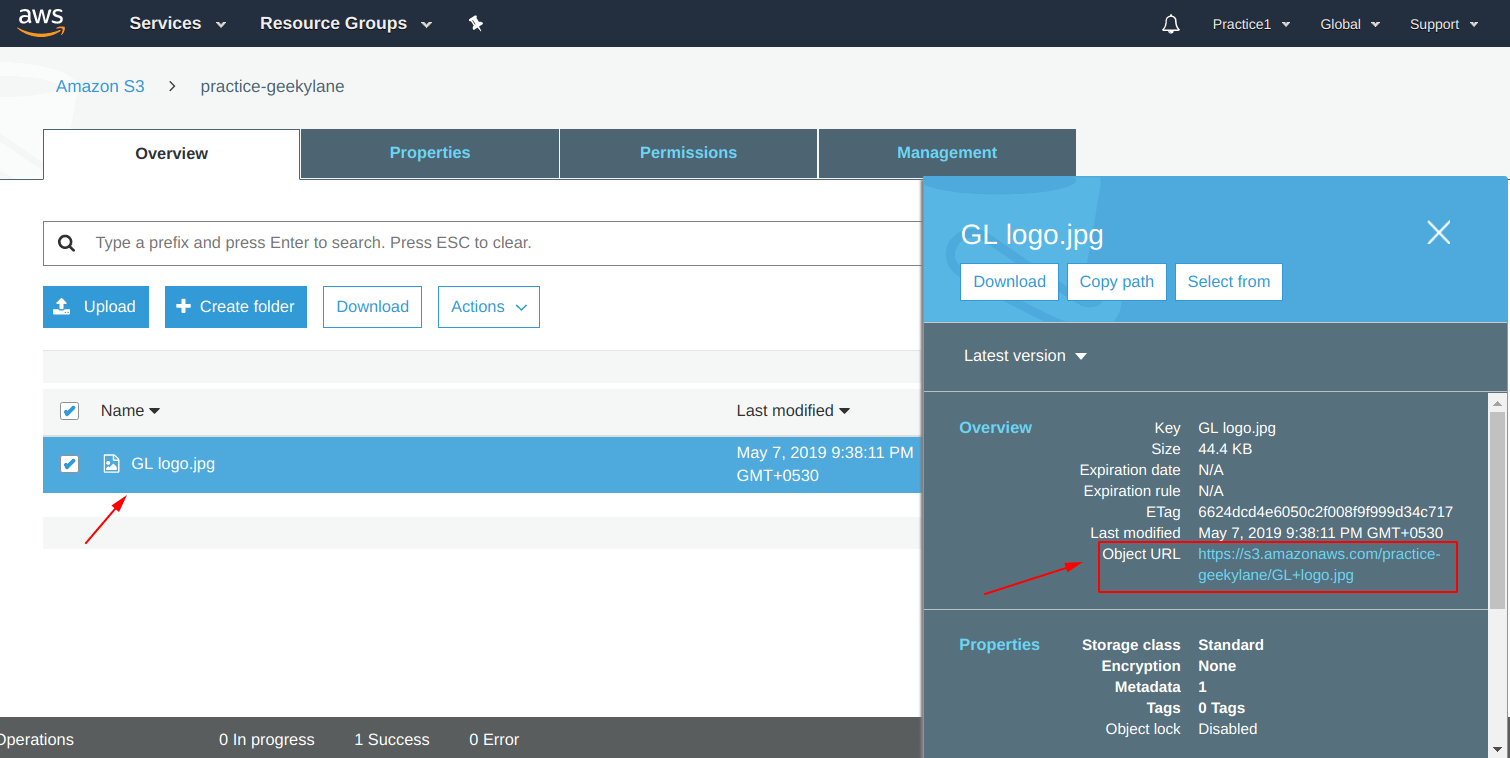
Now, it is time to access our recently uploaded file “GL logo.jpg” to the “practice-bucket“.
In order to do that, click on the “checkbox” of the file name you uploaded, in our case, it is “checkbox” for “GL logo.jpg“. You will be seeing a “key = Object URL“.
After copying the “Object URL“, when we pasted it in the “URL bar” of the browser, you can see that we are getting an error message “Access Denied“.
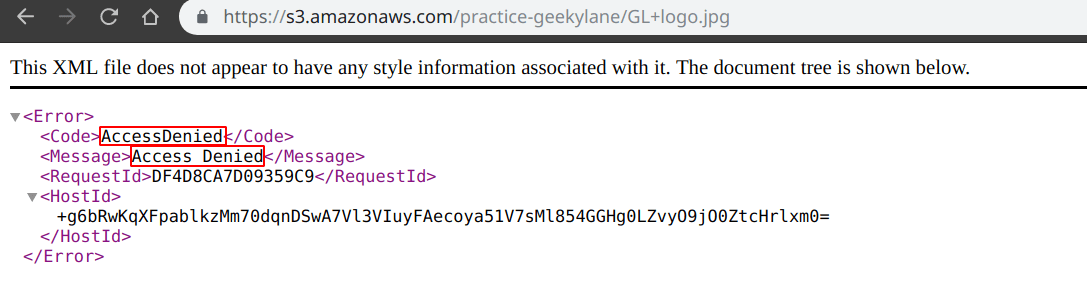
Question: Why accessing the “GL logo.jpg” file is give an “Access Denied” error?
Answer: Because we have not set any permissions on the “GL logo.jpg” file.
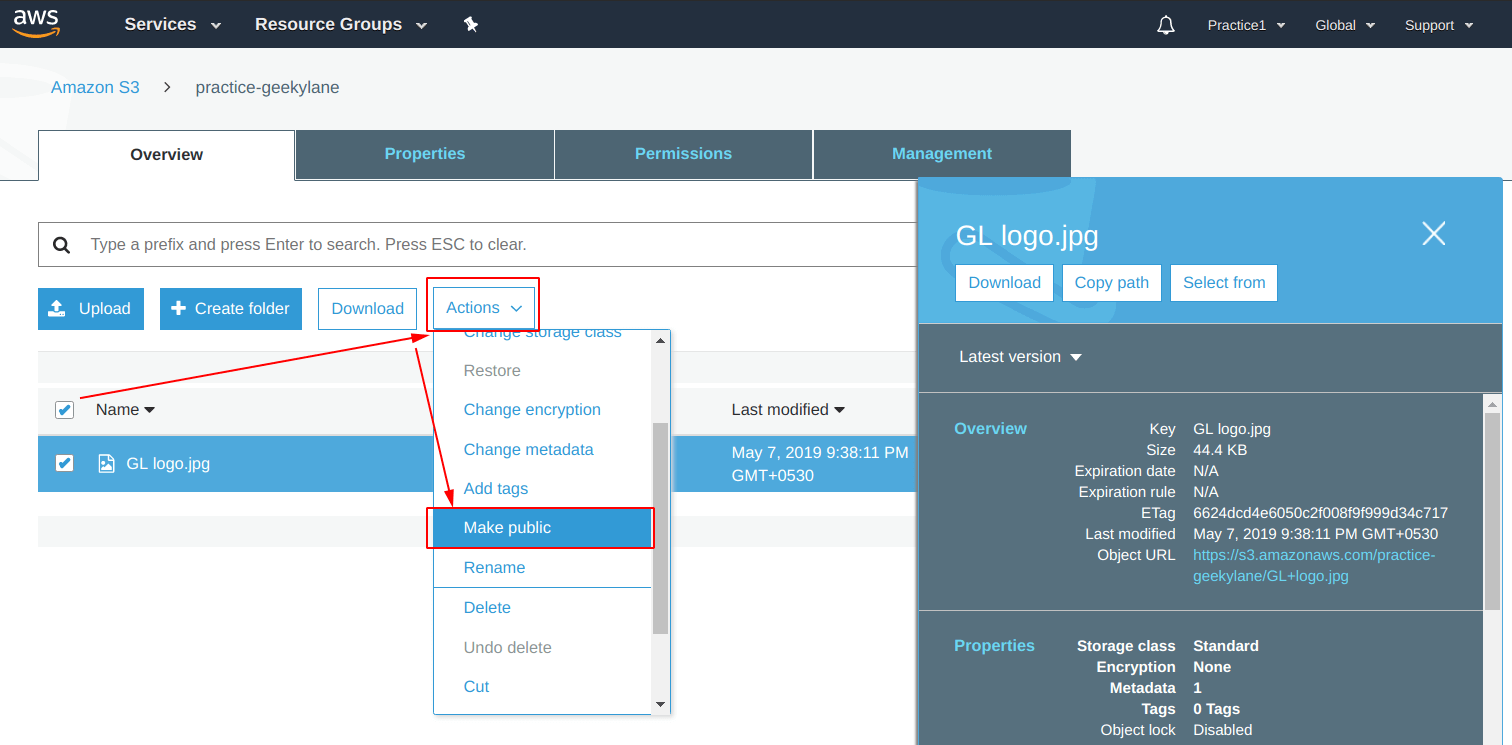
Step 5: Making public the file stored in an S3 bucket
In order to change the permissions of a file stored in an S3 bucket, do as shown below. Click on the “checkbox” of the image, after that click on “Actions“, from there you will be seeing a drop-down menu having an option as “Make public” click on that.
Before making the file public, it is going to give you a message as shown in the image below, simply click on the “Make public” icon, to make it public.
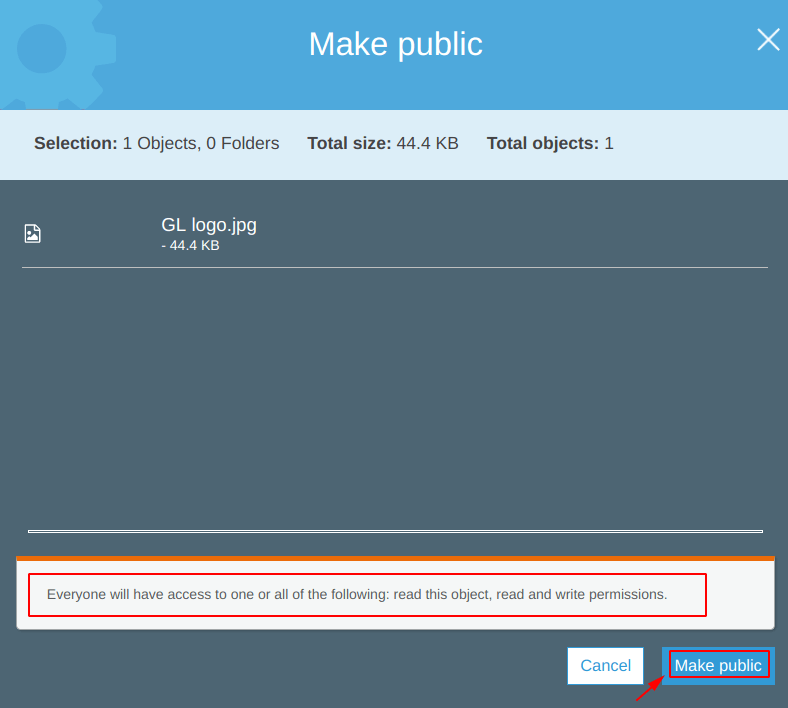
Wait! what? -> it is again giving an error, this time on making the file public, for reference check the picture below.
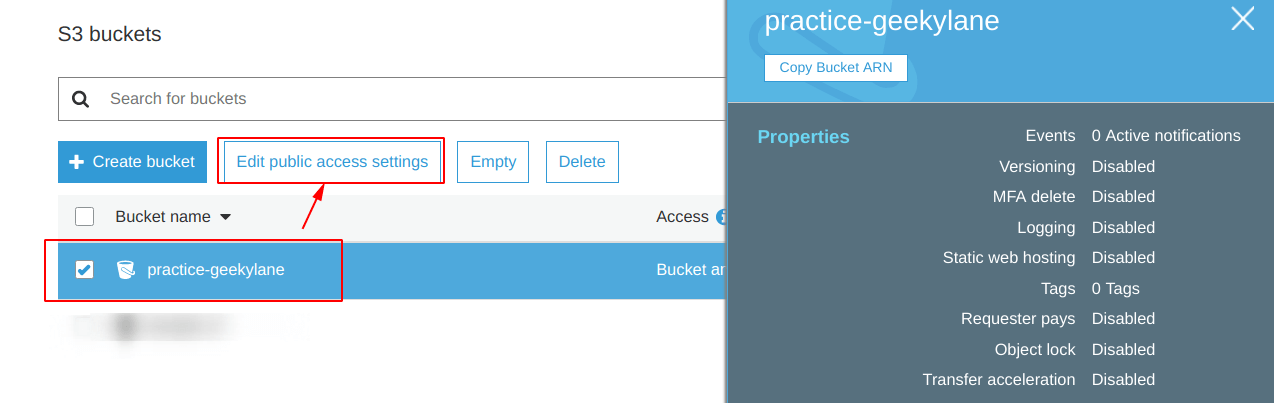
Question: Why is it giving the error?
Answer: It is because we have not set the permissions of the “practice-geekylane“, so in order to make any permissions change on the files stored in the “practice-geekylane“, we have to first change its permissions.

Step 6: Making the S3 bucket public
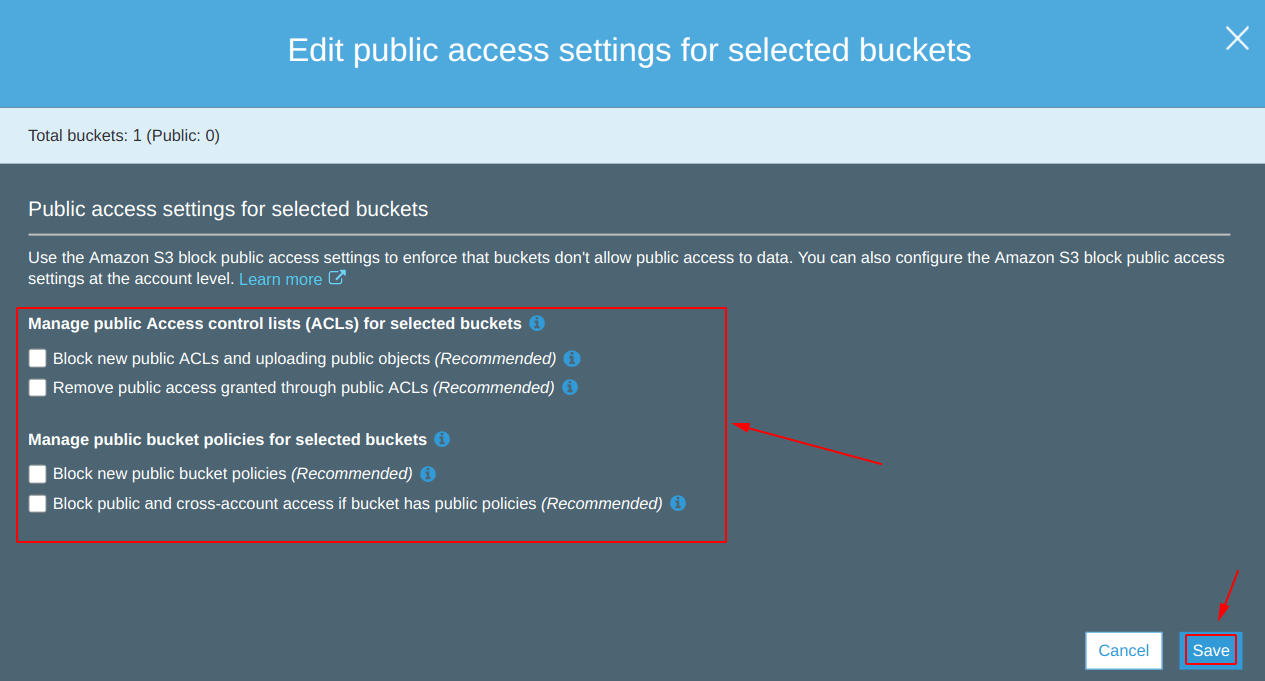
Traverse to your bucket, as we did in our case, now click on the “practice-geekylane” bucket and from there click on the “Edit public access settings” in order to make permissions work on files stored in it.
Again, do note that we are leaving the “check-boxes” “untick“, as shown below, and click on the “Save” icon. This will result in making the “practice-geekylane” public.
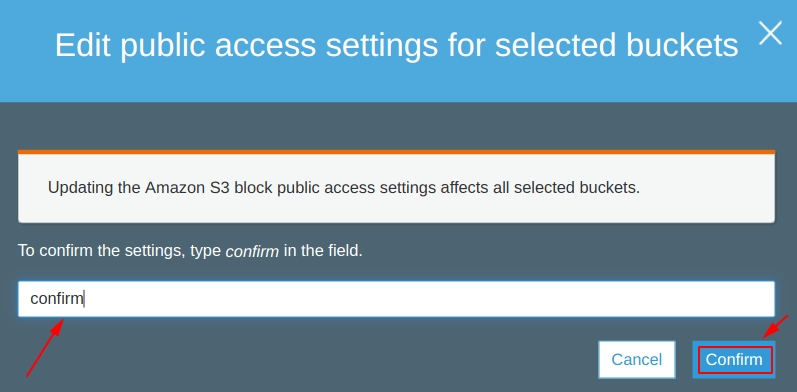
It will again be going to give you a confirmation message, type “confirm” and click on “Confirm” button.
Step 7: Repeat “Step 5”
We are going to do the same as we did in “Step 5“.
Check the screenshot, it is now completed with a “100% Successful” message.

Now, again access the “URL” pasted in the “URL bar“, you will now able to access the file stored in S3 publicly. In our case, the file “GL logo.jpg” is now publicly accessible.
Conclusion for “Create an S3 bucket on aws”
- You will be given a confirmation message every time you make changes to your S3 bucket permissions (ACLs or Bucket policies).
- By default, public access is denied for S3 bucket and its files.
More on AWS: