The main reason why people still choose AWS over other cloud providers is because of its “free tier for full 1 year“. Although it has some limits so, small developers of small start-ups need an “Easy to Start” server of other internet services for their product for testing purpose. CloudWatch is one of the important services offered by AWS, and today we are going to learn about “billing alarm on AWS CloudWatch“.
Question: Why do we need to create a billing alarm on AWS CloudWatch?
Answer: We will understand this with and example:
- Say you own a start-up company and currently have deployed your application on AWS using the “free tier” services.
- But “free tier” services have limits.
- What if your application is currently attending users which leads to the exhaustion of these “free tier limits“.
- Then it is easy for you manager funding as required if you know about that say your account has used the “credits over $50” and you will be informed via an E-mail.
- This is where creating a billing alarm using the aws’s cloudwatch service comes in handy.
Step 1: Enable the Billing Alarm option on AWS
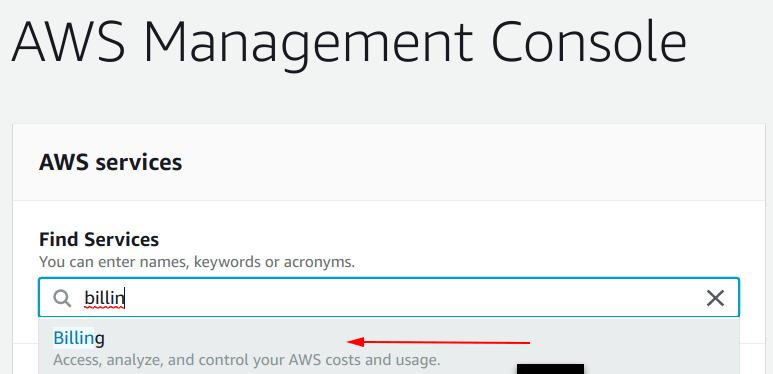
From the AWS dashboard, search for “billing” as shown in the picture below, and select it.
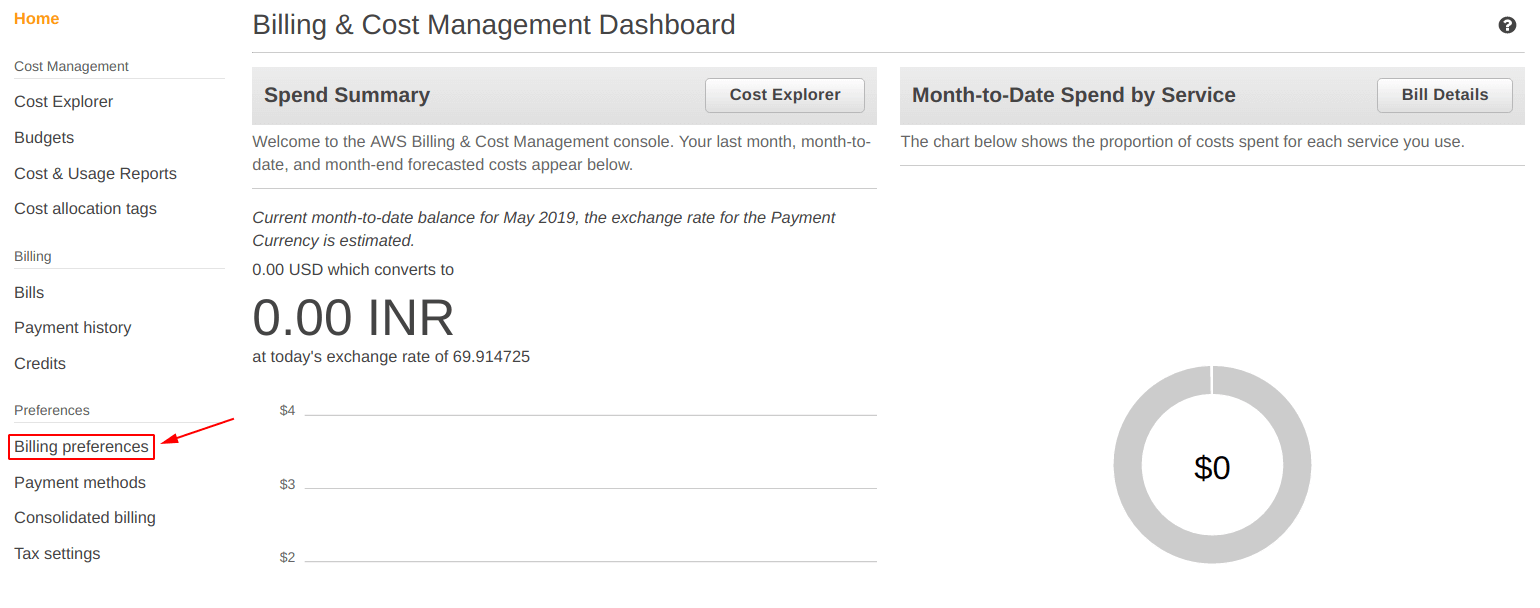
After that, you will be seeing a screen like this on your side as well, from there select the “Billing preferences” option as shown in the screenshot below.
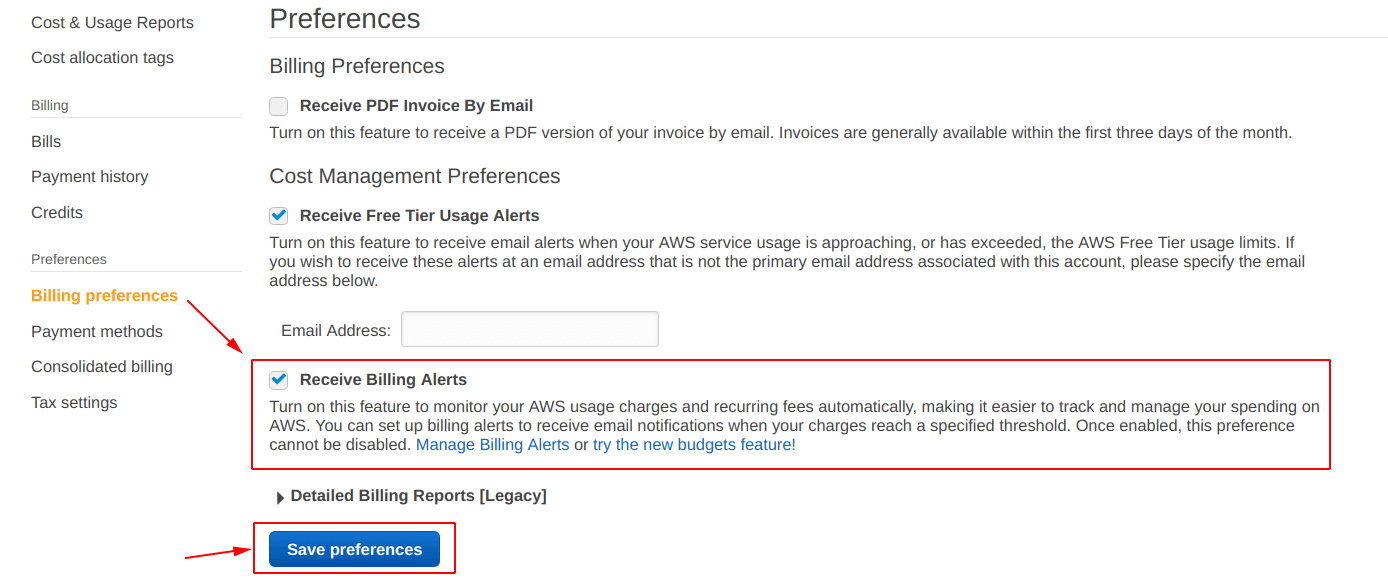
Now you will be seeing something like “Receive Billing Alerts” option with a checkbox under the preferences.
Check the box, as shown below and click on “Save preferences“.
Step 2: Select the CloudWatch service and create an alarm
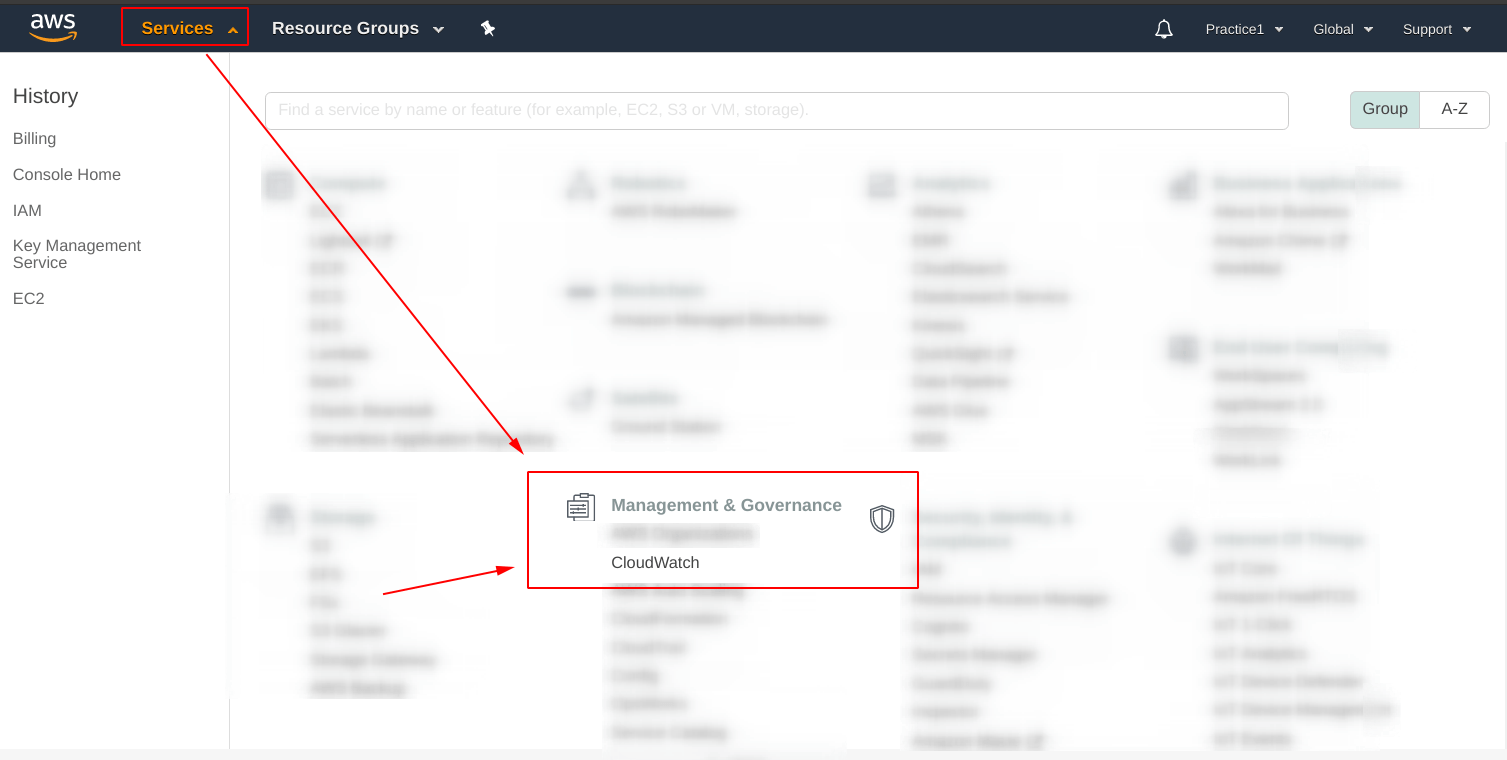
Click on the drop-down menu for services, and select the “CloudWatch” service under “Management & Governance” tab, for reference check the image below.
Now, you will be seeing some options like this (below), from there click on the “Create Alarm” option.

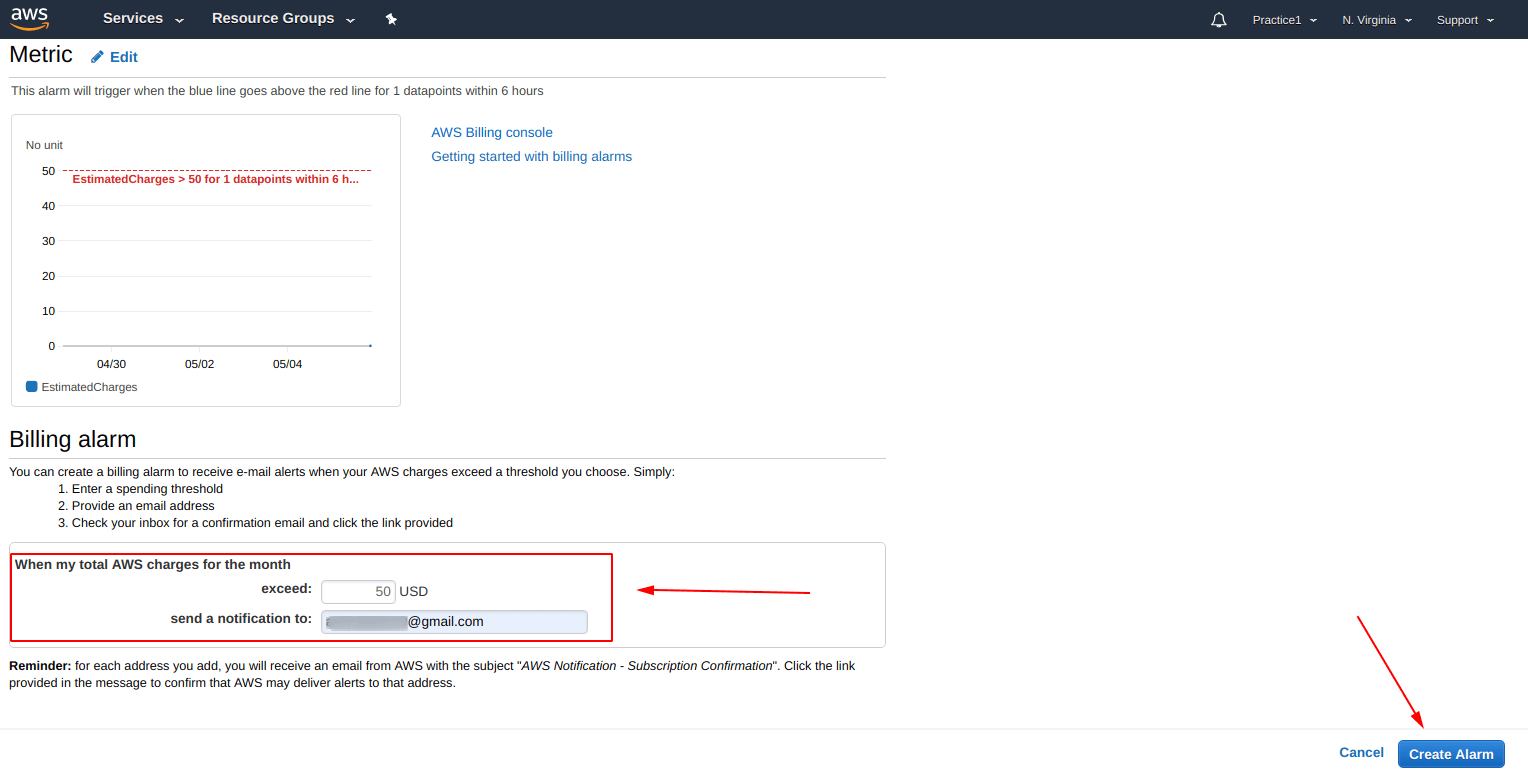
Further, provide the limit for money, as we did “exceed = $50” and also provide an “E-mail address” also for receiving the alerts from this AWS account, then click on “Create Alarm“.
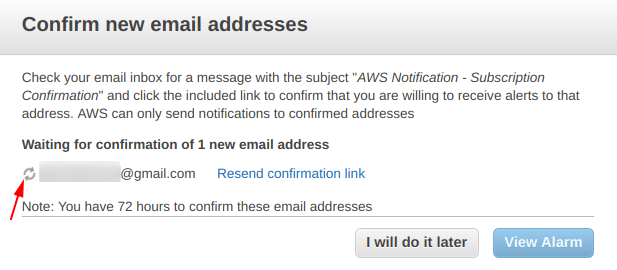
You will be prompted for “E-mail Address verification“, go to your provided “E-mail” dashboard and from there you will seeing an E-mail from AWS, open it.
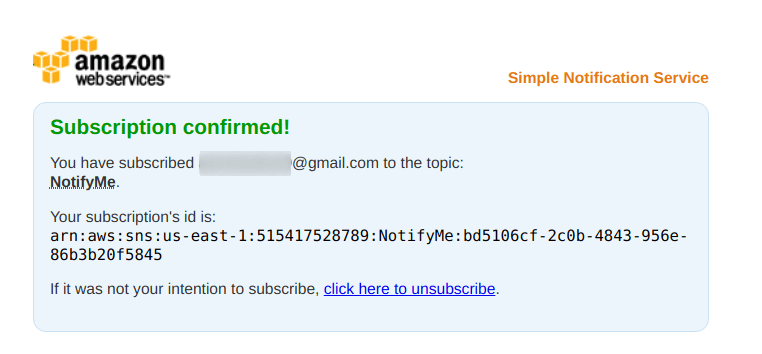
After opening the E-mail, you will have to click on “confirm subscription” link, as shown below.

After clicking on the “confirm subscription” link you will be redirected to a link and you will be seeing something like this, as shown in the image below.
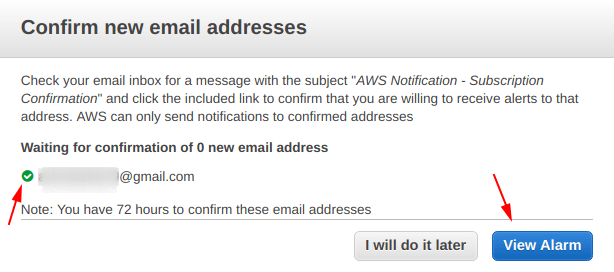
Come back to you AWS CloudWatch dashboard, and you will see a “Green Tick” which means that your provided E-mail ID has been verified for receiving “Billing Alerts“, and now click on “View Alarm“.
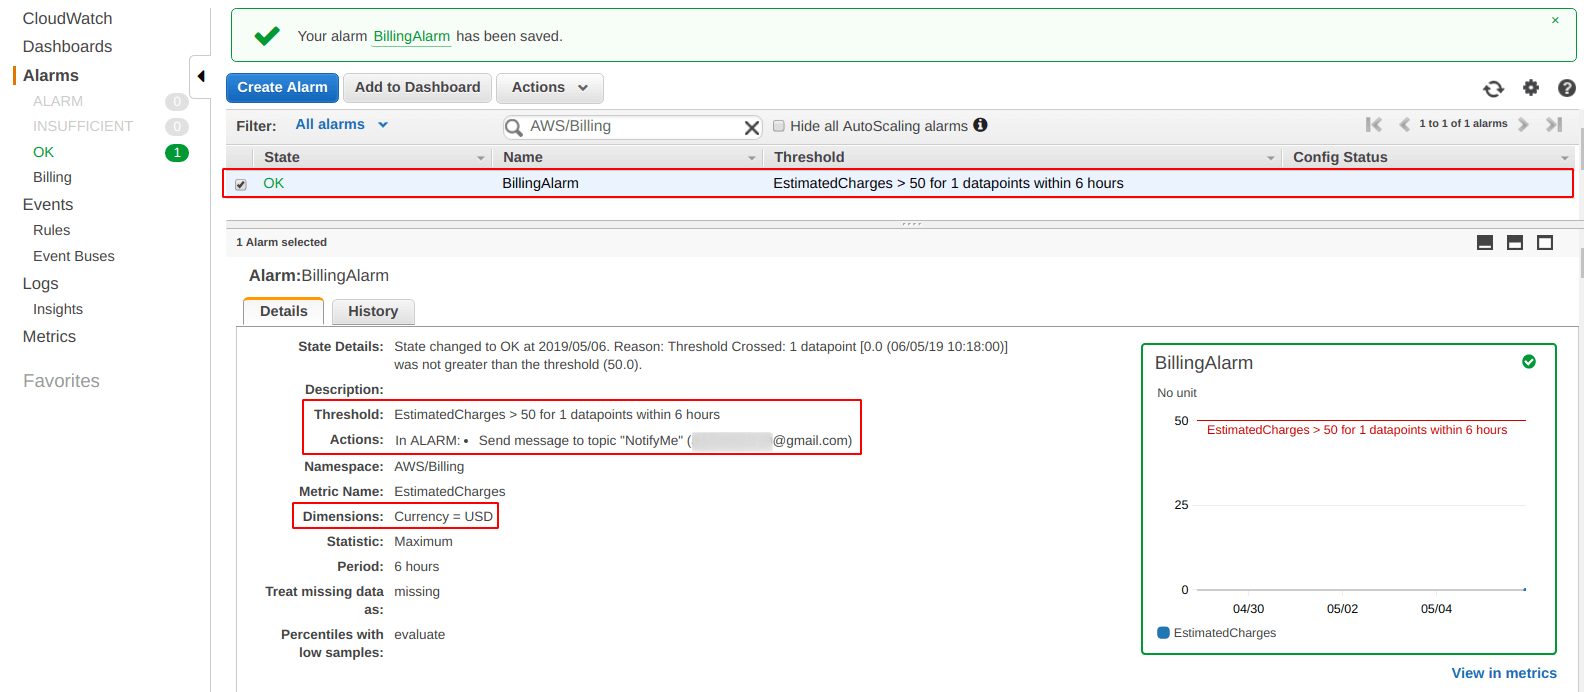
Finally, you will be seeing a screen similar looking to the shown below, and if you click on the alarm the more meta-data can be gathered.
More on AWS:
- Create an instance on AWS (complete guide)
- Login into EC2 instance using private pem key on Linux
- Set-up an Apache2 web server on ubuntu 18.04 EC2 Instance AWS
- Set-up a Nginx web server on ubuntu 18.04 EC2 Instance AWS
- One click WordPress set up with docker and docker-compose (local, live, cloud) (without SSL)
- How to set up IAM on AWS account? (Complete Step by Step Guide)
