Table of Contents
There are times when we need to ensure that if somehow, in any case, our data is being hacked then it will still become unusable for the hacker, as in order to access the data, one must have to decrypt it first. So, today we are going to learn about “encrypt objects during upload to S3 bucket”.
This means that during the upload of a particular object to an S3 bucket, the object is going to be “auto encrypted” using the specified method.
We have following encryption methods available on AWS S3 (as of May 2019):
- Client Side Encryption
- AES 256 – SSE S3 (Server Side Encryption)
- SSE-C (Server Side Encryption)
- SSE-KMS (Server Side Encryption)
- Encryption in Transit
Note: Today we are going to learn about “Server Side AES 256 – SSE S3 Encryption”.
To learn more about S3 Encryption, follow -> Encryption on objects in an S3 bucket
Step 1: Go to S3 dashboard
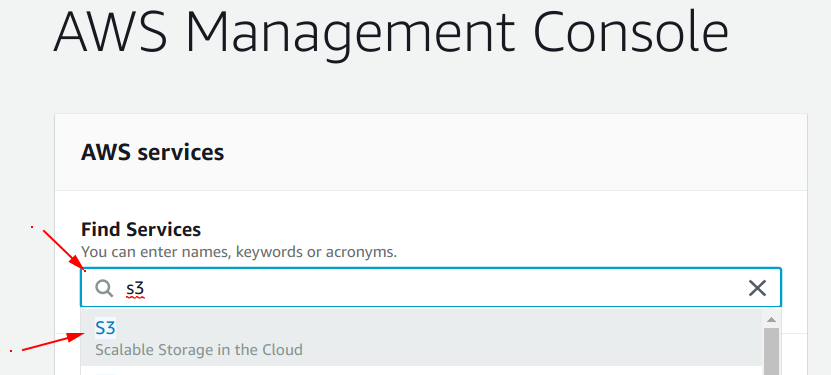
Search for the “S3 service” under the “Find Services” section of your “AWS dashboard” and select it.
Step 2: Create a new S3 bucket
In our case, we have created a bucket with a name “geekylane-encrypted“, shown in the picture below.
If you are new to Amazon S3 and do not know about S3 bucket creation, follow -> How to create an S3 bucket on AWS

Now, in order to specify the “auto encryption” of objects during the upload, we have to set some rules for our bucket.
Note: We are going to use the “bucket policy” method to specify rules on our S3 bucket.
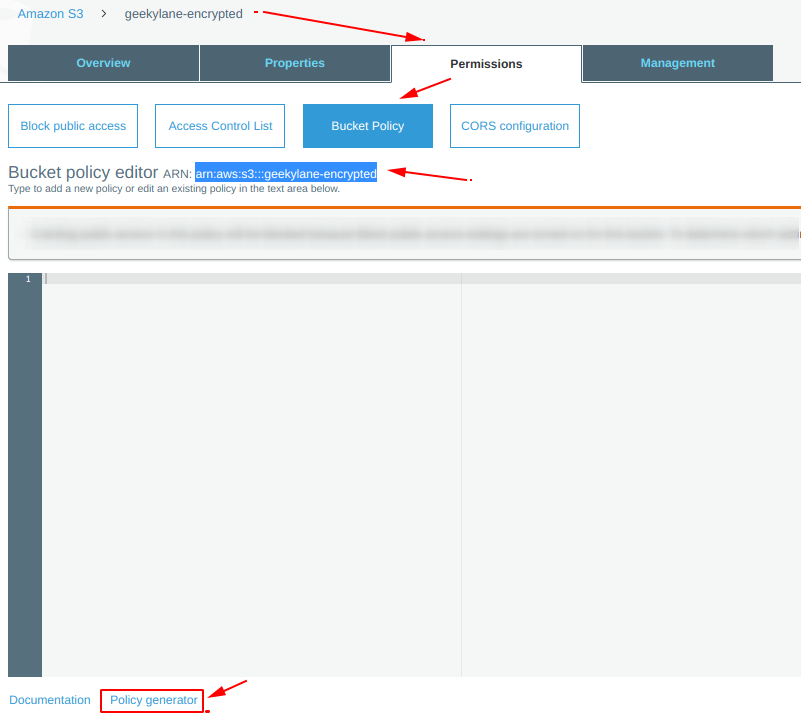
Step 3: Copy the ARN of S3 bucket
Under the “Permissions” tab, we have following option available:
- Block Public Access
- Access Control List
- Bucket Policy
- CORS Configuration
We are going to use “Bucket Policy“.
So, in order to copy the “ARN” or S3 bucket follow as shown below. In our case, our S3 bucket’s “ARN = arn:aws:s3:::geekylane-encrypted“.

Step 4: Generate bucket policy using “Policy Generator”
From the picture below, select the “policy generator” from the below of this screen.
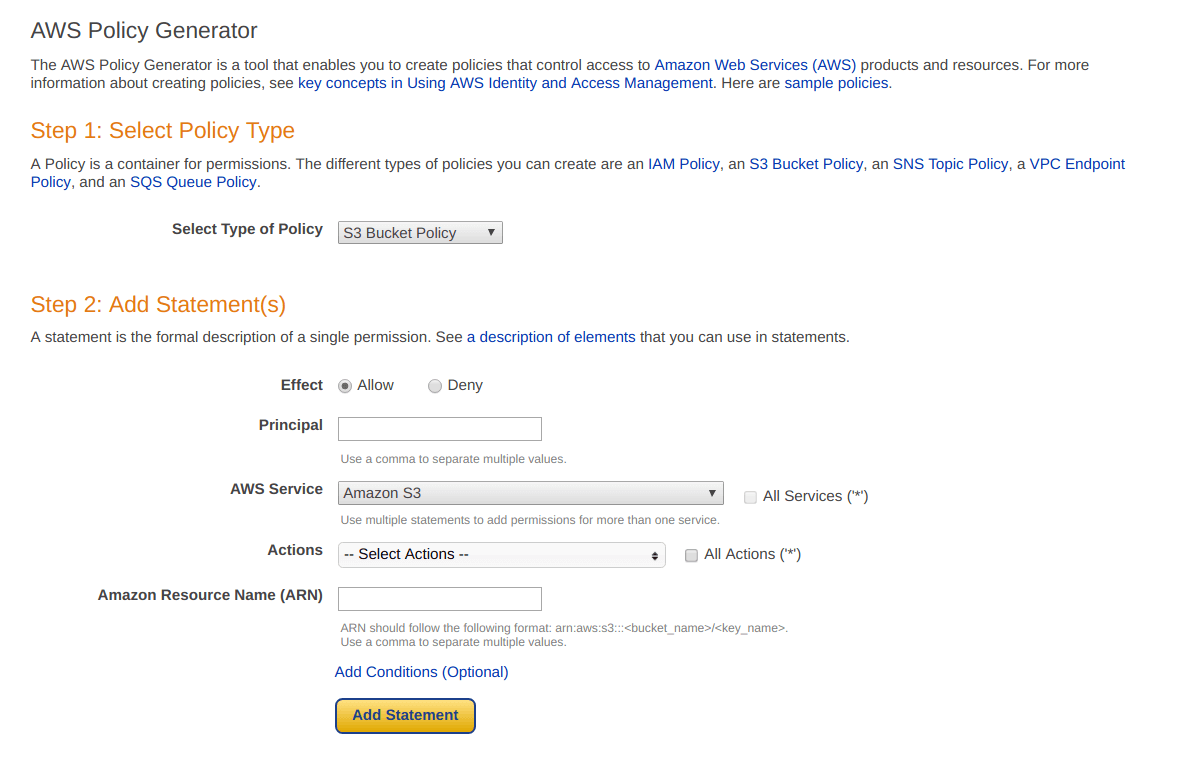
Question: Why we are using “policy generator“?
Answer: It will help us in creating the specific and complex type of bucket policies with one click.
After clicking on that, you will be seeing something like shown below.
We have created the following two statements for our S3 bucket.

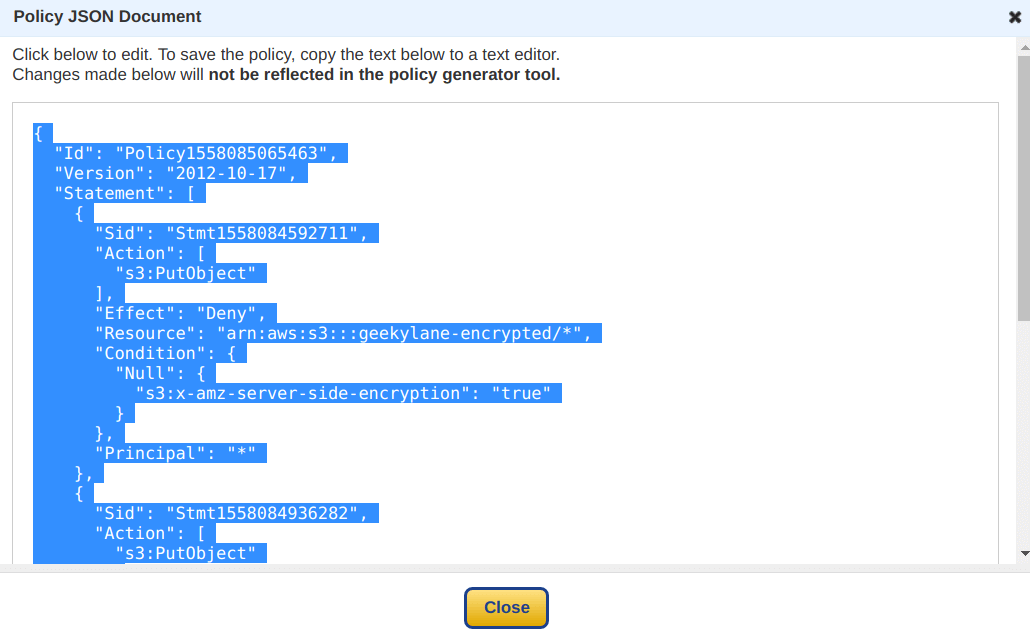
Explanation of Statements mentioned above:
- If the object being uploaded is having the “s3:x-amz-server-side-encryption == NULL“, deny its upload, as a result, we are forcing it to add the header.
- If the “s3:x-amz-server-side-encryption != AES256“, deny its upload, as a result, the object being upload must have the header value equals to this.
After specifying the two statements, we now have to “generate policy“, as shown below.

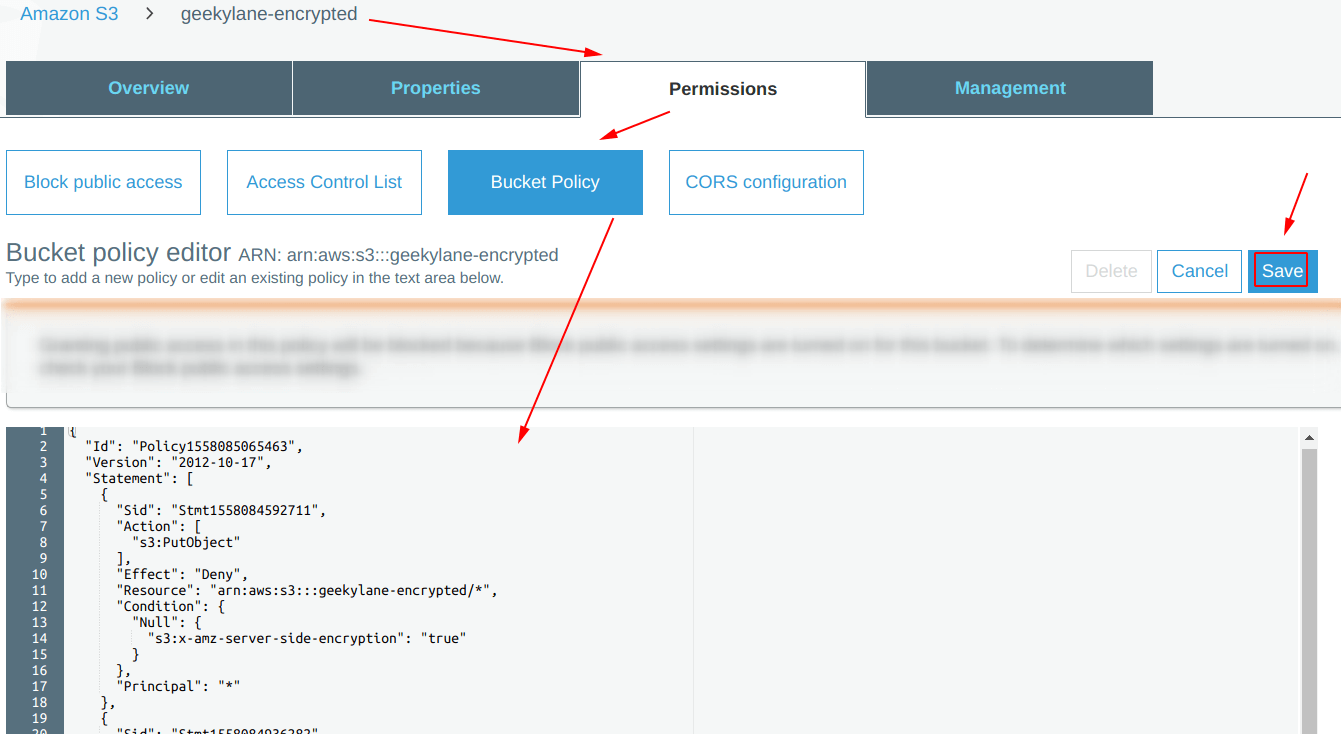
Finally, our bucket policy has been generated successfully. Copy the “JSON Document” in order to use it under the bucket policy permissions of the “geekylane-encrypted” bucket.
Step 5: Specify the bucket policy
Paste the policy copied in the “Step 4” as shown below, and hit “Save“.
Step 6: Upload File – Direct Upload
It is time to check whether our bucket policies are working as intended or not.
Upload some files to the S3 bucket, in our case, we have tried uploading a file with the name “geekylane1.jpg“.
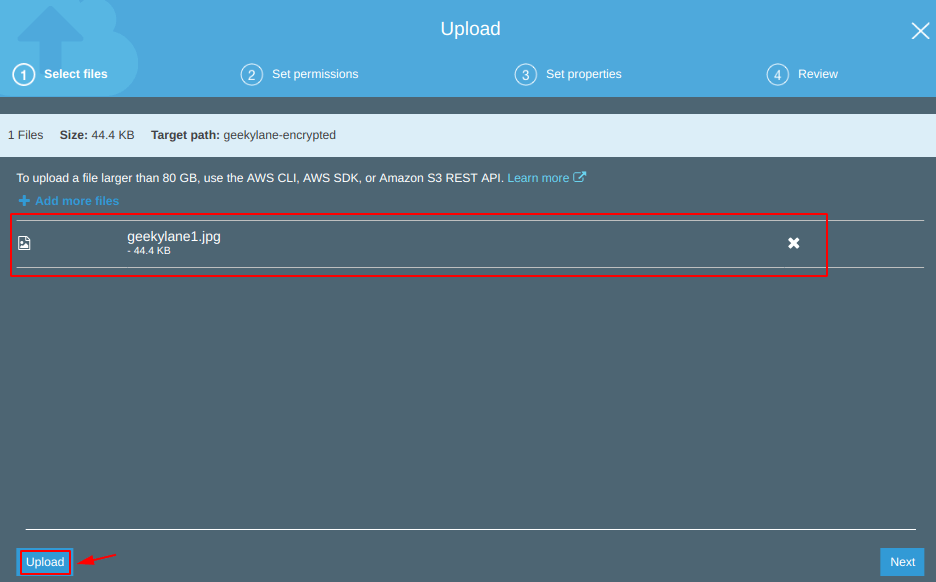
Wait! the “geekylane1.jpg” file upload has been failed, it is showing a “100% Failed” error, as shown below.

Question: What is happening?
Answer: The thing is that by default the S3 does not upload files using any encryption methods, we have to manually specify it. Our first try for “geekylane1.jpg” has been failed because of this reason.
Step 7: Upload File – Using S3 master-key Encryption
Now, we are specifying the type of encryption which needs to be done on the objects being uploaded in the “geekylane-encrypted” bucket.
We are using “Amazon S3 master-key” encryption which is actually “Server Side AES 256 – SSE S3 Encryption“, and this is the type we have specified in our S3 bucket policy.
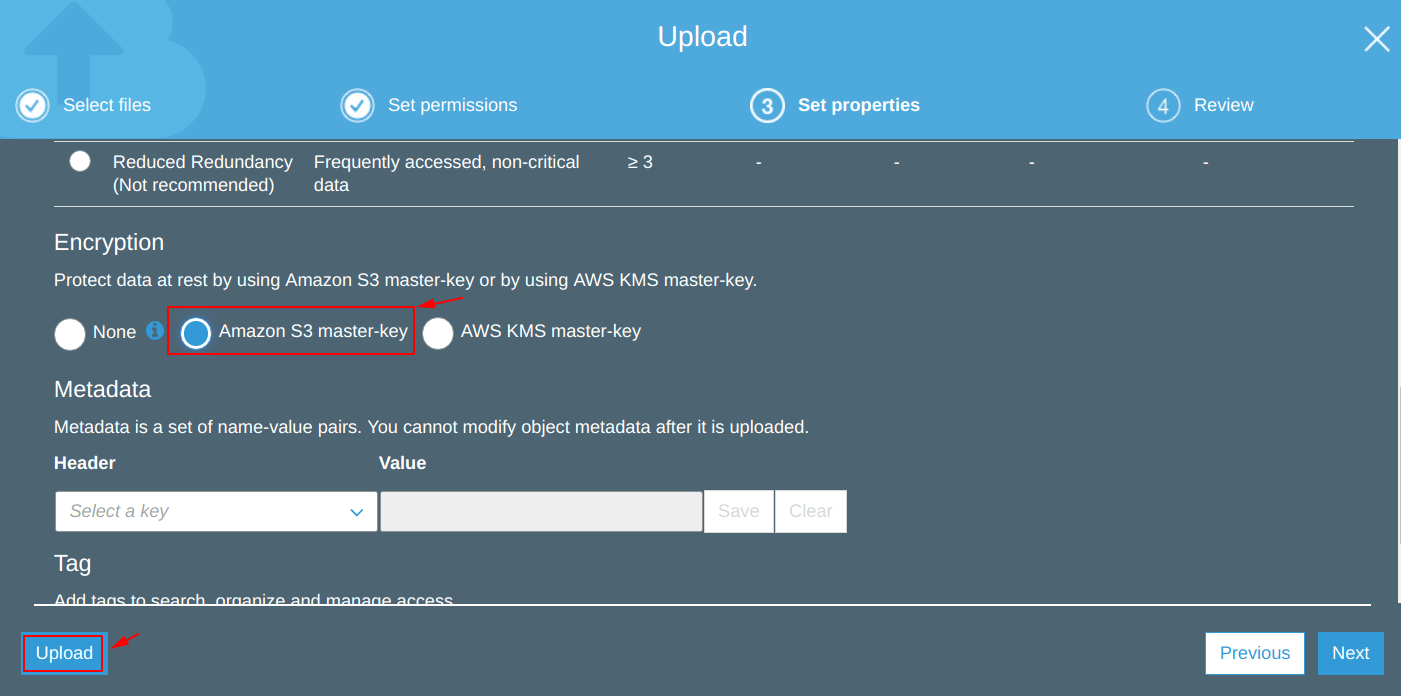
So, from the image below we can confirm that the file “geekylane1.jpg” has been uploaded successfully using the “Server Side AES 256 – SSE S3 Encryption“.

Step 8: Upload File – Using AWS KMS master-key
Now, we are trying to upload and encrypt the object using “AWS KMS master-key” encryption.
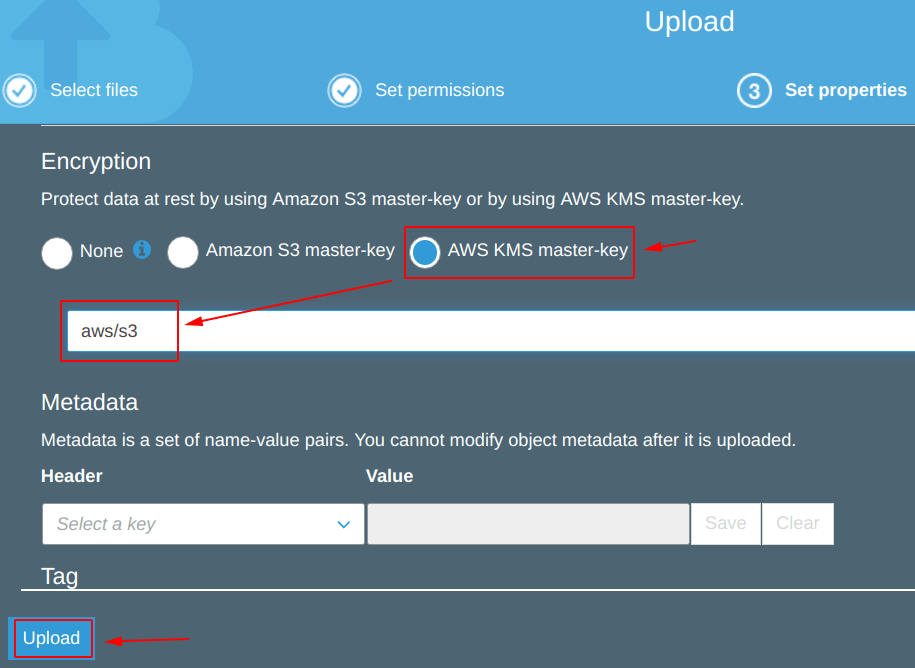
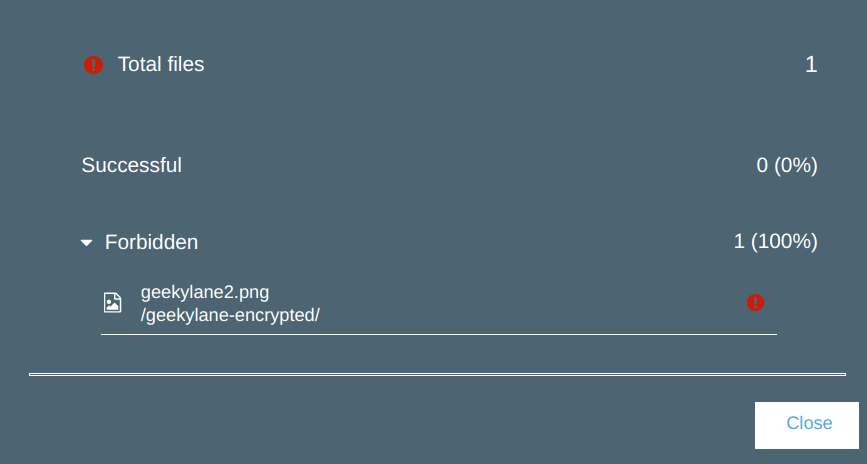
From the photo below, we can see that it has failed to upload.
Question: What is happening here?
Answer: It has failed to upload because we have not specified this type of encryption inside our bucket policy, which we have created in “Step 4“.
Conclusion for “Encrypt Objects During Upload to S3 Bucket”
- Bucket policies are powerful
- Because we have only specified explicitly about the “Server Side AES 256 – SSE S3 Encryption” in our bucket policy in “Step 4“, that is why the object/file fails to upload in “Step 6” & “Step 8” but not in “Step 7“.
More on S3:
