Table of Contents
There are scenarios when we need multiple availability zones for our resources or data on Amazon aws, out of those there is one when we want to “Enable Multi-AZ for an RDS instance“. Today, we are going to look into the same, step-by-step.
Question: What is “Multi-AZ or Multi-Availability Zones“?
Answer: When we wan to replicate the data within a Region on aws, this is what known as replicating the data to “Multi-Availability Zones“.
Step 1: Select RDS service from AWS Dashboard
From the image below, you can see that we have made a search for “rds” and we have selected the very first option, you have to do the same.

Before going further, if you do not know about Amazon RDS, follow -> MYSQL Database on Amazon RDS. Also, learn how to create an Amazon RDS instance from that post because the instance which we have created in that post is going to be used in the upcoming steps of this post.
Step 2: Modify the Amazon RDS instance
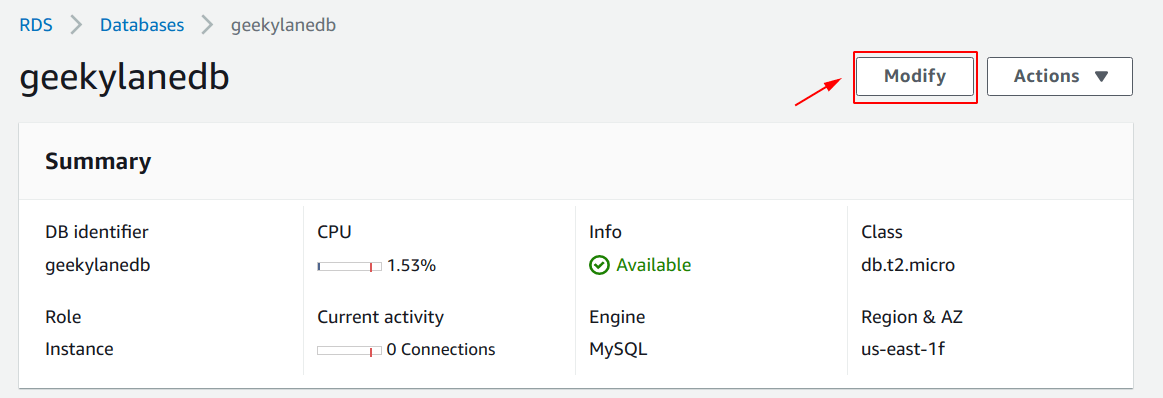
Now, because we want to “Enable Multi-AZ on Amazon RDS instance“, for that we have to modify the already created Amazon RDS instance, named “geekylanedb” as shown in the screenshot below.
Modify

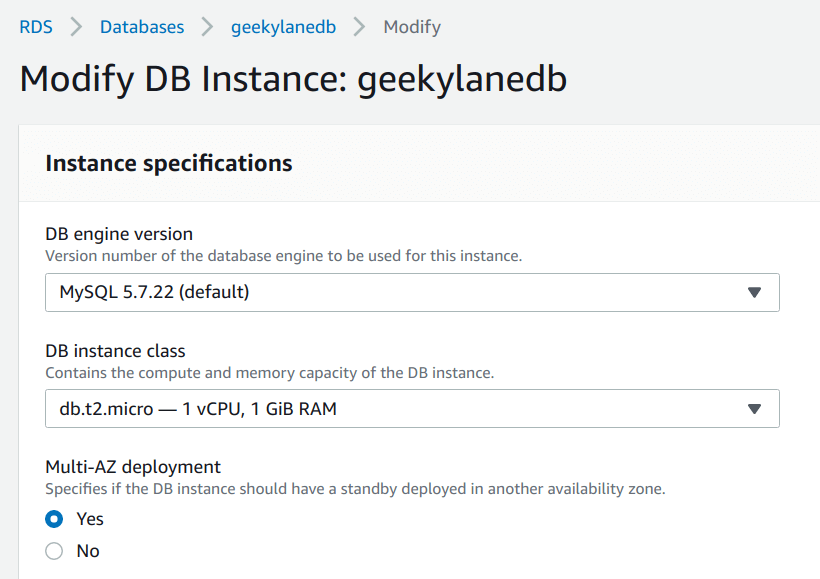
After clicking the “Modify” button on the screen shown above, you will be seeing a screen like shown below, where there is an option for “Enable Multi-AZ deployment“, we have to simply check the box for “Yes“, as shown in the photo below.
Amazon RDS instance Specifications

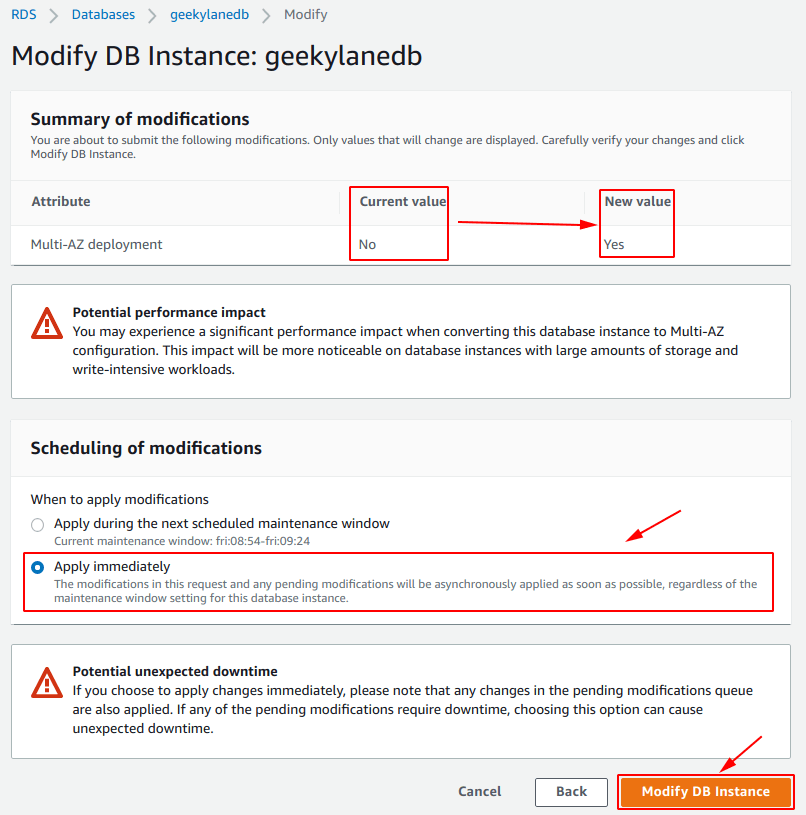
After doing the steps above, you will be seeing a screen like shown below, simply click on the Continue box.

Summary of modifications
In this, it will show you and give information about “what is the current value of the attribute that is going to be changed and what new value it is going to have after the modification being made“.
Also, it is going to you ask about “whether you want to apply this modification immediately or under scheduled maintenance window“, we will be going for “Apply immediately“
After cross-checking all the details, click the Modify DB Instance button shown below.

Status = Modifying
After doing all the steps mentioned above, you will be seeing a screen like shown below, the status of the instance is changed to “Modifying“.

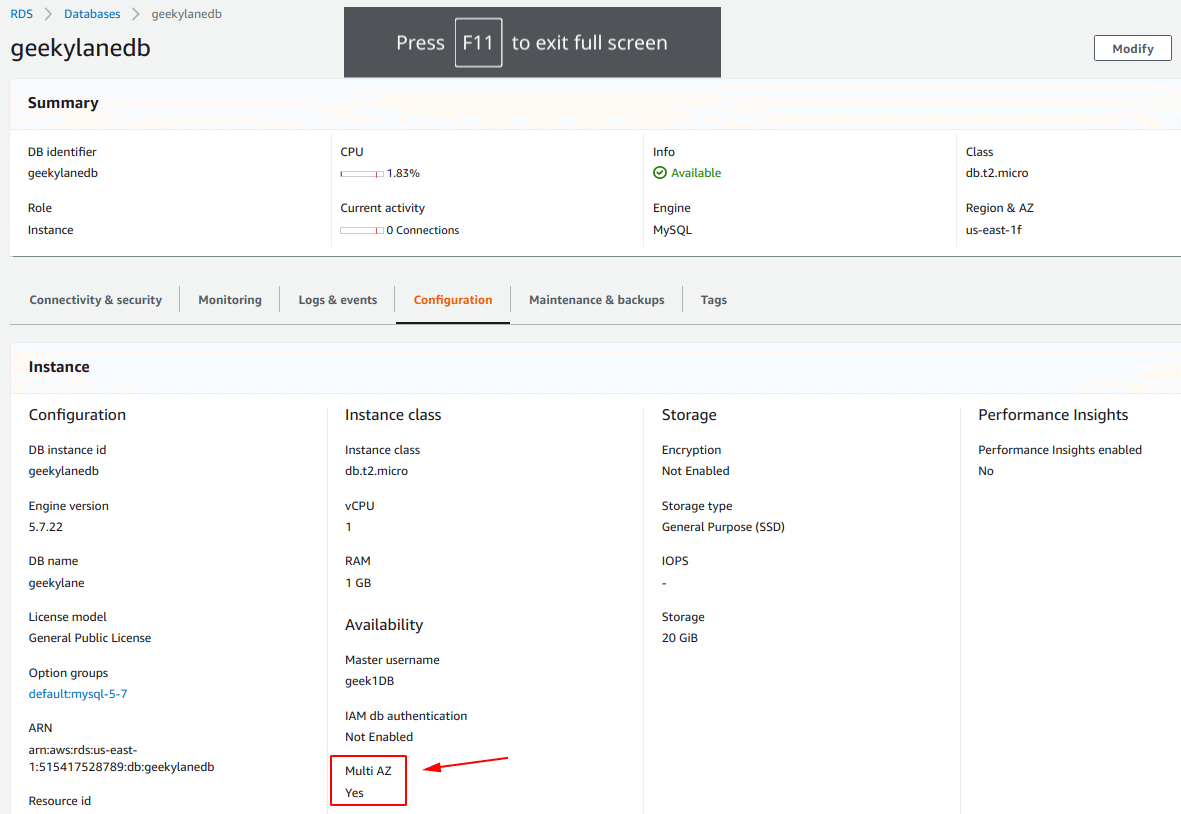
Give it some time, it will take some. After that, the “status” will be changed to “Available” and the “Multi-AZ” column is changed to “Yes“, which means now the instance is available in multiple availability zones.

Also, under the “Configuration” you can double-check that.

Check this: Understanding Tadalafil: A Comprehensive Guide
More on AWS:
