Docker networking is important if you are dealing with it on a production level, because if unaware then one might end up exposing the whole system or containers to the outside world, which as a result is very dangerous. Today, we are going to cover the “bridge network driver” in docker.
Before going further, make sure you know the theory behind the docker networking, do read -> Docker Networking
The docker bridge networking is of two types:
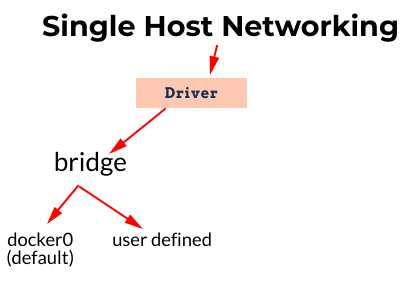
docker0 – the default bridge network
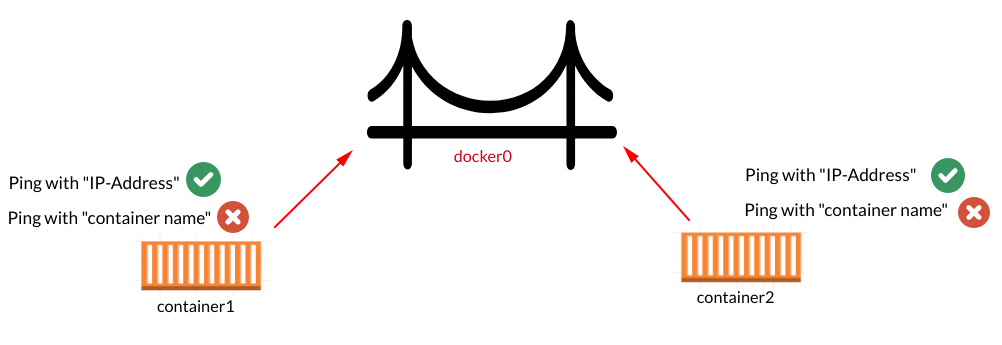
We have to achieve something like shown in the picture diagram below:
First, we will check the existence of this network by the following command:
$ ip a s docker0
Now, check the available networks, by default on a docker host:
$ docker network ls
From the photo above, for this particular post, we are interested in the highlighted one, which is “bridge“.
Before moving further, look at the default or stock configuration of this “docker0” bridge network using the command below:
$ docker network inspect bridge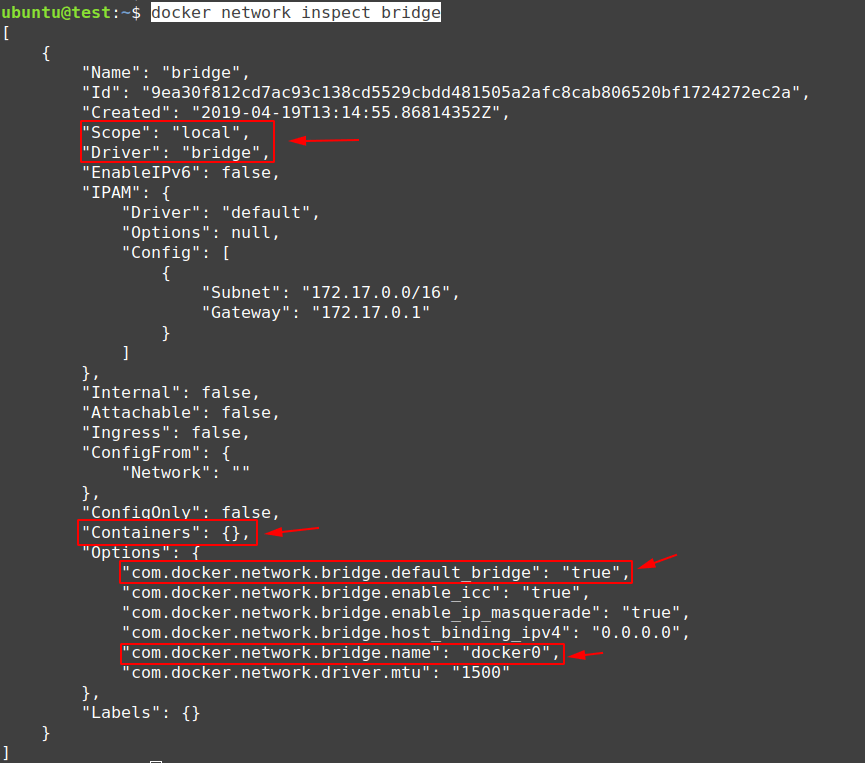
From the image above, we have to note a few things:
- Scope = local <- the scope of this network is “local”
- Driver = bridge <- this is bridge type network
- Containers = {} <- this means currently zero (0) containers are attached to this network
- com.docker.network.bridge.default_bridge = true <- this is the default network to be used for creating containers
- com.docker.network.bridge.name = docker0 <- this is the default name of this network
Now, create two new containers using this network:
$ docker container ls
Create “container1” using the following command:
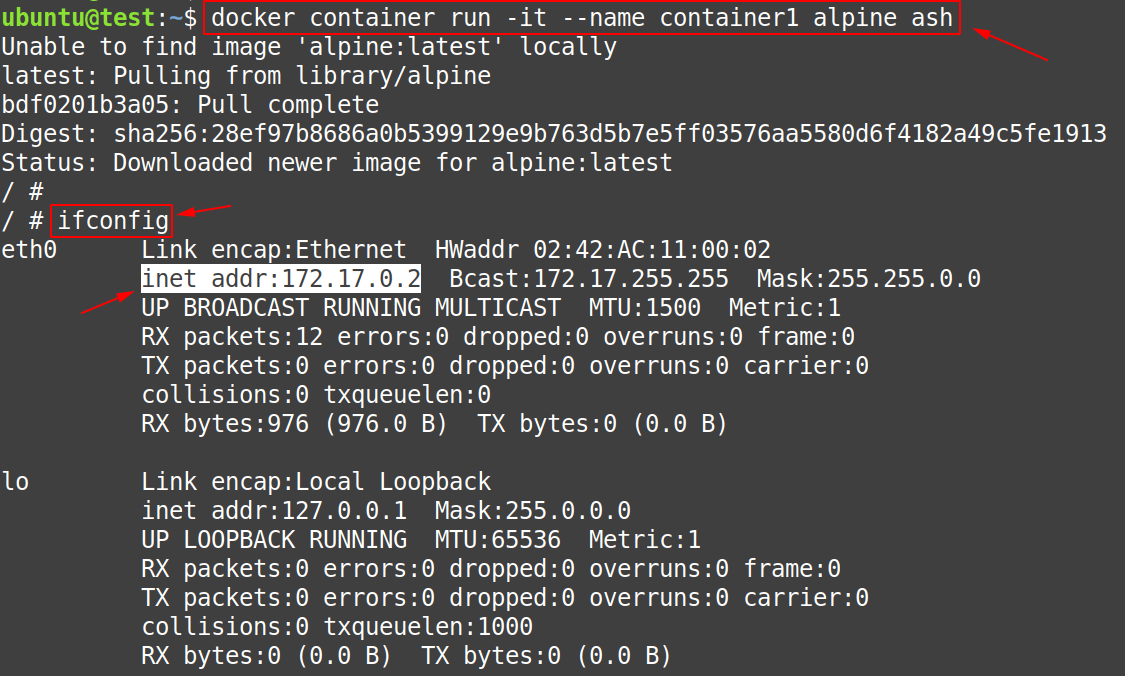
$ docker container run -it --name container1 alpine ashNote: In the command used above, there is no need to specify the type of network to be used, because in case of bridge network, by default “docker0” is going to be used. But if still, you want to specify the network type then use -> “– – net=bridge” in the command used above.
Now, that the “container1” is created, use the following command inside the “container1” to get its IP-Address.
# ifconfig- IP-Address of container1 = 172.17.0.2
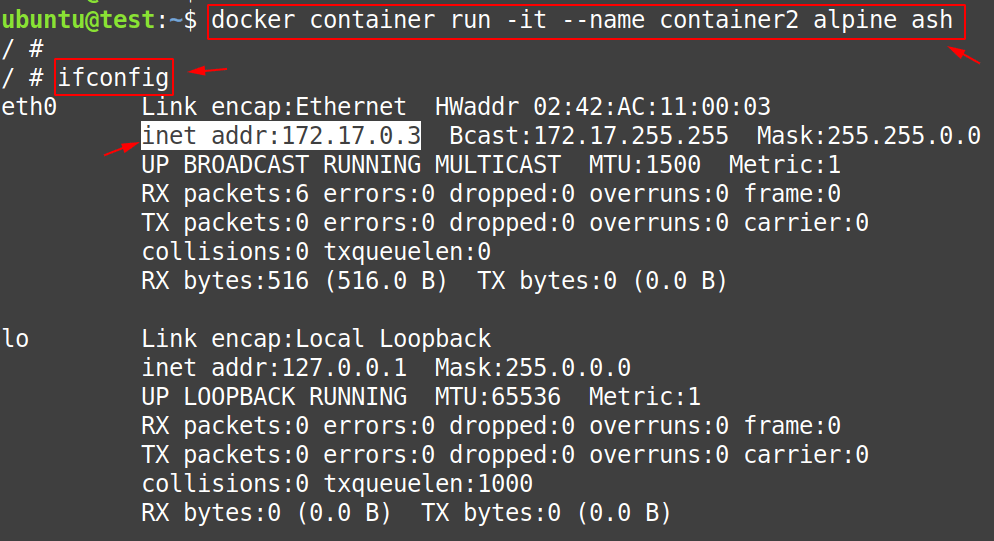
Create “container1” using the following command:
$ docker container run -it --name container2 alpine ashNow, that the “container2” is created, use the following command inside the “container2” to get its IP-Address.
# ifconfig- IP-Address of container2 = 172.17.0.3
Now, it time to check whether we can ping from “container1 to container2” and vice-versa.
Question: Why we are we doing this?
Answer: To understand the communication between containers which are using the default “docker0” bridge network and identifying what can be achieved with it and what not.
# ping 172.17.0.3
From the “gif” above we can confirm that the communication from “container1 to container2” is perfect.
# ping 172.17.0.2
From the “gif” above we can confirm that the communication from “container2 to container1” is perfect.
Note: We are doing this all because of the benefits of “user-defined docker bridge network” over “default docker0“.
Question: What we can not do with “default docker0 bridge” network.
Answer: We can not access another container from one, using its name but we can use the IP-Address, as we have done above by pinging the two containers from each other using the IP-Address.
You can confirm the answer to the question above by seeing the screenshots below:
# ping container2
# ping container1
Question: What if we still want to achieve that
Answer: That is simple actually, simply edit the “/etc/hosts” file of both the containers, by adding an entry:
- about “container2” in the “/etc/hosts” file of “container1“
- about “container1” in the “/etc/hosts” file of “container2“
# cat /etc/hosts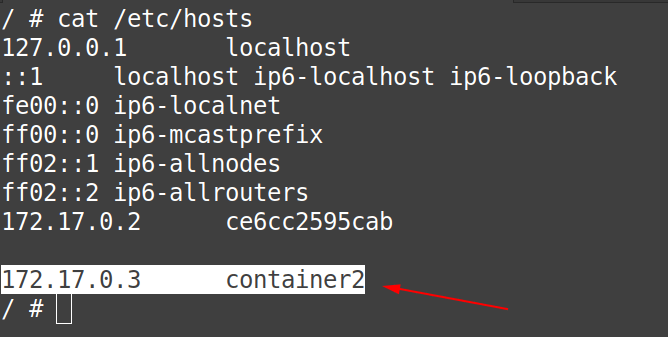
Now, from the “gif” below, we can confirm that the “container1” can reach “container2” using its name and not its IP-Address.
# ping container2
# cat /etc/hosts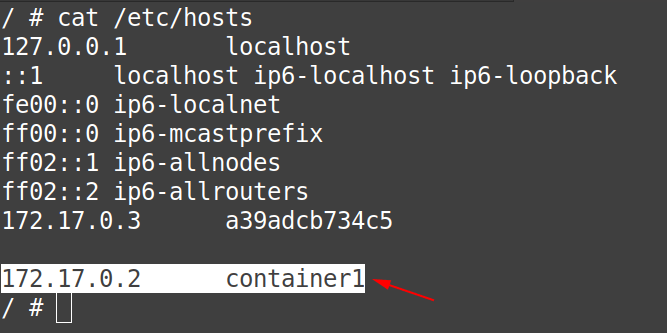
Now, from the “gif” below, we can confirm that the “container2” can reach “container1” using its name and not its IP-Address.
# ping container1
Now, check from the output of the following command, that the “Containers” section of the “docker0 bridge” is no more empty, it is now showing both the containers, “container1” and “container2” in it.
$ docker network inspect bridge | grep -A 14 Containers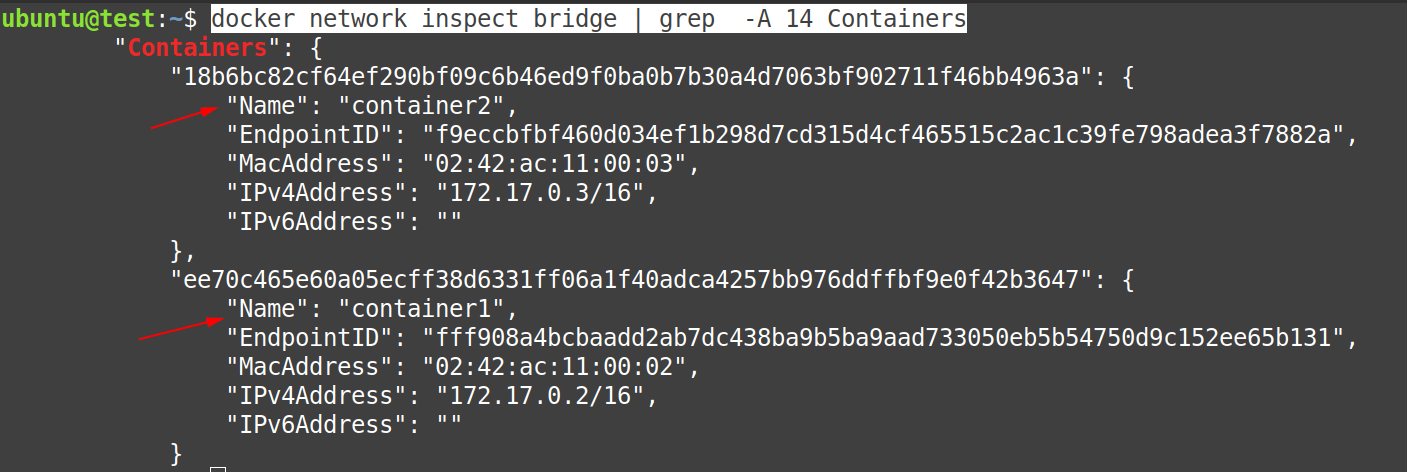
Now, it is time to clean our playground, so stop and remove both the containers.
$ docker container stop container1$ docker container stop container2$ docker container rm container1$ docker container container2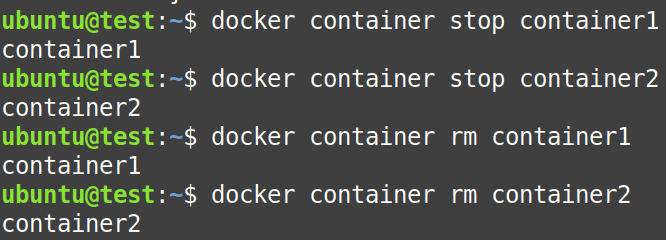
Again, from the screenshot below, we can confirm that after deleting the containers from the system, they no more exist in the “docker0 bridge” configuration.
$ docker network inspect bridge | grep Containers
User-Defined bridge docker network
We have to achieve something like shown in the picture diagram below:
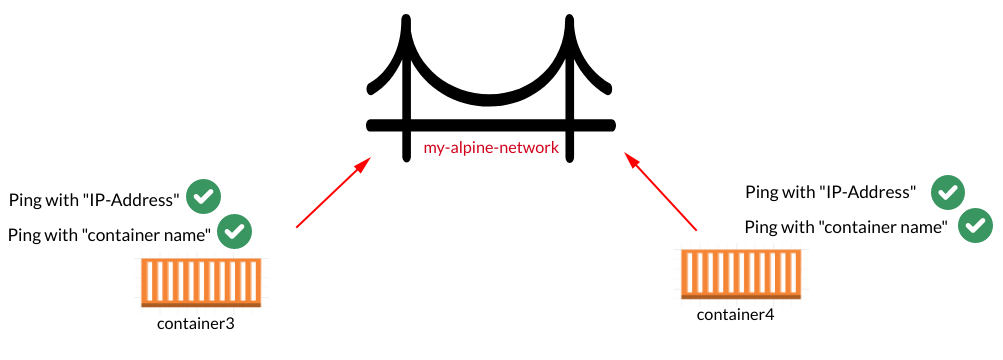
First of all, we need to create one “user-defined” bridge using the following command:
$ docker network create my-alpine-network
The effect of command used above is that it will create a software bridge inside the docker host, which can be further configured.
You can confirm from the picture below, that there exists a new network named “my-alpine-network” on our docker host.
$ docker network ls
Before going forth, inspect “my-alpine-network” and check its default configuration.
$ docker network inspect my-alpine-network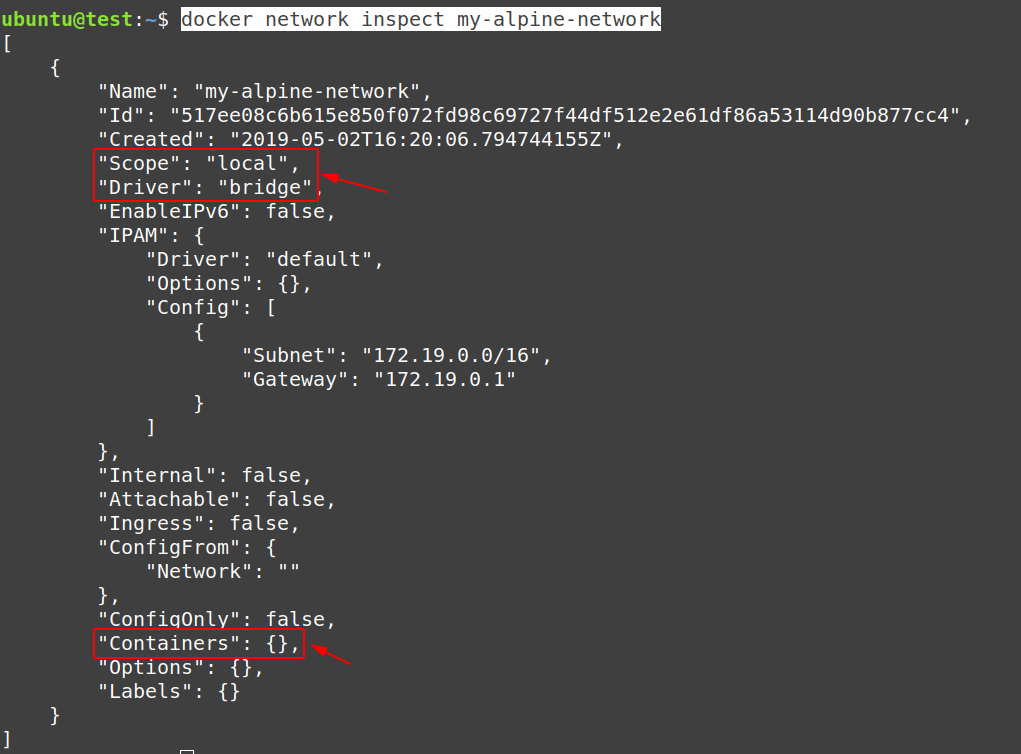
From the image above, we have to note a few things:
- Scope = local <- the scope of this network is only to it docker host
- Driver = bridge <- this is a bridge type network
- Containers = {} <- currently zero (0) containers are connected to this user-defined bridge network
Now, Create two containers, “container3” and “container4” using the following commands:
$ docker container run -it --network my-alpine-network --name container3 alpine ashNow, that the “container3” is created, use the following command inside the “container3” to get its IP-Address.
# ifconfig eth0- IP-Address of container2 = 172.19.0.2

$ docker container run -it --network my-alpine-network --name container4 alpine ashNow, that the “container4” is created, use the following command inside the “container4” to get its IP-Address.
# ifconfig eth0- IP-Address of container2 = 172.19.0.3

Now again, inspect “my-alpine-network” and check the “Containers” section from the output of its configuration.
$ docker network inspect my-alpine-network | grep -A 15 Containers
From the output above, we can confirm that both the containers “container3” and “contianer4” are connected to our “user-defined my-alpine-network” bridge network.
Now, check the communication between both containers using the “IP-Address” as well as using the “Container name“
# ping 172.19.0.3# ping container4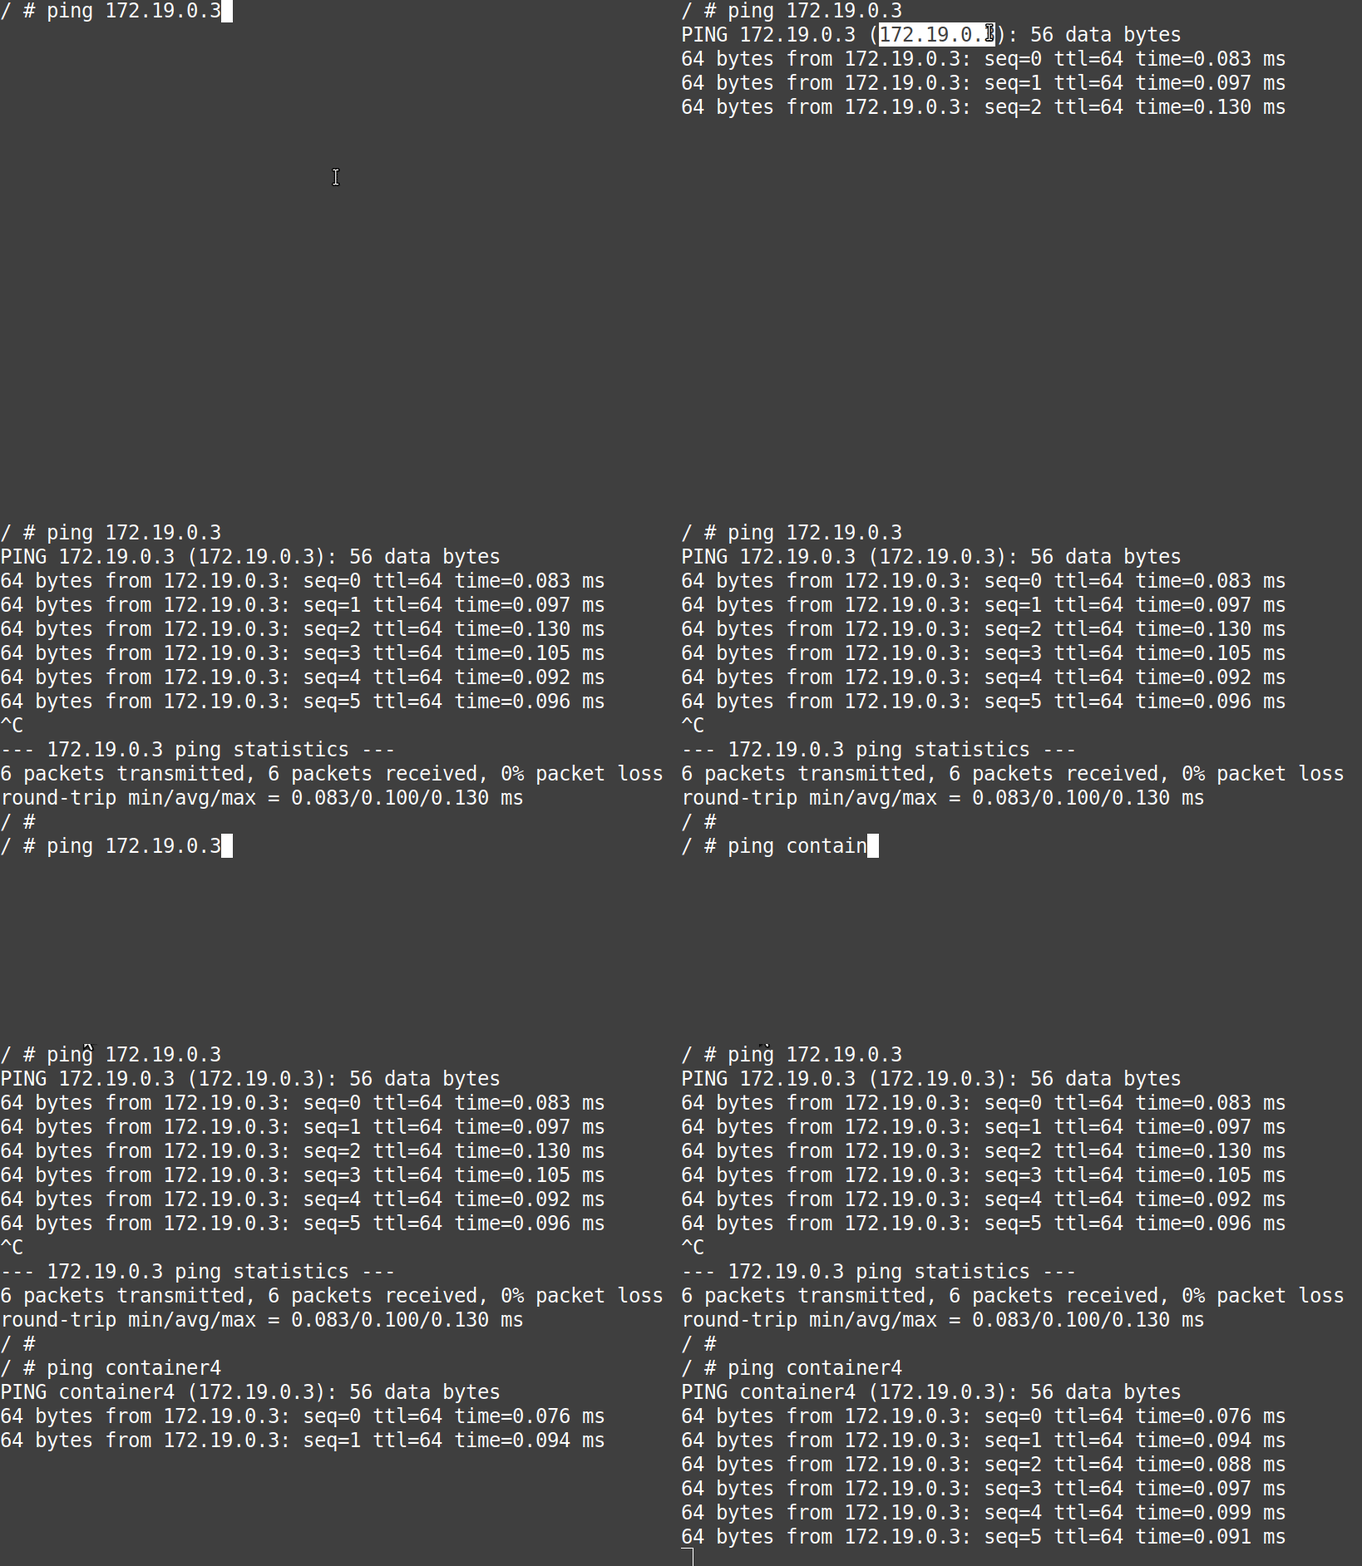
# ping 172.19.0.2# ping container3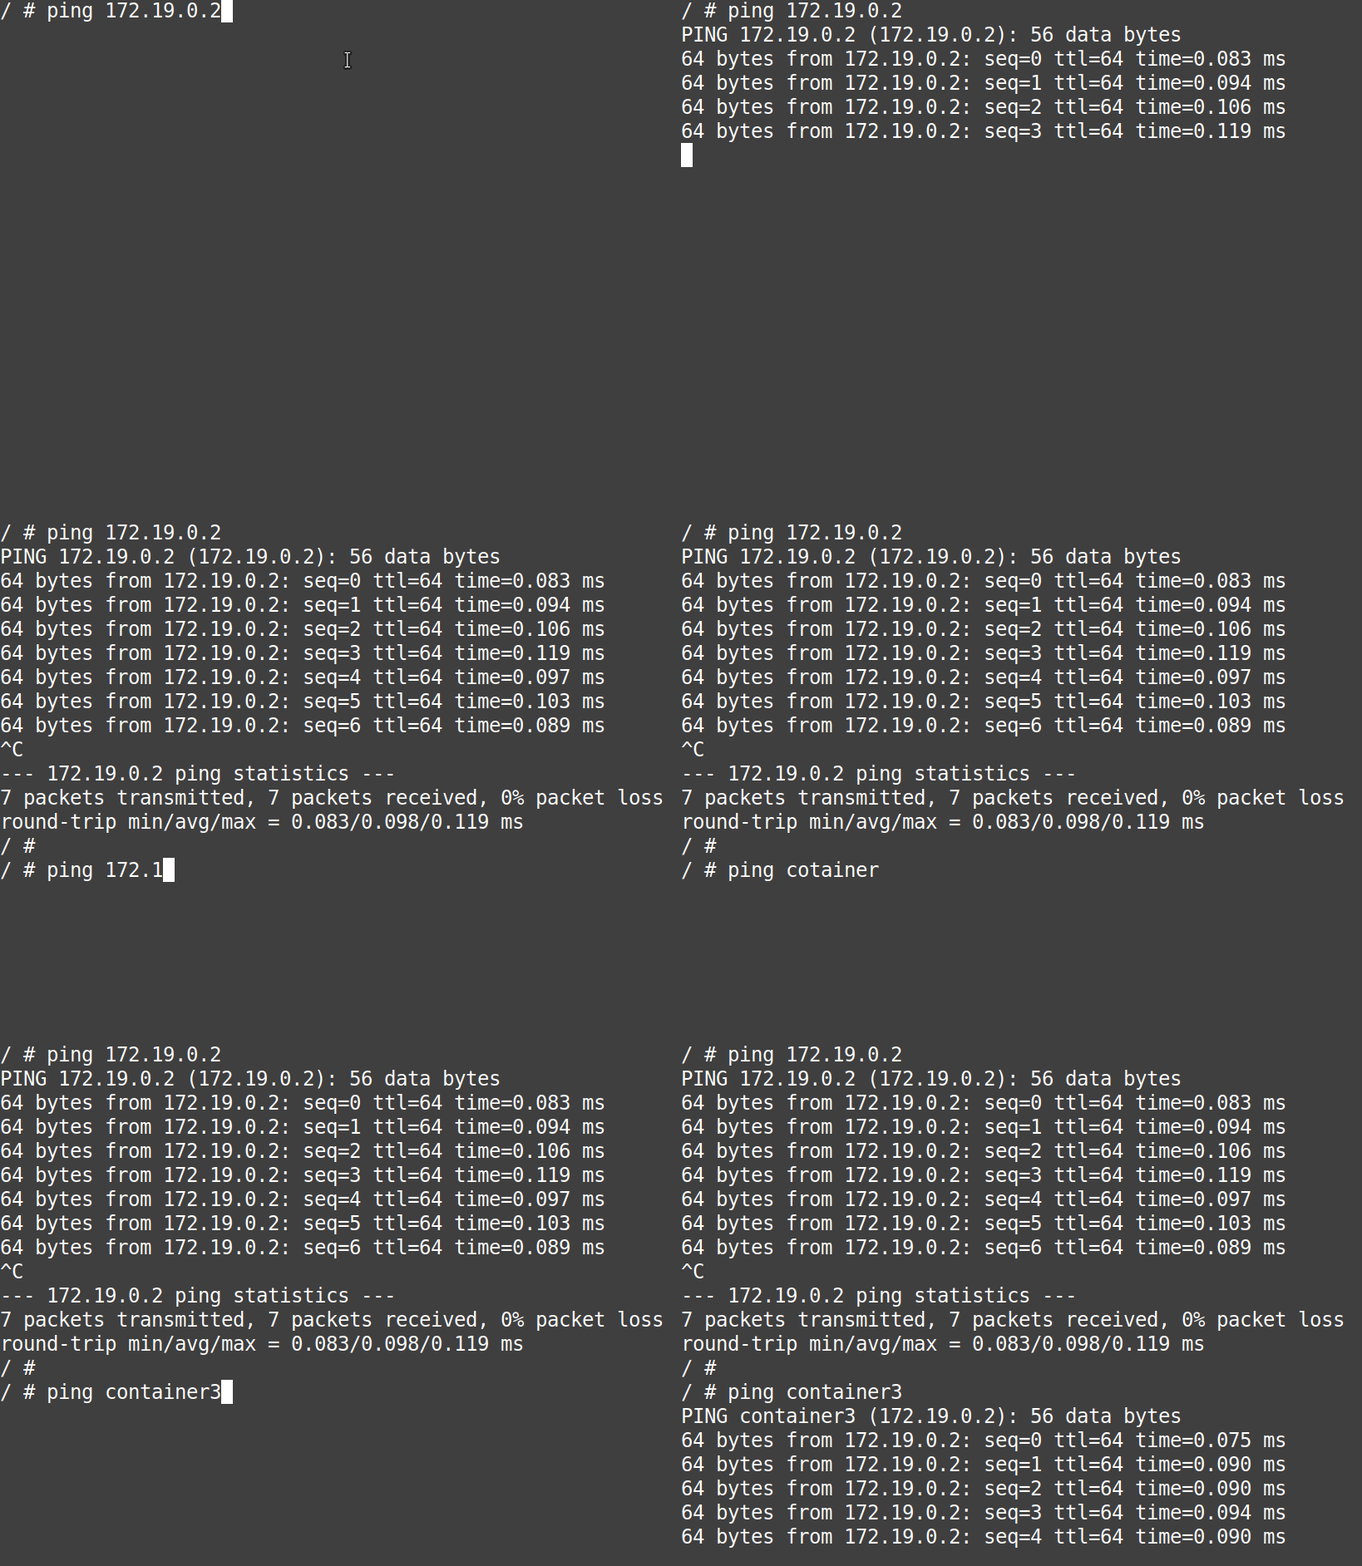
From above, we can conclude that without doing anything extra and without modifying the “/etc/hosts” files of the containers, they can access each other with their names directly.
Note: This is the power of “user-defined bridge networks” over “default docker0” network.
Note: This is the DNS resolution provided by the user-defined bridge networks
Also, do check from the output of the “/etc/hosts” files from the “container3” and “container4” that there is still no entry about each other in these files.
# cat /etc/hosts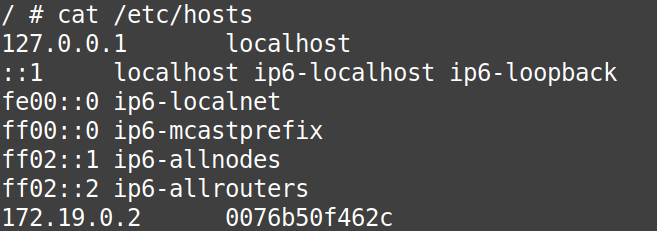
# cat /etc/hosts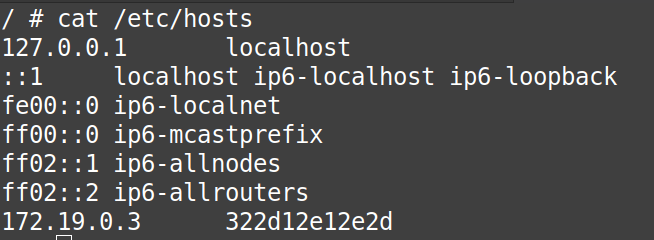
Now, it is time to clean our playground, so stop and remove both the containers.
$ docker container stop container3$ docker container stop container4$ docker container rm container3$ docker container rm container4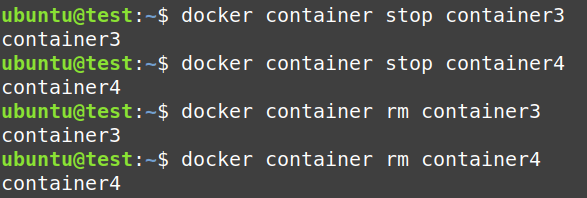
Again, from the screenshot below, we can confirm that after deleting the containers from the system, they no more exist in the “my-alpine-network bridge” configuration.
$ docker network inspect my-alpine-network | grep Containers
Now, remove the “my-alpine-network” also.
$ docker network rm my-alpine-network
Conclusion
- user-defined bridge networks are superior and more advanced than the default “docker0” network.
- With “docker0” there no DNS resolution from “name to IP-Address“.
- With “user-defined bridge” there is DNS resolution from “name to IP-Address“.
To learn more about docker, follow -> Learn Docker
