After setting up a “Raspberry Pi“, one of the main tasks is to access the internet on it. In turn, with the help of which one can install some extra software on it, for example, VNC Server, Samba Server et cetera. In addition, we are going to achieve the same i.e. “giving internet to raspberry pi“.
Before proceeding further, make sure you have read the previous posts on raspberry pi, which are following:
- Raspberry Pi headless set up for the first time (Flashing Raspbian OS)
- Giving an IP Address to Raspberry Pi using Ethernet Cable on Windows 10
- Raspberry Pi SSH login by creating an SSH file in boot partition (Windows 10)
Now that you have read the articles mentioned above, you are good to go with the flow.
Note: As we are using an “Ethernet Cable” in order to give IP Address to our “Raspberry Pi” this particular post is only applicable to “Ethernet Cable” connection and not for “WI-FI enabled Raspberry Pi”
The post is going to be covered in the following steps.
Note: Make sure before the upcoming steps, you have connected your “Raspberry Pi” via “Ethernet Cable” your laptop or computer, moreover make sure you have internet connection already in your laptop (via wi-fi) or in computer (via ethernet).
Question: Why we must be having an Internet connection on our laptop or computer?
Answer: Because we are going to route that Internet connection to our “Raspberry Pi”
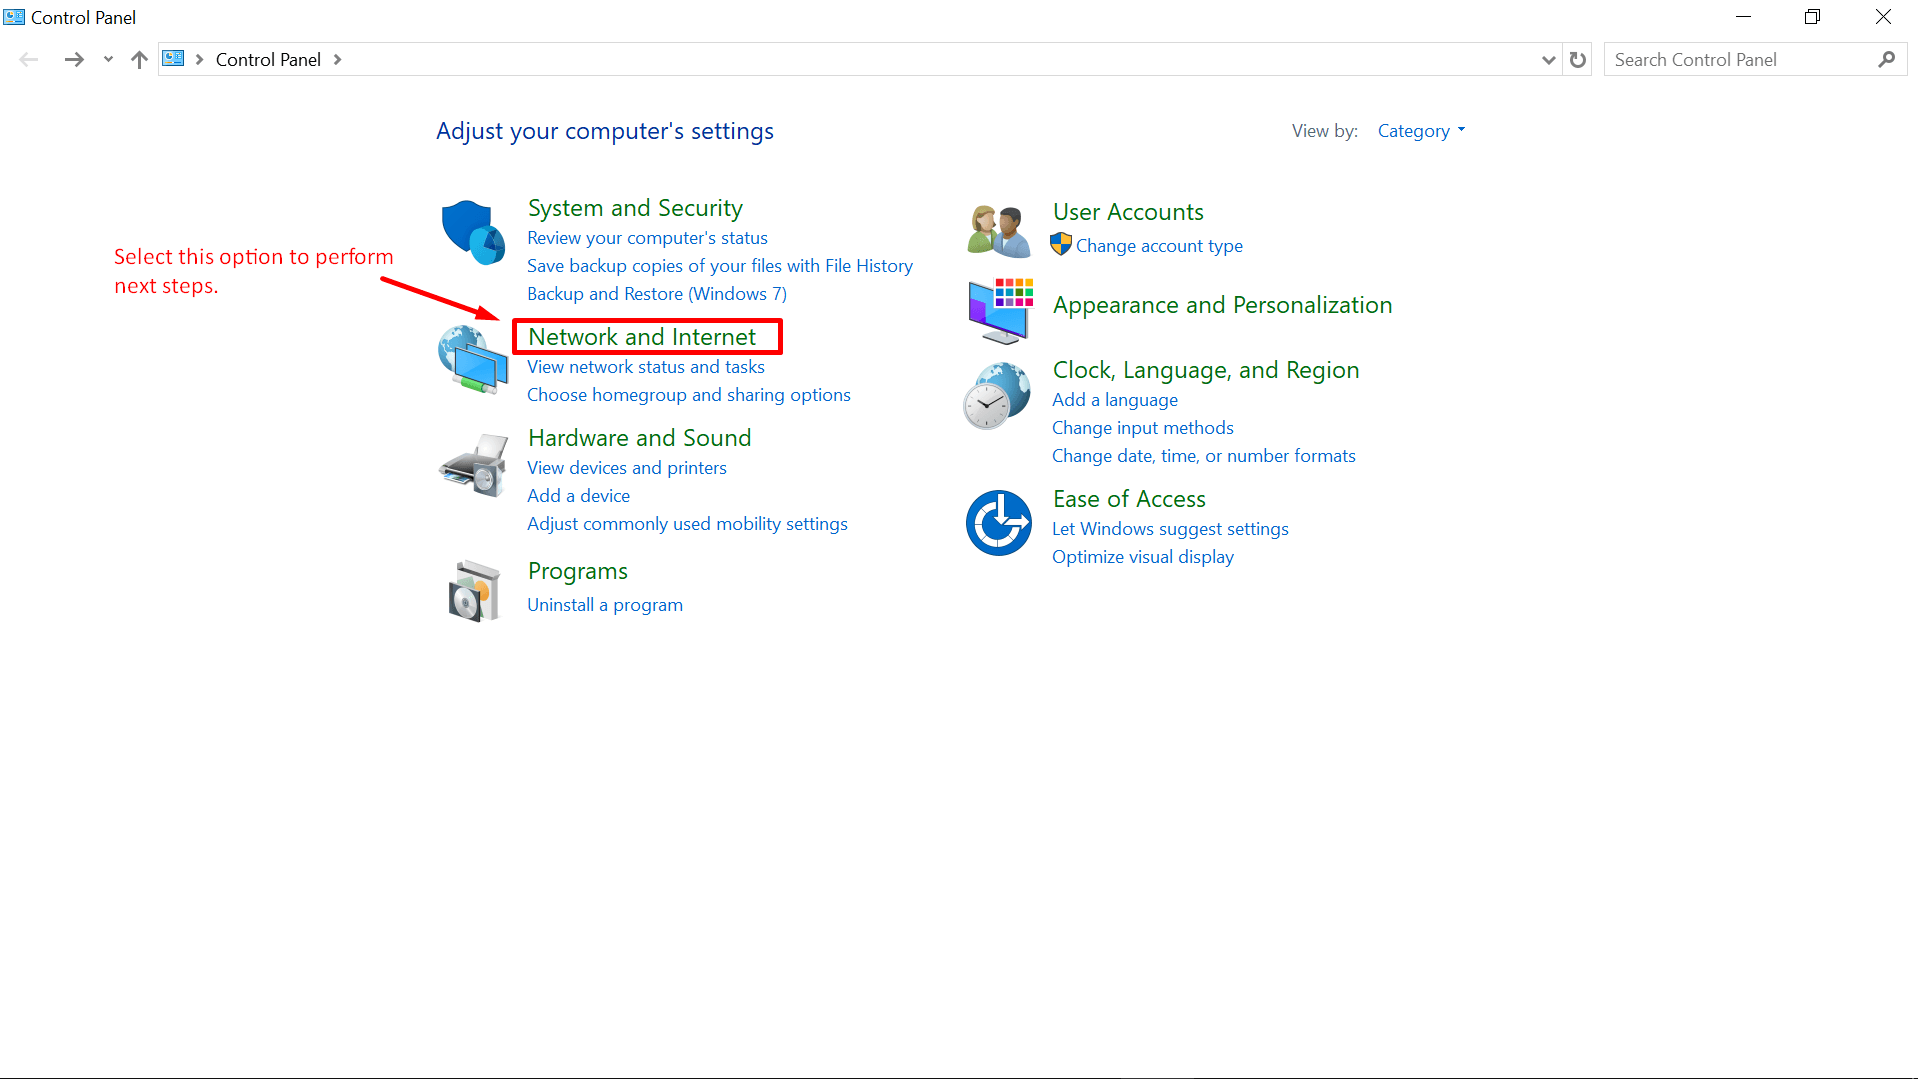
Step 1: First of all you have to open the “control panel” in Windows 10, after that, you have to navigate to the “Network and Internet” section and select it for further options.
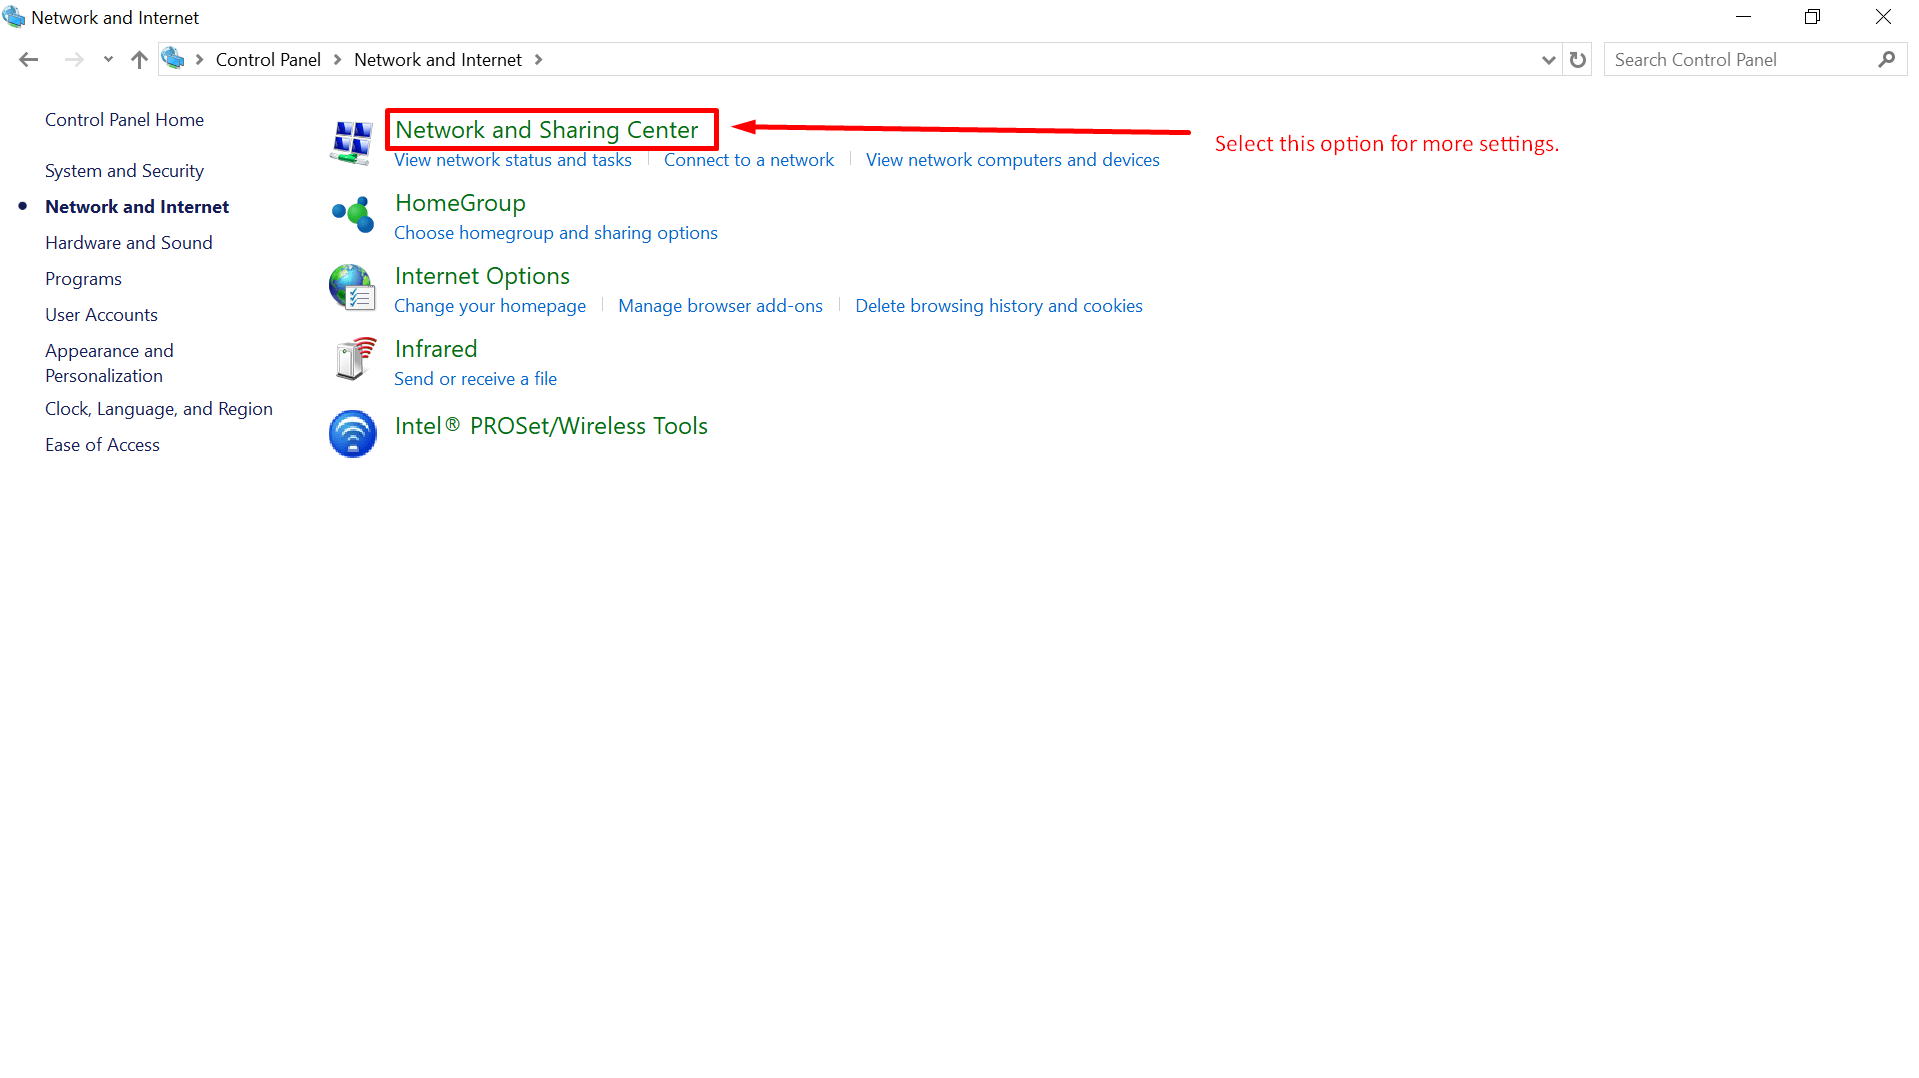
Step 2: After that, look for “Network and Sharing Center” as shown below, select it for more options.
Step 3: Now on this particular step, you can see that our “Raspberry Pi” is showing as “Ethernet 2” because it is connected via “Ethernet Cable” to our laptop.
Note: It can be different in your case, make a note of it.
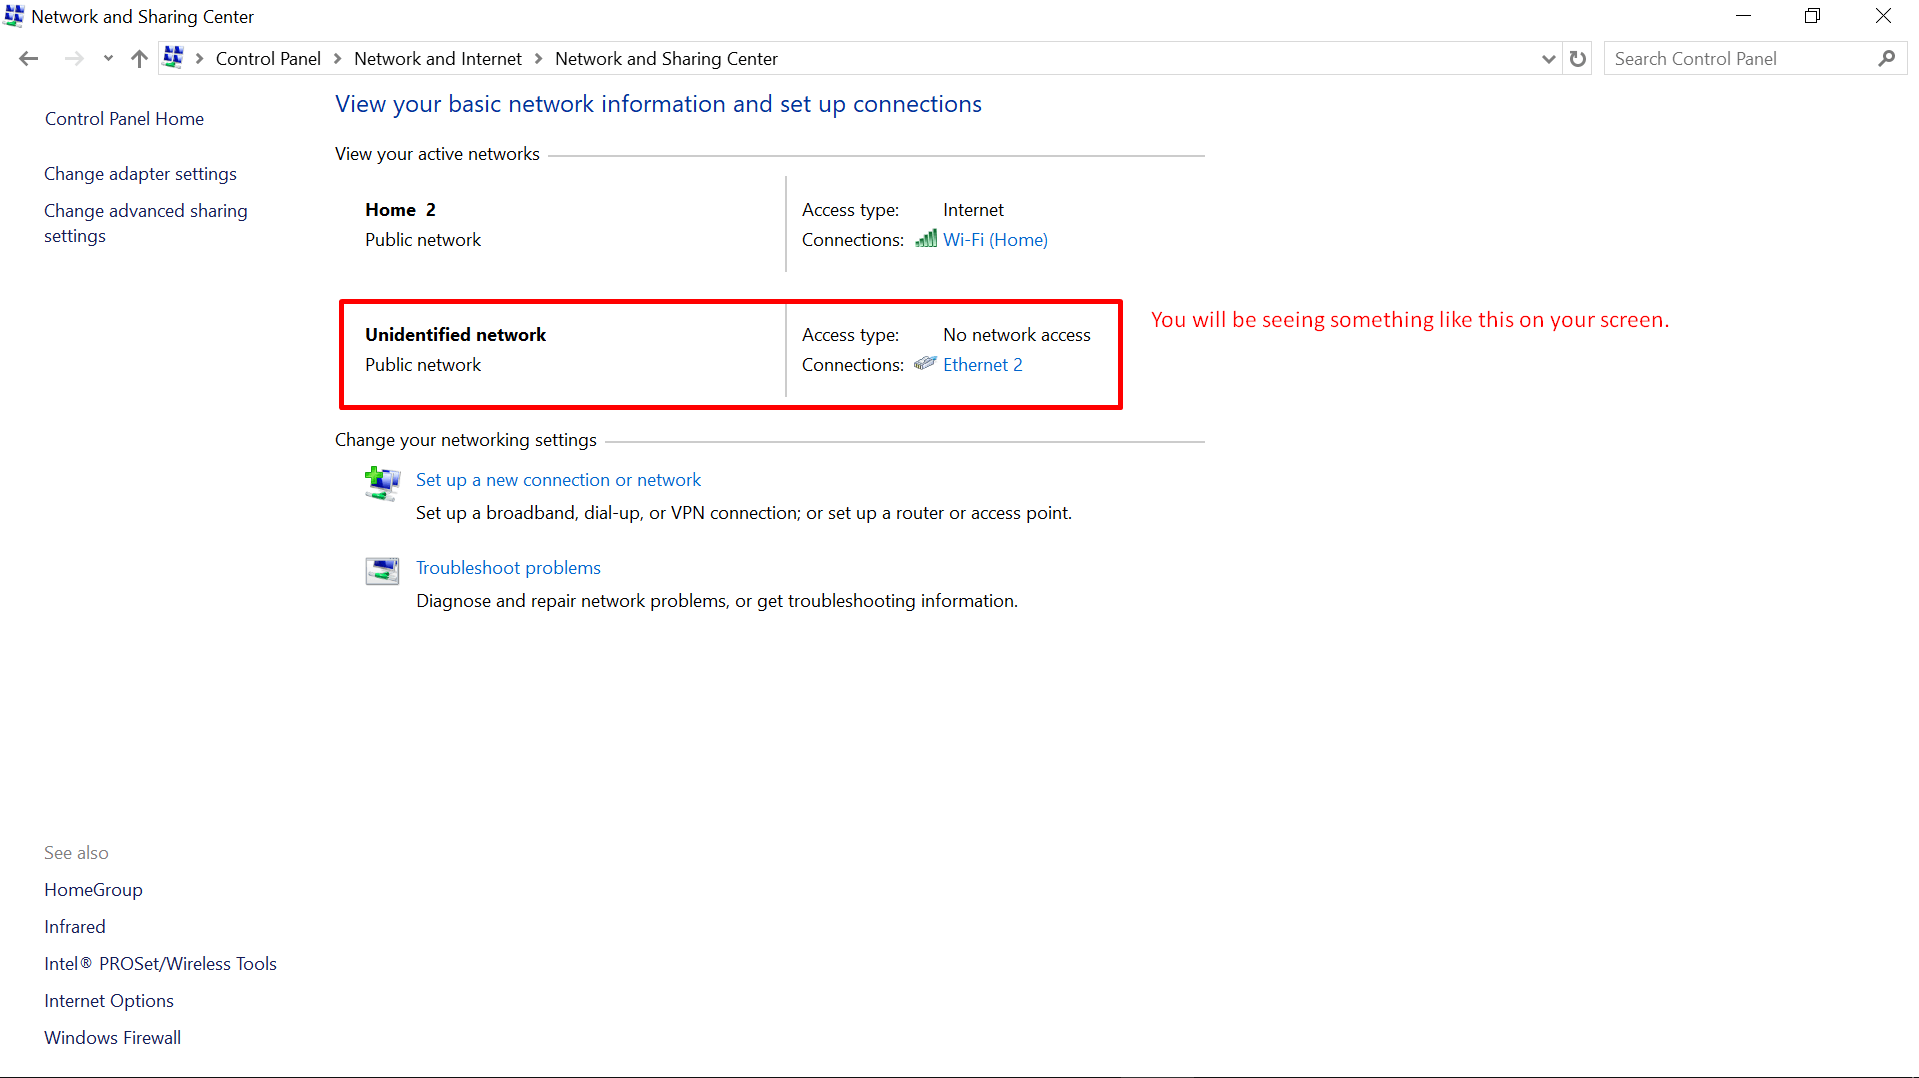
Step 4: This particular step is important, from the picture below you can see that:
Raspberry Pi = Ethernet 2
Internet = Wi-Fi
Now, what we are going to do is, we are going to route/share the internet traffic coming from “Wi-Fi Connection” –> to –> “Ethernet 2“.
In this manner, we are able to get the internet connection working on our “Raspberry Pi” if it is connected via “Ethernet Cable“.
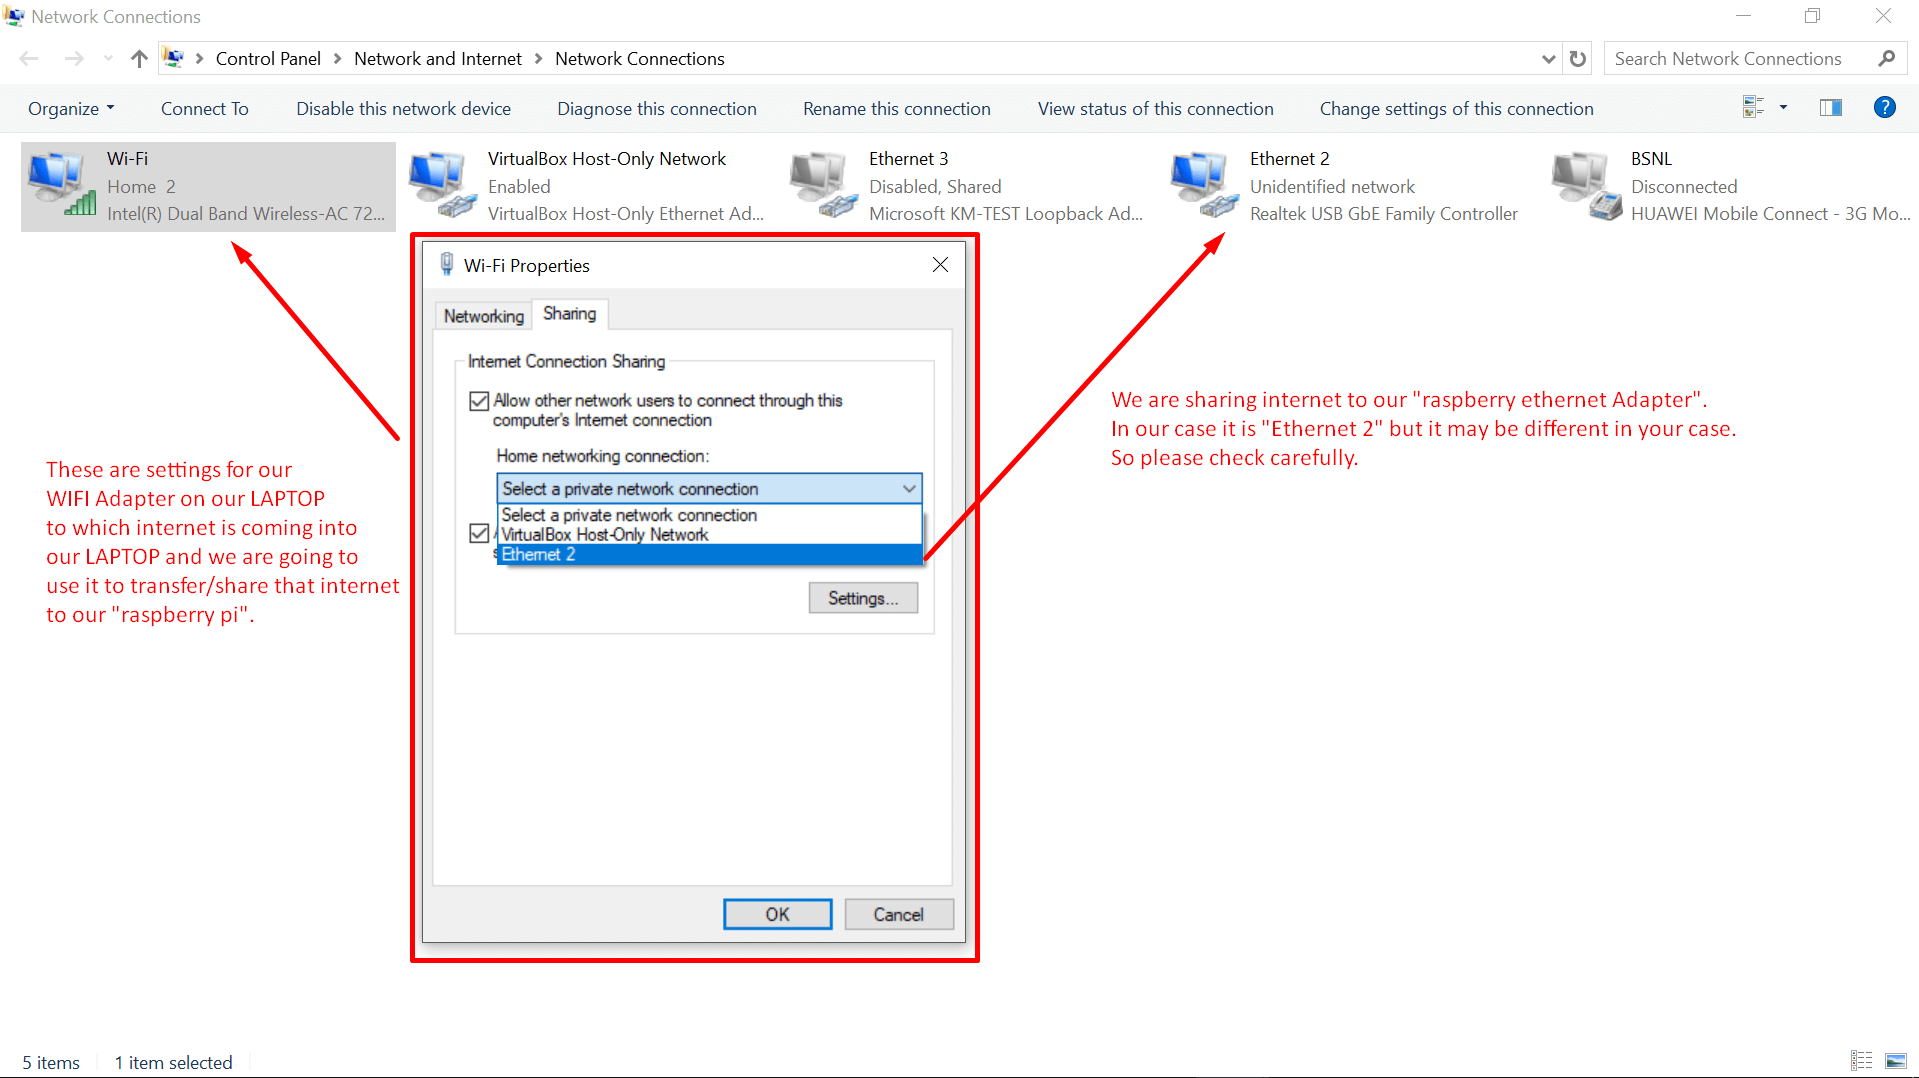
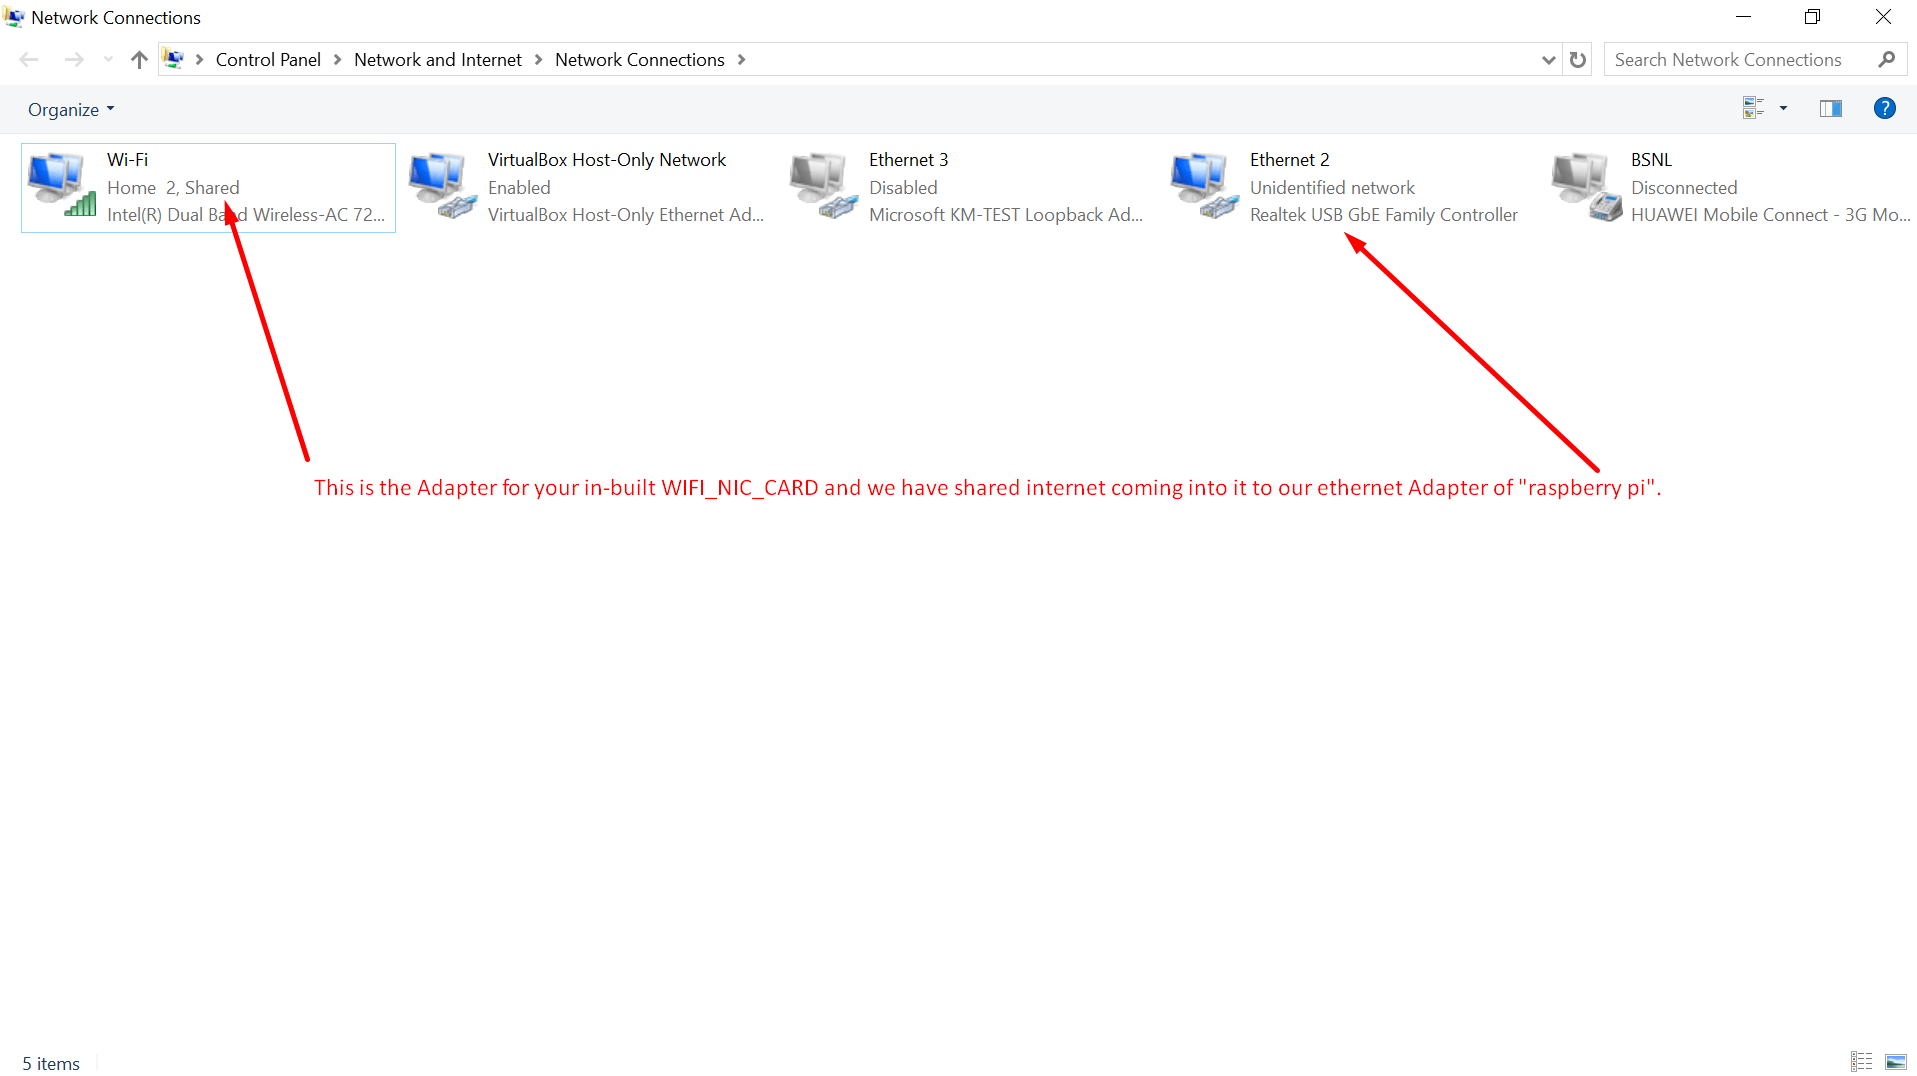
Step 5: From the photo below, you can see the further explanation. Further, not that the “Wi-Fi” is showing something like “Shared” which means the incoming and outgoing traffic on this “Adaptor” is being share with other “Adaptor“.
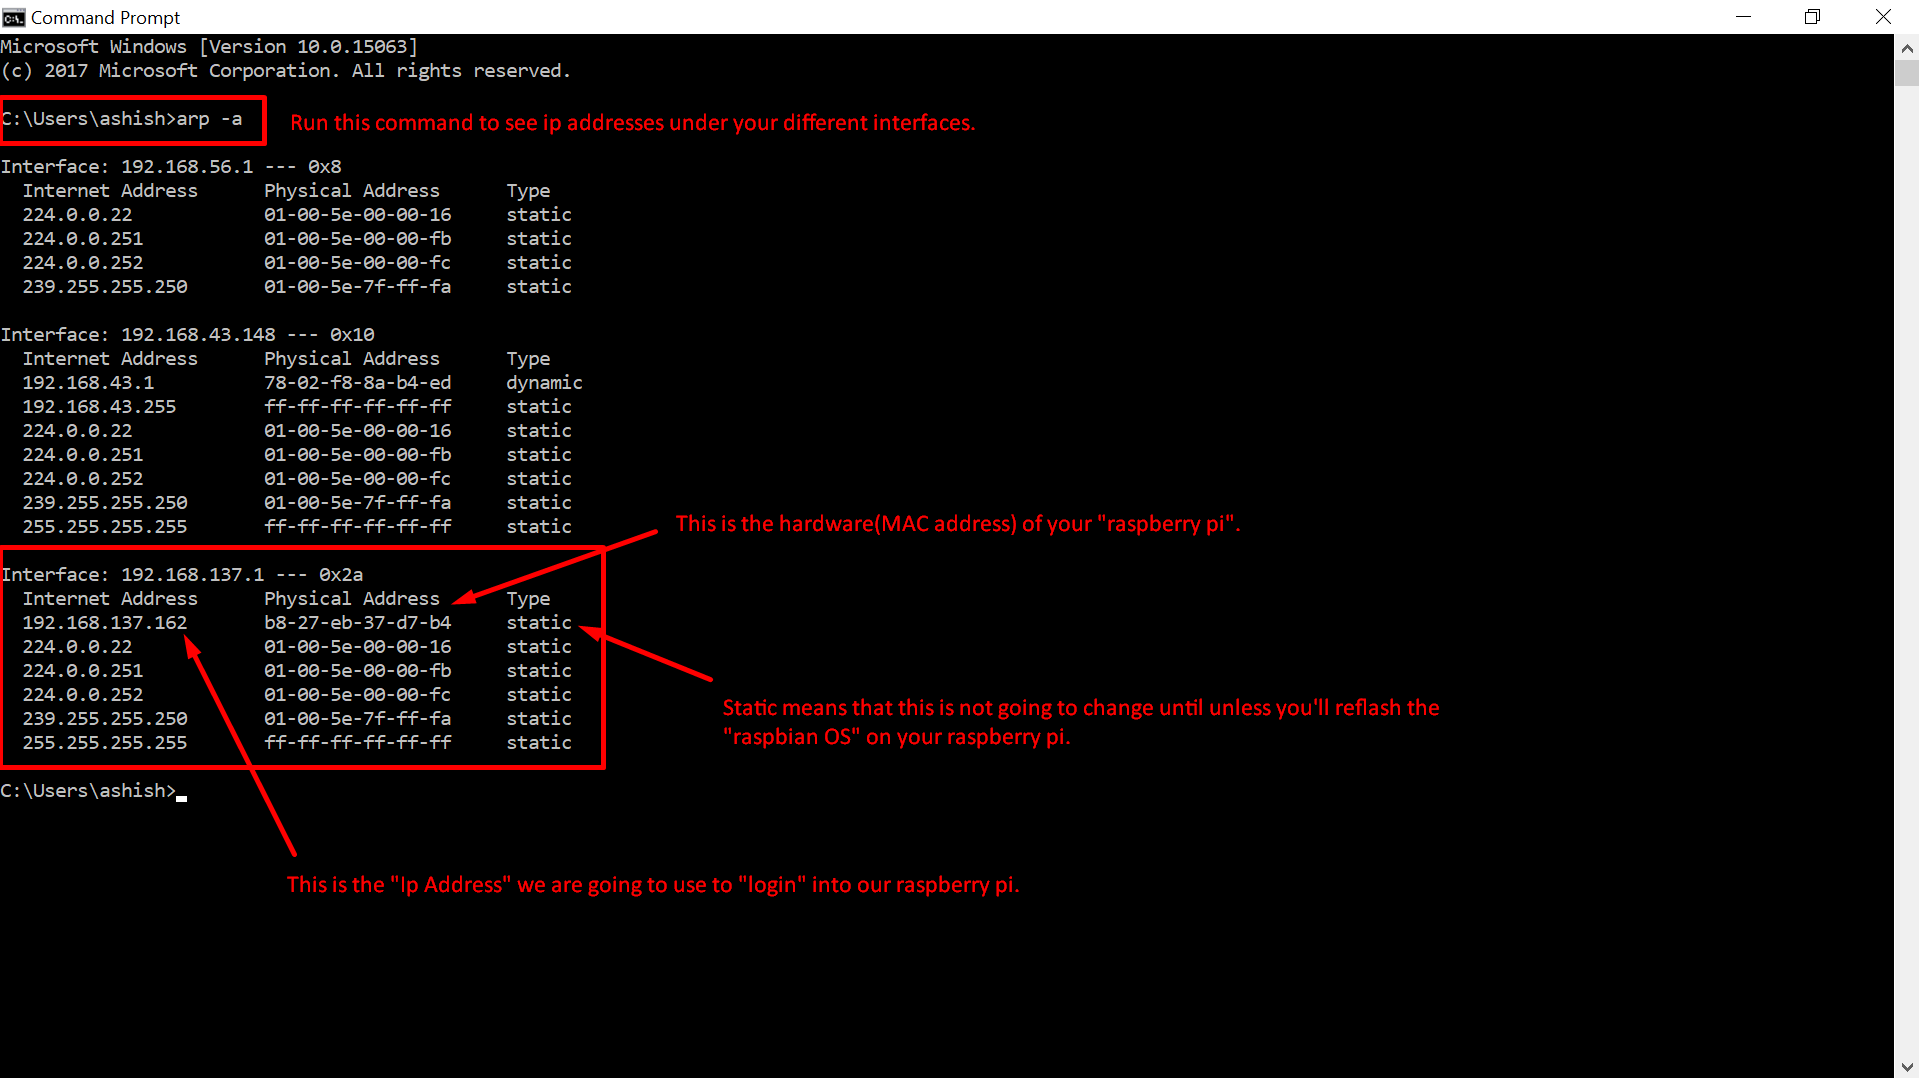
Step 6: Again with the help of “arp -a” command you can find out the IP Address of “Raspberry Pi” if connected via “Ethernet Cable” or via “Wi-Fi” but in case of “Wi-Fi” your laptop should also be connected on the same “Wi-Fi“.
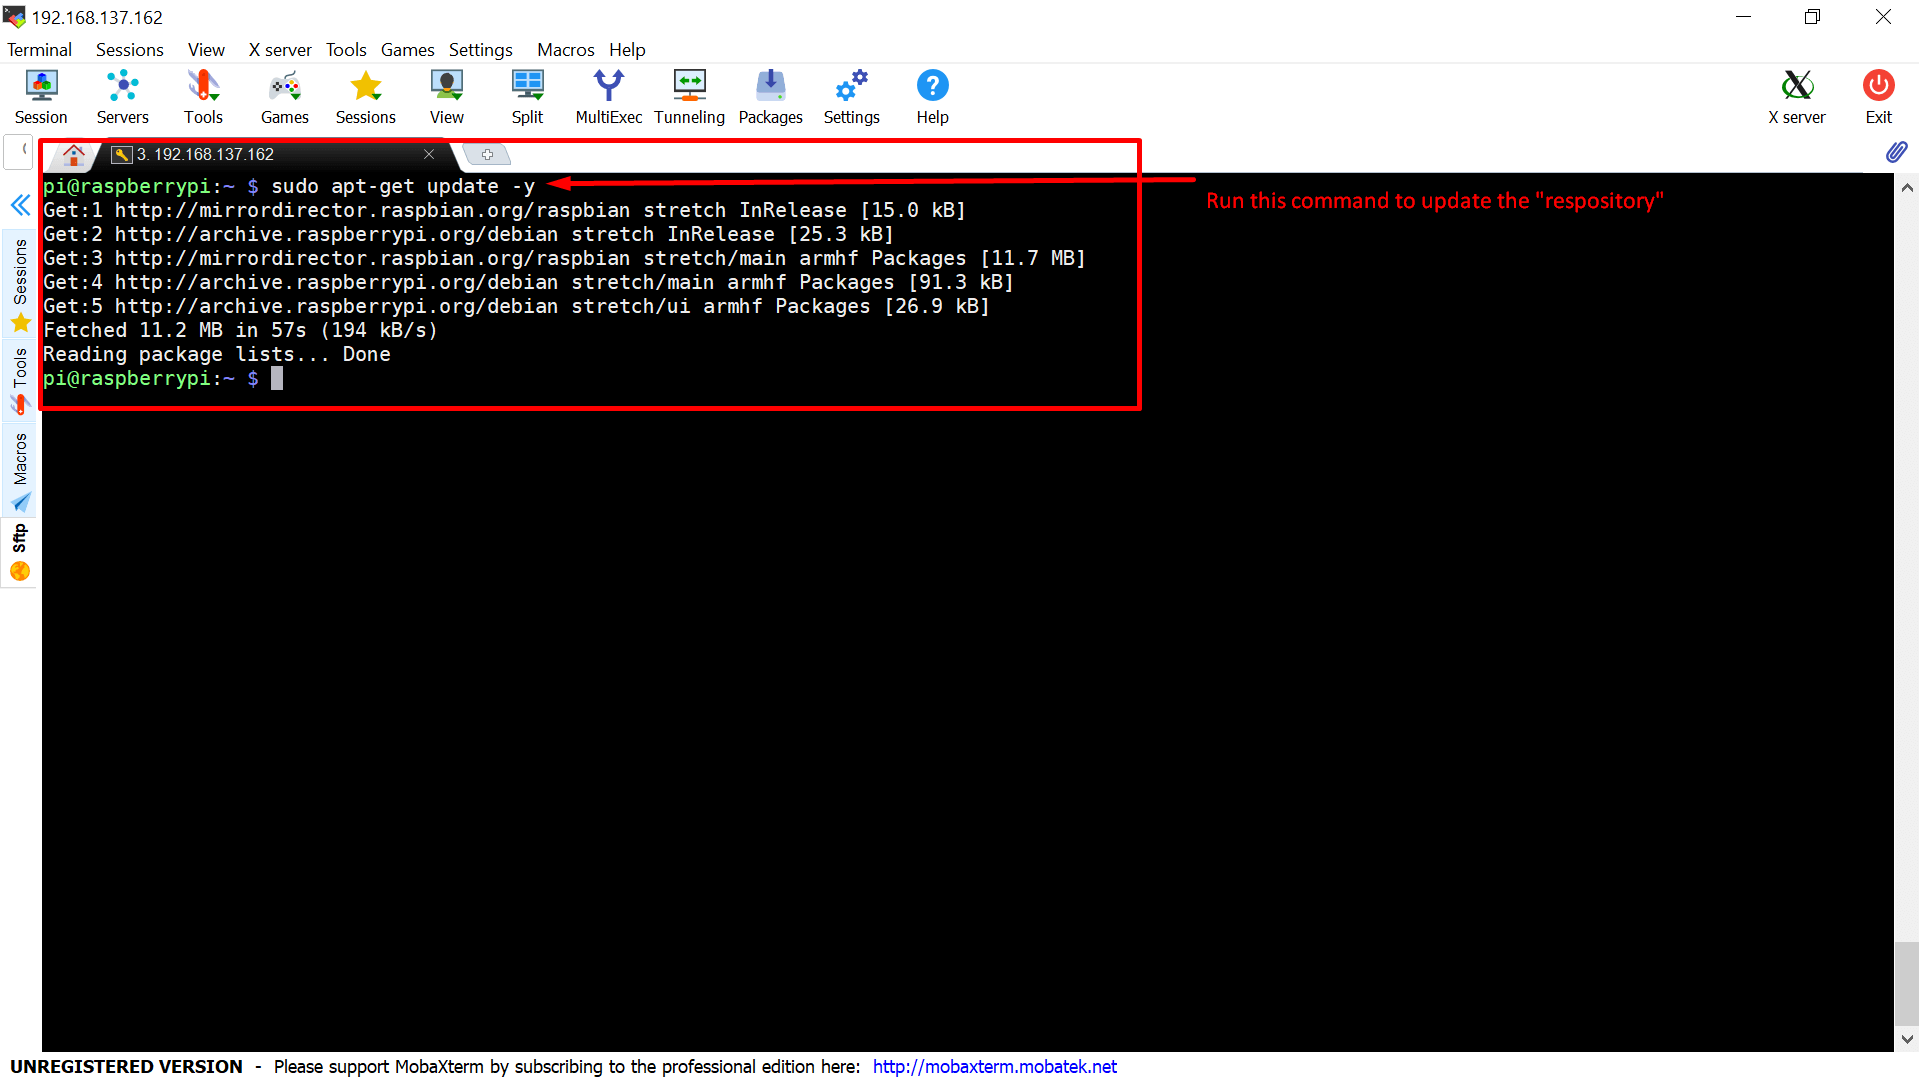
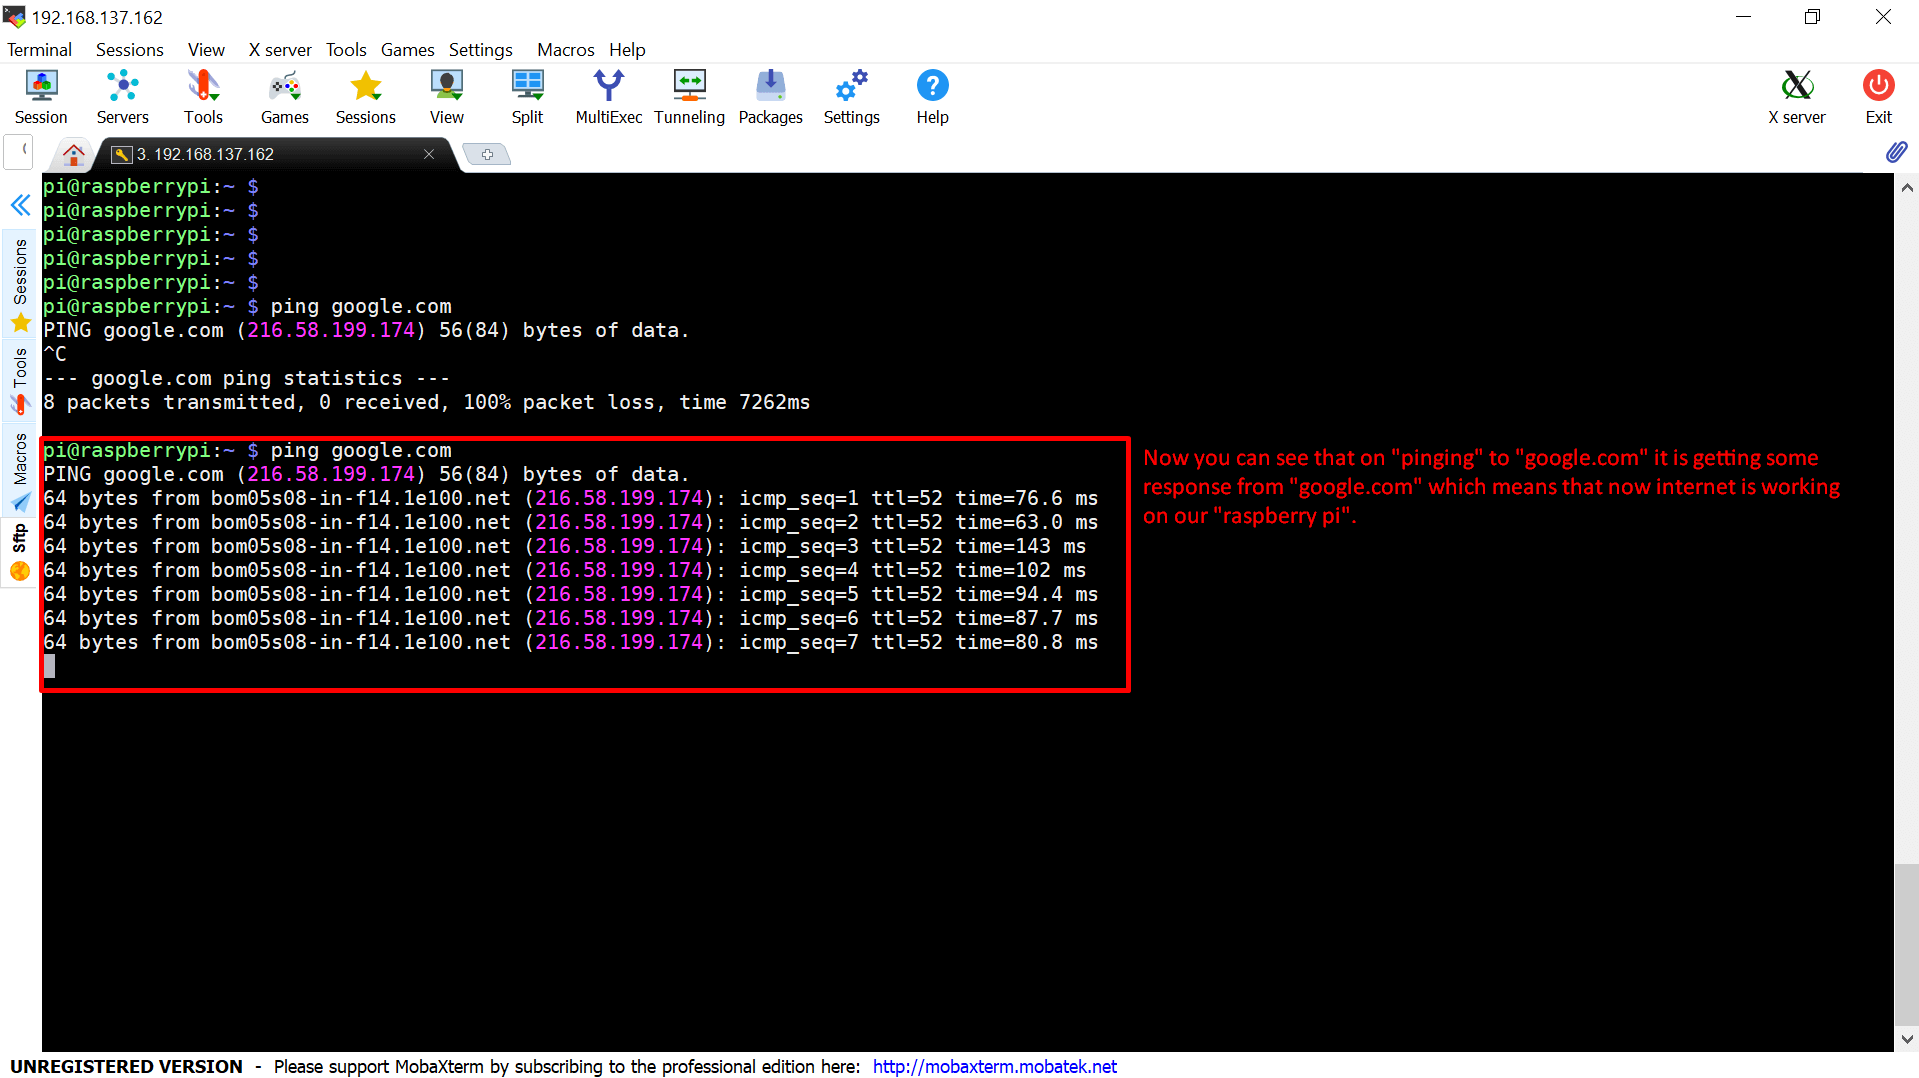
Step 7: From the picture below, you can confirm that the internet is now working on our “Raspberry Pi“.
Step 8: Run the following command in order to update the repositories of “Raspberry Pi“.
