One of the problems people face while working with “Raspberry Pi” is “Giving an IP Address to Raspberry Pi“. In this post, we are going to learn the same and more specifically we will be using “Ethernet Cable“.
If you are new to using “Raspberry Pi” and do not know where to start or how to install and run an OS on it, then read this post -> “Raspberry Pi Headless Set Up“
After you have gone through the post mentioned above, you are good to go and learn the upcoming steps.
Step 1: Open the “Device Manager” by typing it in the “Windows 10 Search Button” which can be easily accessed by pressing the “Windows Button” on the keyboard.
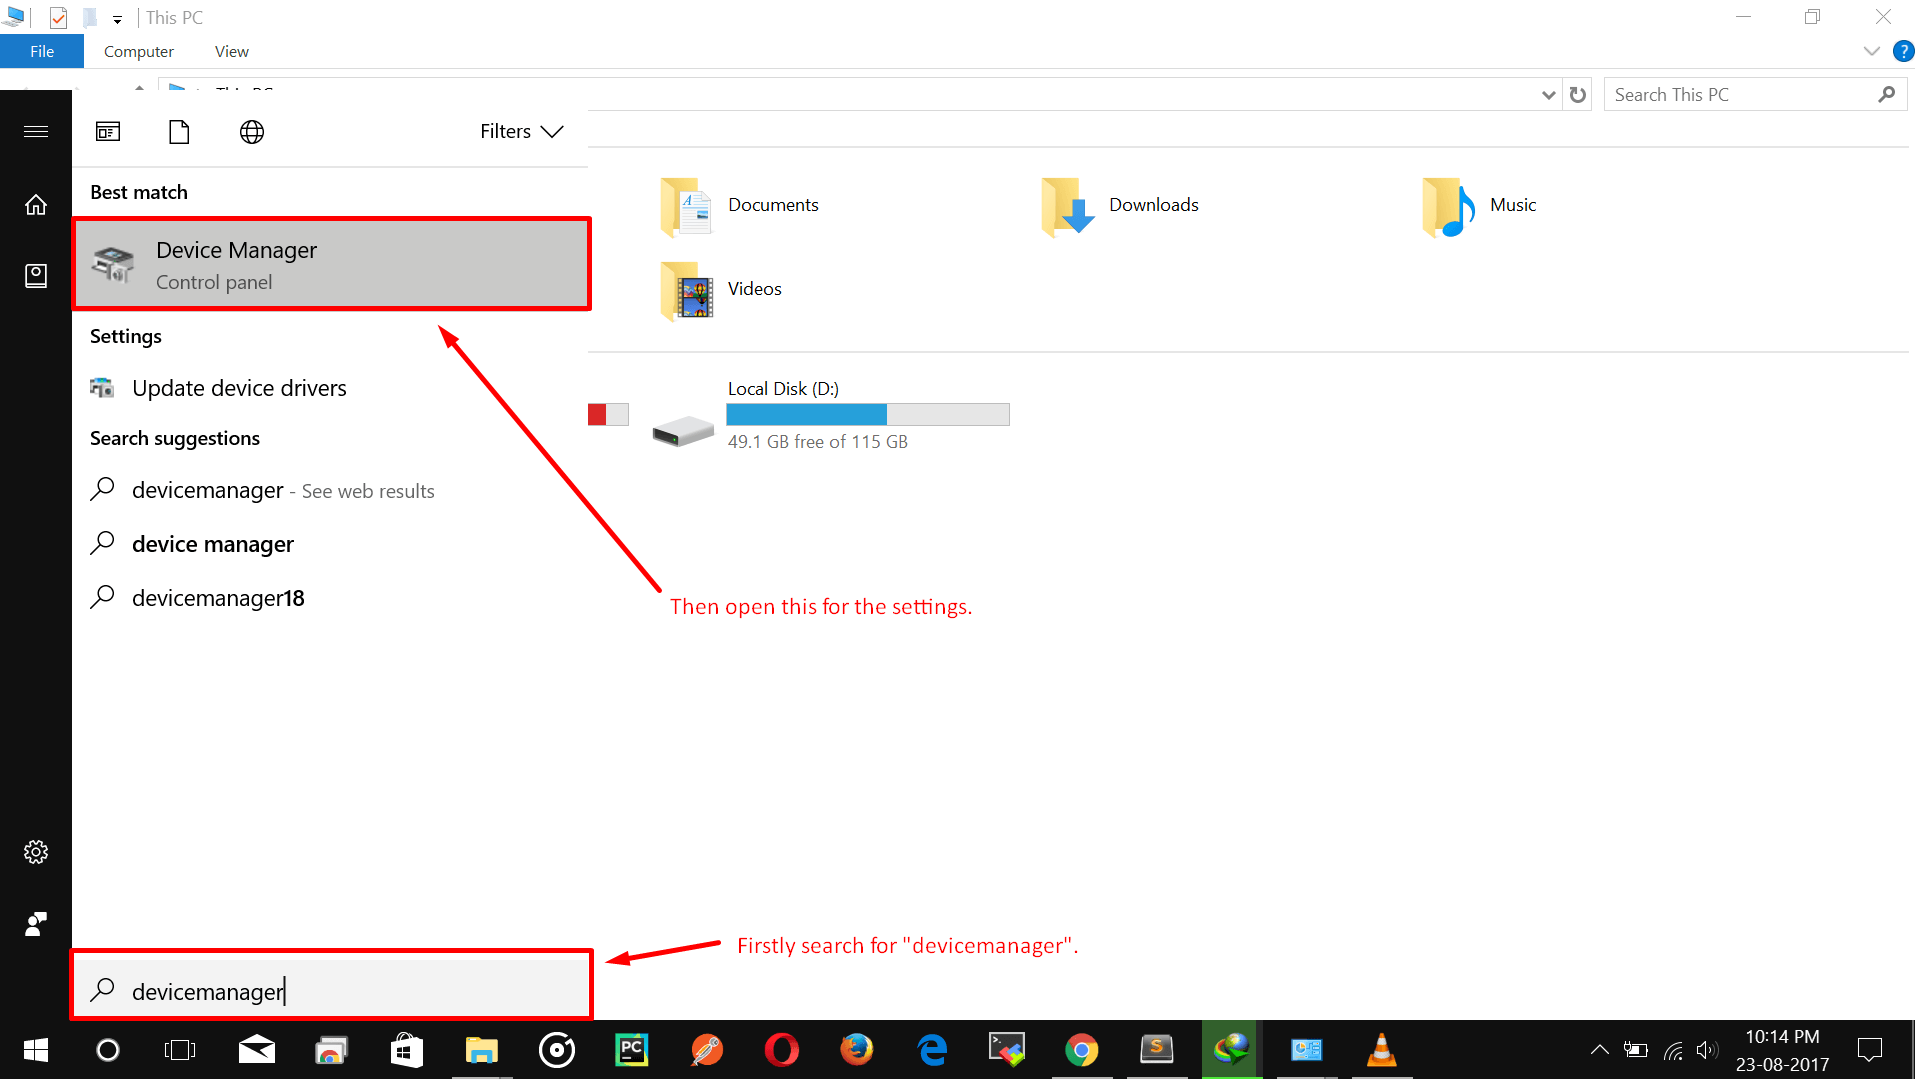
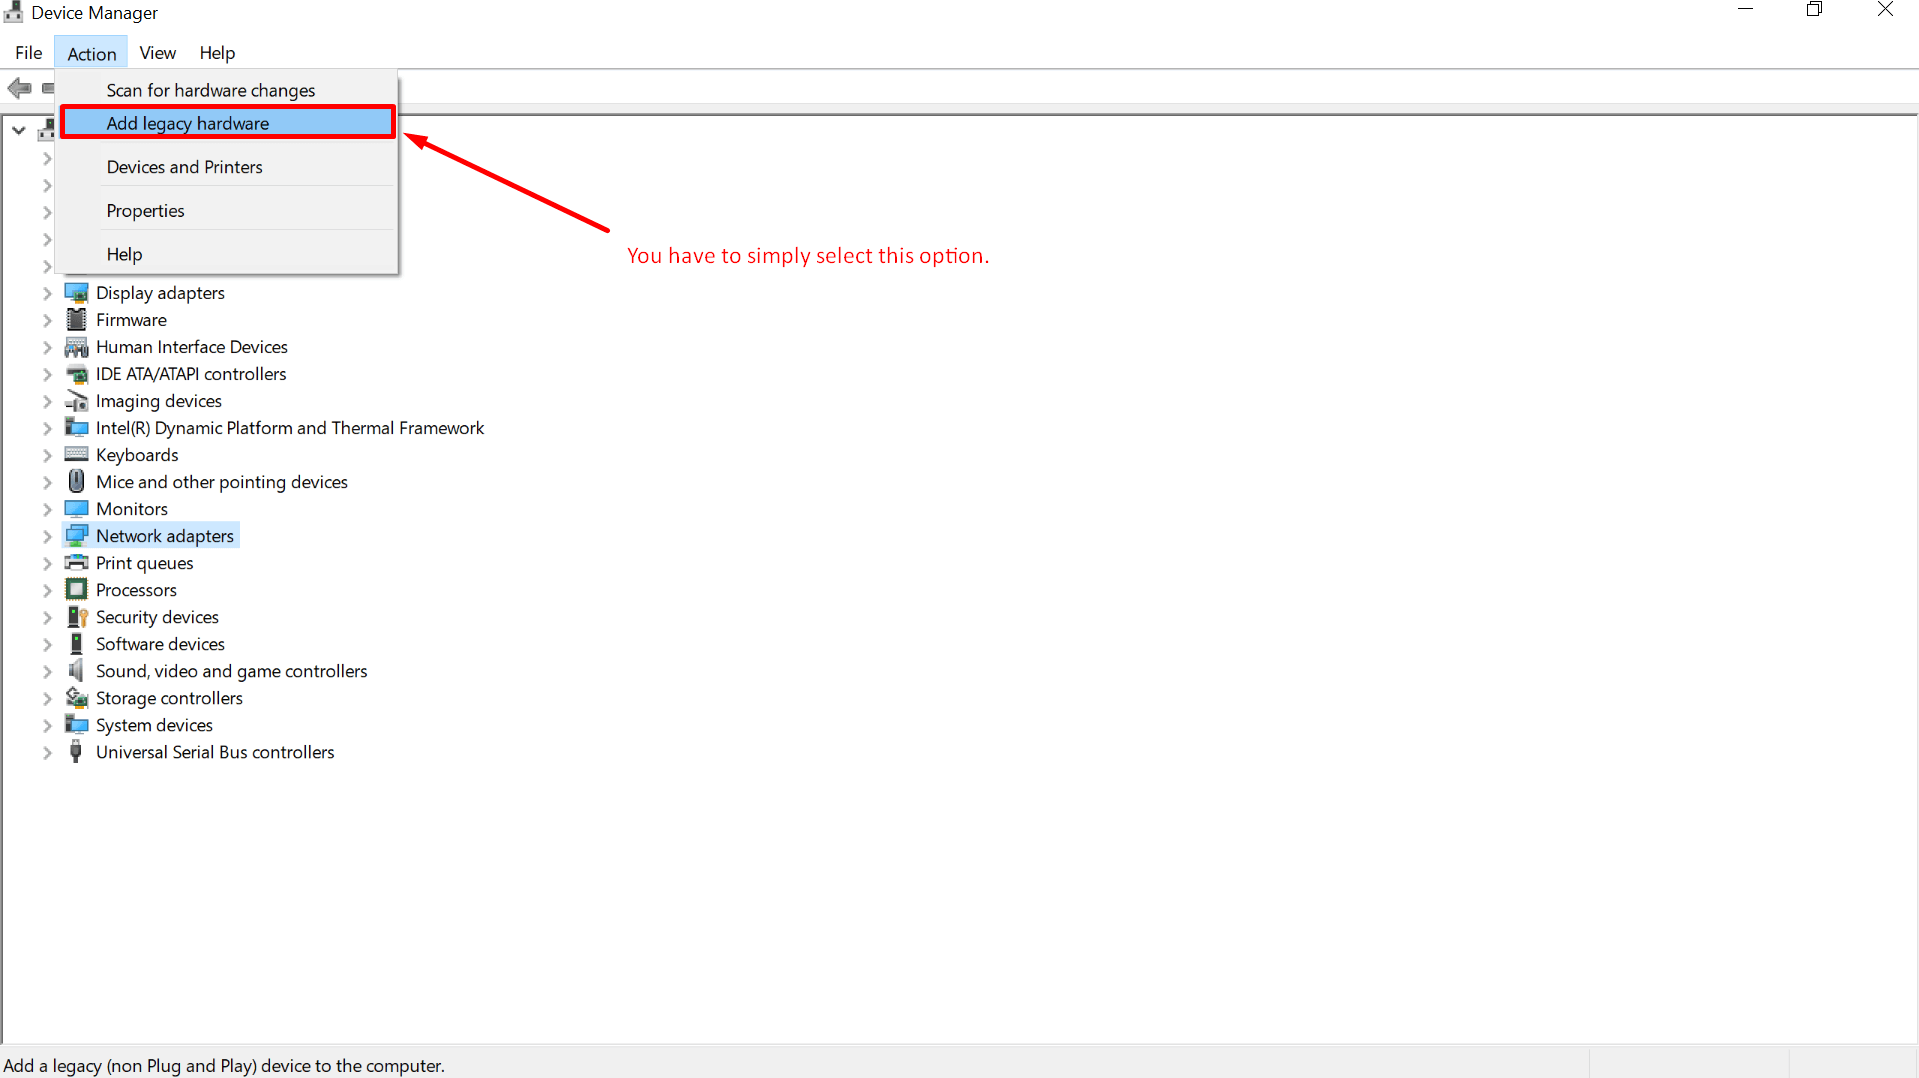
Step 2: Now, first select the “Network Adaptors” and then go to the “Action” tab as shown in the picture below, after that select the “Add legacy hardware” option.
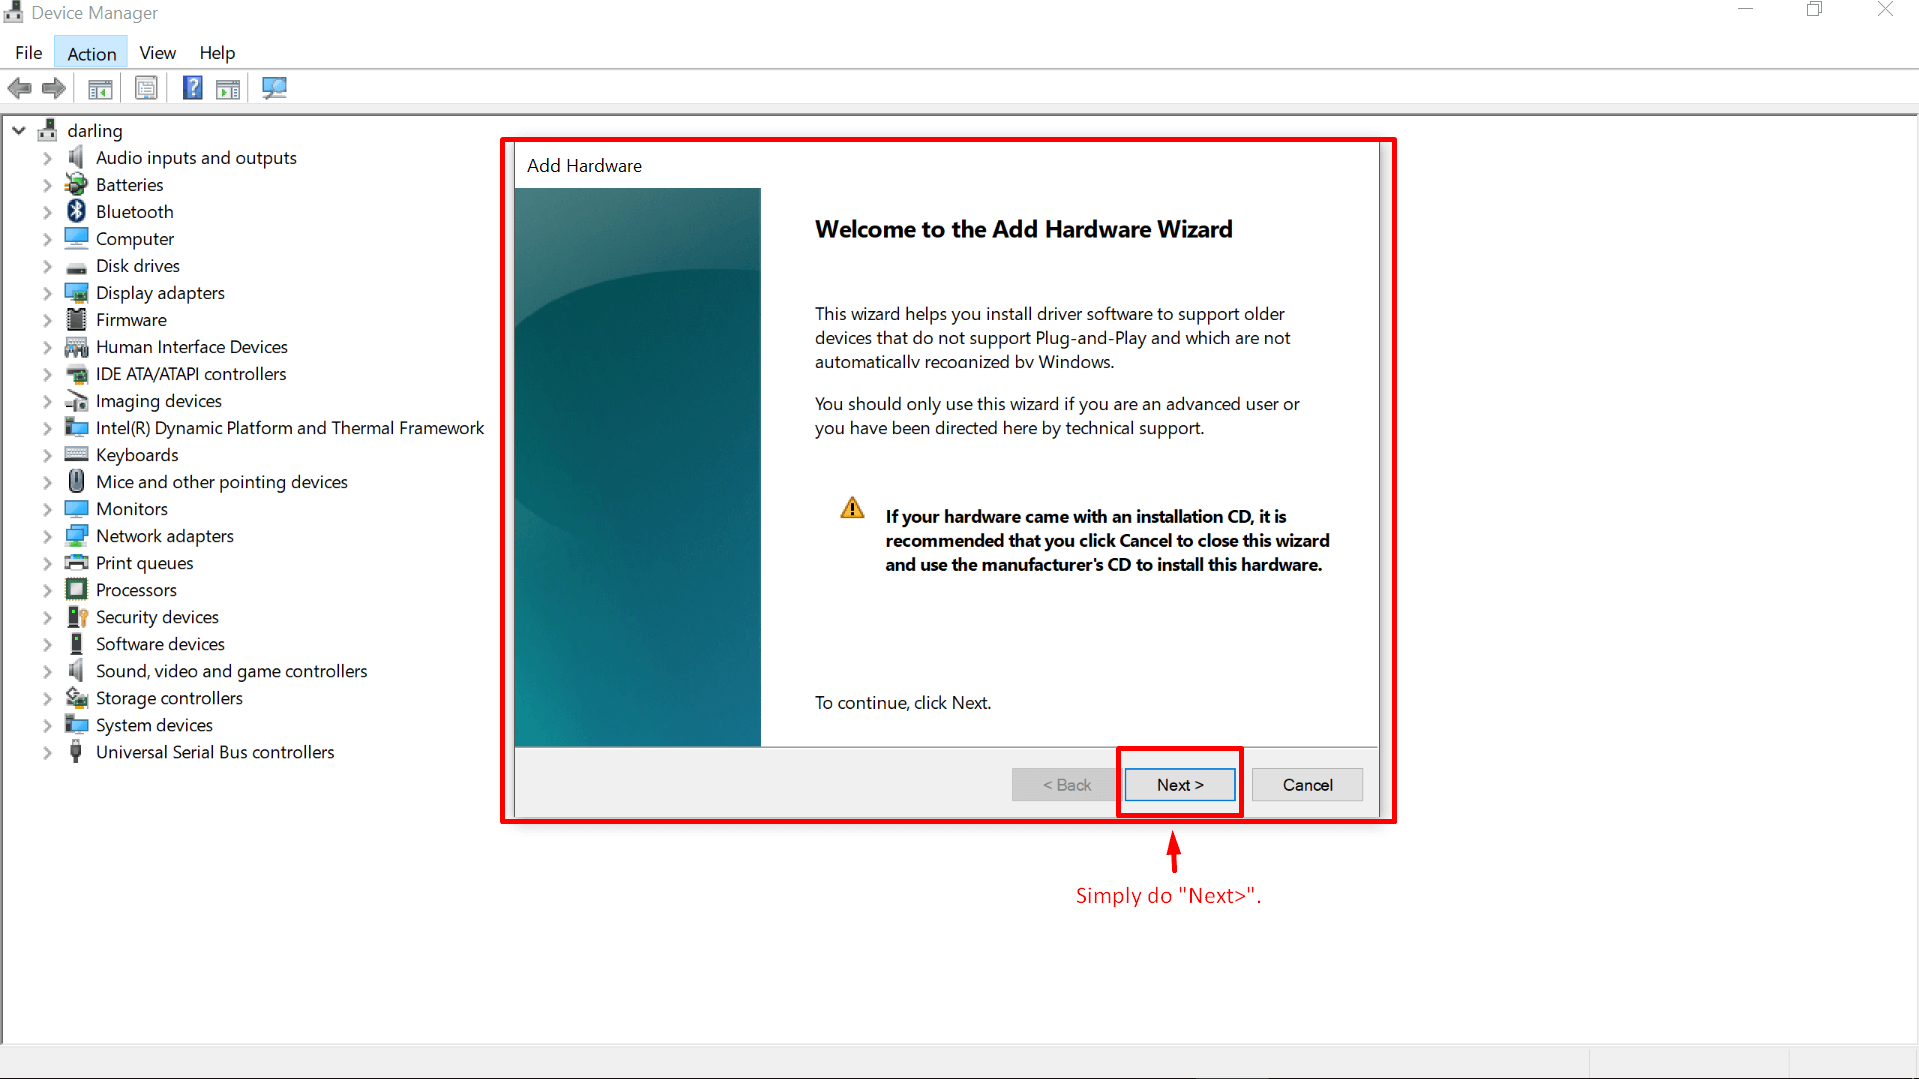
Step 3: As shown below, simply select the “Next” from this particular window.
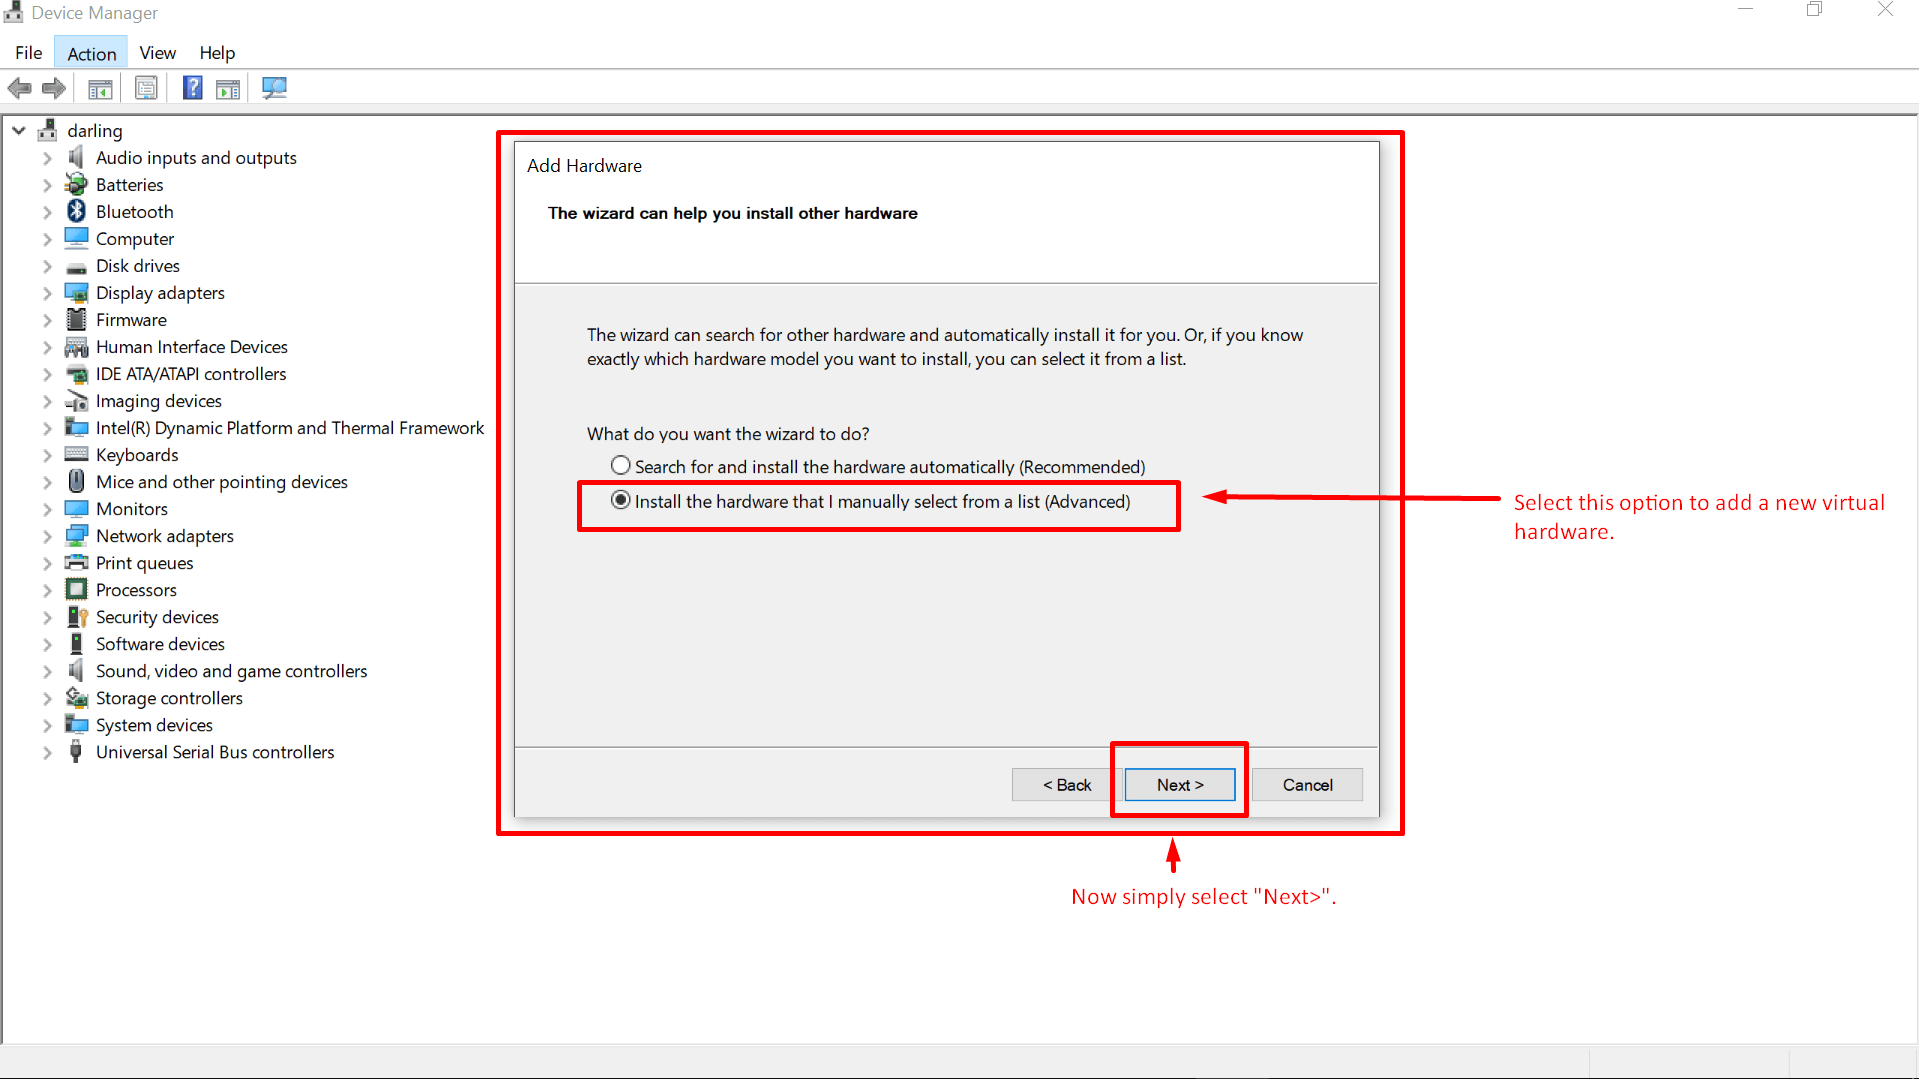
Step 4: In this step, do as shown in the screenshot below, select the “Install the hardware that I manually select from a list (Advanced)” option.
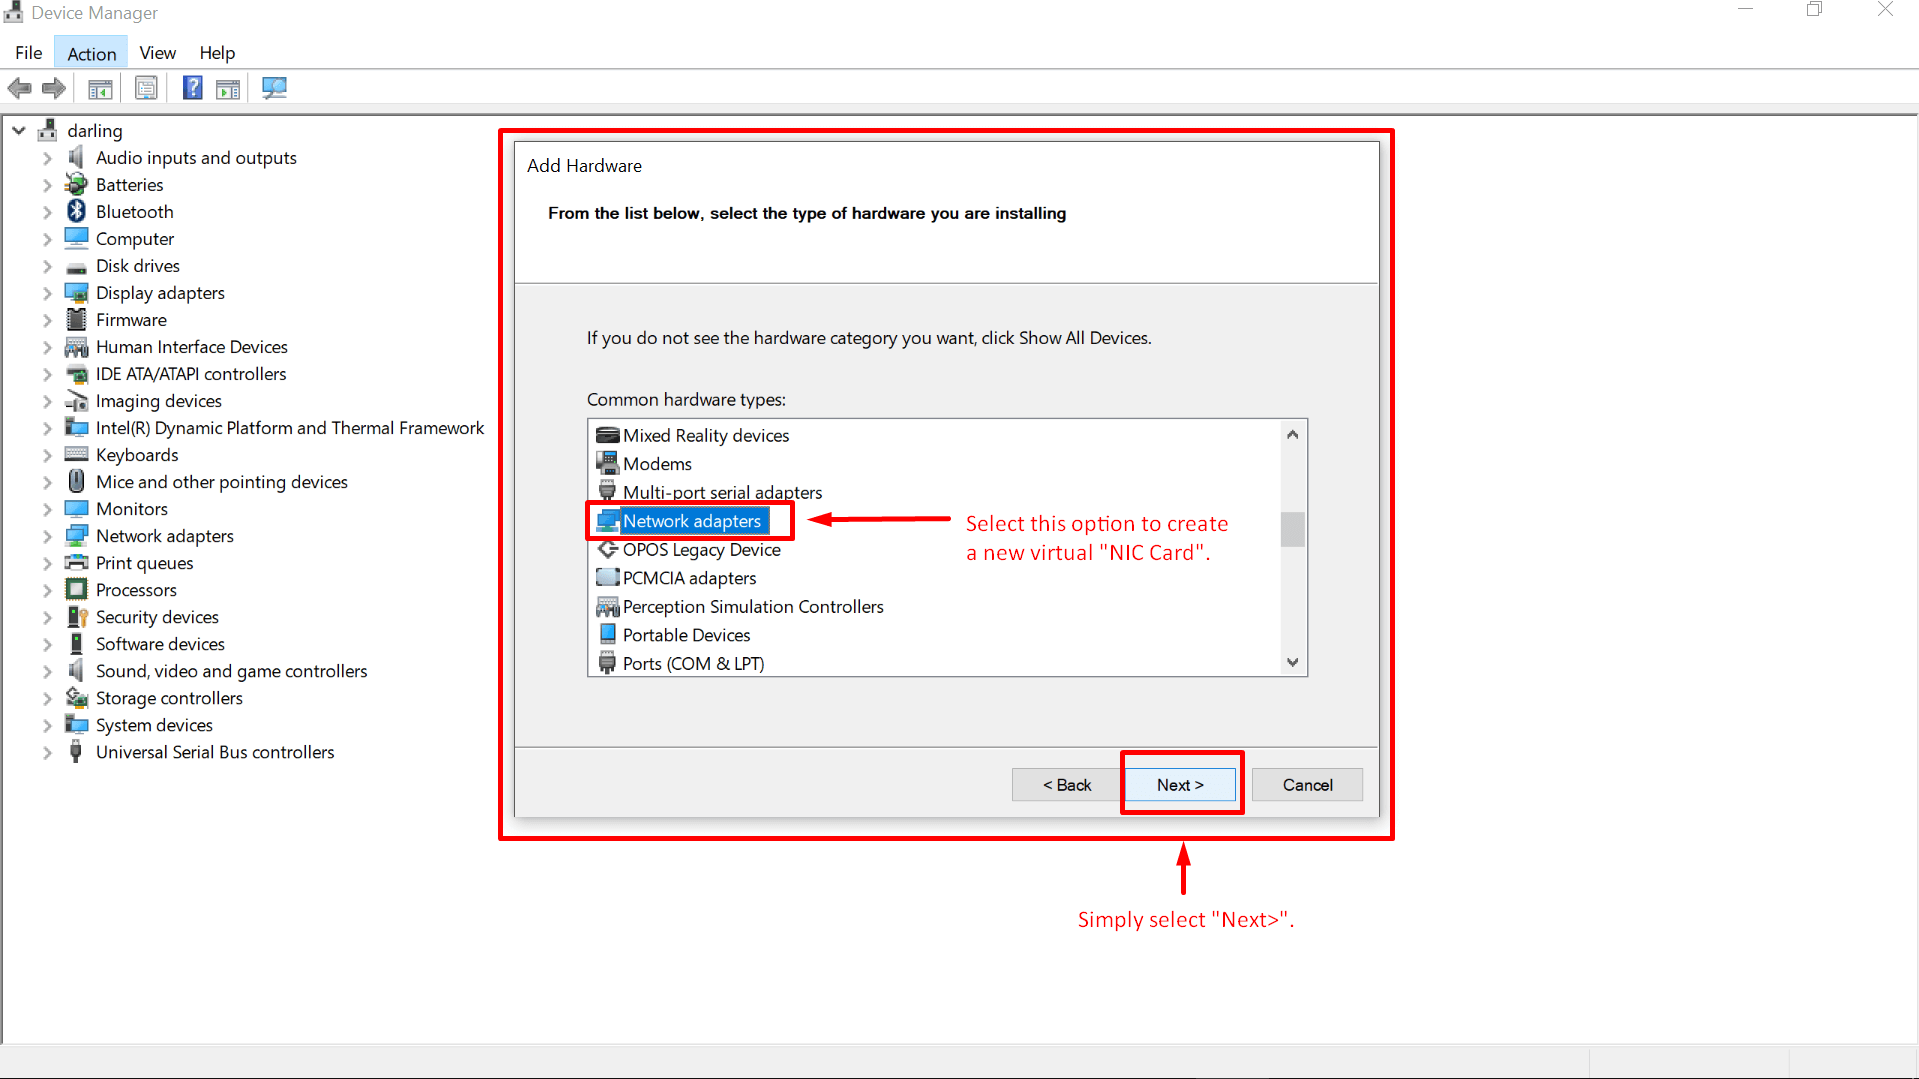
Step 5: In this window, select the type of hardware we want to add, as we want to add a network adaptor so we are going to select the “Network Adaptors” and simply hit the “Next” button as shown.
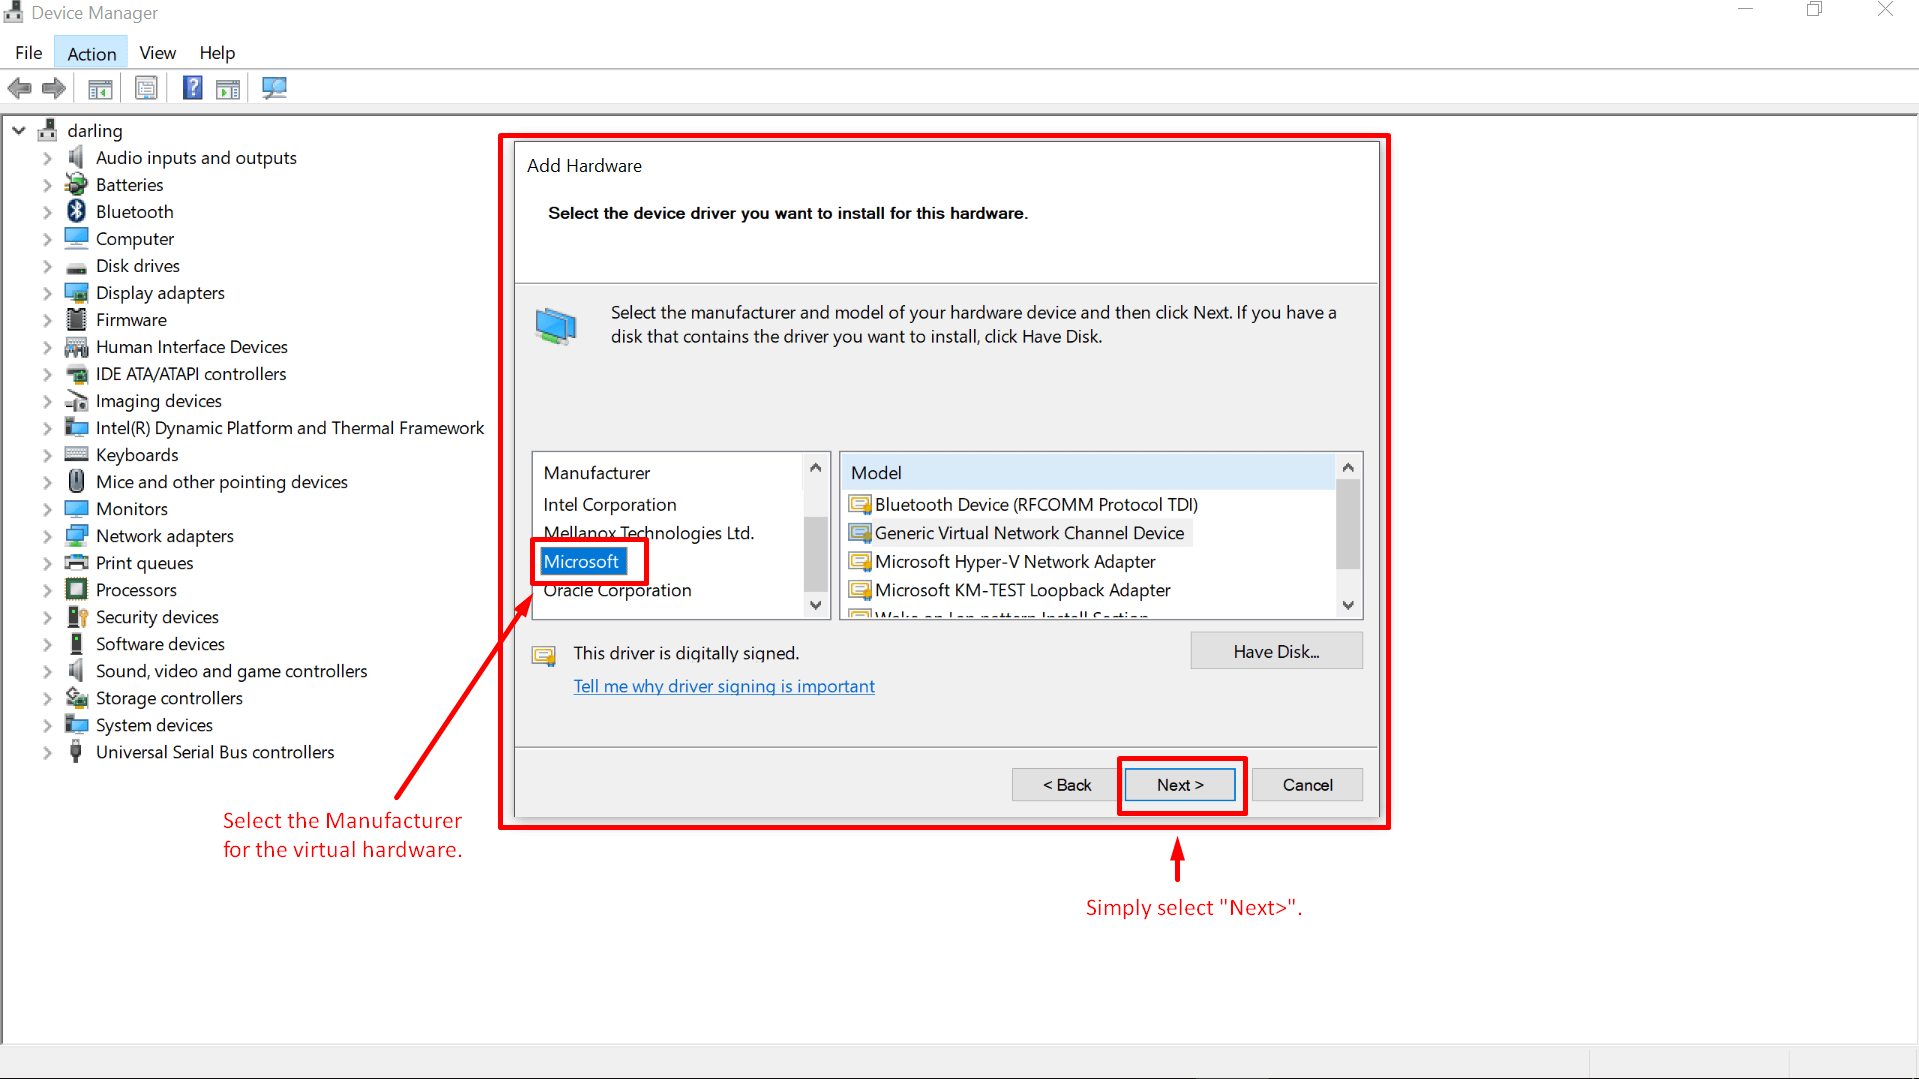
Step 6: From the “Manufacturer” tab select the “Microsoft“.
Step 7: And from the “Model” tab select “Microsoft KM-TEST loopback Adaptor” as shown in the image below.
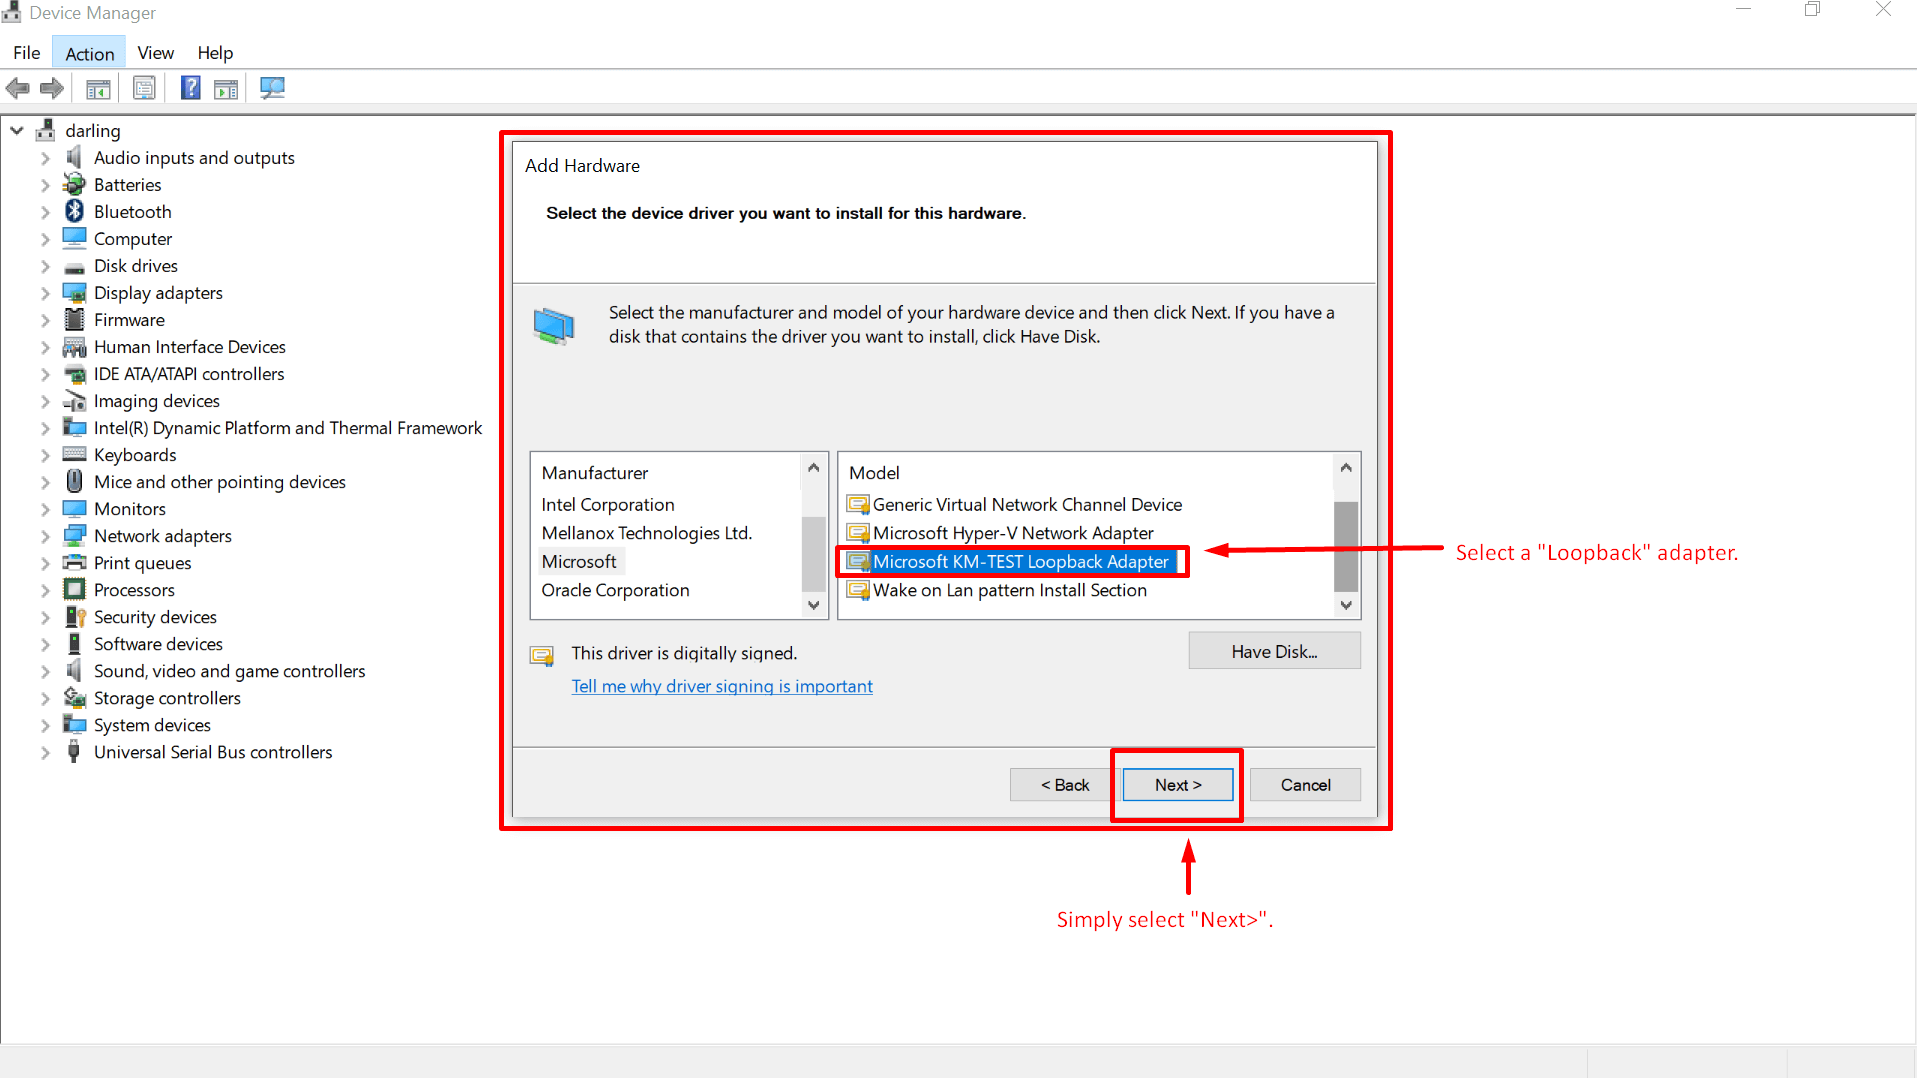
Step 8: After completing all the steps above, simply hit the “Next” button on this particular window.
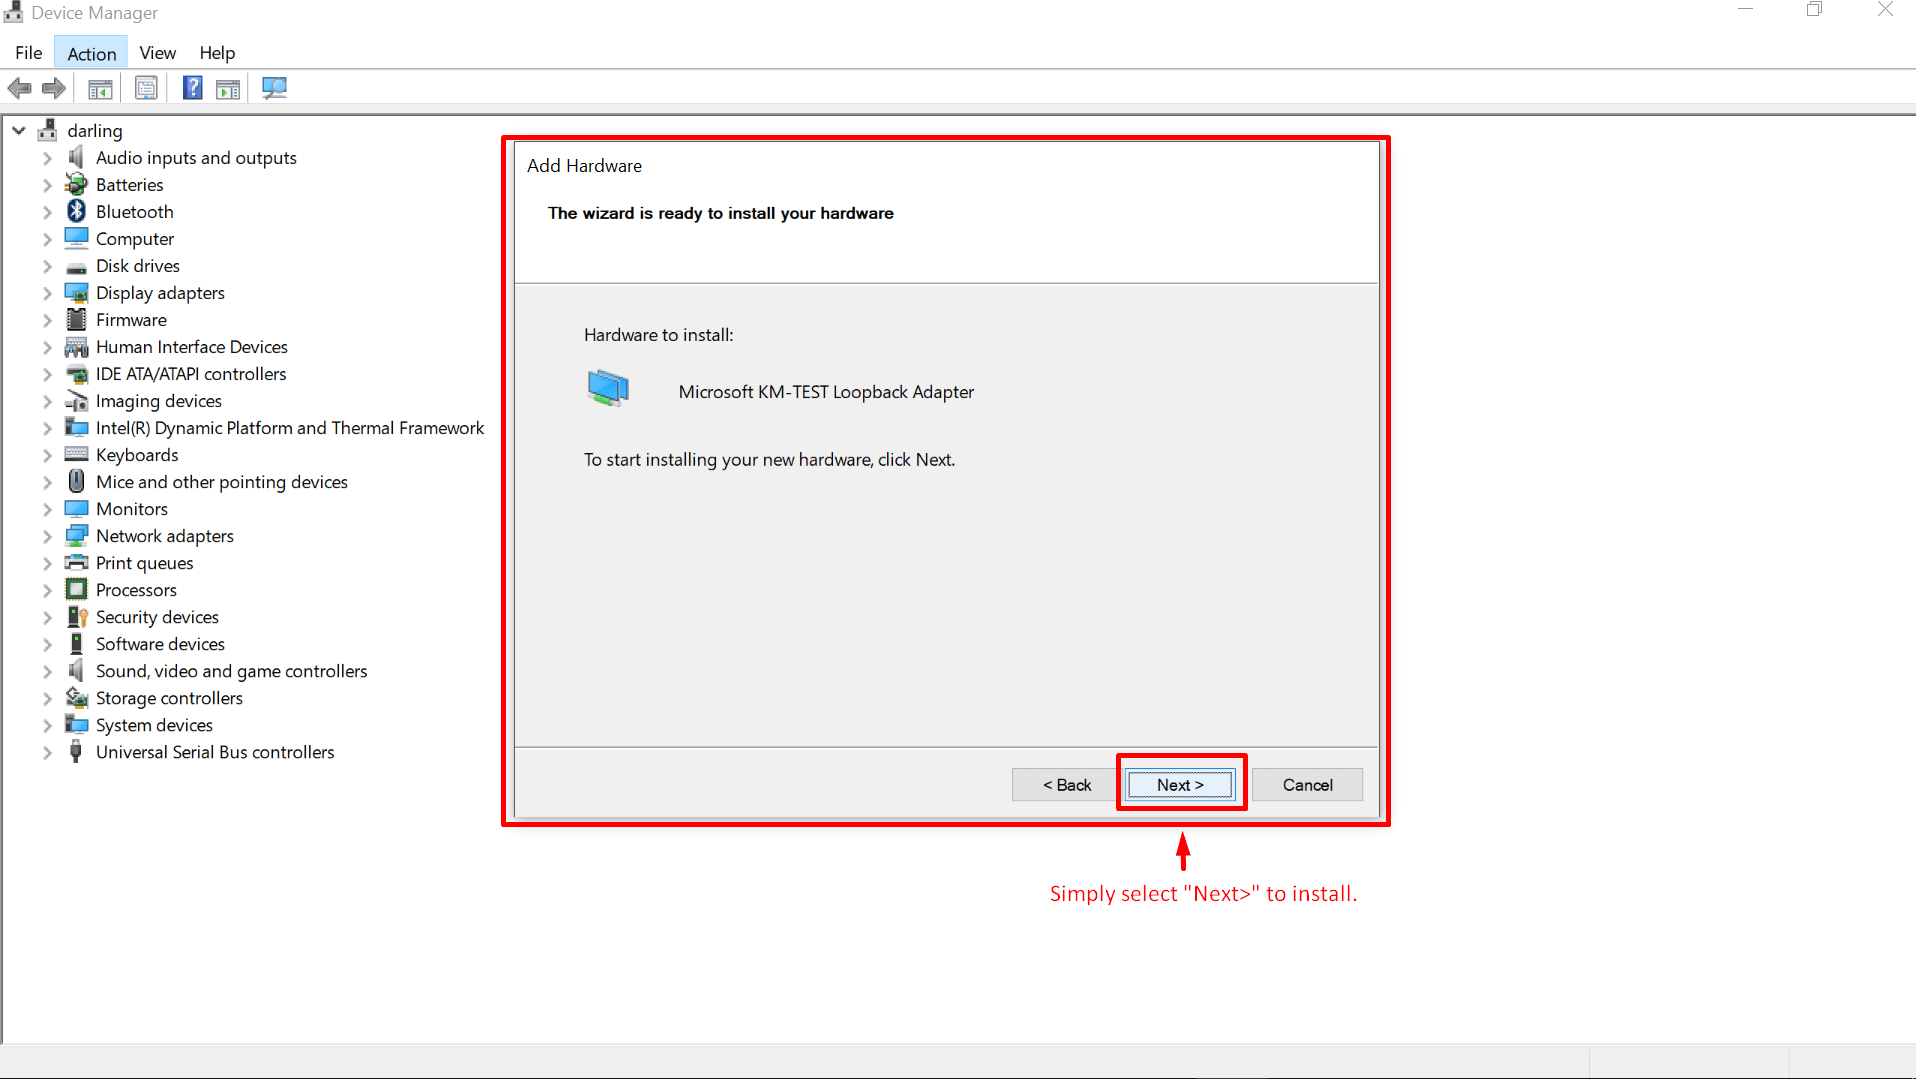
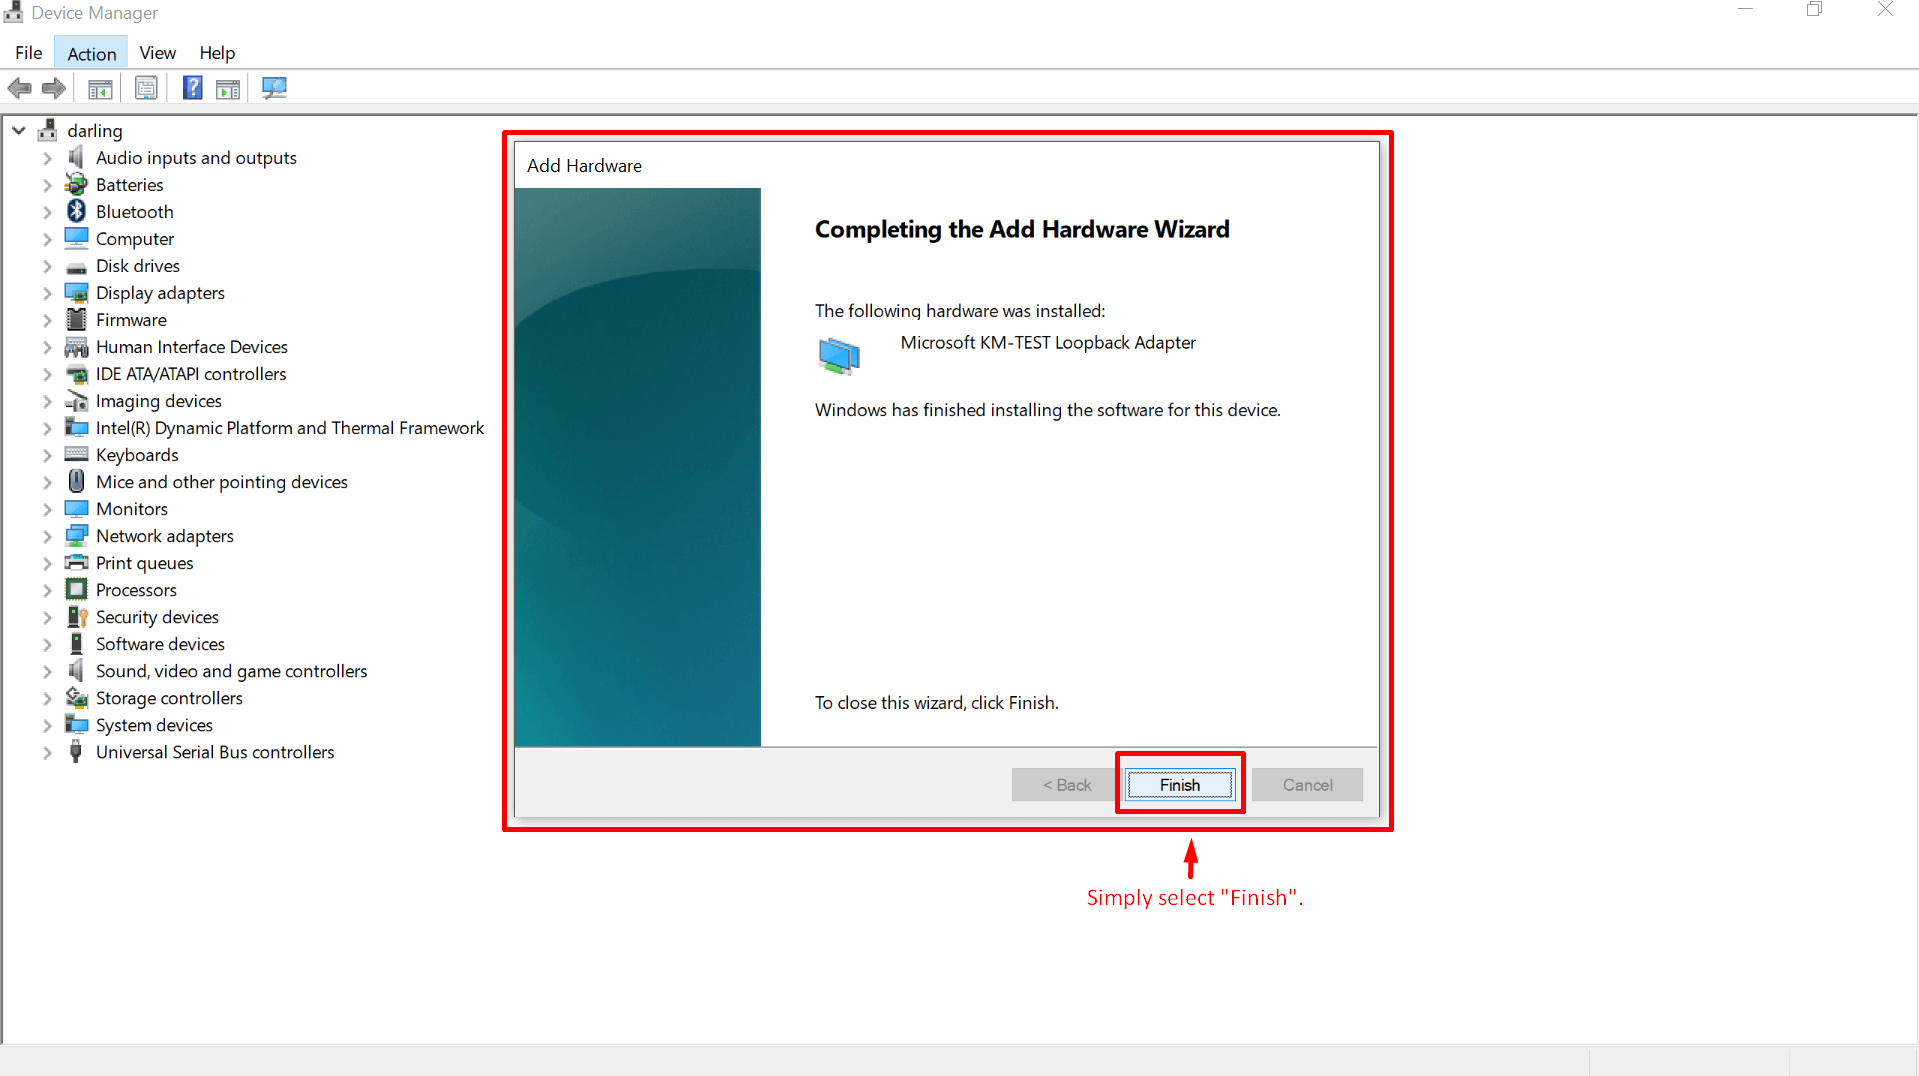
Step 9: This is simplest of all steps, hit the “Finish” button as shown.
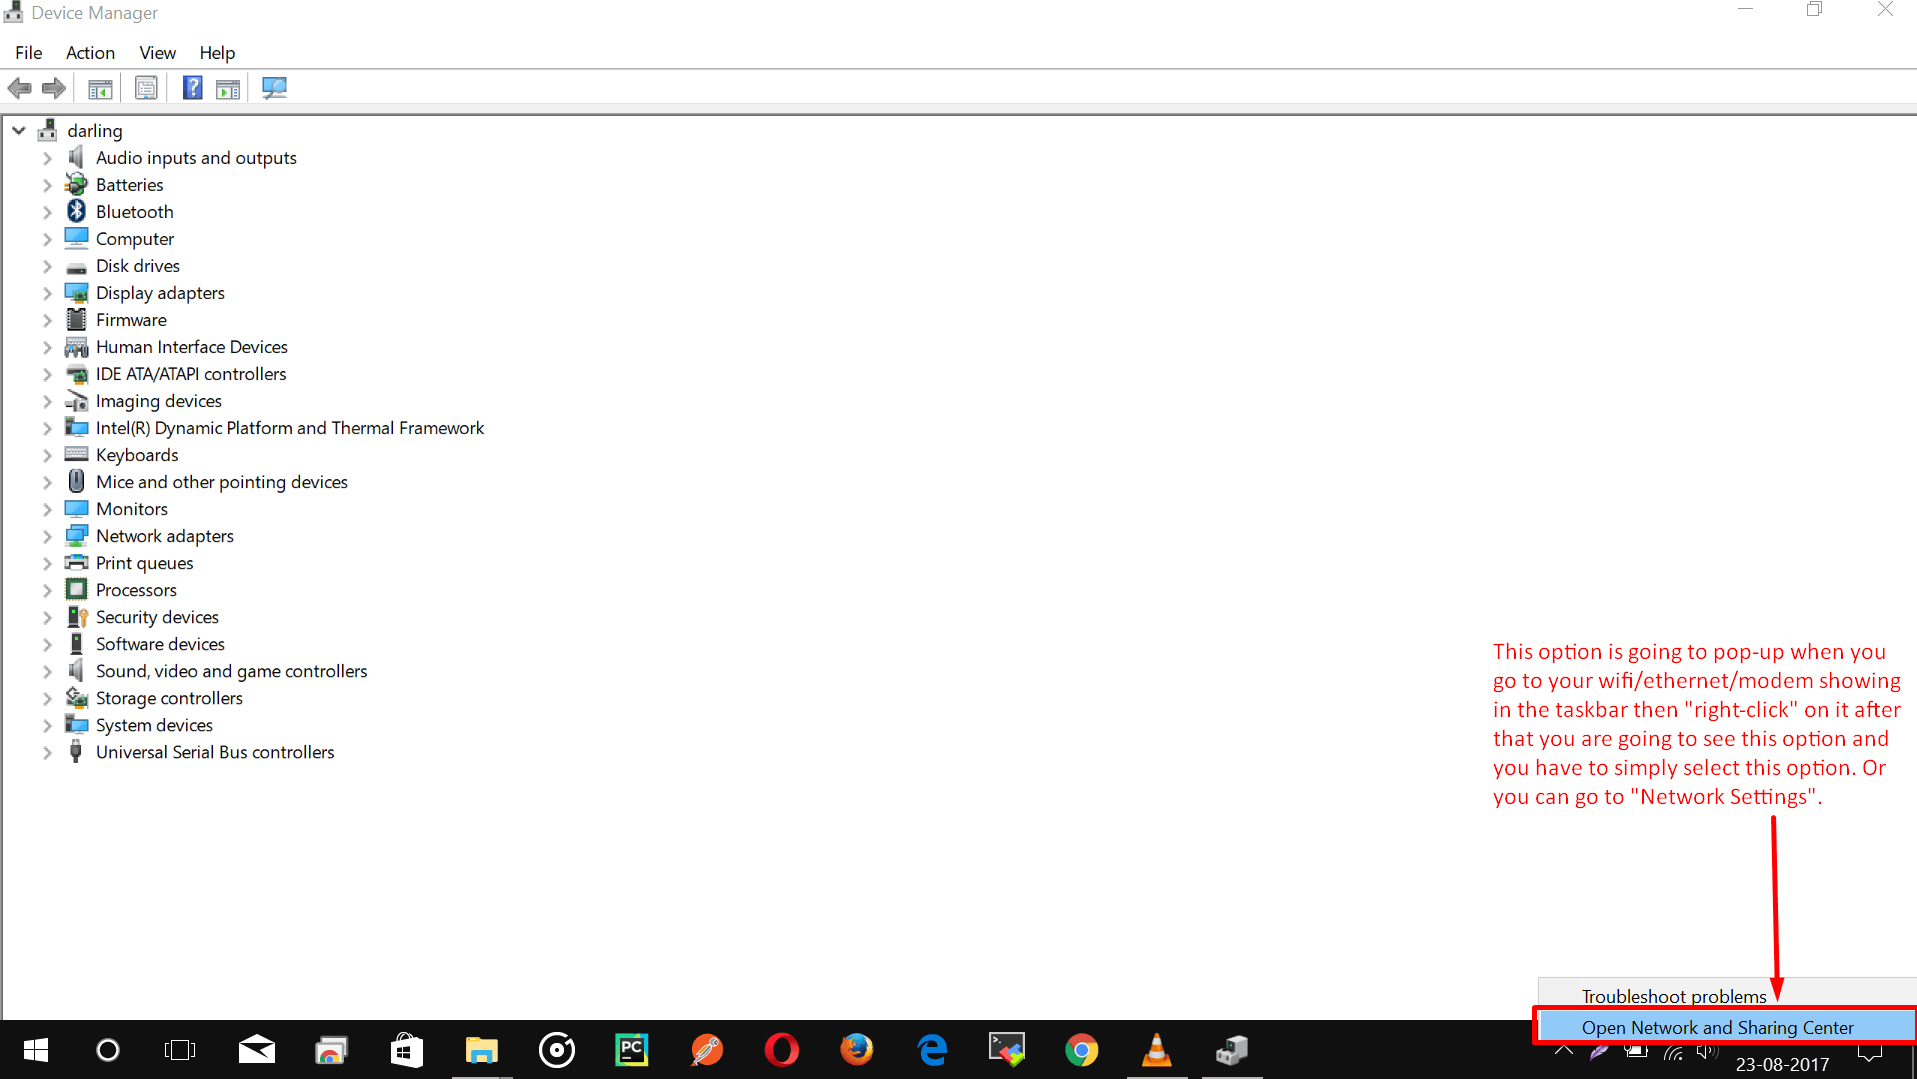
Step 10: Now that we have added a “loopback adaptor“, it is time to further configure it and to achieve that do as shown below and “Open Network and Sharing Center“.
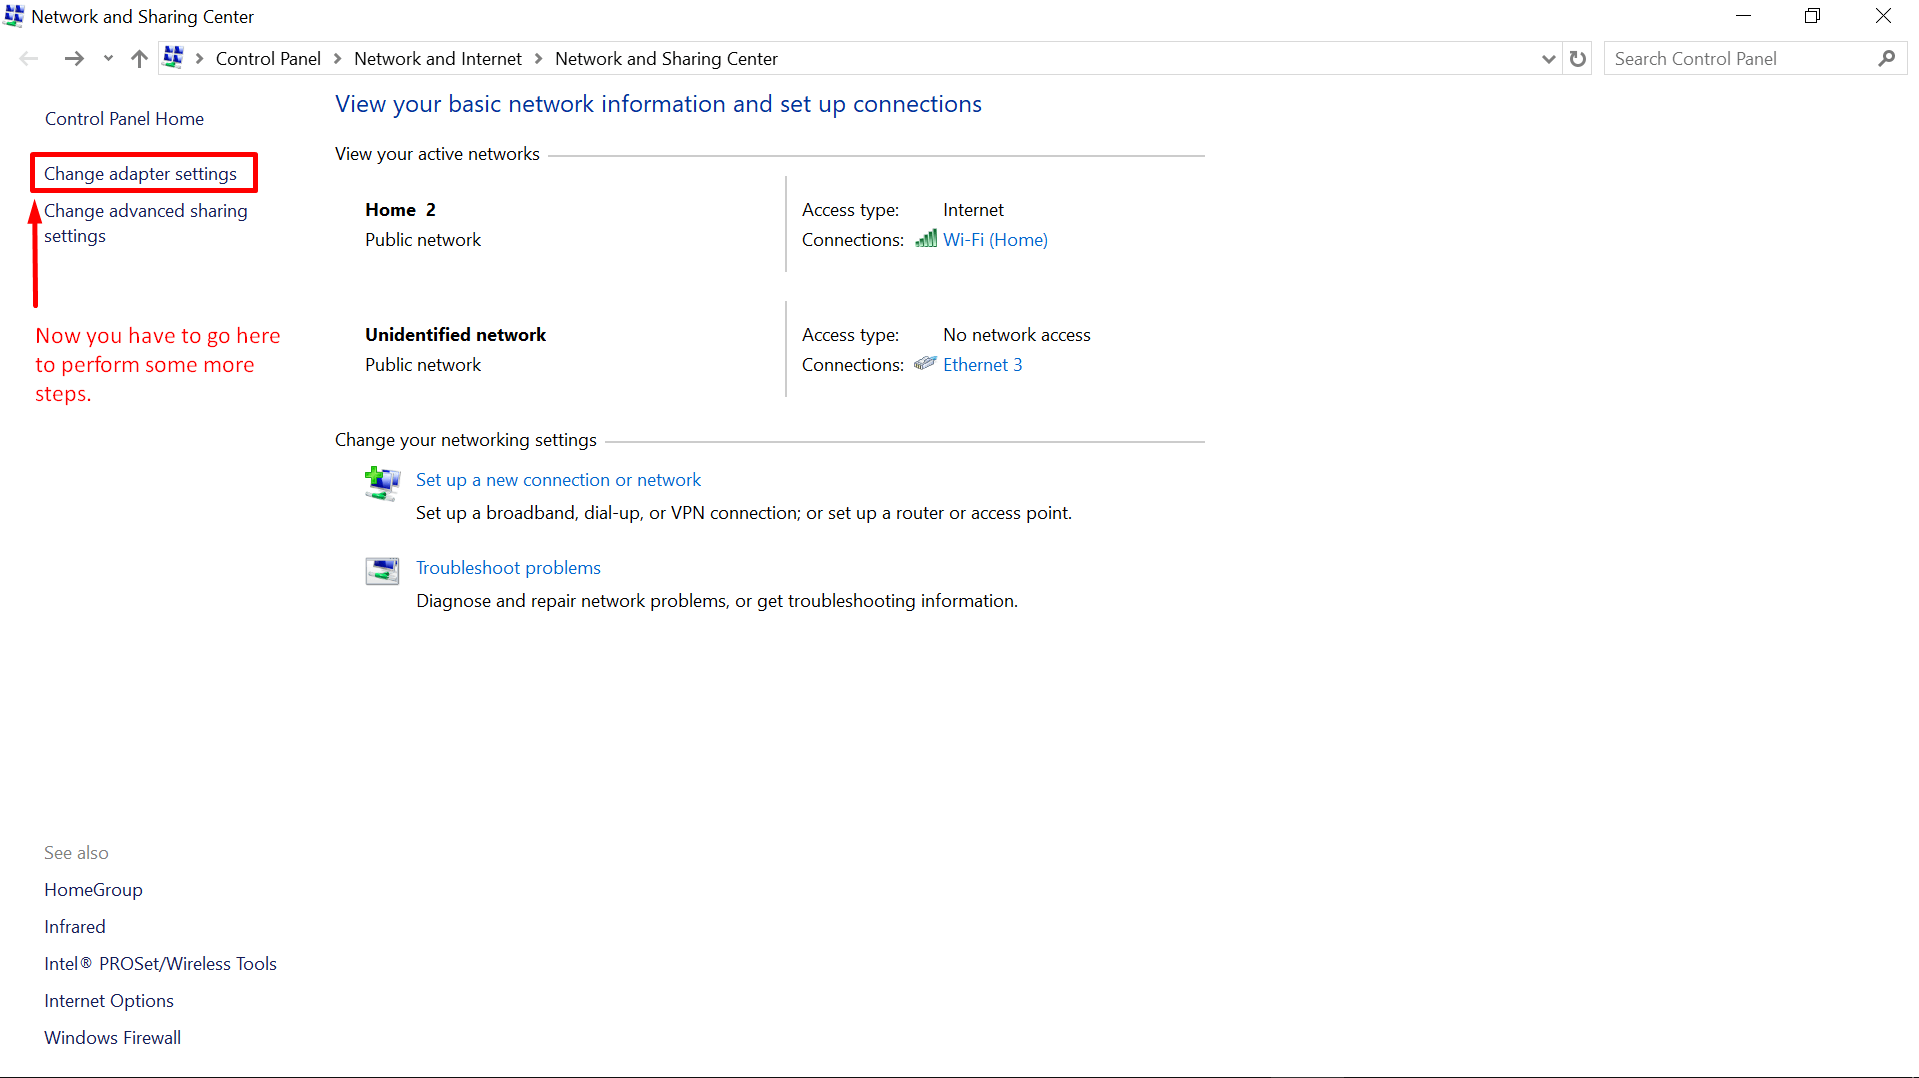
Step 11: After that, select the “Change adaptor settings” from the control panel settings of “Network and Internet” on Windows 10.
Step 12: Now from the picture below, carefully see the selection of available options.
Here, we are going to change the settings of our newly created adaptor, simply do as shown below.
Note: Maker sure to edit the settings of that adaptor which is showing “Microsoft KM-Test loopback Adaptor“
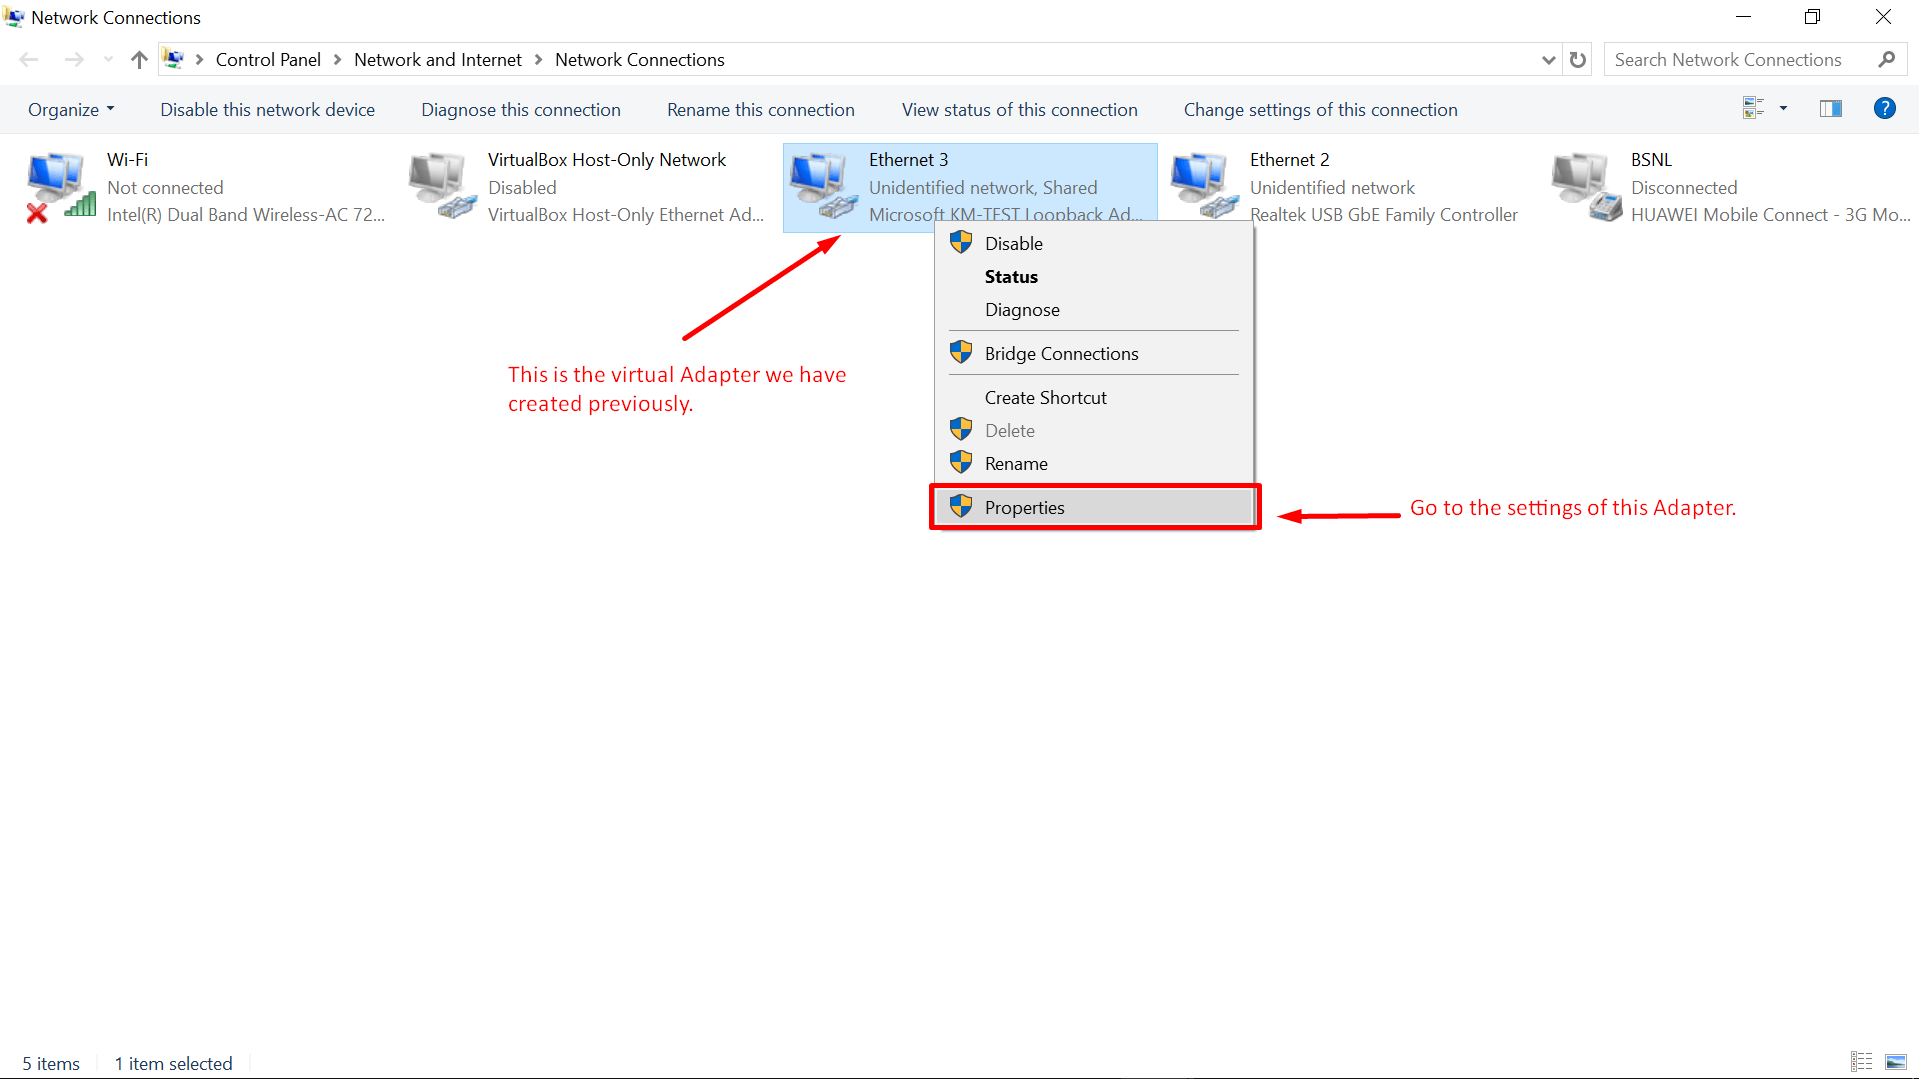
Note: Before going to next step, make sure you have connected your raspberry via an Ethernet cable to the Ethernet port of your laptop or computer and power up the “Raspberry Pi”, If you do not know how to do that follow -> “Raspberry Pi Headless Set Up“
Step 13: Now, as we have connected our raspberry pi to the laptop or computer, we will be seeing something like “Ethernet x“.
Here “x” can be:
- 1
- 2
- 3
- and so on (depending upon your system configuration)
But in our case, it is showing as “Ethernet 2“.
Question: What actually we are trying to achieve here?
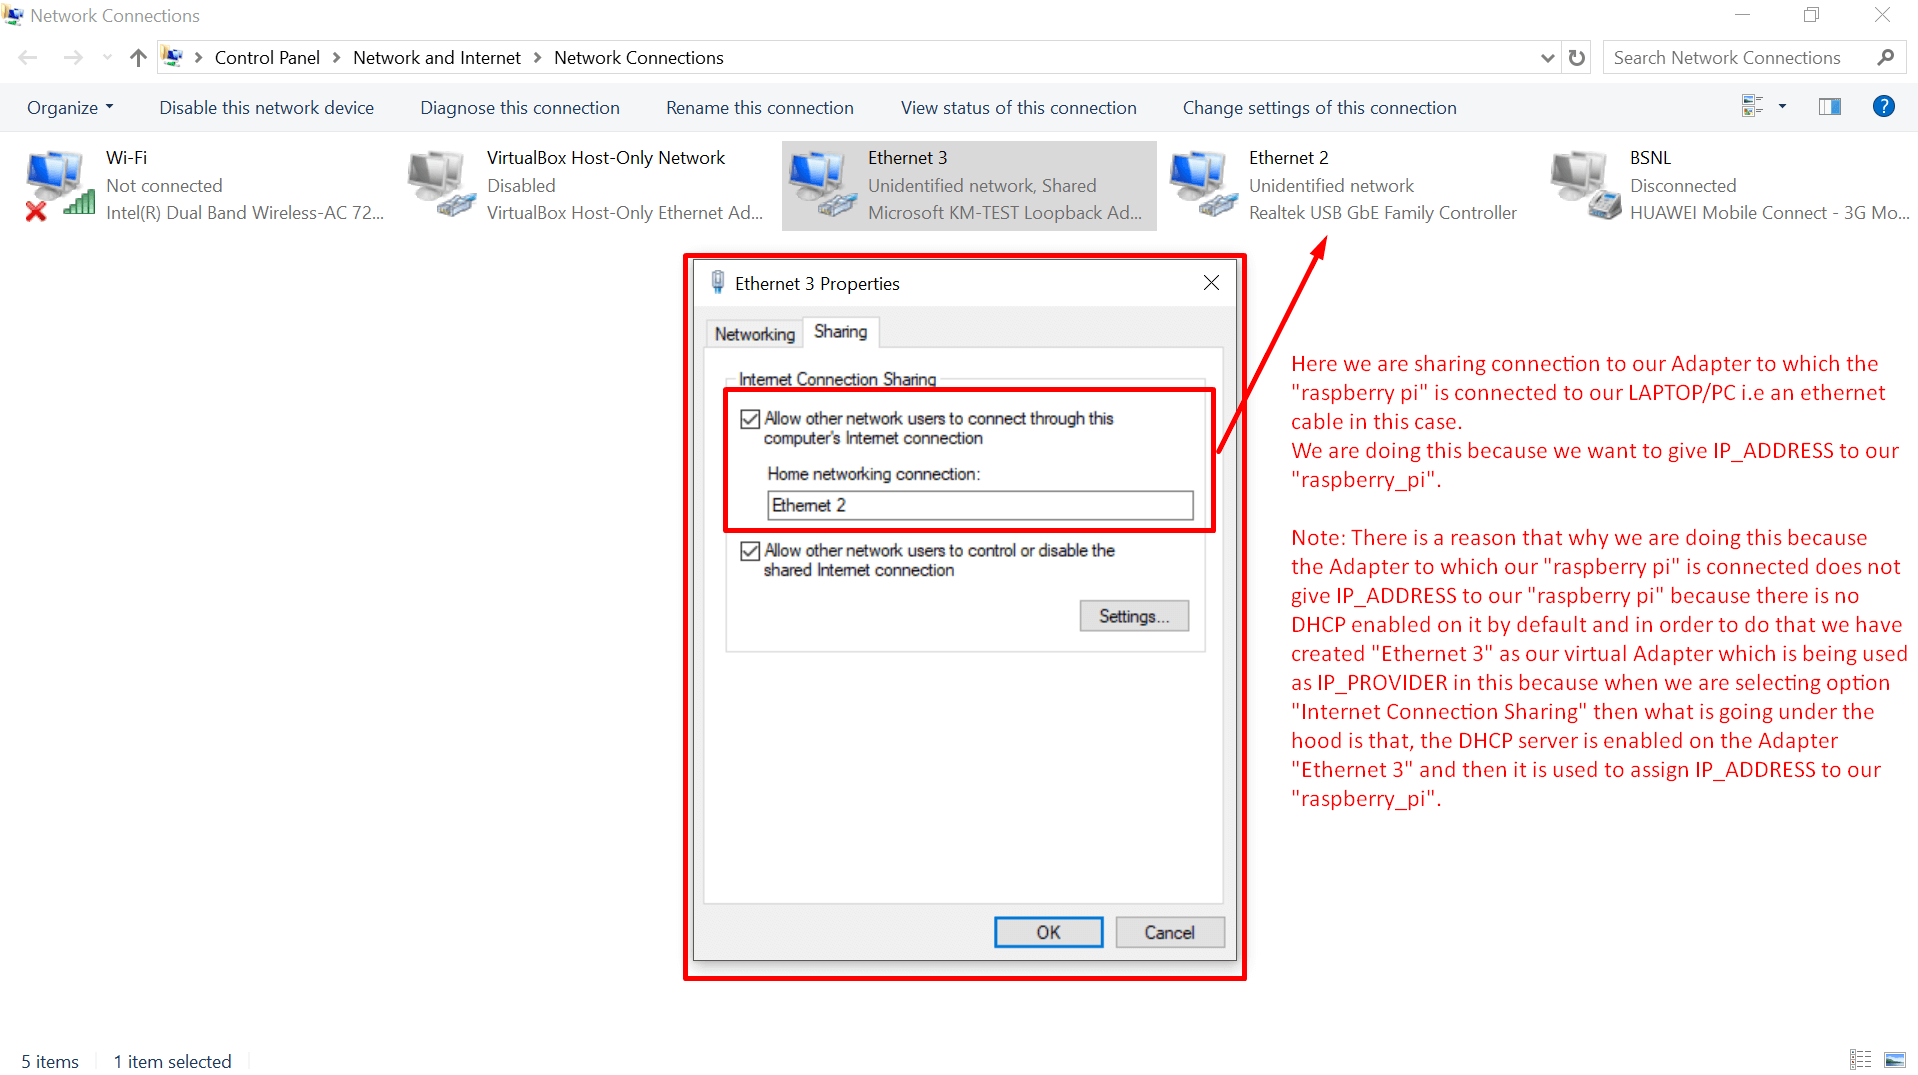
Answer: We are going to use the previously created “loopback adaptor” as a DCHP server for giving IP Address to our “Raspberry Pi” and in order to achieve that we are going to share the connection from “loopback adaptor” to “Raspberry Pi’s” adaptor.
” and in order to achieve that we are going to share the connection from “loopback adaptor” to “Raspberry Pi’s” adaptor.
Under the “Properties” of “loopback Adaptor” go to “Sharing” tab and share the connection to the “Raspberry Pi’s” Adaptor which is “Ethernet 2” in this case.
Further explanation is given in the screenshot itself.
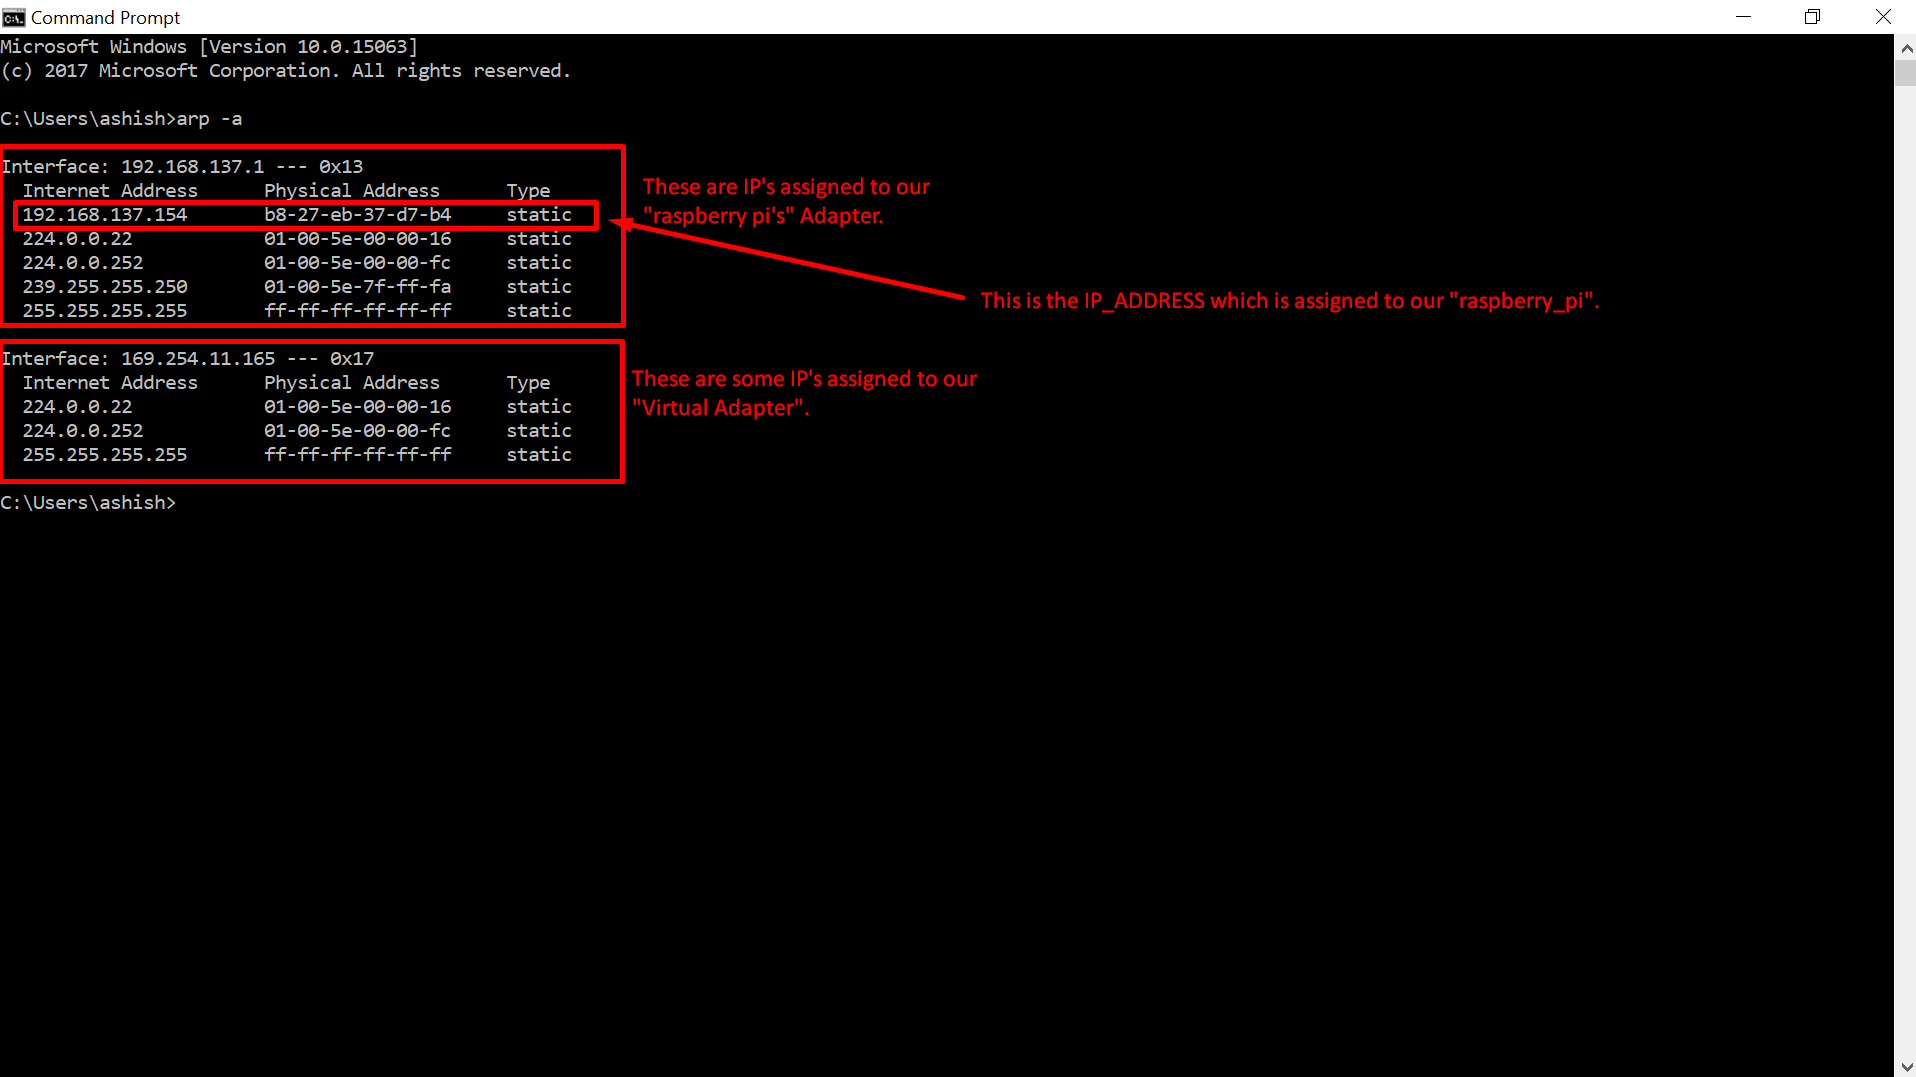
Step 14: From the picture below, you can see that the IP is given to the “Raspberry Pi” with the help of our “loopback adaptor“.
