Whenever it comes to run or deploy a particular piece of code or software or a server it can be, docker is the mainstream answer and solution for the same. Moreover, aws ec2 + docker combined leads to great power. In today’s post, we are going to learn about “Install docker on aws ec2“.
If you want to learn more about docker, read -> “Docker Everything“
Before going further, make sure you also know about “How to create an instance on EC2 AWS“.
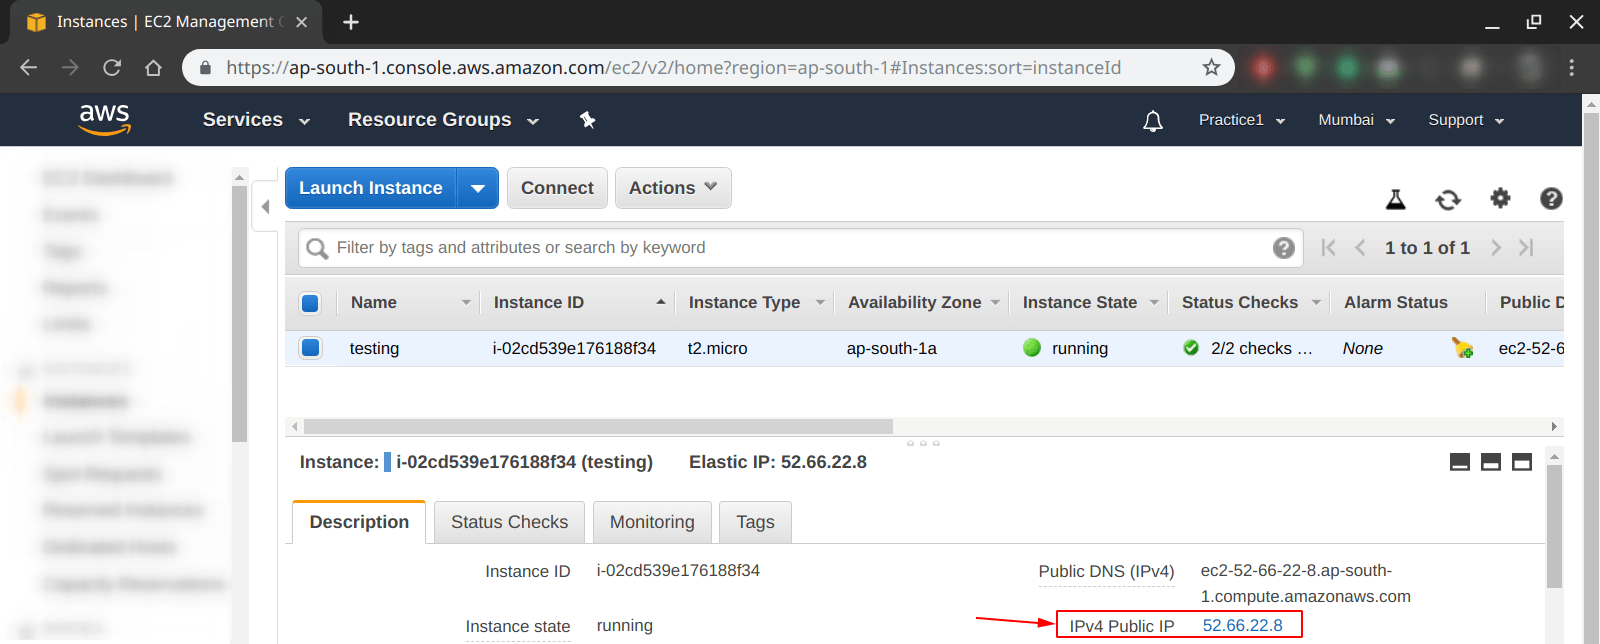
Step 1: Go to AWS EC2 dashboard, select your created instance then look for “IPv4 Public IP” as shown in the picture below, simply copy it.

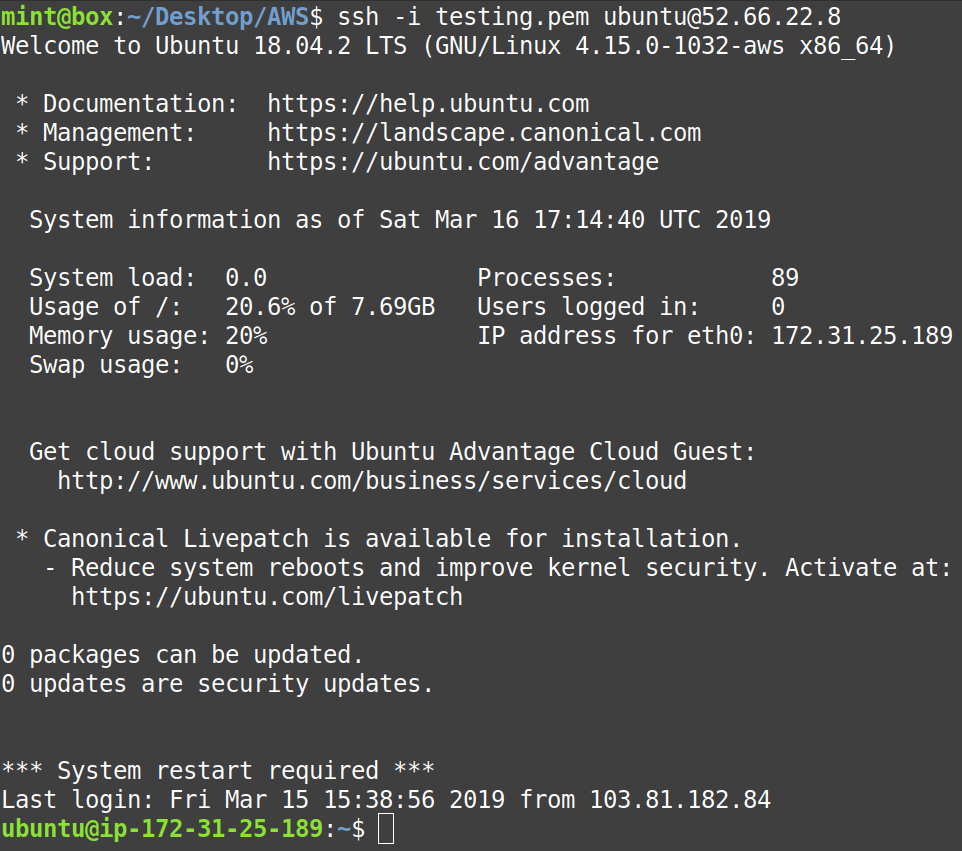
Step 2: Login into the instance, using the IP Address from the previous step.
Note: The IP Address will be different in your case.

Step 3: Now, using the following command, download the “get-docker.sh” script from “https://get.docker.com” using the “curl” browser.

Step 4: After the script has been downloaded, you can see it with the help of the

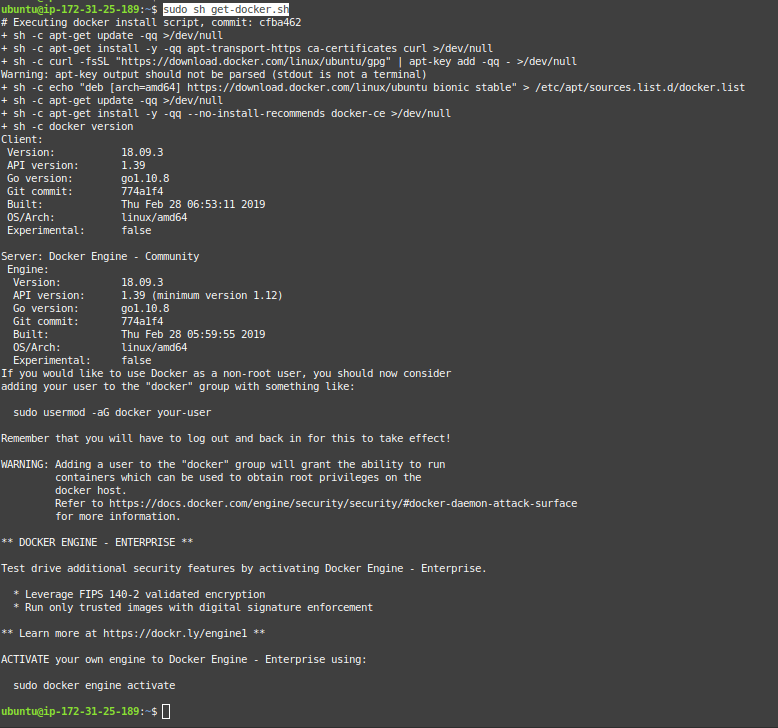
Step 5: Now, in order to install docker using the script downloaded in previous step 4, we have to run the following command shown in the photo below, it will trigger the code written in the “get-docker.sh” script and install the docker on our/your machine.

Step 6: Confirm the installation of docker on EC2 Ubuntu 18.04 instance, use the following command.

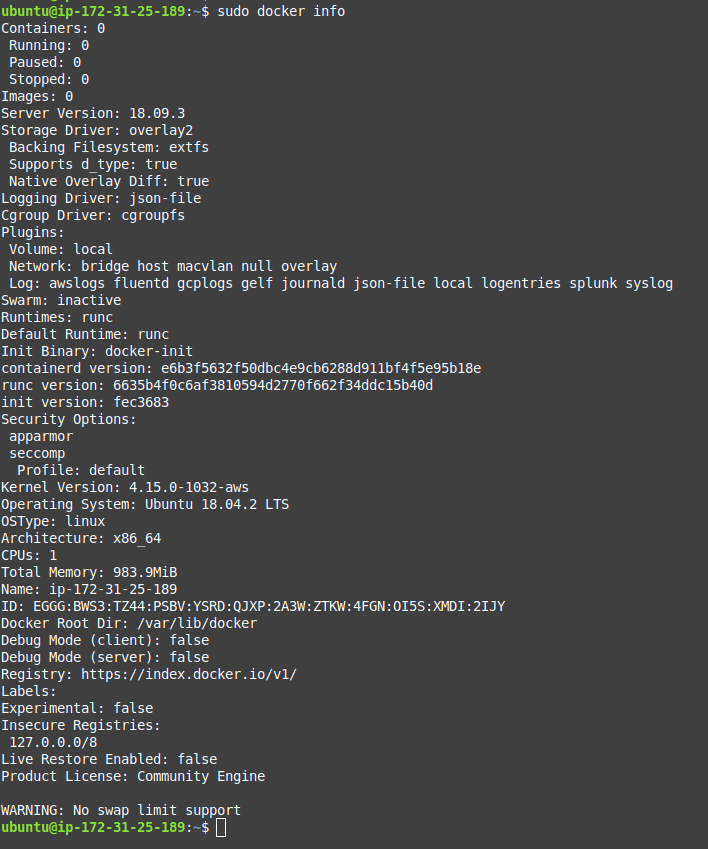
Step 7: Check the detailed information about docker and its other components using the following command.

Question: How to run “docker” command without “sudo” on AWS EC2 Ubuntu 18.04 instance?
Answer: In order to do so, we need to add the “ubuntu” user under the “docker” group, follow the forthcoming steps to achieve that.
Step 8: From the command below, check the details about the “ubuntu” user on EC2 Ubuntu 18.04 instance, it is created by default.

Step 9: Use the following command to add the “ubuntu” user on AWS EC2 Ubuntu 18.04 to “docker” group in order to run “docker command” without “sudo“.

Step 10: You can confirm with the help of command below, that the user “ubuntu” is now added to “docker” group.

Note: Before going to the next step, make sure you “Logout” and “Login” again, so that new configuration for the user can be reflected.
Step 11: Use the “docker -v” command without “sudo” as shown below, and confirm that now all the docker commands can be executed without using “sudo“.

More on AWS:
