Table of Contents
Before proceeding you must be having advance knowledge of DNS, postfix, dovecot, networking, and Linux command line. We can use both rhel7 as well as CentOS7, but in our case, we are using CentOS7.
Install Required Packages
1. Update your system to the latest repository data.
# yum update
2. The version of Postfix included in the main CentOS repository does not include support for MariaDB, therefore, you will need to install Postfix from the CentOS Plus repository. Before doing so, add exclusions to the “[base]” and “[updates]” repositories for the Postfix package to prevent it from being overwritten with updates that do not have MariaDB support.
Your repository should look like below:
[base]
name=CentOS-$releasever - Base
exclude=postfix
#released updates
[updates]
name=CentOS-$releasever -
Updates exclude=postfix
3. For the database support, we are using “
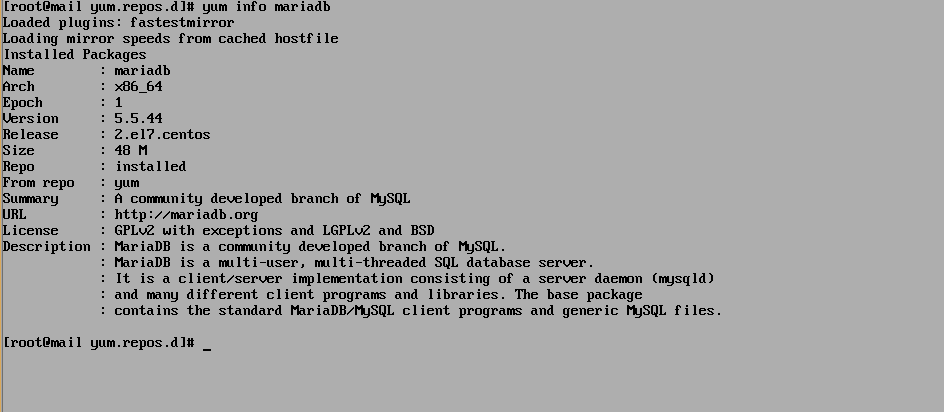
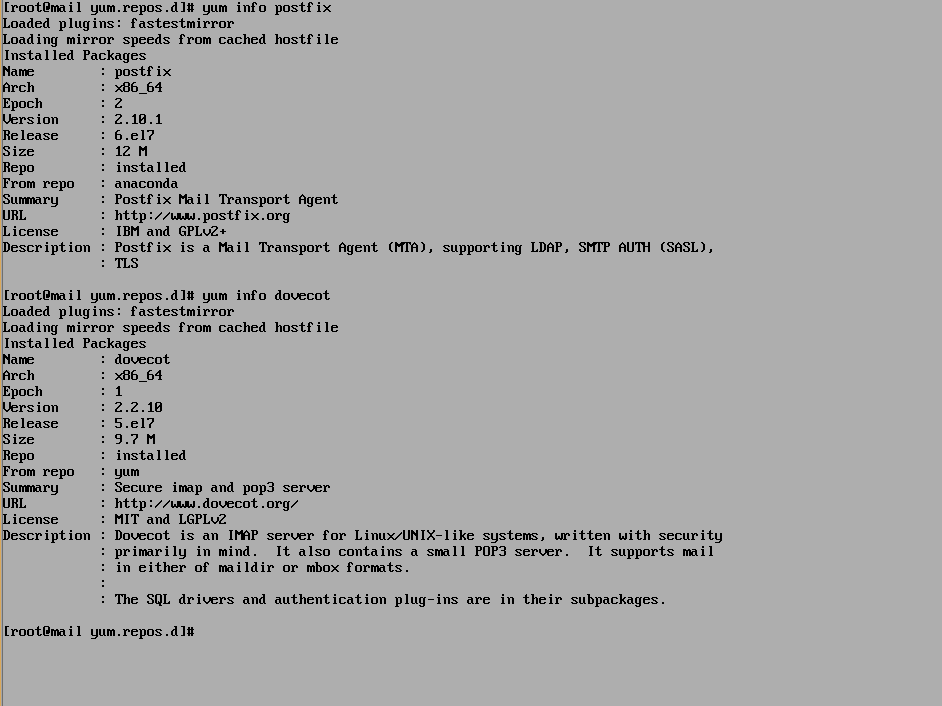
4. Install the required packages.
# yum –enablerepo=centosplus install postfix
# yum install dovecot mariadb-server dovecot-mysql
# yum install bind bind-utils
Setup DNS Server
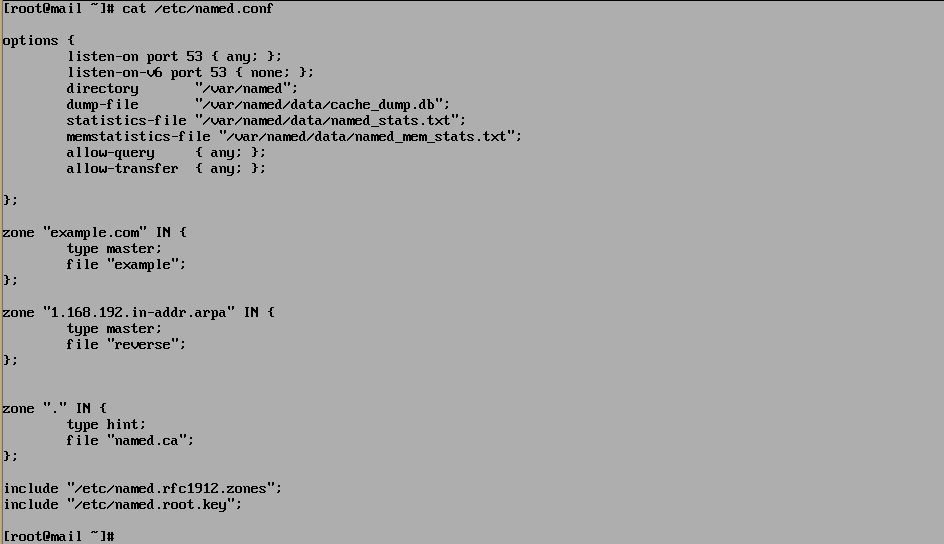
- Your “/etc/named.conf” file should look exactly like this.
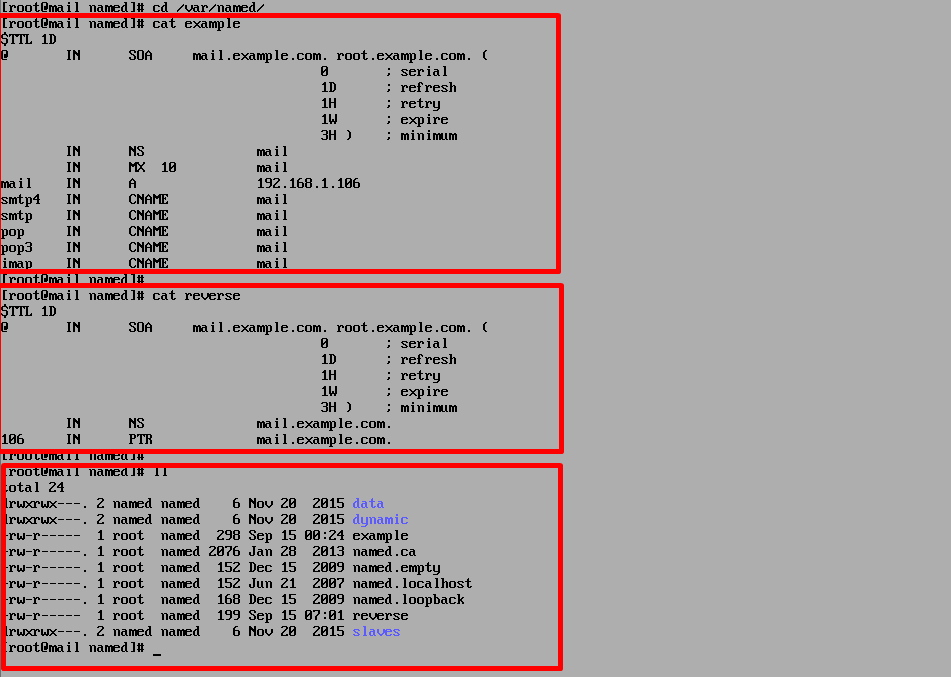
- Create your zone files by navigating to “/var/named/” and the group of zone files to “named”.
- Start your local dns server and check it.

# service named restart
# chkconfig named on
# nslookup mail.example.com ( it should return your machine’s ip )
Setup the MariaDB for Virtual Domains and Users – Mail server with front-end
- Configure mariadb to start on boot, then start its service.
# systemctl enable mariadb
# systemctl start mariadb
2. After starting its service, run the following command:
# mysql_secure_installation
> set a root password ( in my case the password is ‘1’ )
> remove anonymous user accounts ( y )
> disable root logins outside of localhost ( y )
> remove test databases ( y )
> reload privilege tables ( y )
3. Start the mariadb shell.
# mysql -u root -p
4. Create a database for your mail server and switch to it.
> CREATE DATABASE mail;
> USE mail;
5. Create a mail administration user called “mail_admin” and grant it permissions on the “mail” database. Also, set password of your choice ( in our case password = password ).
> grant all on mail.* to ‘mail_admin’@’localhost’ identified by ‘password’;
> grant all on mail.* to ‘mail_admin’@’localhost.localdomain’ identified by ‘password’;
> flush privileges; ( don’t forget to run this command )
6. Create virtual domains table to store virtual domains.
> CREATE TABLE domains (domain varchar(50) NOT NULL, PRIMARY KEY (domain) );
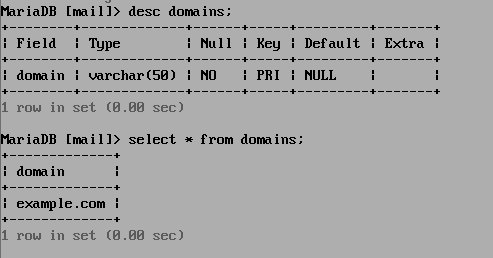
7. Create a table to handle mail forwarding.
> CREATE TABLE forwardings (source varchar(80) NOT NULL, destination TEXT NOTNULL, PRIMARY KEY (source) );
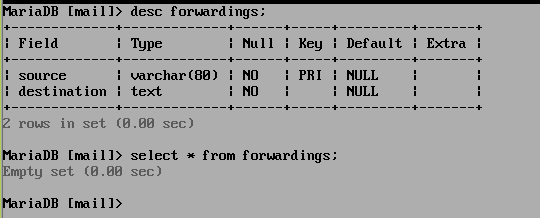
8. Create users table.
varchar(20) NOT NULL, PRIMARY KEY (email) );
> CREATETABLE users (emailvarchar(80) NOTNULL, password

9. Create a transports table.
> CREATE TABLE transport ( domain varchar(128) NOT NULL default ”, transportvarchar(128) NOT NULL default ”, UNIQUE KEY domain (domain) );
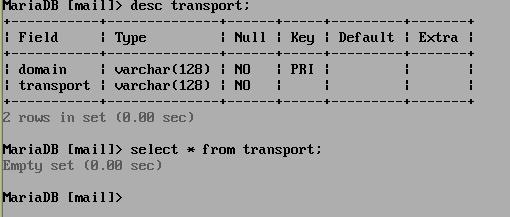
10. Exit the mariadb shell.
> quit
11. Bind your MariaDB to localhost (127.0.0.1) by editing “/etc/my.
> bind-address=127.0.0.1
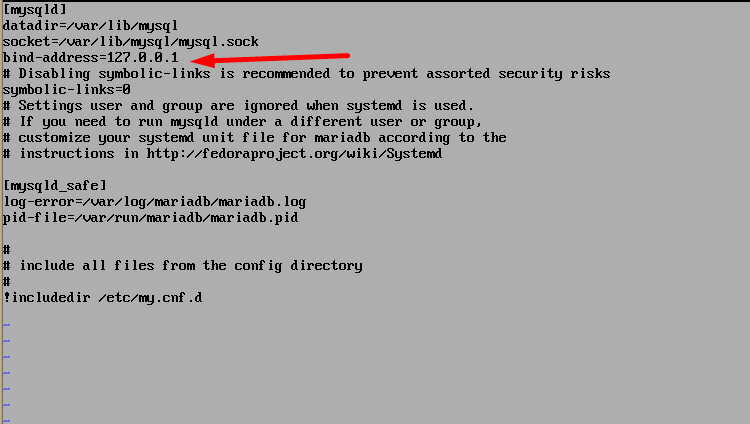
**This is required for Postfix to be able to communicate with the database server. If you have MariaDBset up to listen on another IP address (such as an internal IP), you will need to substitute this IP addressin place of 127.0.0.1 during the Postfix configuration steps. It is not advisable to run MariaDB on apublicly-accessible IP address.**
12. Restart your database server.
#systemctl restart mariadb
Next, We will be configuring the postfix so that it can communicate with our database.
Configure Postfix to Work With MariaDB – Mail server with front-end
1. Create a virtual domain configuration file for postfix called “/etc/postfix/mysql-virtual_domains.cf”.

2. Create a virtual forwarding file for Postfix called “/etc/postfix/mysql-virtual_forwardings.cf”.

3. Create a virtual mailbox configuration file for Postfix called “/etc/postfix/mysql-virtual_mailboxes.cf”.

4. Create a virtual email mapping file for Postfix called “/etc/postfix/mysql-virtual_email2email.cf”.

5. Set proper permissions and ownership for these configuration files.
# chmod o= /etc/postfix/mysql-virtual_*.cf
# chgrp postfix /etc/postfix/mysql-virtual_*.cf

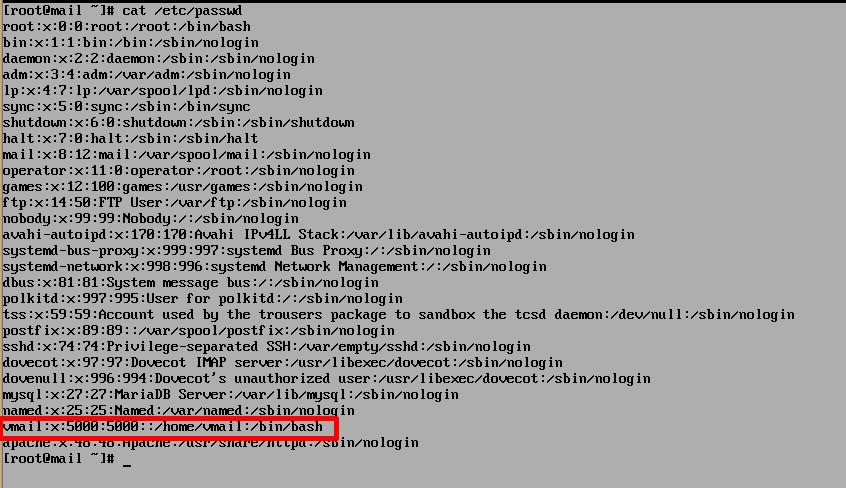
6. Create a user and a group for mail handling. All virtual mailboxes will be stored under this user’s home directory.
# groupadd -g 5000 vmail
# useradd -g vmail -u 5000 vmail -d /home/vmail -m
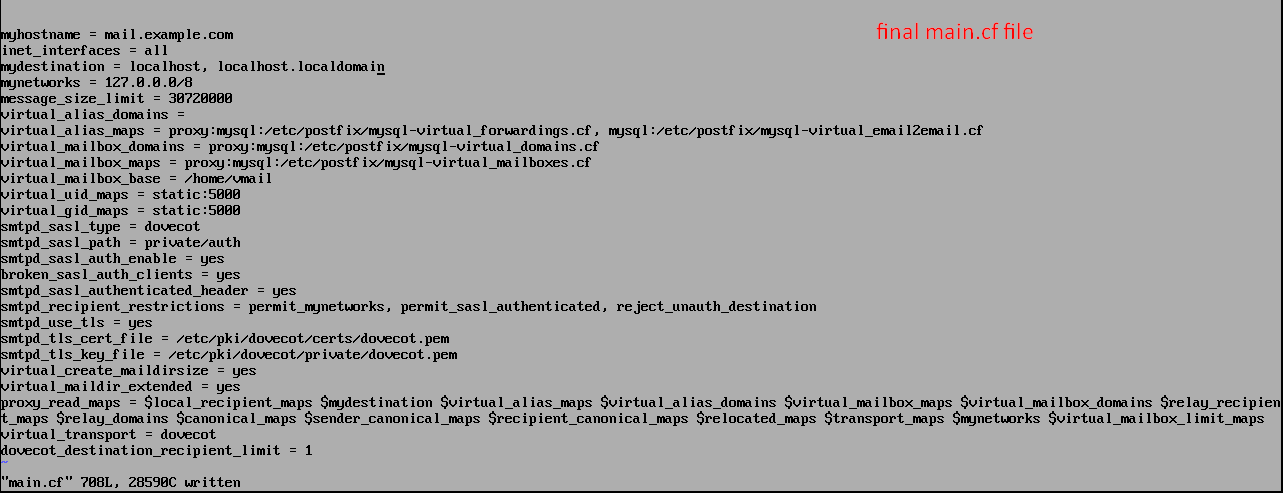
7. Complete the remaining steps required for Postfix configuration. Please be sure to replace “server.example.com” with the Host’s fully qualified domain name. If you are planning on using your own SSL certificate and key, replace “/etc/

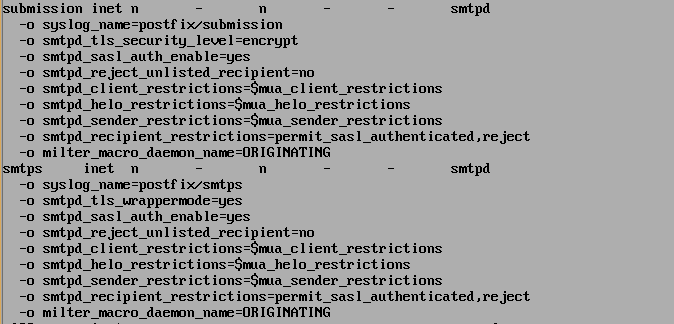
8. Edit the file “/etc/postfix/master.cf” and add the Dovecot service to the bottom of the file.

9. Configure the postfix to start on boot and start it for the first time.
# systemctl enable postfix
# systemctl start postfix
Configure Dovecot
1. create a backup of your “dovecot.conf” file.
# mv /etc/dovecot/dovecot.conf /etc/dovecot/dovecot.conf-backup
2. Your dovecot file should look like this.
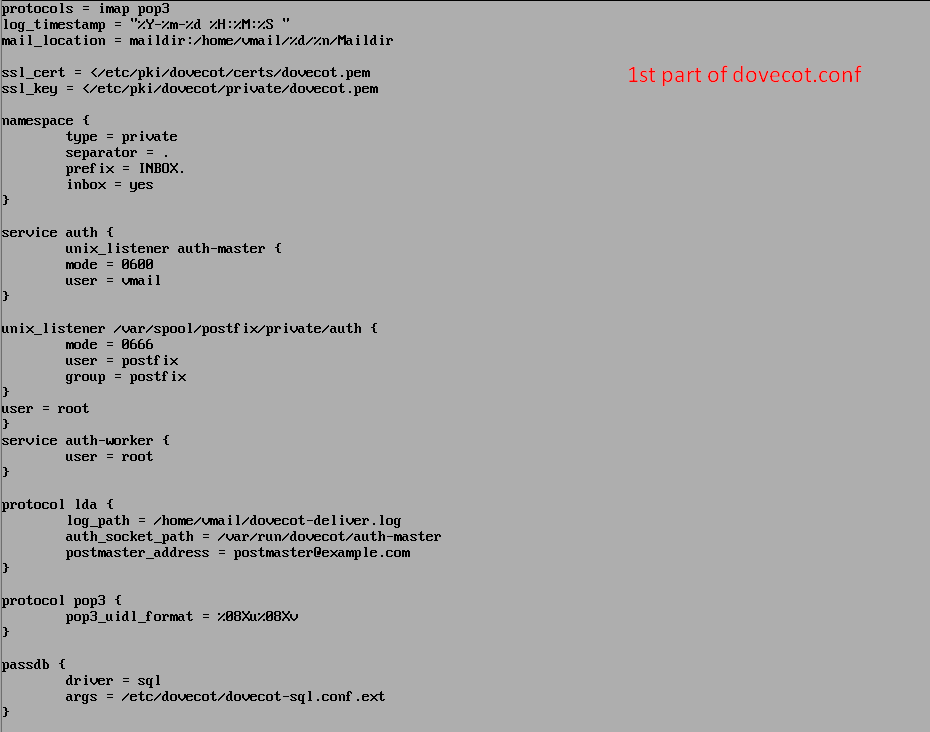

3. MariaDB will be used to store password information, so “/etc/dovecot/dovecot-sql.conf.ext” must be created. Insert the following contents into the file.

4. Restrict access to the file by changing the permissions to allow users in the dovecot group to accessit, while denying access to others.
# chgrp dovecot /etc/dovecot/dovecot-sql.conf.ext
# chmod o= /etc/dovecot/dovecot-sql.conf.ext
5. Configure Dovecot to start on boot, and start it for the first time.
# systemctl enable dovecot
# systemctl start dovecot
6. Check your “/var/log/
7. Test your pop3 server to make sure it’s running properly.
# yum install telnet telnet-server
# chkconfig telnet on
# telnet mail.example.com pop3

Configure Mail Aliases
1. Edit the file “/etc/aliases”

2. Update aliases and restart Postfix.
# new aliases
# systemctl restart postfix
This completes alias configuration. Next, test Postfix to make sure it’s operating properly.
Testing Postfix
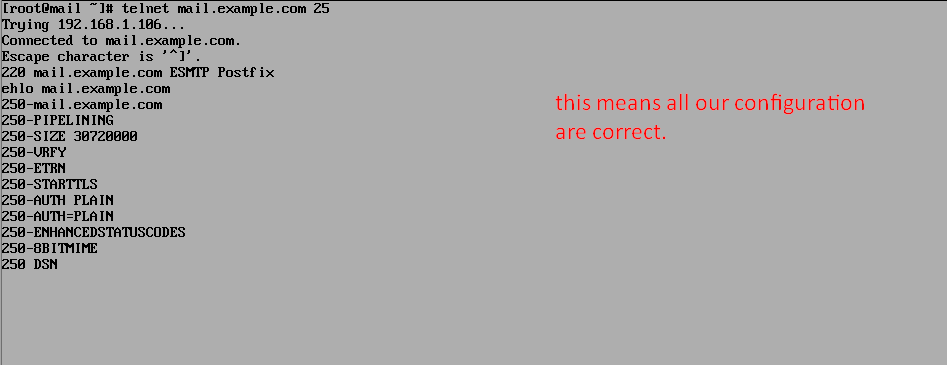
1. Test Postfix for SMTP-AUTH and TLS.
# telnet localhost 25

2. While still connected, issue the following command.
>
Setup Web Server With PHP Support – Mail server with front-end
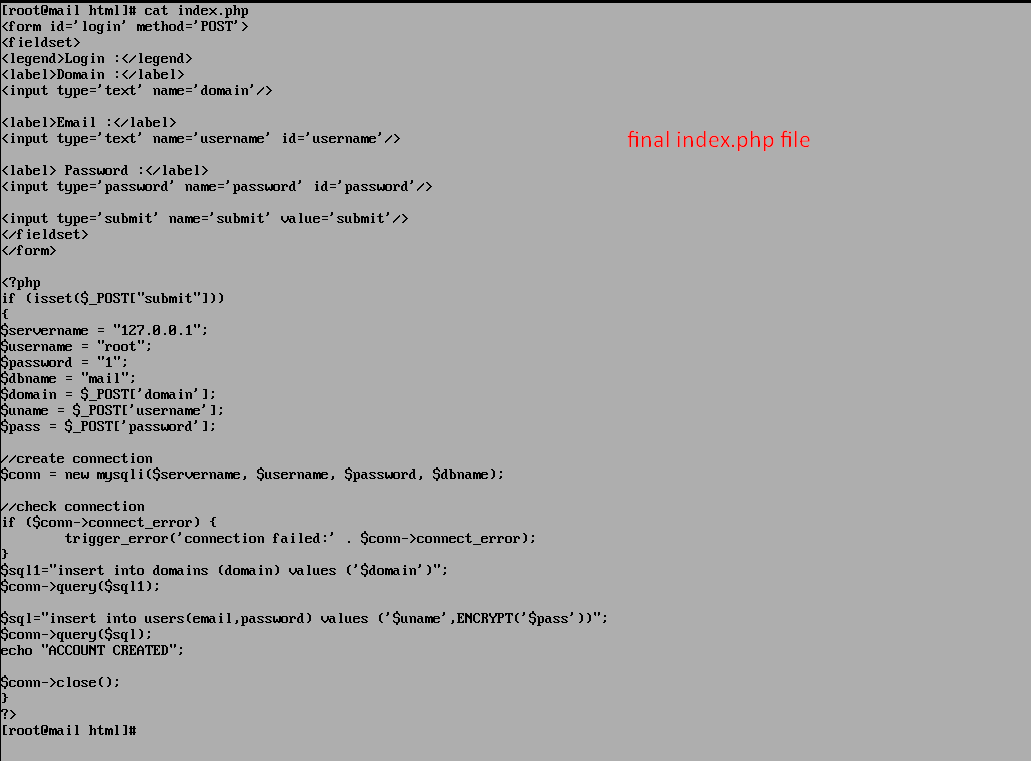
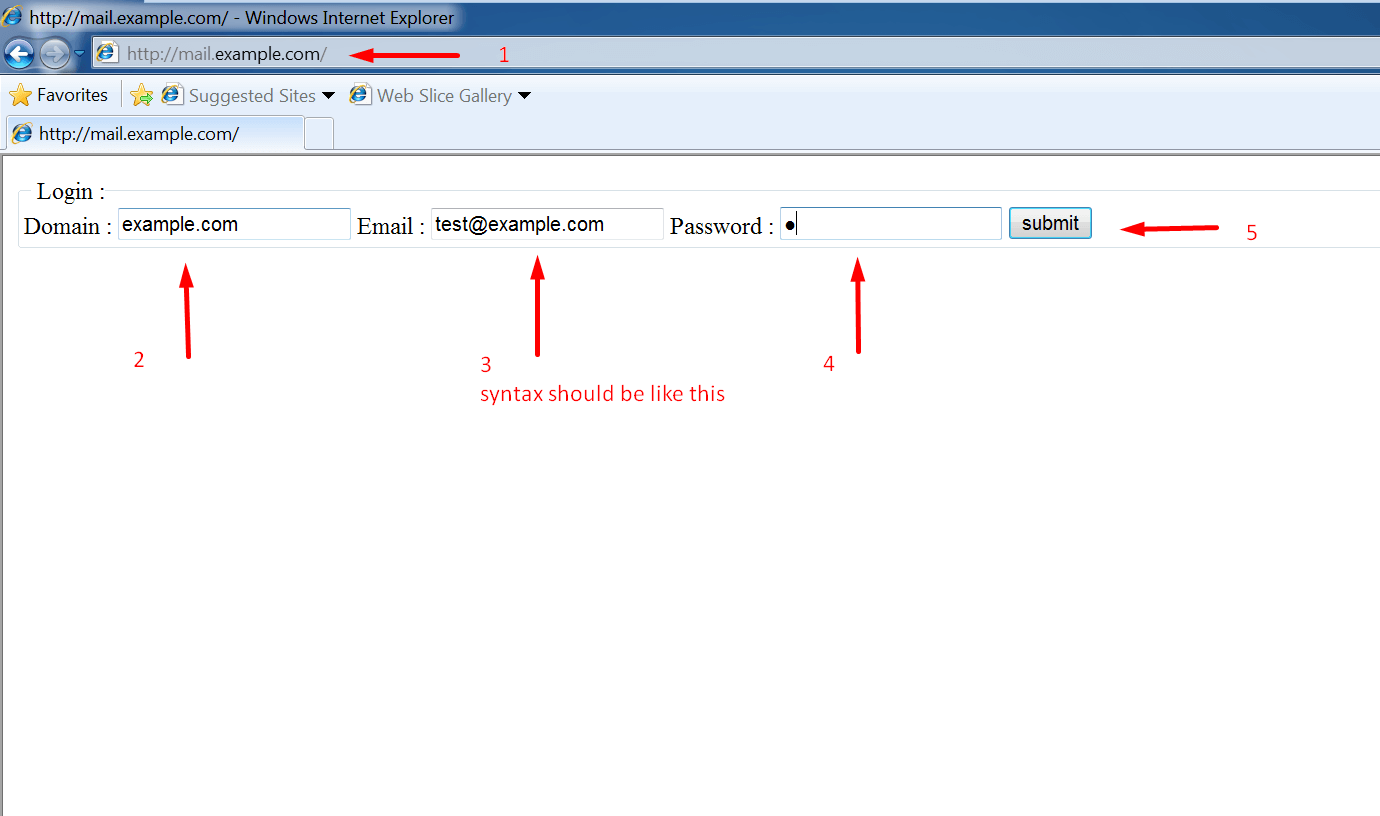
Note: we are doing this because we want to add users and domains to database via webserver throughconnecting php with our mail server database.
1. Install the required packages.
# yum install php httpd php-mysql
2. Navigate to “/var/www/html/”.
> your index.php
This file is going to act as “Mail server with front-end”.
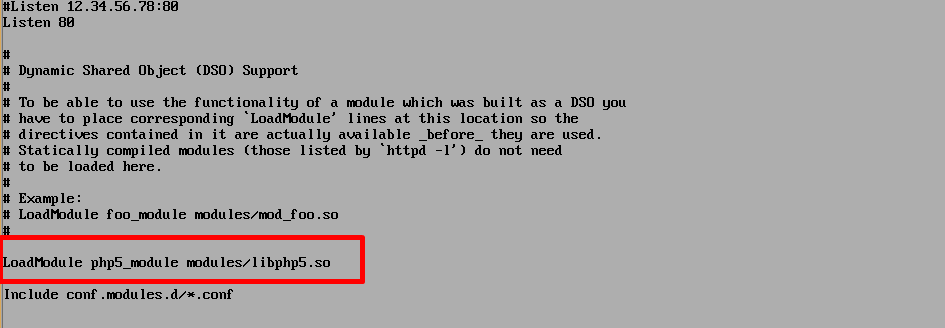
3. If you are using centos 6 or
4. If you want that your web server should open your “index.php” file by default then edit your “/etc/

Time To Test Our Server
* In our case, we are using windows7 with em-client (email client), you can use any client you like.
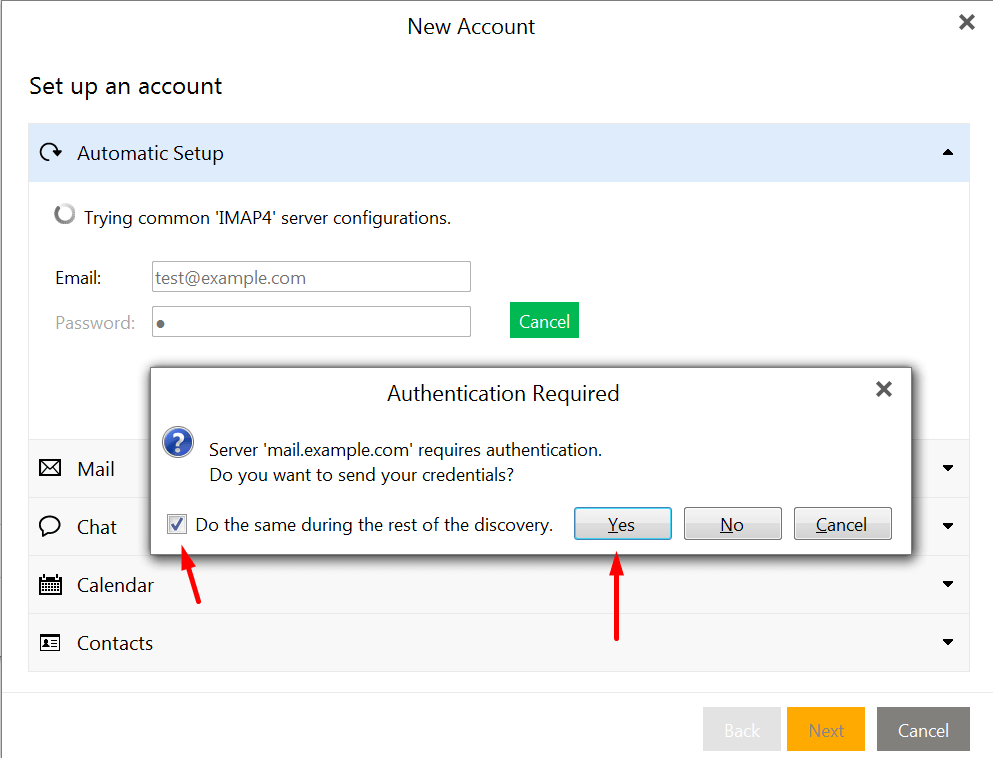
Now open your mail client and enter your newly created account’s credentials.
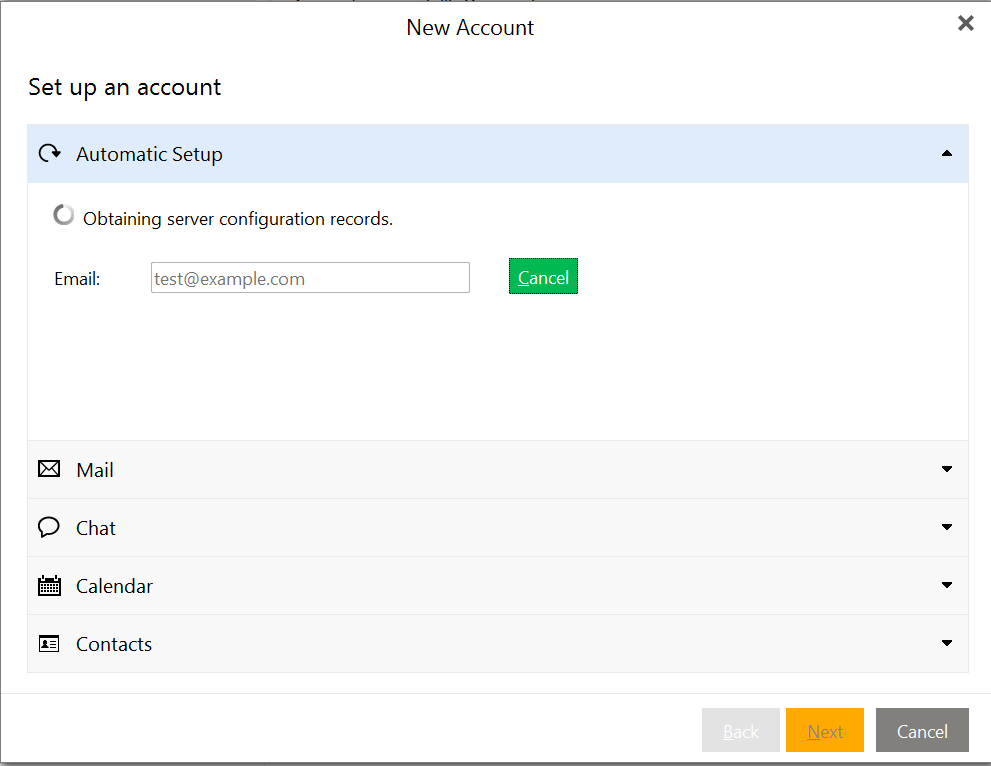
Do as shown below.
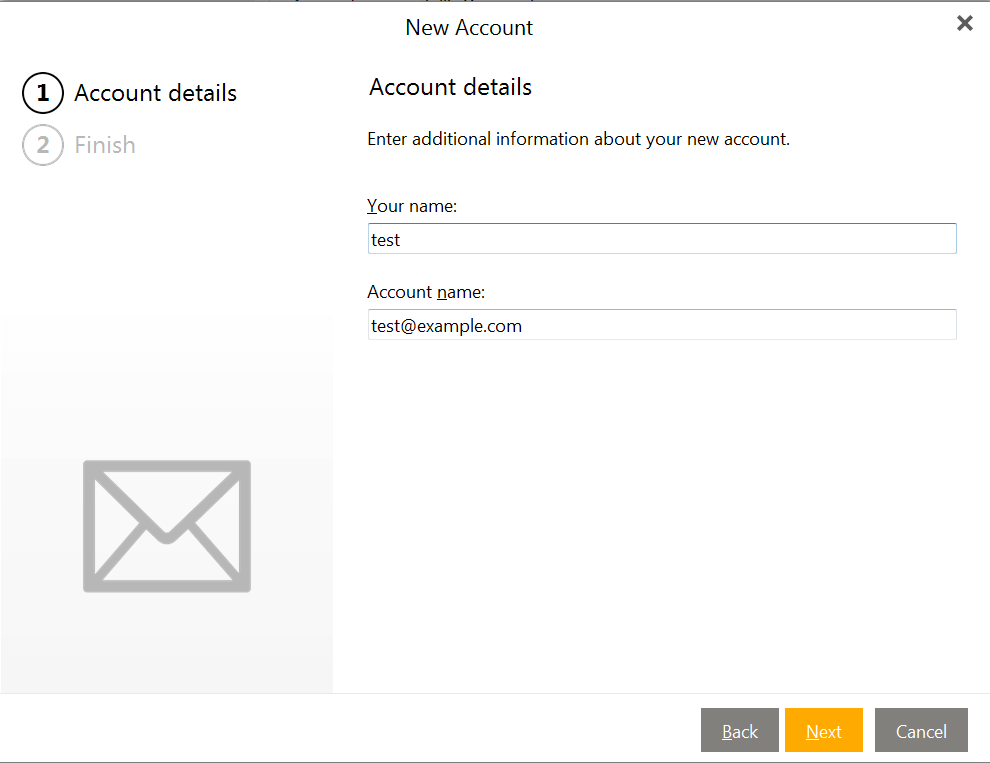
Enter your account name and your name.
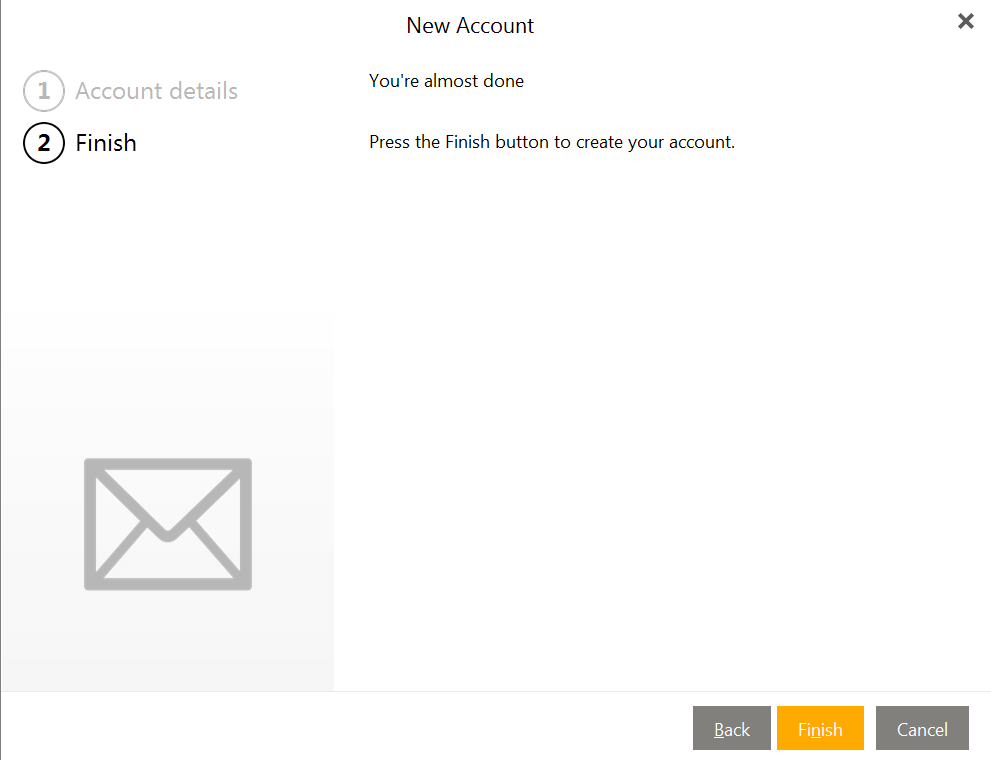
Finish the account setup.
Also Read: Completely Setup and Configure PXE installation server on Redhat 6.* or Centos 6.*
