Table of Contents
The IAM service of the aws is very powerful, it helps us to control each and every element of aws in an easy manner. Today we are going to learn about “Set-up EC2 with IAM roles”.
Question: Why we need IAM roles with EC2 Instances?
Answer: For example, We want to access the S3 bucket service of aws from an EC2 instance, then, in that case, we have the following two options available:
- IAM user
- IAM roles
Problem with “IAM user” -> When we use the “IAM user” method to access the aws services from the CLI using the “aws cli”, then it creates and stores the “IAM user’s” credentials inside the “home directory” of the user under the “.aws” directory. As a result, if somehow the EC2 Instance got hacked, the hacker can access the “ACCESS ID” and “ACCESS KEY” of the “IAM user”, which is very dangerous.
Why use “IAM roles” -> When we use the “IAM roles” method, it does not store any information on the EC2 instance. That is why it is a preferable and secure method as compared to using “IAM user”.
Now that we know the power and reason for using the “IAM roles“, it is time to do some hands-on.
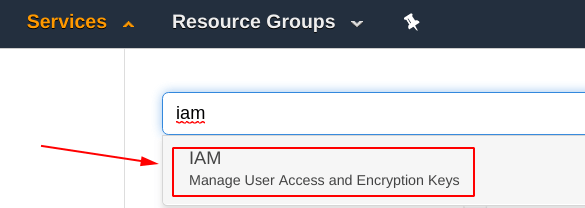
Step 1: Select the IAM service
From the aws dashboard, search for the “IAM” service and you will be seeing something like shown below, select it in order to get into the “IAM dashboard“.
Step 2: Create a Role
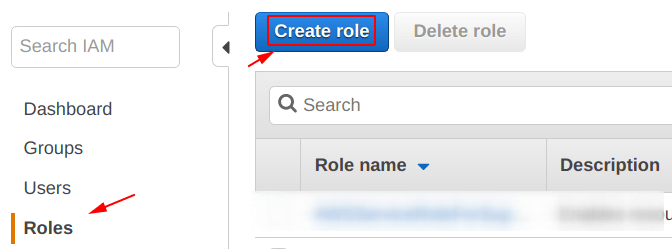
When you enter into the “IAM dashboard” you will be seeing option similar to the ones shown in the screenshot below, from them select the “Roles” section from the “left-hand side” of yours.
After that, click on the “Create role” icon which is in blue color, as shown below.
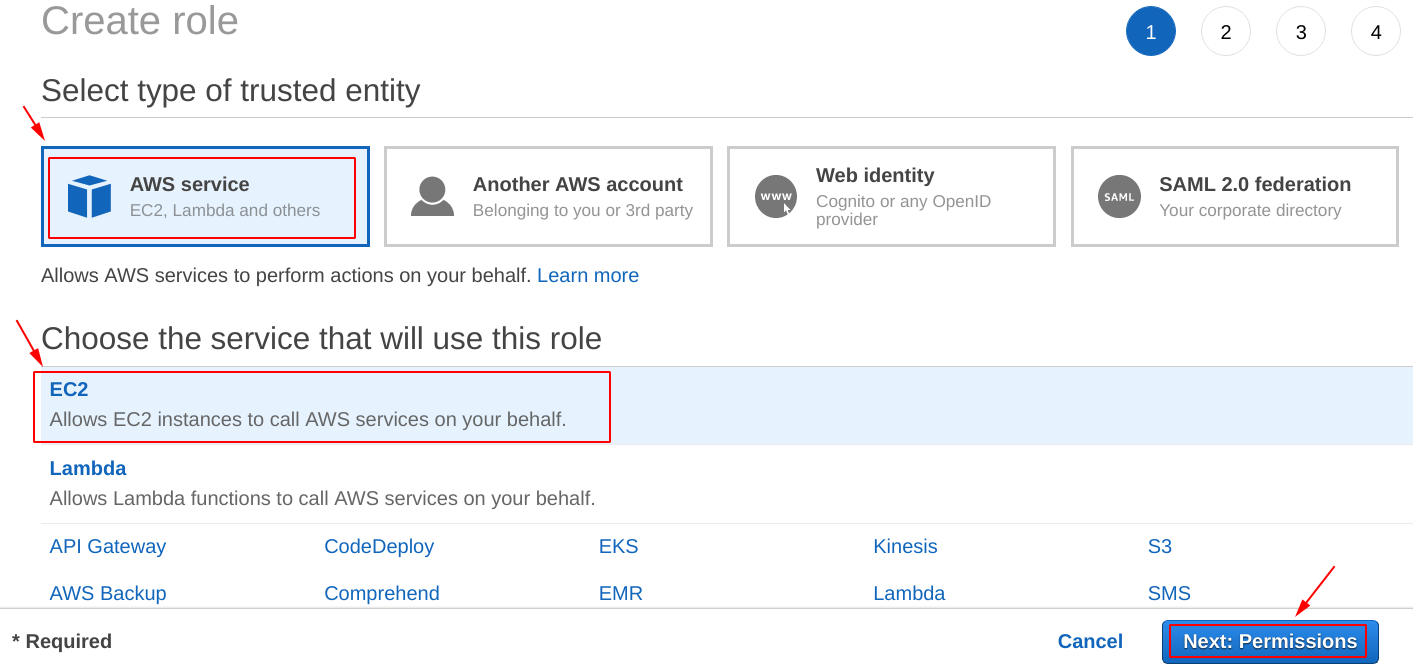
After that, we have to specify, about which trusted entity we want to create the IAM role for, so in our case, we have selected the “AWS service” as a trusted entity.
Further, it is asking for which service is going to use the “IAM role” we are about to create, and because we want the role to be for “EC2“, we have selected the same as can be seen from the picture below.
After selecting the appropriate options, click on the “Next: Permissions” icon.
Attach Permissions Policies
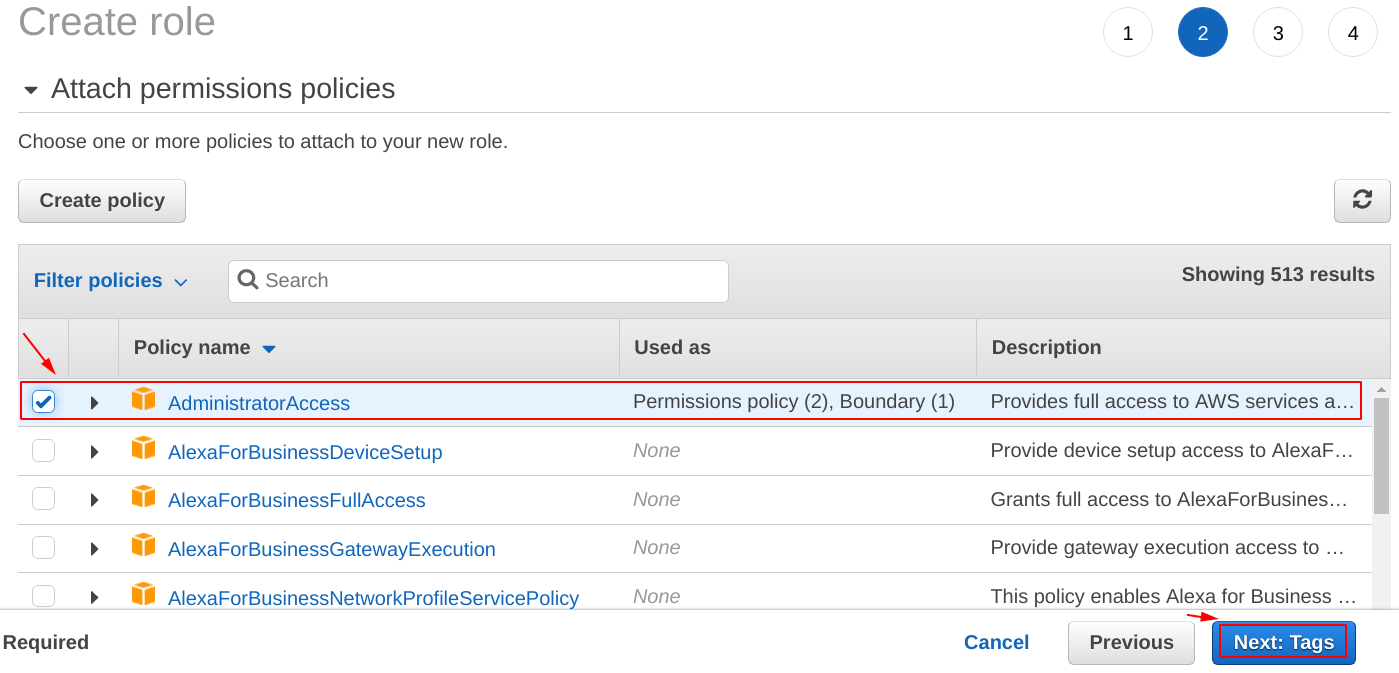
It is time to specify what level of permission is going to be there for the “IAM role” we are creating.
In this case, we are creating the “IAM role” to be having the “Full AdministratorAccess“. We are doing this because we are only this for demo purposes, but for production level implementation keep one thing in mind, never give full access to an IAM role.
Add Tags
On this screen, provide some tags for your “IAM role”, tags help in differentiating one thing from others. They work as some “metadata” for a particular thing.

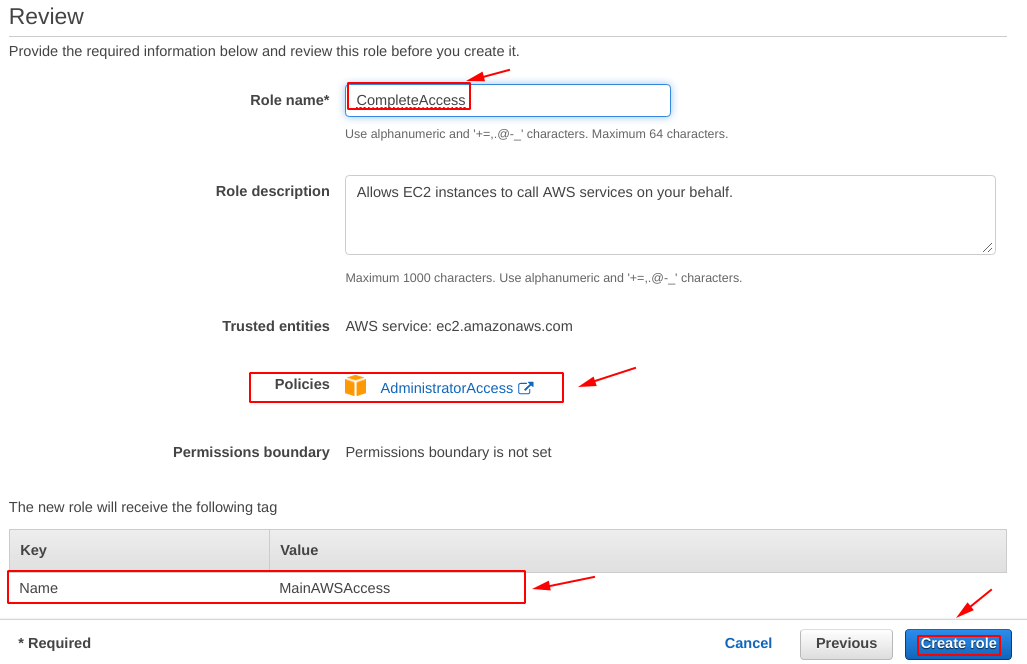
Review – Set-up EC2 with IAM roles
Before committing the final changes to the “IAM role“, make sure you double check them on this review screen and then hit “Create role“.
Step 3: Create an EC2 Instance
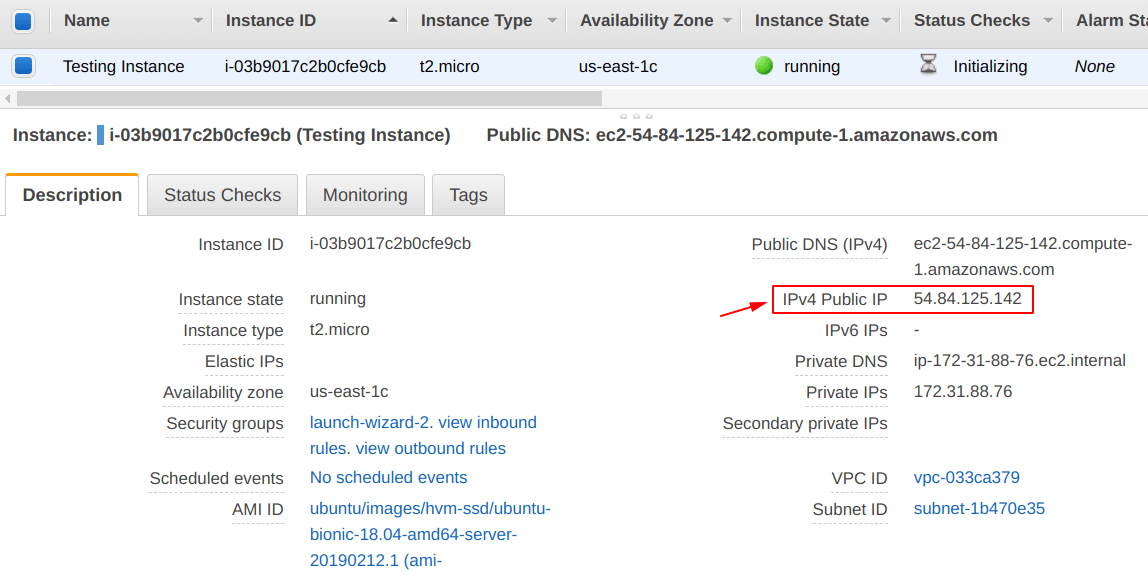
Because we are doing this post the “Set-up EC2 with IAM roles“, it is important for us to have an “EC2 Instance” up and running. So, for that, we have created an “EC2 Instance” with the name “Testing Instance” as can be seen below.
To learn more about EC2, follow -> Create an instance on AWS (complete guide)
Step 4: Attach an “IAM role” to an “EC2 Instance”
This is the most important step of this post, in this, we are going to “attach the IAM role (CompleteAccess)” we have created in “Step 2” to our “EC2 Instance (Testing Instance)” we have created in “Step 3“.
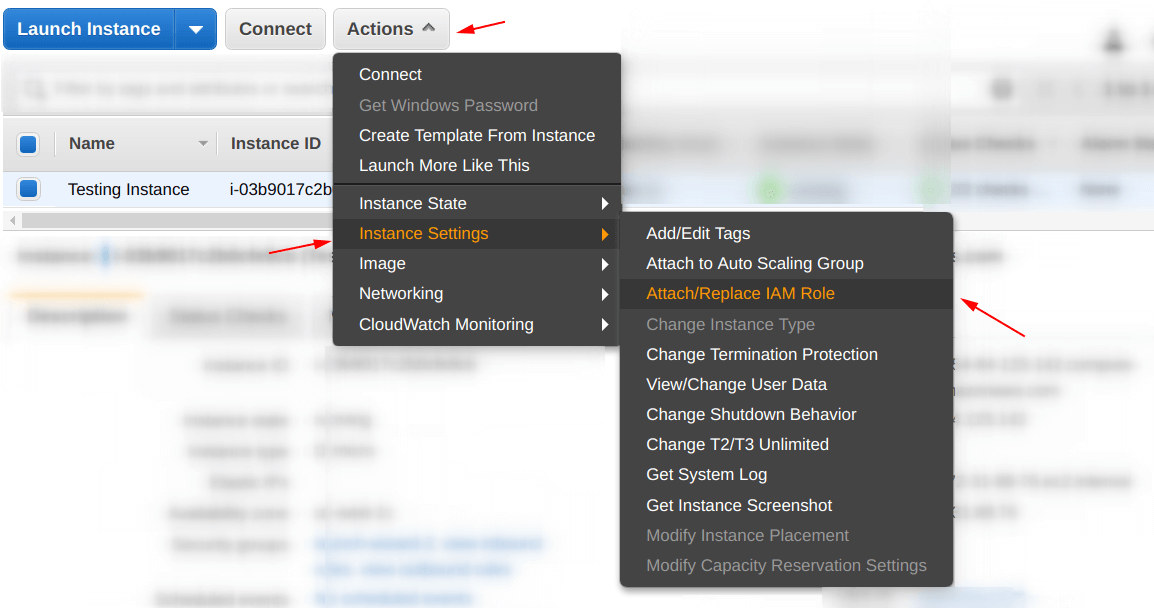
To do that, select the “EC2 Instance” as we did by selecting our “Testing Instance“, after that go to the “Actions” tab and from the “drop-down menu” go to the “Instance settings” again a new menu will be shown, from there look for “Attach/Replace IAM Role“, and select it, for reference check below.
During the attachment, a screen as shown below be shown by the dashboard, select the “IAM role” from the drop-down options and then hit “Apply“.

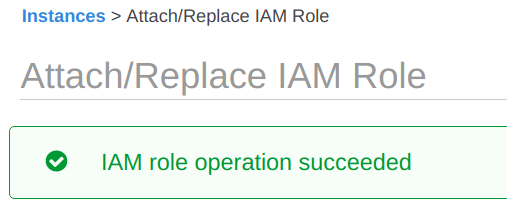
After that, you will be seeing a message stating “IAM role operation succeeded“.
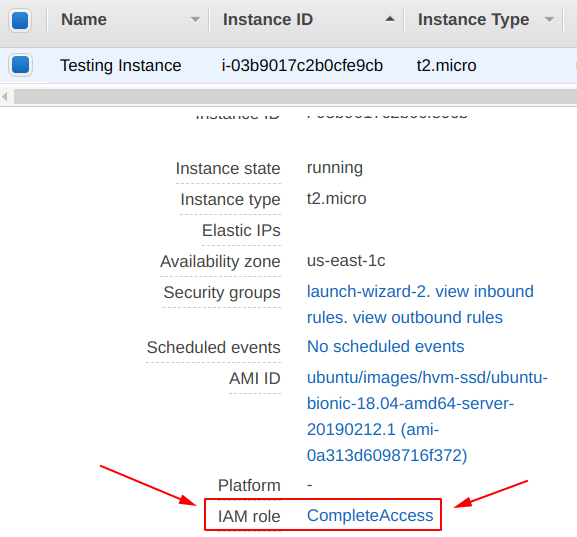
And to confirm the IAM role attachment, if you select the “EC2 Instance” and check the metadata, you will see the “IAM role” has been successfully attached, in our case, “IAM role = CompleteAccess” is attached properly.
Step 5: Login into the EC2 Instance
The “Testing Instance” we have created in the “Step 3” is up and running. It is time to login into it also check whether the “IAM role” attached in “Step 4” to it, is working perfectly or not.
If you want to learn more about logging in into the EC2 Instance, follow -> Login into EC2 instance using private pem key on Linux
From the screen below, you can see that we have successfully logged in.
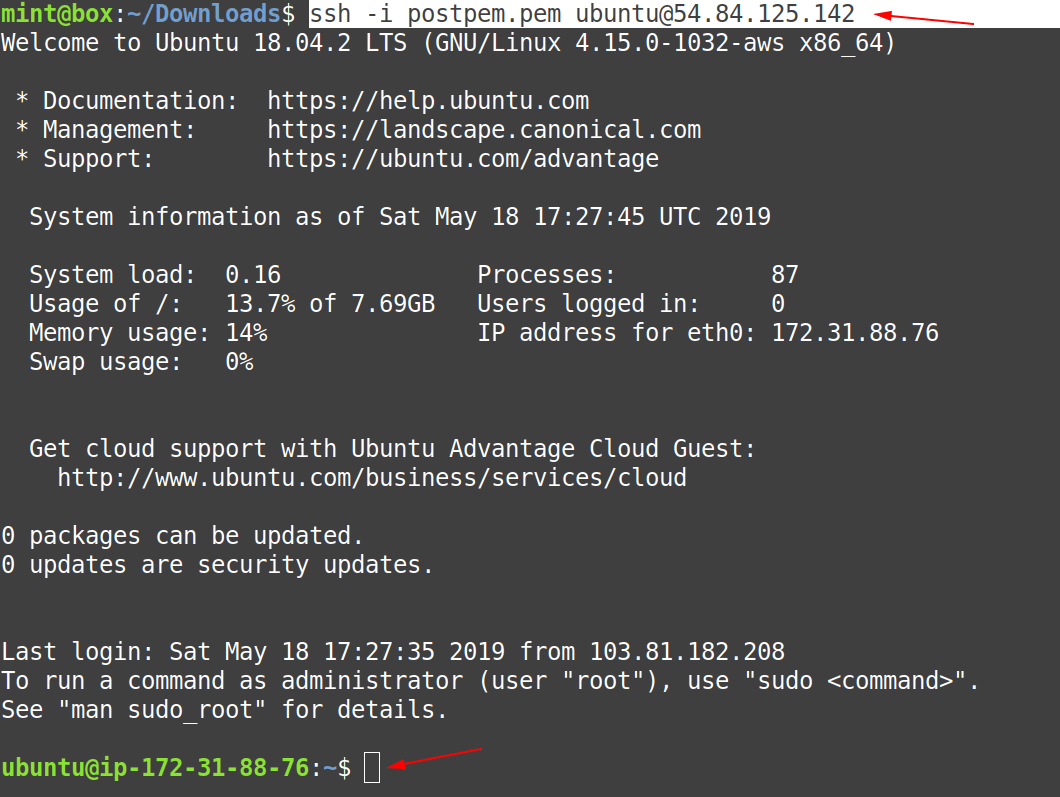
On this point, firstly check whether the “.aws” directory is there or not, and from the screenshot, below we can confirm that in case of the “IAM role” it is not present, as a result, more security.

Step 6: Use AWS Services
In order to start using the aws services from the command line, we have to first install the “aws cli” on the machine. To do that, use the command below to install “aws cli” if you are using a “Debian based Linux” distribution.
$ sudo apt install awslcli -y
Now, for testing purposes, we have tried accessing the “S3 service” and listing the buckets stored, and we are successfully able to do that, as shown below.

More on AWS:
