Table of Contents
Amazon’s aws is one of the best cloud platforms available out there in today’s date. It has so many advanced services out of which one is its “Amazon RDS” service, which is an “aws database service“. So, today we are going to learn about “creating an MYSQL Database on Amazon RDS“.
First of all, make sure you have an “Amazon aws” account. Also, if you don’t have one and want to create one, follow -> Create AWS Account
After that you have created the account, you are good to go with the post.
Creating an MYSQL Database on Amazon RDS
We will be covering the things “Step-by-Step“, so that you will get to know each and every option an “Amazon RDS instance” has.
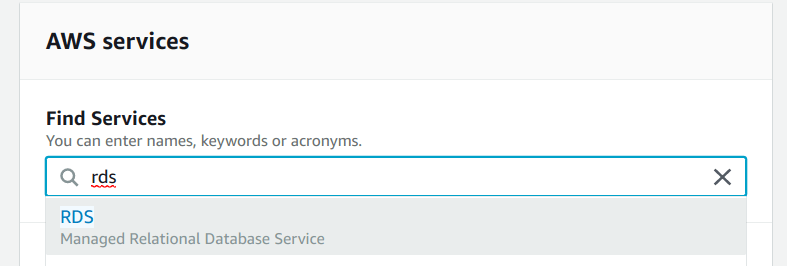
Step 1: Select the “Amazon RDS” service
Type “rds” under “Find Services” to search for the “Amazon RDS” service in the AWS dashboard, as shown below.
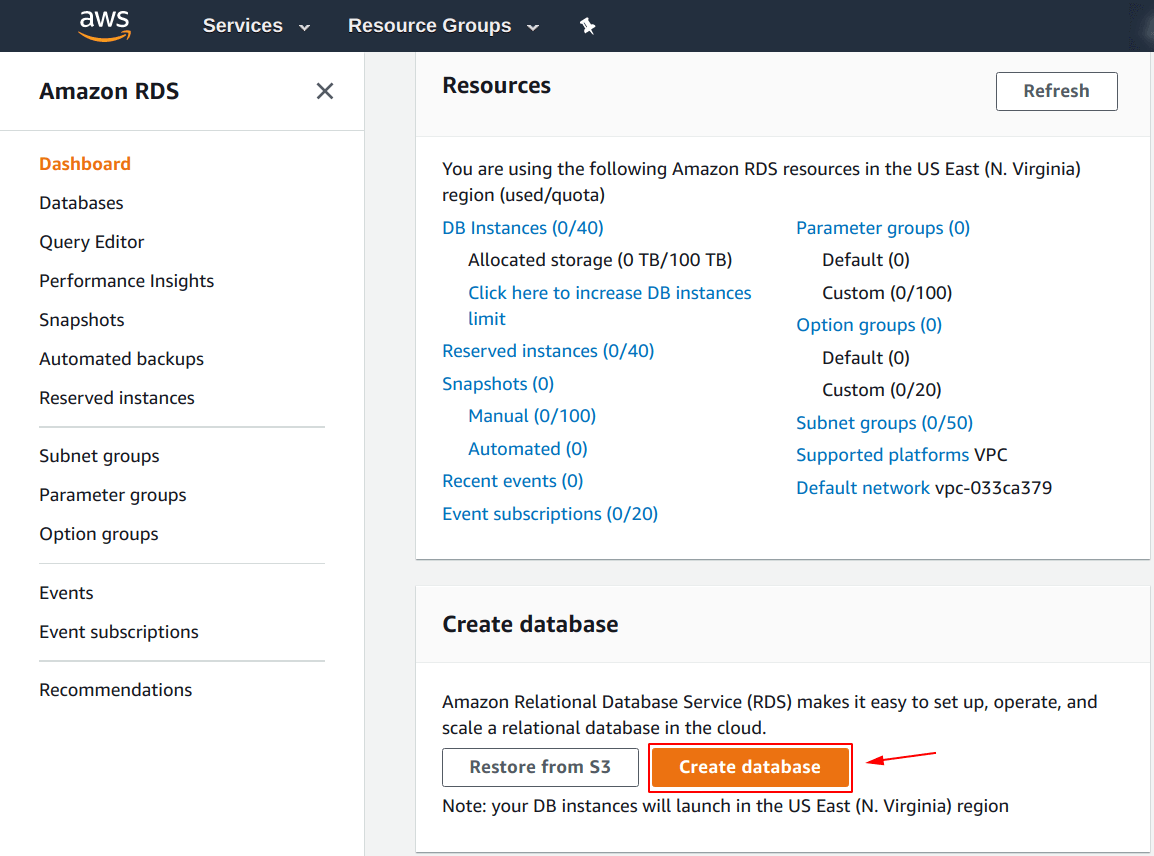
Step 2: Create the “Amazon RDS” database
Shown below is the default “Amazon RDS Dashboard” as of 2019, it may change in the future.
From this window, you can see a button “Create database“, click on it to create an “Amazon RDS database instance“.
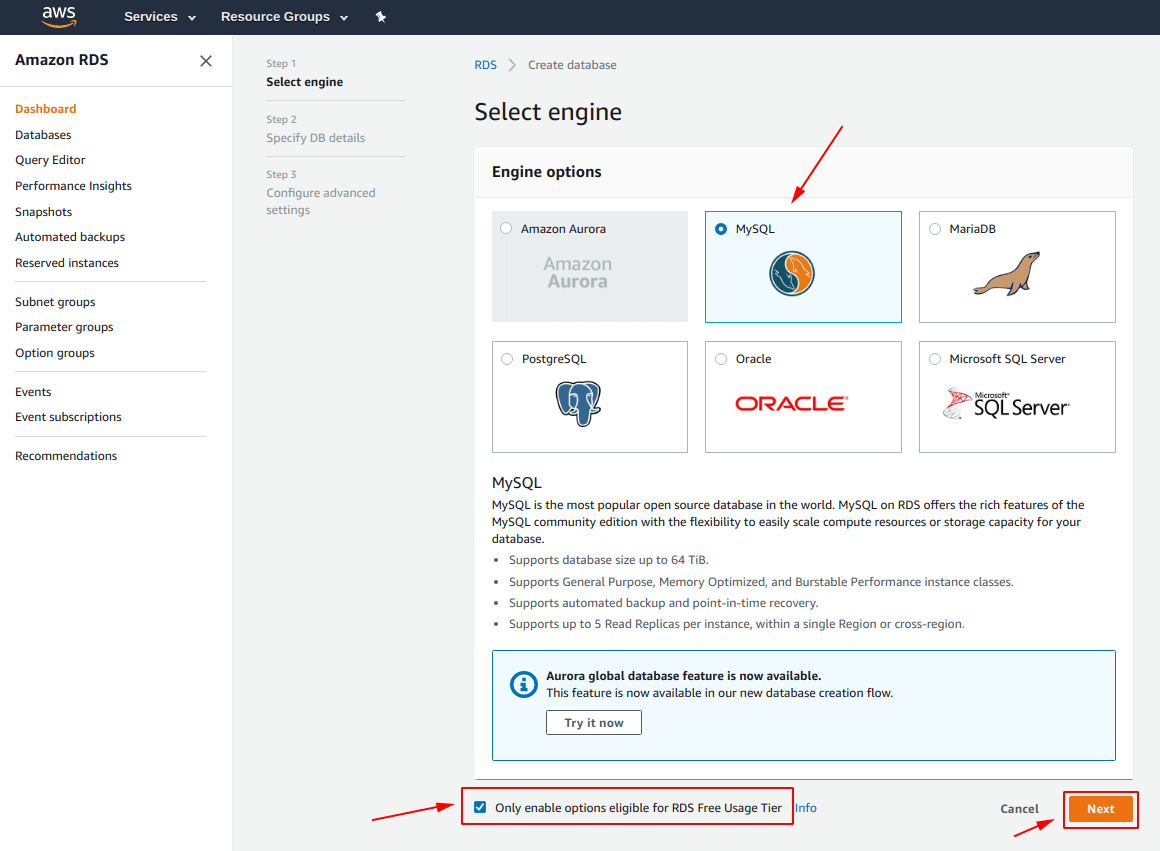
Step 3: Select the type of “Database Engine”
Now, there are a total of 6 database engines available as of 2019 on “Amazon RDS“, they are shown in the screenshot below.
For this post, we are going to select the “MySQL” engine and then hit “Next“.
Note: To check the “Only enable options eligible for RDS Free Usage Tier“, so that you will not be charged for any premium services.
Step 4: Specify “Amazon RDS” instance specifications
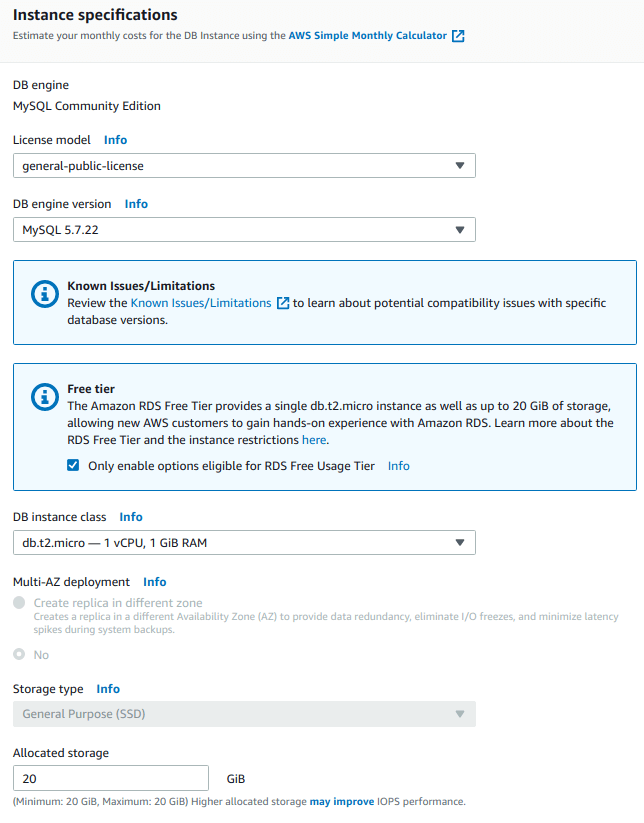
This is time to provide “Amazon RDS Instance’s Specifications“.
From the picture below, note we have specified:
- DB engine = MySQL Community Edition
- License model = general-public-license
- DB engine version = MySQL 5.7.22
- DB instance class = db.t2.micro – 1vCPU, 1 GiB RAM
- Allocated Storage = 20 GB
Step 5: Settings for “Amazon RDS” instance
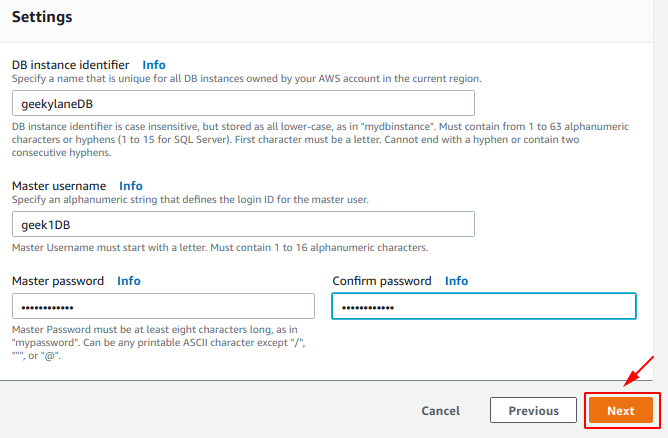
It is time to provide some more settings for the instance:
- DB instance identifier = geekylaneDB
- Master username = geek1DB
- Master password = <your-strong-password>
- Confirm password = <your-strong-password>
After that, hit “Next” for the next step.
Step 6: Advanced settings for “Amazon RDS” instance
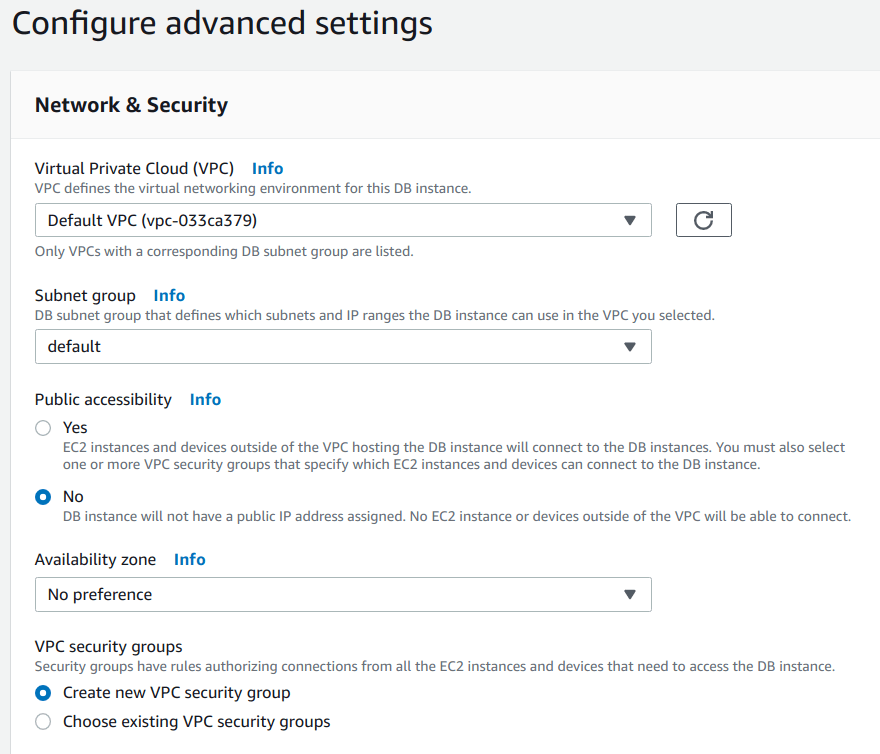
Here come the “Advanced Settings” for our “Amazon RDS instance“:
Network & Security
In this we have provided the following:
- Virtual Private Cloud (VPC) = Default VPC
- Subnet group = default
- Public accessibility = No
- Availability zone = No preference
- VPC security groups = Create a new VPC security group
Database Options – MYSQL Database on Amazon RDS
- Database name = geekylane
- Port = 3306
- DB parameter group = default.mysql5.7
- Option group = default:mysql-5.7
- IAM DB authentication = Disable

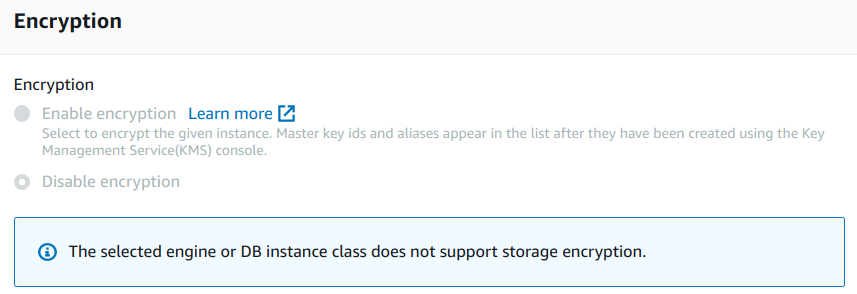
Encryption” for “Amazon RDS” instance
Note: This “MySQL” engine’s instance type does not support the “Storage Encryption“
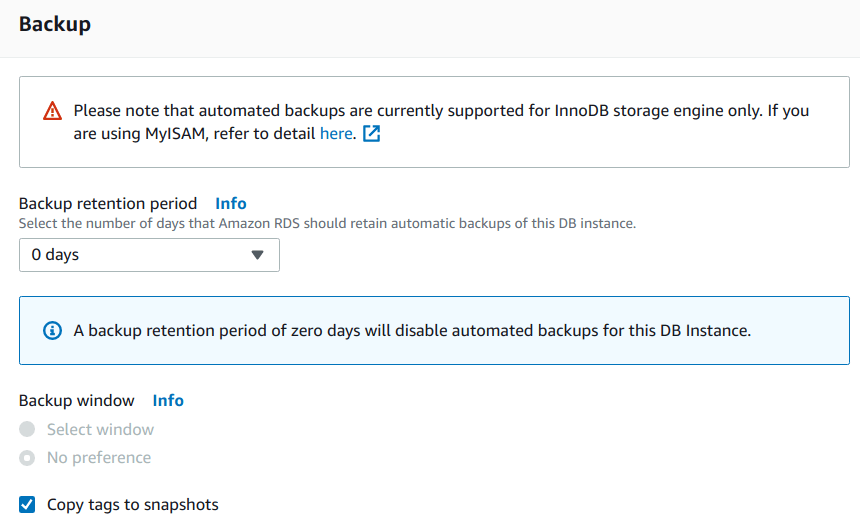
Amazon RDS instance “backup” options
Backup retention period = 0 days (this will disable automated backups for this instance)
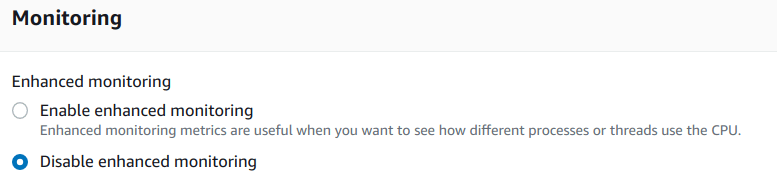
Monitoring of “Amazon RDS instance”
We have disabled “monitoring” as of now for this “DB Instance“.
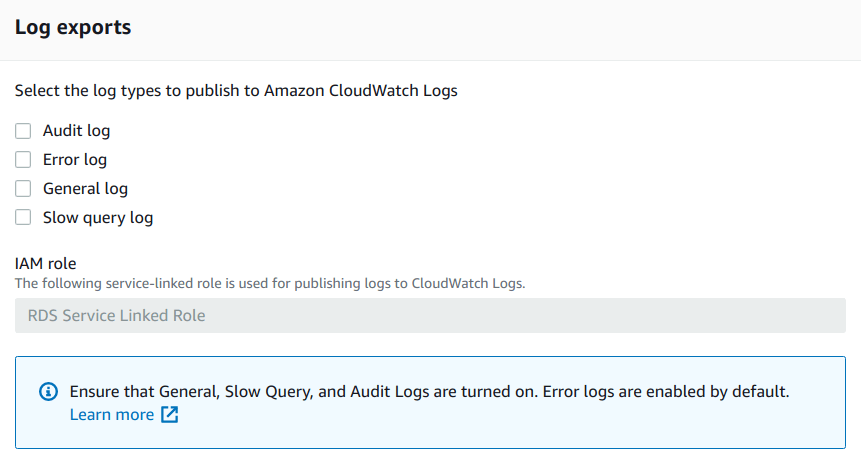
Specify “Log Exports”
We have not specified any type of logs for this DB Instance.
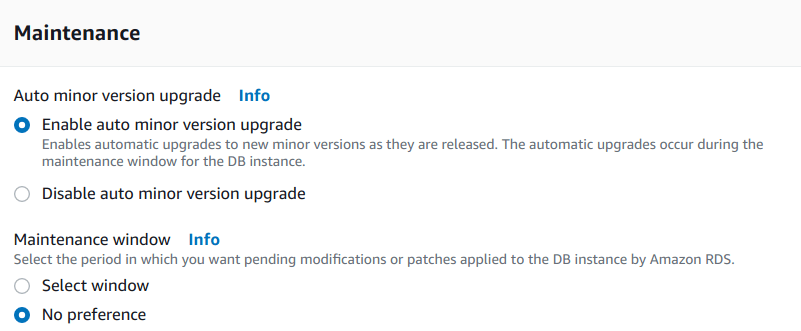
Maintenance
Auto minor version upgrade = Enable auto minor version upgrade
Maintenance window = No preference
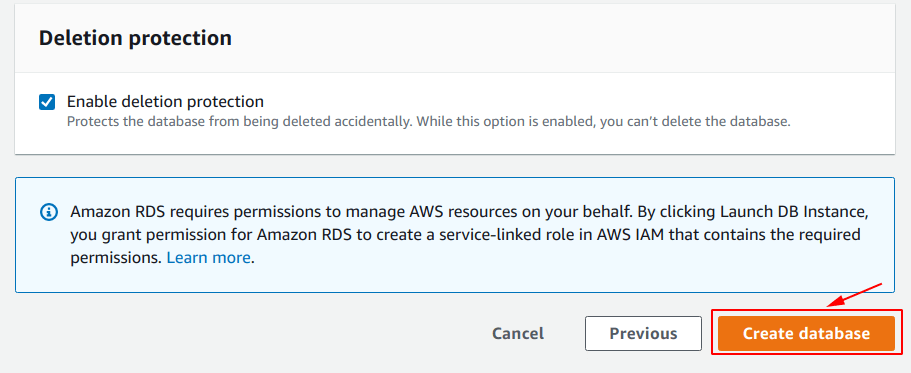
“Deletion Protection” for Amazon RDS instance
We have enabled “Delete protection” for this “DB Instance“.
After that, hit the “Create database” button.
Database Instance has been created
From the image below we can see that our “DB instance is being created“.
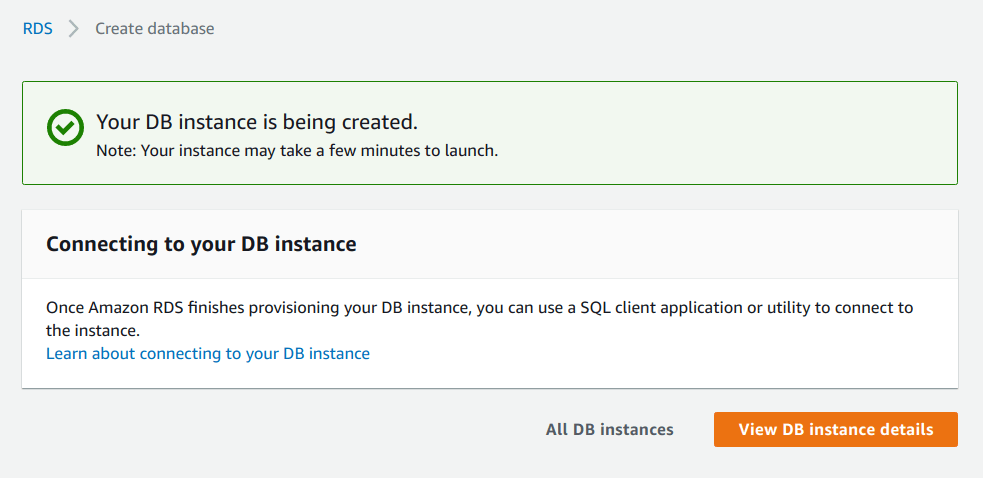
Now that we have created our “Amazon RDS MySQL instance“, it is time to check it and analyze its configuration and metadata.
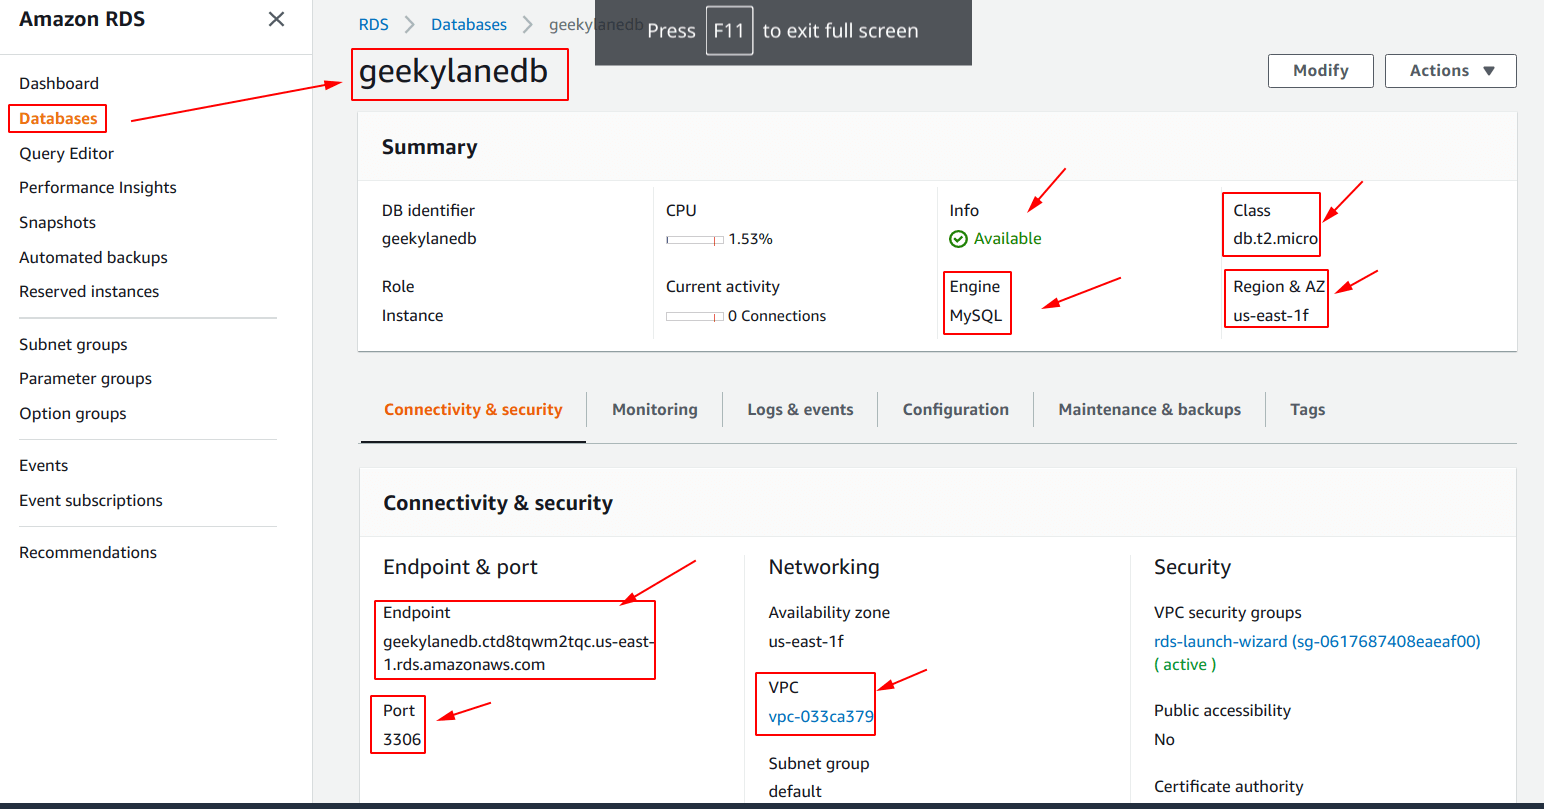
Step 7: Check “Amazon RDS” instance details
From the screenshot below, we can note the following things:
- DH identifier = geekylanedb
- Engine = MySQL
- Class = db.t2.micro
- Region & AZ = us-east-1f
- Port = 3306
- Endpoint = <can be anything>
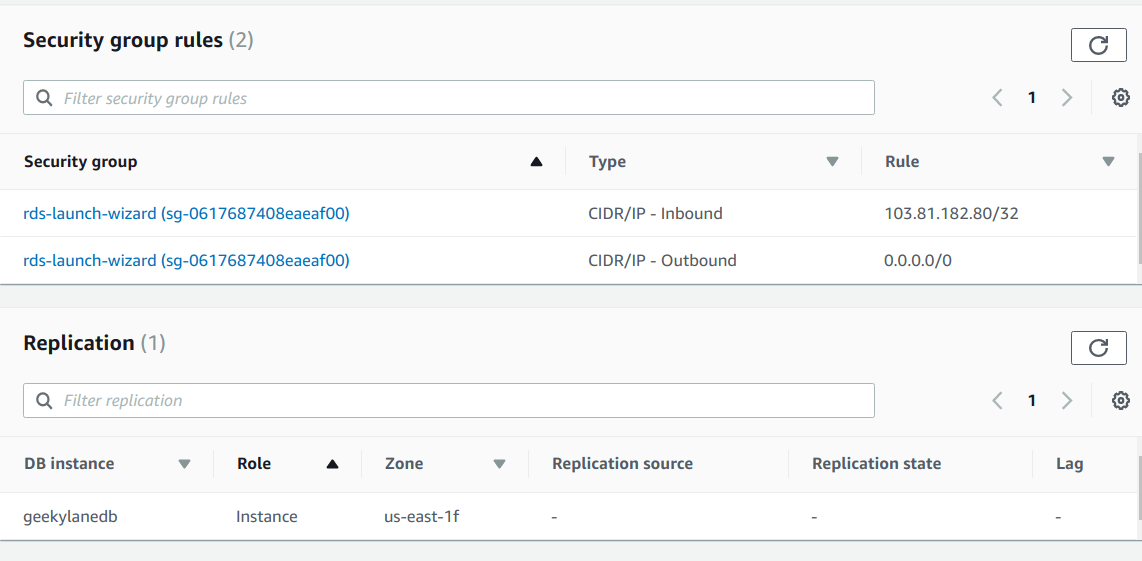
Step 8: Check “Security group rules” & “Replication”
There are 2 security group rules we have by default here.
1st = CIDR/IP – Inbound => the traffic is allowed only from “103.81.x.x/32“
2nd = CIDR/IP – Outbound => the traffic is allowed to “0.0.0.0/0“
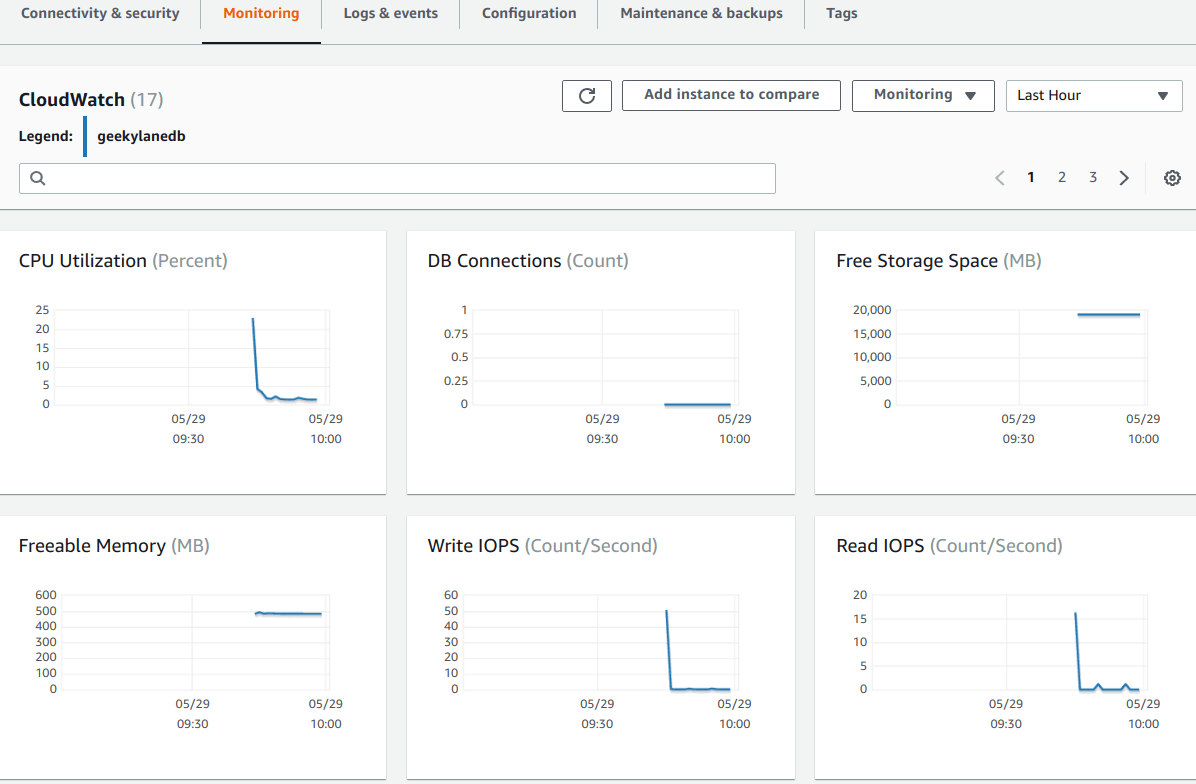
Step 9: Check “Monitoring” – MYSQL Database on Amazon RDS
Under this tab, we can see that there are a lot of metrics available on this screen:
- CPU Utilization = This will show your DB instance’s CPU utilization in percentage
- DB Connections = Number of connections currently made to the DB instance
- Free Storage Space = Free space available on your DB instance in MB
- Freeable Memory = This will show you what amount of memory can be freed from the DB instance
- Write IOPS = Will show you Write Input/Output count per second to you DB instance
- Read IOPS = Will show you Read Input/Output count per second to you DB instance
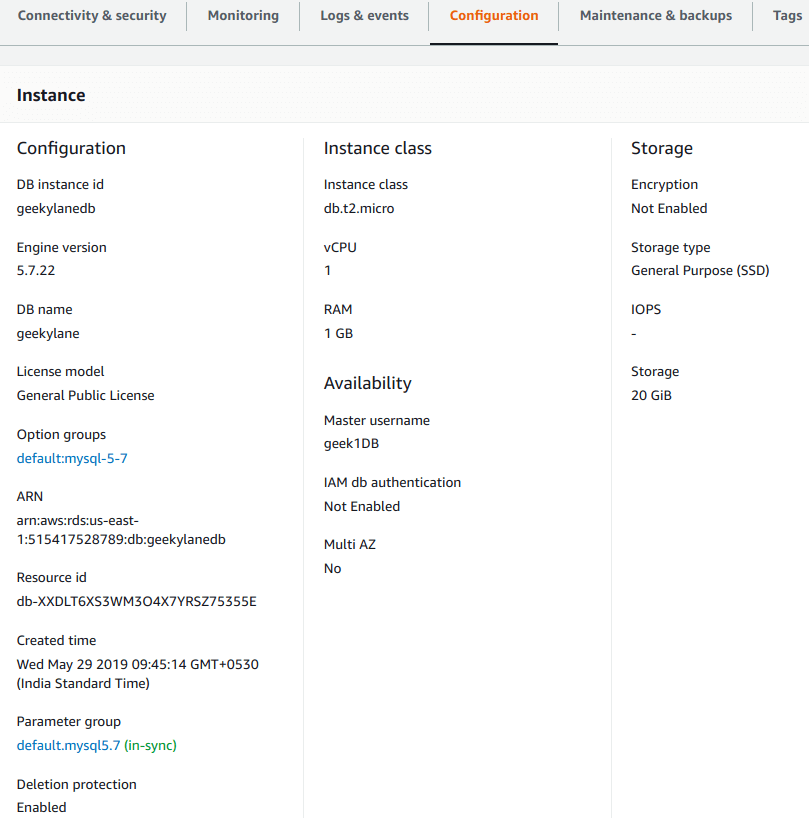
Step 10: Check configuration of “Amazon RDS instance”
Following is the overall configuration the current DB instance is having.
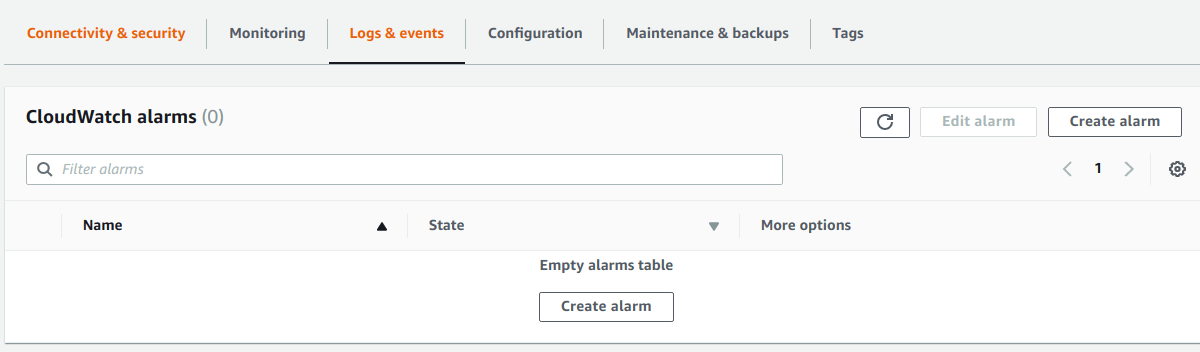
Step 11: Check “Logs & Events”
Under the “Logs & events” tab, all the logs can be seen. Also, we can specify “CloudWatch Alarms” in here.
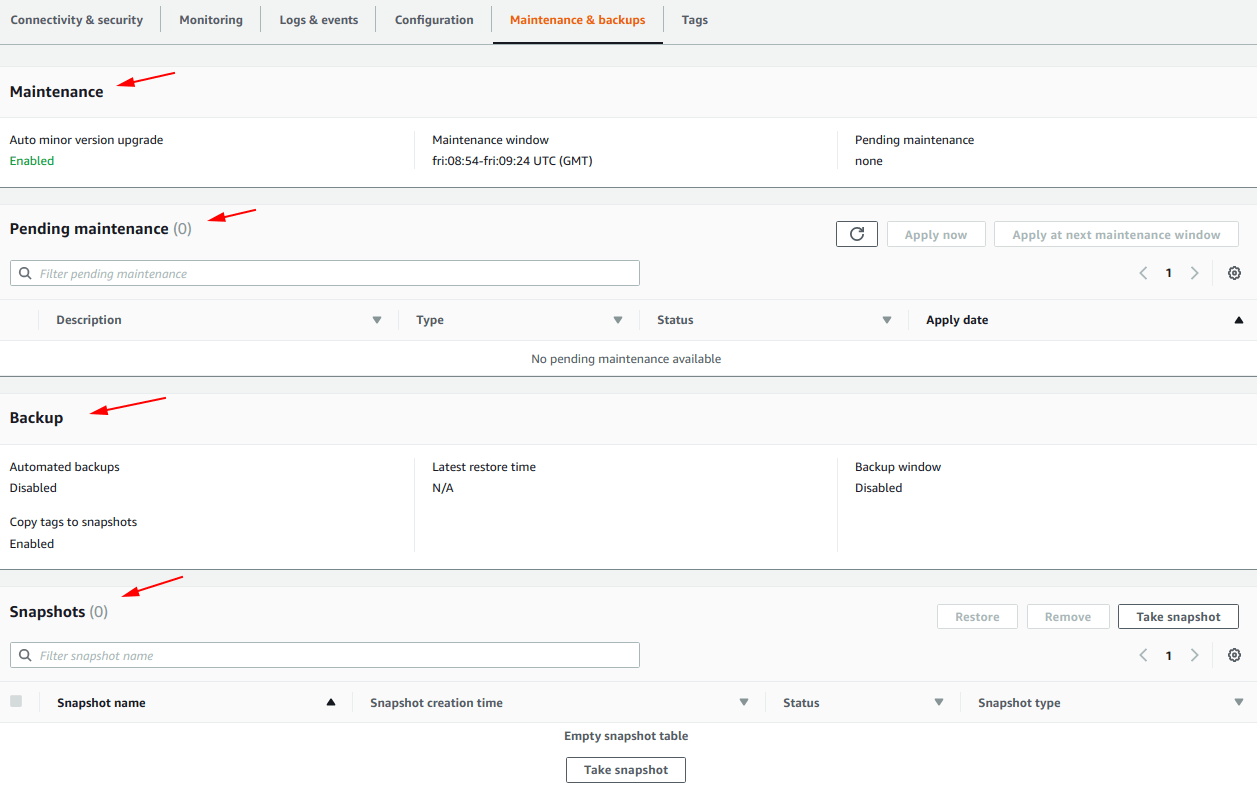
Step 12: Check “Maintenance & Backups”
On this screen, you can see:
- Maintenance
- Pending maintenance
- Backup
- Snapshots
More on AWS:
- Set-up an Apache2 web server on ubuntu 18.04 EC2 Instance AWS
- How to Set-up EC2 with IAM roles (Step-by-Step Guide)
- How to Set-up and Configure aws cli (Local, Live) (Step-by-Step)
- How To Use Bootstrap Scripts With EC2 Instance (Step-by-Step)
- How to Create a Static Website Using S3 Bucket (Step-by-Step)