Table of Contents
Create docker account and push docker image to docker hub
Before proceeding further, make sure you know basics of docker. After that, it is now time to understand how to push docker image to docker hub.
Requirements
- An account on hub.docker.com
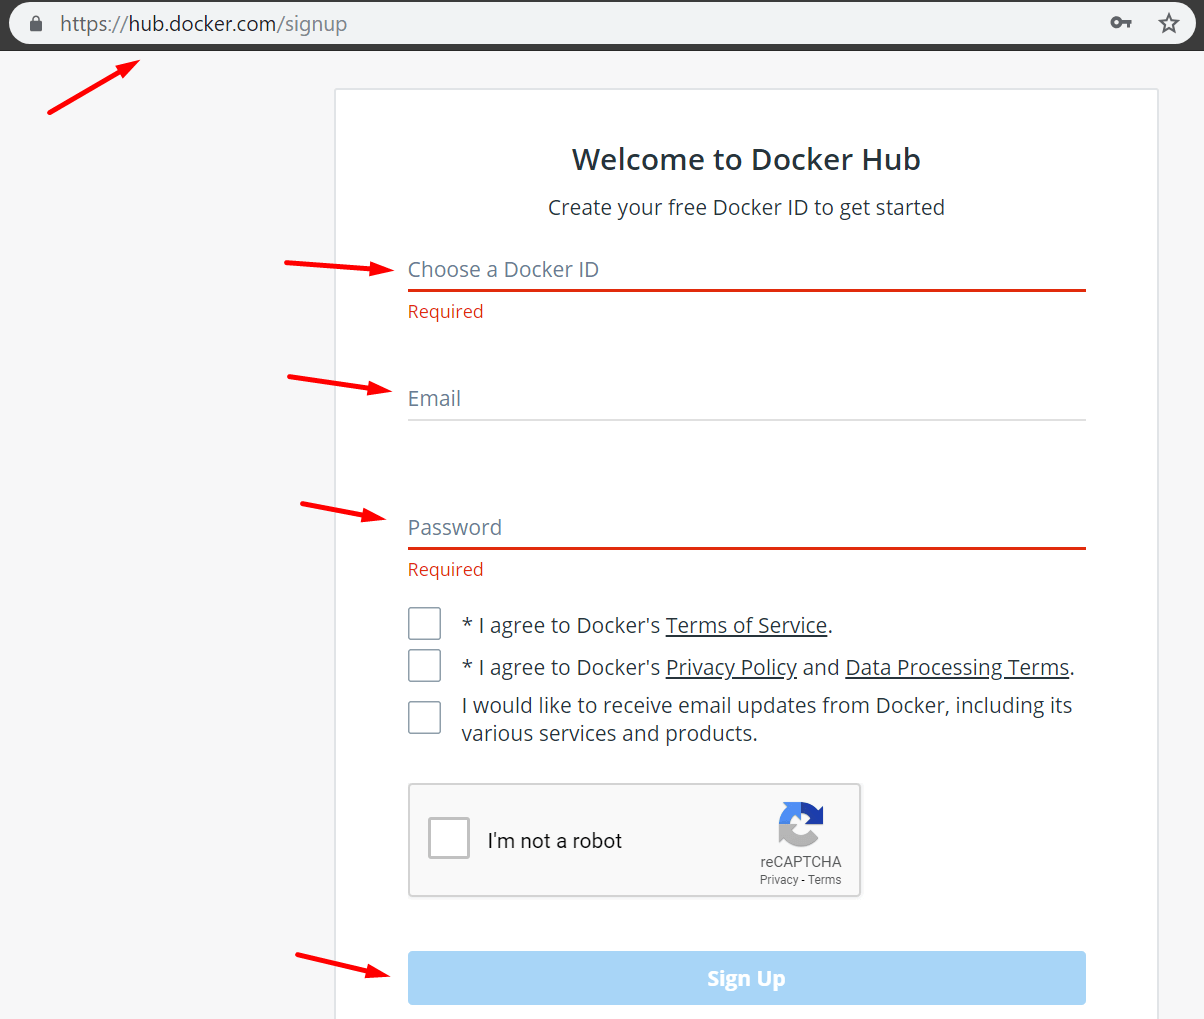
In order to create one, do follow the steps below along with the picture below:
- Step 1 = Go to https://hub.docker.com/signup
- Step 2 = Choose a docker ID
- Step 3 = Specify your working email address
- Step 4 = Provide a secure password
- Step 5 = Read their terms and then decide whether you agree to them or not
- Step 6 = Click on the “Sign Up” button

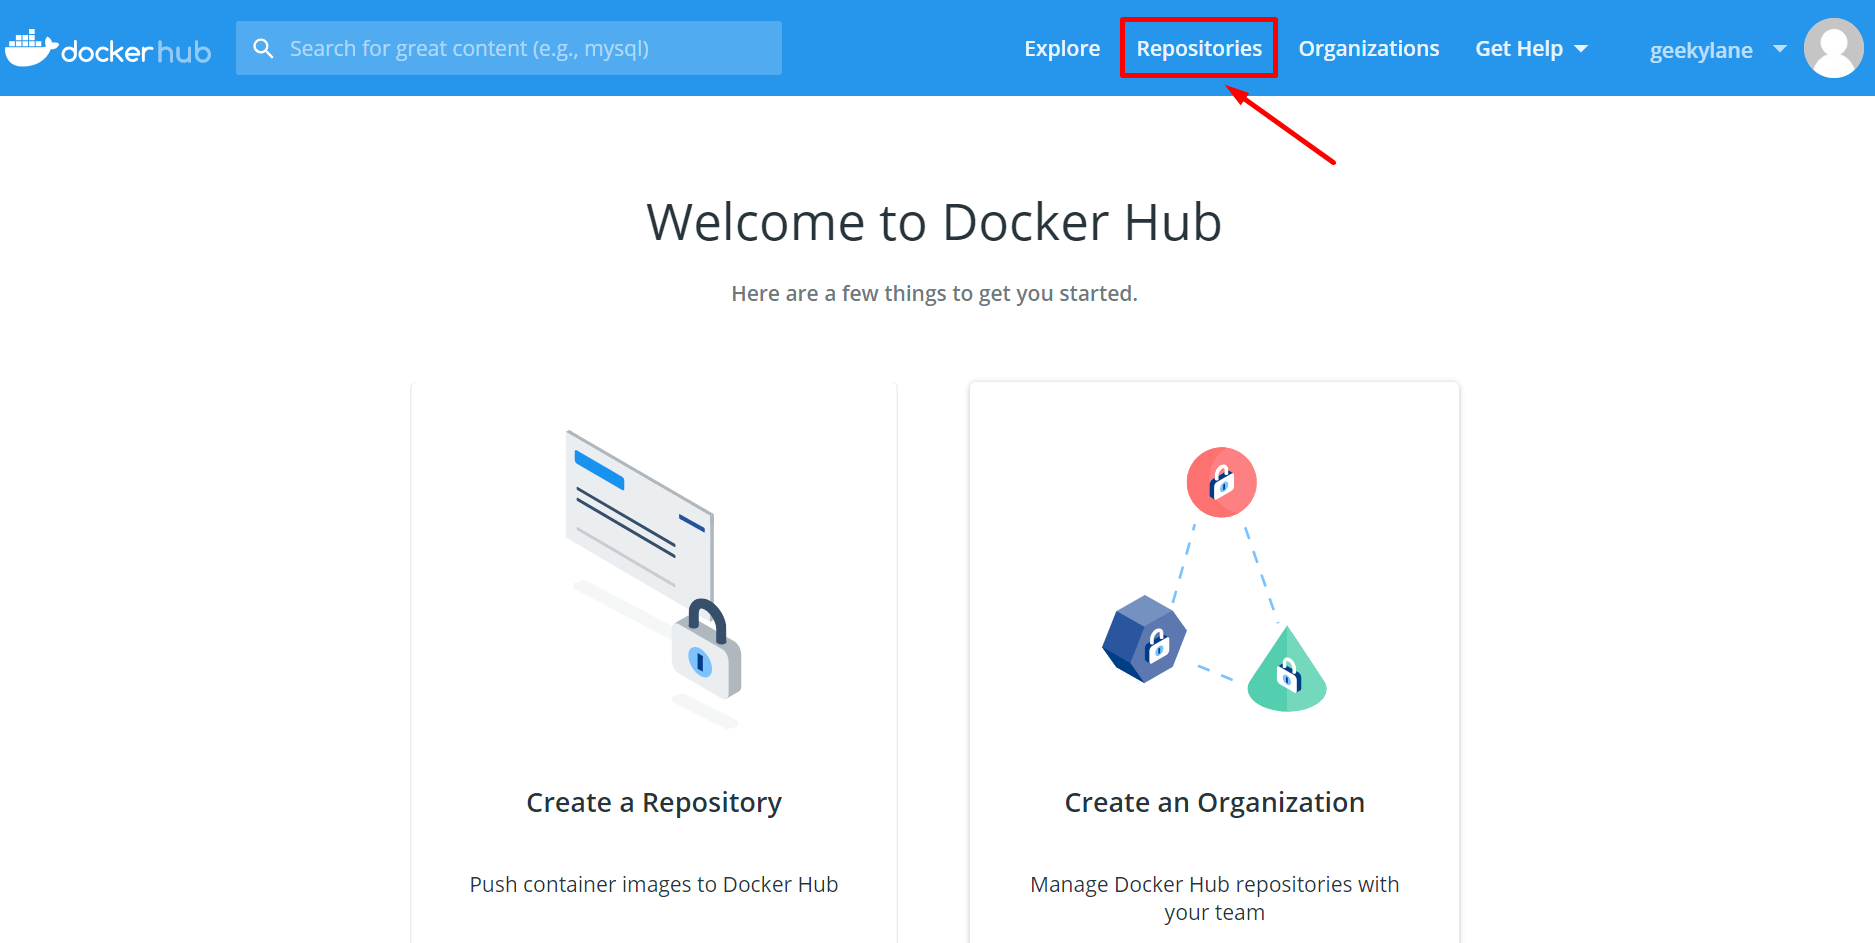
After you done with the account creation, it is now time to explore the “dashboard“. From the picture shown below, you can see that there is a “repositories” section and we need focus on that for now.

As shown below, after going to the “repositories” section we can see that there are several things available:
- geekylane = It is our docker ID
- Create Repository = By clicking it, you can create an repository in GUI mode

Note: In this post, we are only going to create the repositories via command line.
Docker Login
First of all, we need to login to hub.docker.com using our credentials via command line or terminal.
See the picture below, with the command “sudo docker login” we are prompted to provide a “username” and its “password“, by providing that we see a message having something like “succeeded” in it.

sudo docker login
Tag a docker image
Now, before going further, we need to learn “how to tag docker image“. As shown in the picture below, simply by executing the command in the photo we are able to give a tag to any image specified.

sudo docker image tag alpine-elinks-installed geekylane/alpine-elinks-installed:1.0
- sudo = the specified command is going to run as a root user
- docker = name of the command
- image = context to the command
- tag = flag being provided to the image
- alpine-elinks-installed = to which image we want to add the tag to
- geekylane = docker username
- alpine-elinks-installed = again the name of the image
- 1.0 = this the tag, it can be anything (but recommended to use 1.0, 1.1, 1.2 ……)
Now that we have given tag to our image, it is time to cross check that, and following command’s output is showing that the image has been tagged successfully.

sudo docker image ls
Push docker image
After successfully logging into our docker account, we can simply push the image to our repository specified with tag name as shown below.

sudo docker image push geekylane/alpine-elinks-installed:1.0
- sudo = run the command as root user
- docker = name of the command
- image = giving context to the command
- push = flag to the command, to push the image
- geekylane = username of docker account
- alpine-elinks-installed:1.0 = the name of the image to be pushed with the
tag name
To cross check we can go the hub.docker.com and in dashboard we can see that under the name of our ID, “alpine-elinks-installed” which is our pushed image is present.

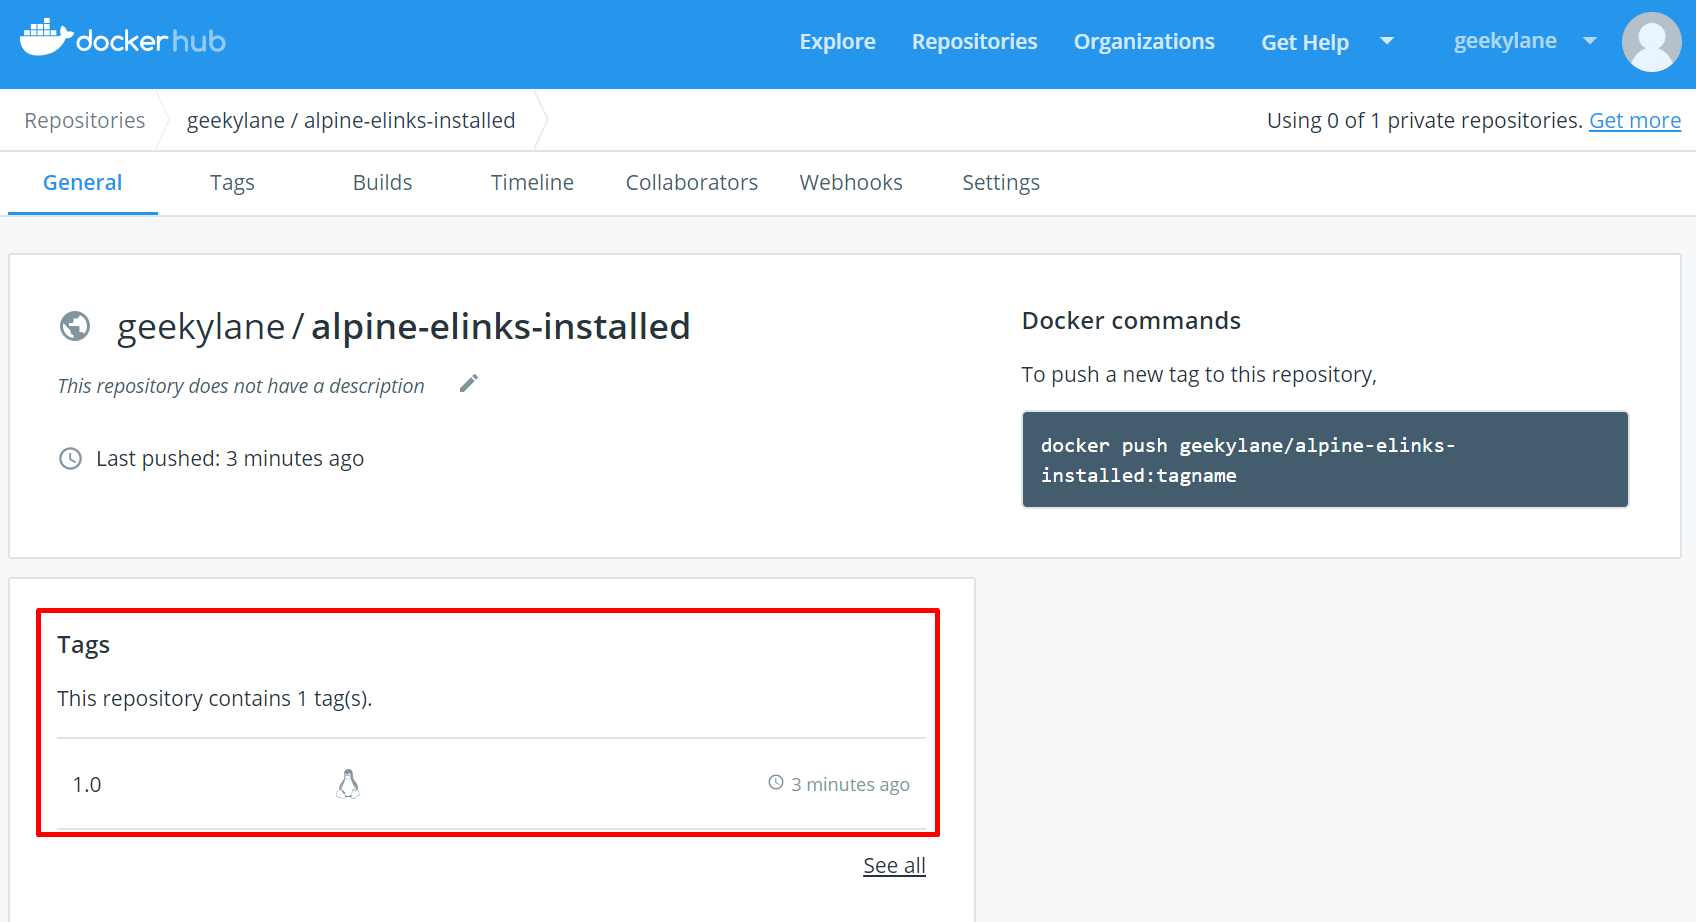
By clicking on the name of the repository shown above, we are able to see something like shown below, from there it is seen that our specified tag which is “1.0” is also mentioned there, which in turn in easy tracking of images with same name.

Testing
Now that we have knowledge about pushing images to our docker’s repository or to our docker account.
It is time to check that uploaded/pushed image by pulling it on local system and testing it by running it.
Before that, check that whether we are currently having any images or not. In our case, no images are available at the moment in our local repository.

sudo docker image ls
In order to run our uploaded image, we need to provide the full path to the image on the docker’s server, which is “geekylane/alpine-elinks-installed:1.0“. It can be anything in case of yours.

sudo docker container run -i -t geekylane/alpine-elinks-installed:1.0
The above command is firstly going to check whether that image is currently present in the local repository or not, and if the image is not present locally then it is going to pull the image from the server with the help of path to the
As we know, that our custom image is having “elinks” installed in it, so the below picture shows it use by accessing the “google.com”.

elinks google.com
From below, we can see that our newly created container from our custom image from docker hub is running properly.

