
Post Installation Settings
There are always a few things which need to be set in order to make the best out of a particular thing, and the same applies to centos 7. So, in order to do some
Note: Before going next, make sure you have installed your CentOS by following the following post – > CentOS 7 Installation
Step 1: Firewall Settings in CentOS.
There are two ways to manage firewall in CentOS:
- firewalld
- iptables
We are going to use the second method which is “iptables“.
So, in order to set it, we have to run a few commands, but to run those commands we need to first install the “iptables-services” package with the help of “yum” package manager because it is also a part of post installation settings.

sudo yum install -y -q iptables-services
Step 2: Disable the other firewall controlling service, which is “firewalld“.
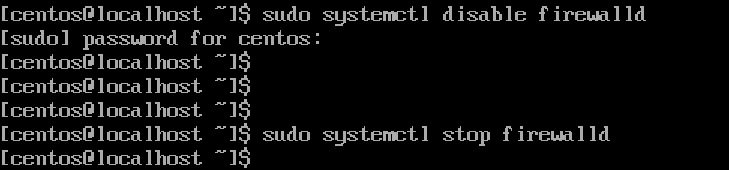
sudo systemctl disable firewalld
Step 3: Flush any existing firewall rules with the help of “iptables” utility.

sudo iptables -F
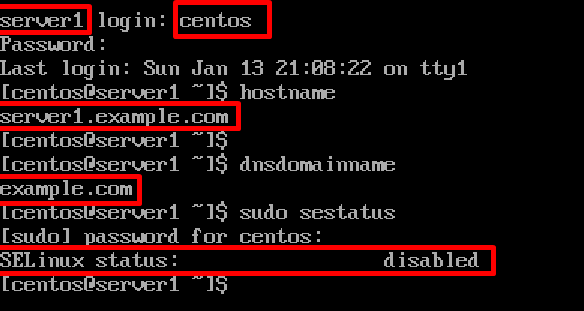
Step 4: Check the active selinux status and disable it, if it is “enabled“.

cat /etc/sysconfig/selinux | grep -v ^#
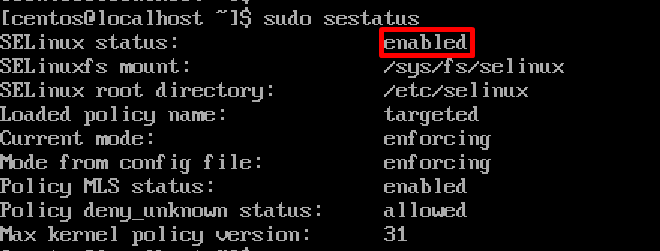
sudo sestatus
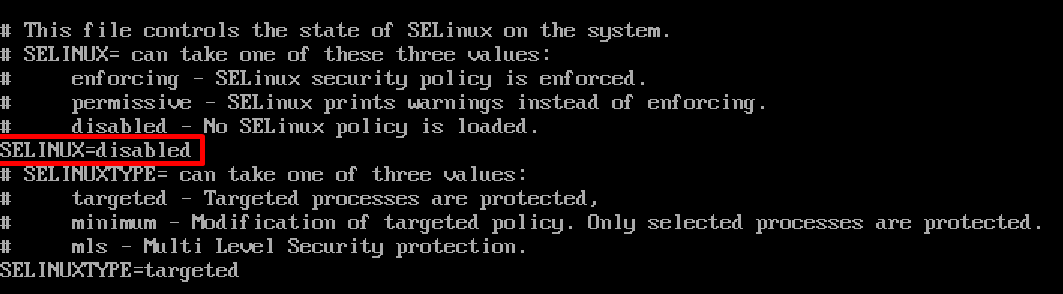
sudo vi /etc/sysconfig/selinux
Step 5: Check “network settings” in CentOS 7 and configure them.

hostname

dnsdomainname
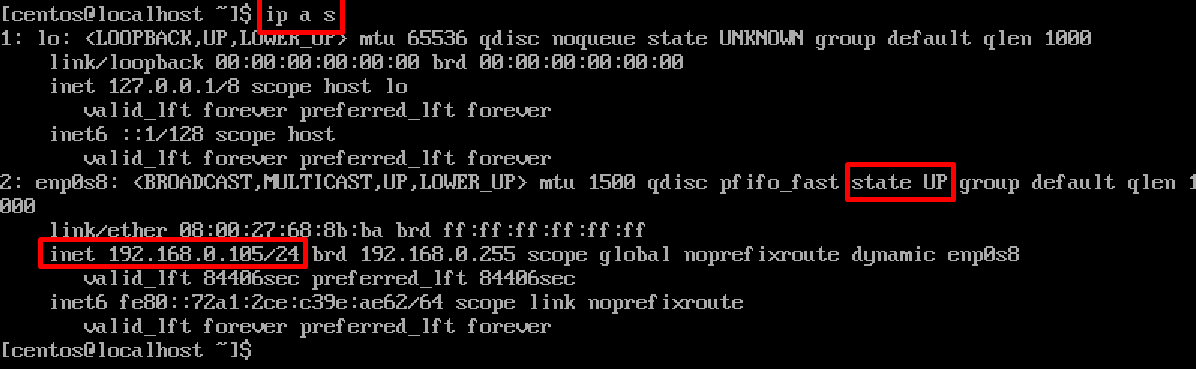
ip a s

sudo hostnamectl set-hostname server1.example.com

cat /etc/hosts
Step 6: Verify all the change as shown below:
Conclusion “centos 7 post installation”
In this post, we have learned about some crucial as well as some important things one should do after installing centos 7.