
Table of Contents
There are times when we need to interact with “AWS Services” using the command line interface of our “Linux or MacOS terminal“, the reason being the CLI is much more powerful and reliable than the user interface of GUI. So, today we are going to learn about “Set-up and configure aws cli” on ubuntu 18.04 lts EC2 Instance.
Note: In order to access the aws services from the CLI, we need to set-up an IAM user with appropriate permissions.
So, before going further, follow -> How to set up IAM on AWS account?
Step 1: Create an IAM user
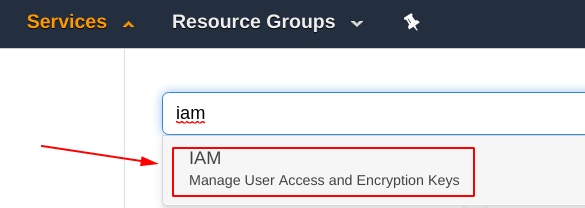
Select Service
From the aws dashboard, search for the “IAM” service as shown below, and select it.
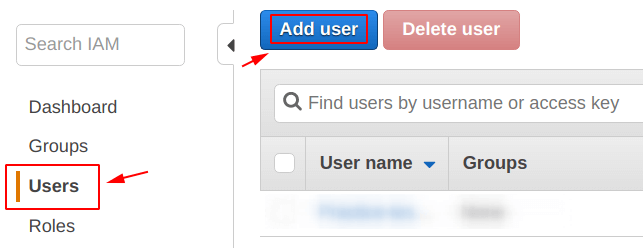
Add User
Now, you will be seeing something like shown below, from there select the “Add user” icon under the “Users“.
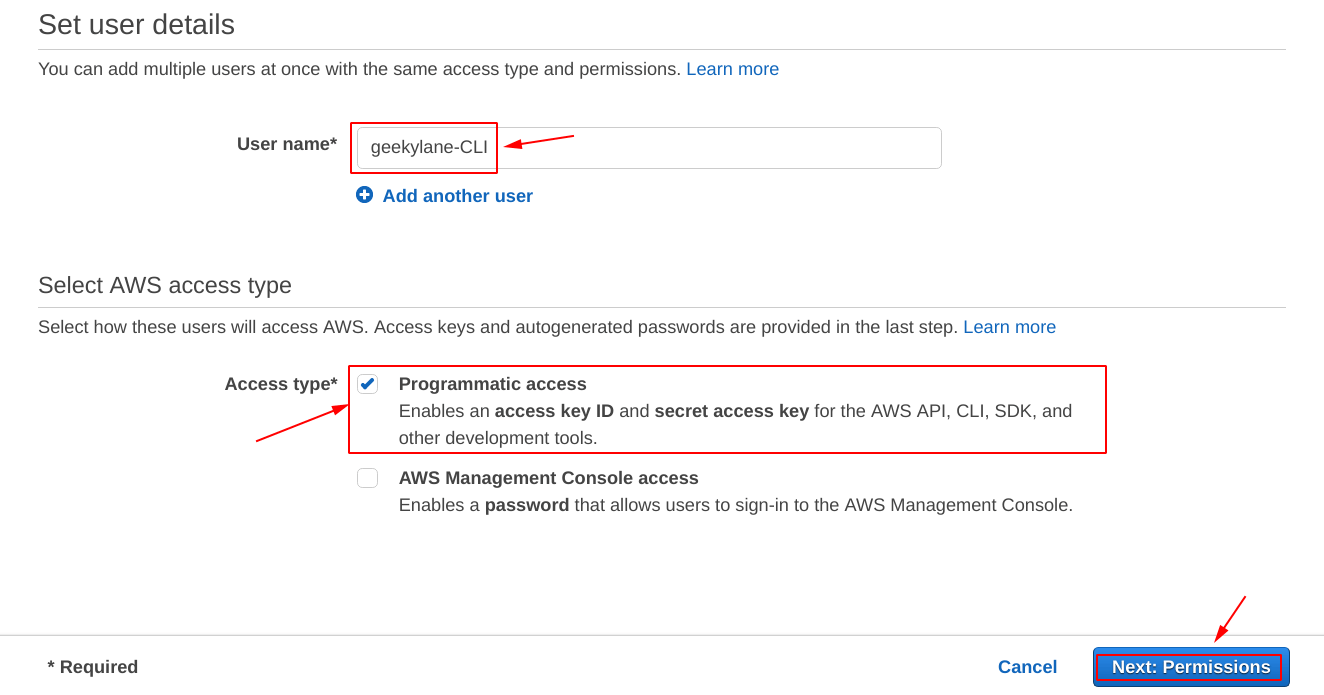
Set User Details
On this screen, provide the details for the IAM user:
- User name = geekylane-CLI
- Access type = Programmatic access
We have only checked the “Programmatic access” because we only want this user to have access for “Command Line Interface“.
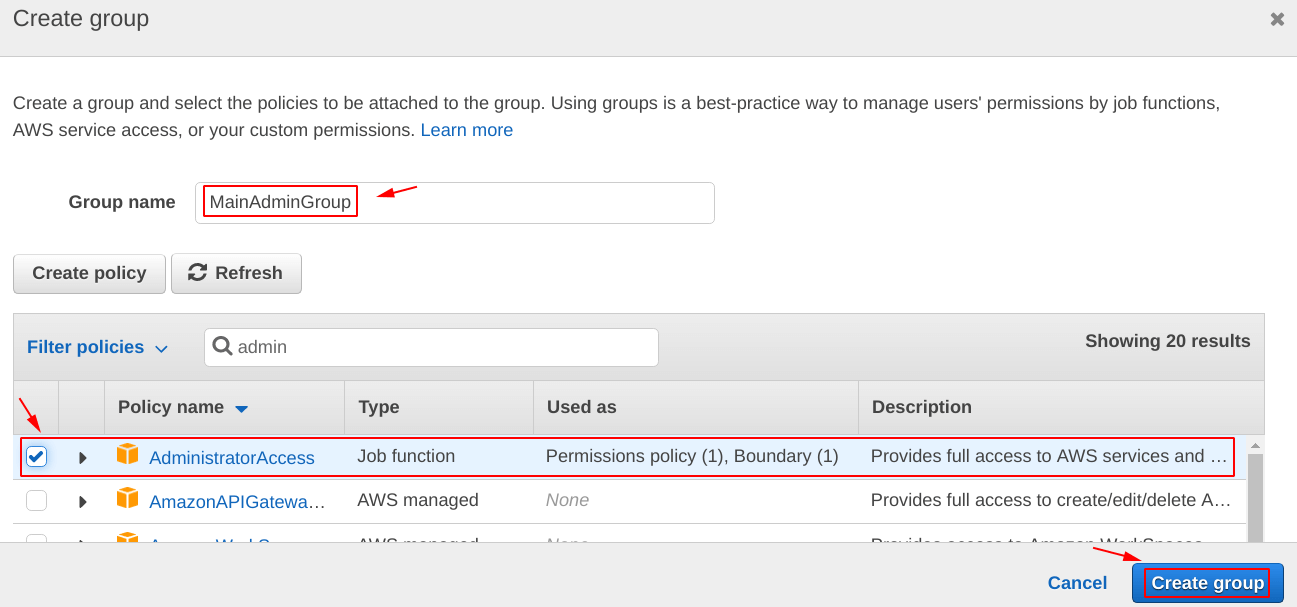
Create a Group
Groups let us define and specify the permissions at once, and then those groups can be directly used for individual users.
So, we have created a group with the name “MainAdminGroup“, as shown below. The group will have the “AdministratorAccess“.
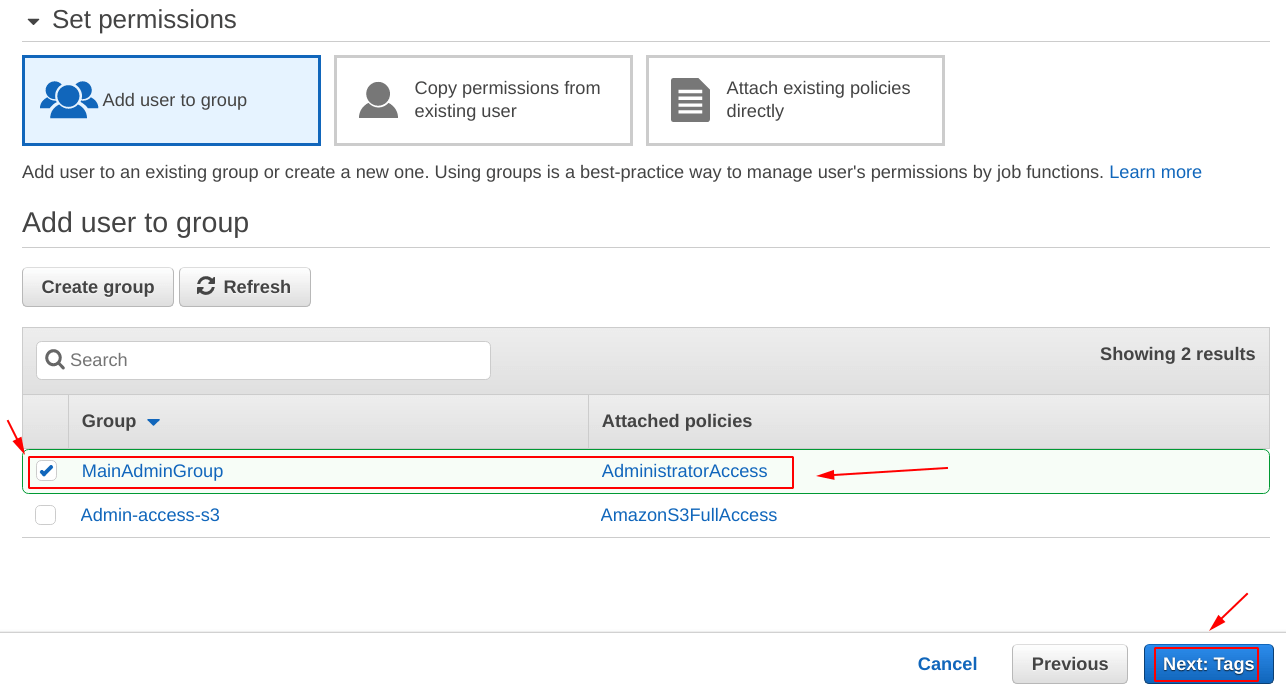
Set Permissions
On this screen, we have to specify to which group we want to add our IAM user “geekylane-CLI“, and because we have just created a group “MainAdminGroup“, we want to add the user to the same group.
Add Tags
Tags work as the metadata for our IAM user, set them as you like.

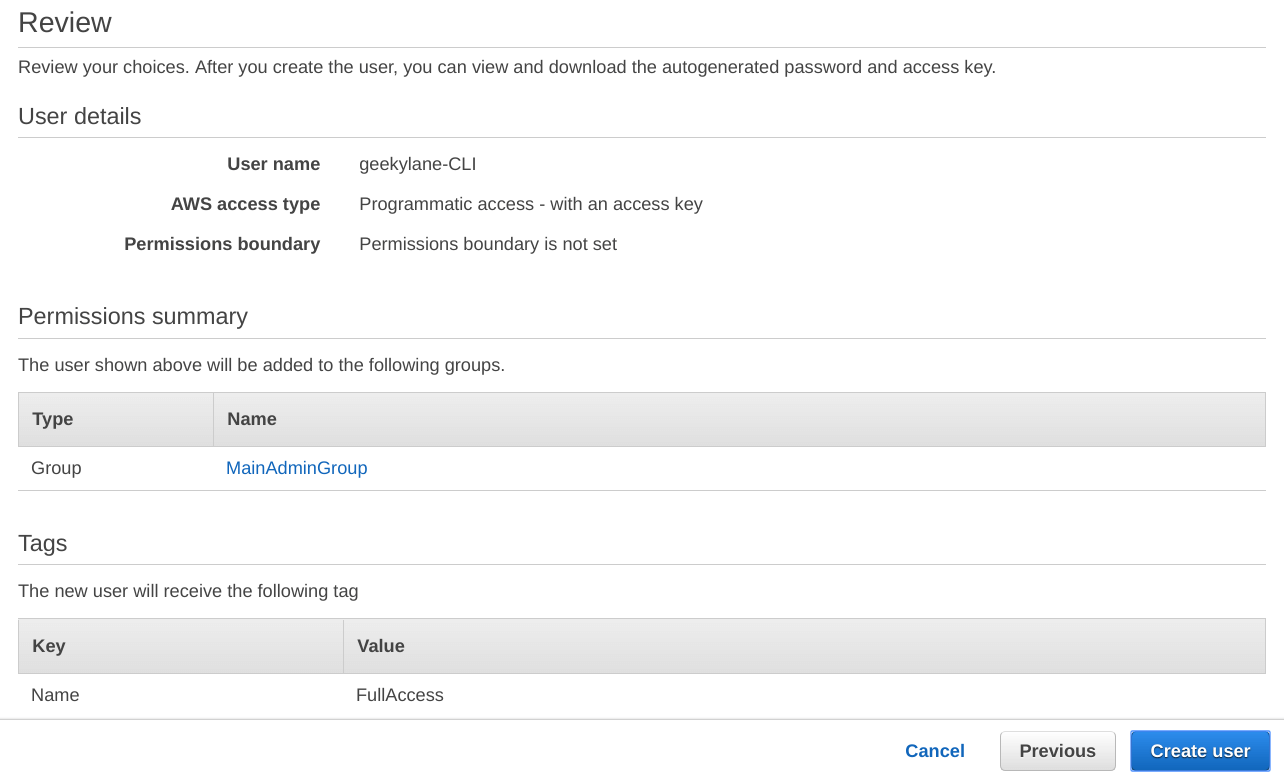
Review
Before hitting on the “Create User” icon, make sure crosscheck all the details entered so far.
Download “credentials.csv”
On this screen, you will be only prompted to download the “credentials.csv” file only once, so make sure you download them to your computer at this point.

We are done with the base step of Set-up and configure aws cli.
Note: Although we can also set-up the “aws cli” on a local computer, for now, we are going to use the “EC2 Instance“.
Step 2: Create an EC2 Instance – configure aws cli
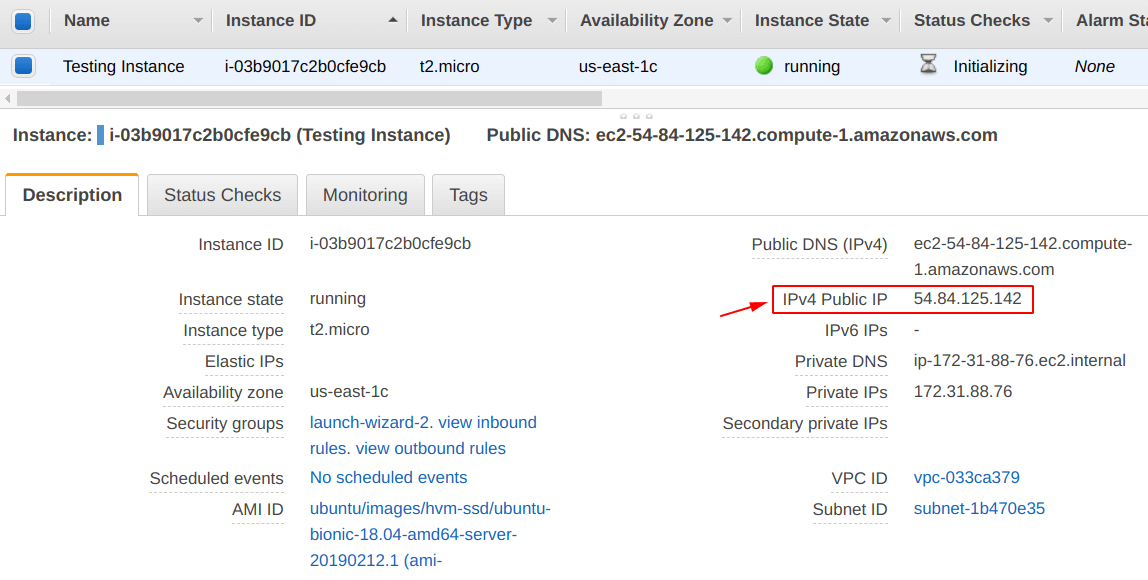
We have created an EC2 Instance “Testing Instance” as can be seen from the picture below.
To learn more about EC2 Instance creation, follow -> Create an instance on AWS (complete guide)
Also, from the screen shown below, make sure you note the “IPv4 Public IP” of your instance.
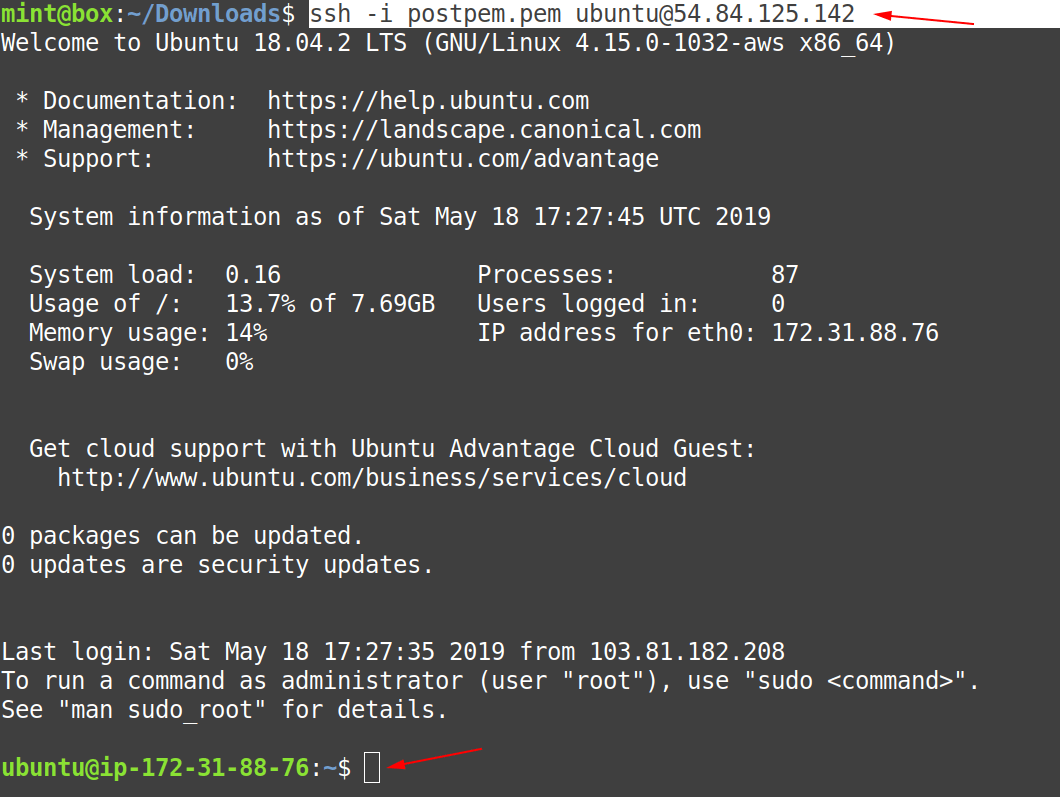
Step 3: Login into the EC2 Instance
Now, we have to login into our “Testing Instance” we just created in the “Step 2“, and we have successfully logged in, to confirm check below.
Step 4: Install “awscli”
As we are using “Ubuntu 18.04 LTS” for our base system, so we have used the following command to install the “awscli” to our system.
$ sudo apt install awscli -y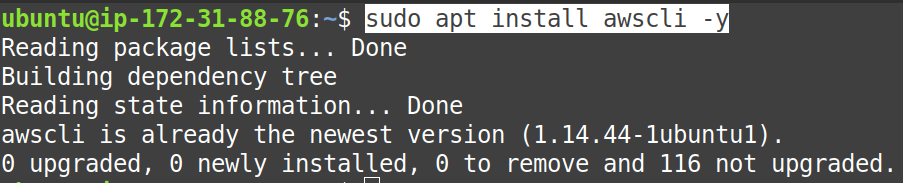
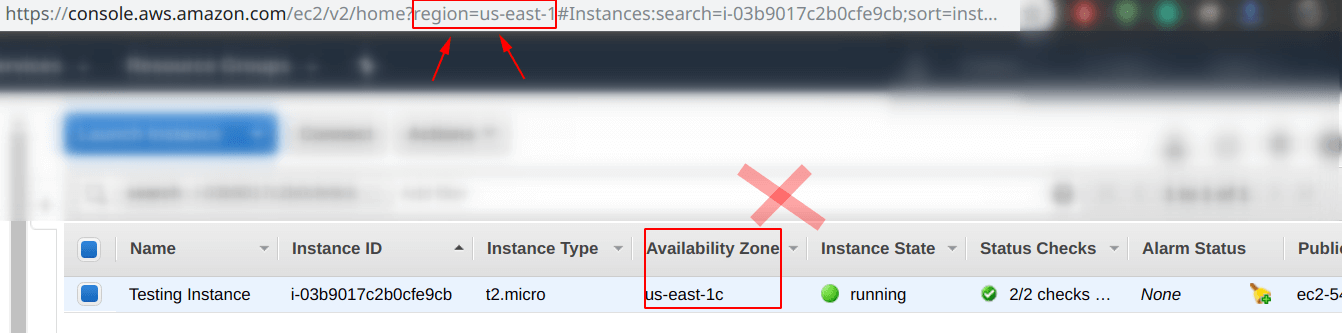
Step 5: Check the “region” & Configure “aws cli”
On this step, first of all know the difference between and availability zone and region of an EC2 Instance.
Question: Difference between “availability zone” and “region“?
Answer: The “region” is what it sounds, whereas the “availability zone” is a part of “region“
So, for setting up “aws cli” we need to specify the “region” of our “EC2 Instance” and not “availability zone“.
As can be seen from the screenshot below, our “Testing Instance” has the “us-east” as the region and “us-east-1c” as the availability zone. So, we are concerned with “us-east” which is the region for it.
Configure “aws cli” on Ubuntu 18.04 LTS
Run the following command in order to start the configuration process.
$ sudo aws configureWe have specified the following things:
- AWS Access Key ID
- AWS Secret Access Key
- Default region name

Till the “Step 5”, you should be able to set-up your “aws cli” perfectly and we are done with Set-up and configure aws cli.
Step 6: Verify the “aws cli”
We are going to list the available S3 buckets we have in our S3 already created using the “aws cli“.
From the picture below, we can confirm that the “aws cli” is working perfectly as it is able to show the available S3 buckets.
To learn more about S3, follow -> How to create an S3 bucket on AWS?
$ sudo aws s3 ls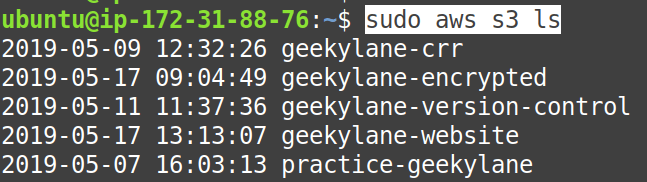
Further, we are also going to create an S3 bucket using the “aws cli“.
Use the following command to create an S3 bucket with the help of “aws cli“:
$ sudo ws s3 mb s3://geekylane-bucket-cli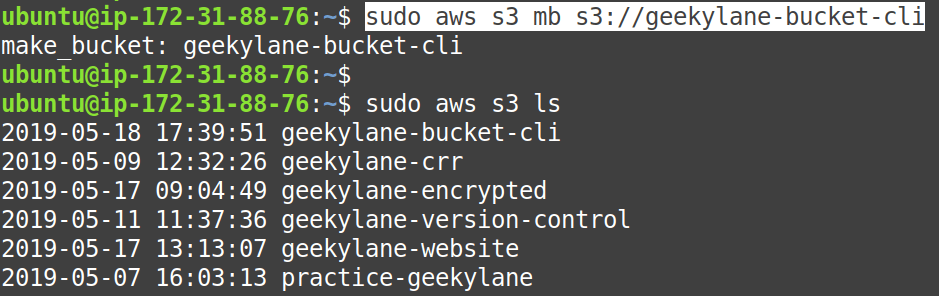
Check this: Understanding Tadalafil: A Comprehensive Guide
More on AWS: