
Table of Contents
There are times when we want to scale-up our existing database, on aws it is known as “Read Replicas“. So today we are going to learn about “Read Replica for an RDS instance“.
First of all, Read Replicas are available for the following databases on aws (as of 2019):
- MySQL
- PostgreSQL
- MariaDB
- Aurora
Note: We will be working with “MySQL” for this post.
Question: What is a Read Replica?
Answer: It allows you to create a “read-only” copy of your database in production.
Points about the Read Replicas on aws RDS instance:
- They are used for “Scaling” and not for “Data Recovery“
- Automatic Backups should be enabled in order to deploy a “Read Replica“
- At most 5 copies can be made using “Read Replica“
- If needed, you can have “Read Replicas of the Read Replicas“
- Every “Read Replica” will have its own unique “End Point“
- They can be “Multi-AZ“
- Can be deployed in different regions
Now that we know enough about them, let us get into the process of setting up Read Replica for an RDS instance.
Before going further, make sure you follow this -> MYSQL Database on Amazon RDS post because upcoming steps can only be performed when we have a running RDS instance, which we learned in that post, this post is in the continuation of that post.
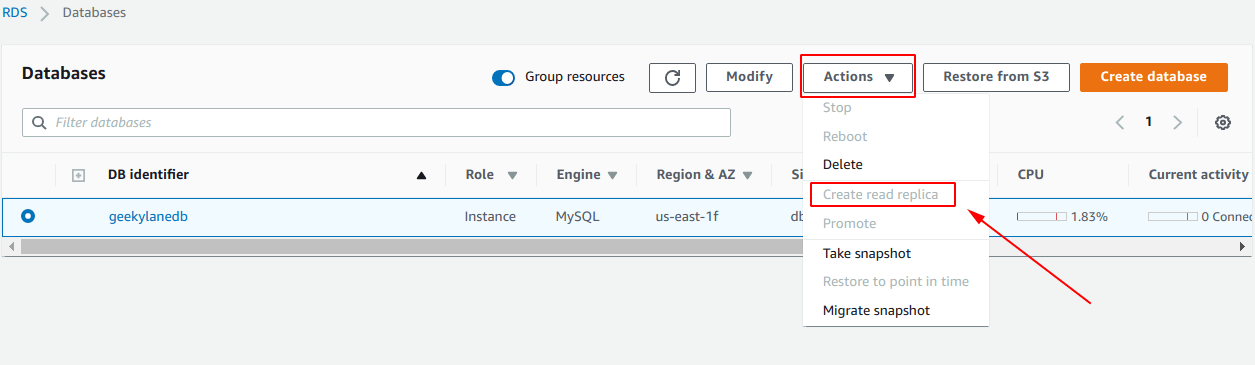
Step 1: See whether the “Create read replica” option is available
From the picture below, we can see that currently, the option is not available to us.
Note: The option is not available, because we have not enabled backups for this RDS instance.
Enable backups for an RDS instance
Select an RDS instance from the “RDS Dashboard” under the “Databases” section, you will be seeing a button labeled as “Modify“, simply click on that for the options, as shown below.

From the screenshot below, you will be seeing something like this, we have specified the backup requirements as needed by us, you have them as you want.
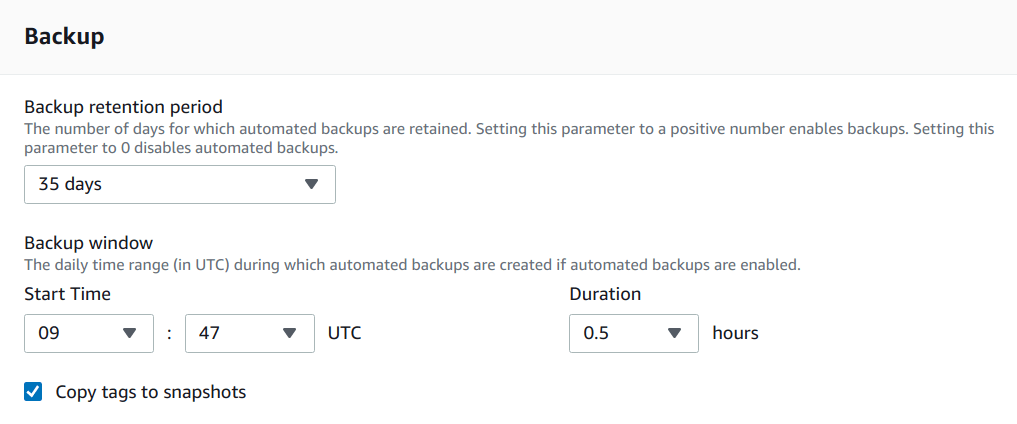
After that, you will be seeing a button as Continue, simply click on that.

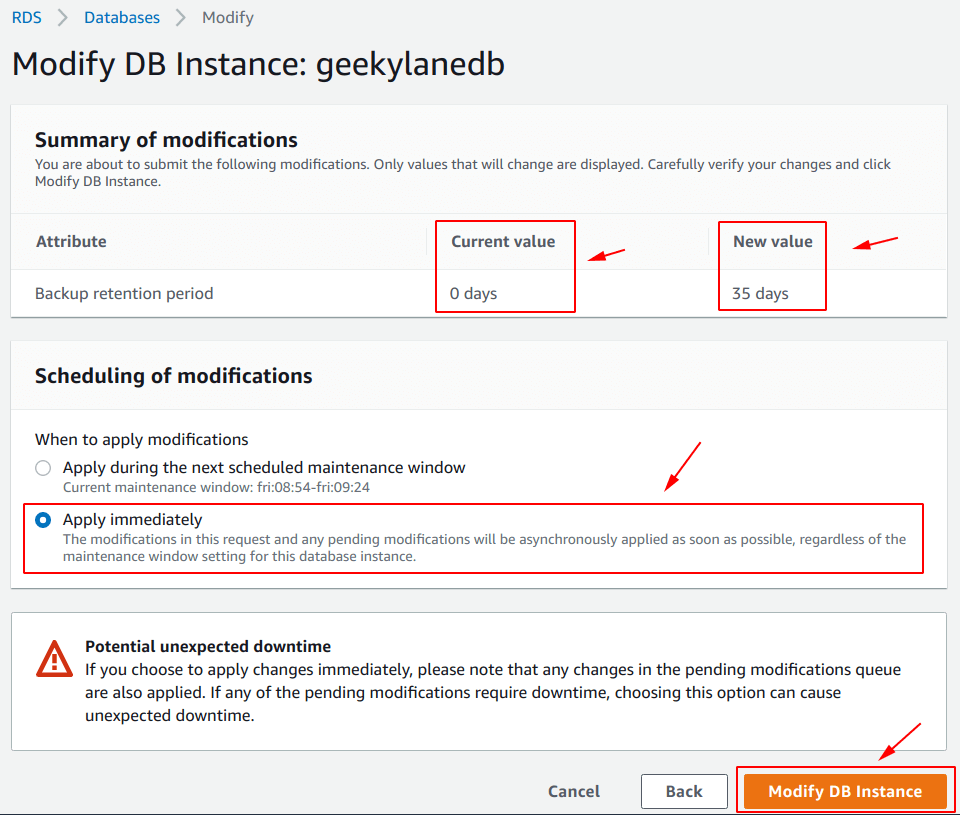
Confirmation of modifications
You will be shown a screen like below, the screen will give you information like “what is the last value of the modified attribute and what will the future value“.
Also, check for “Apply immediately” so that the changes made should affect instantly. After that, simply click on the Modify DB Instance button.
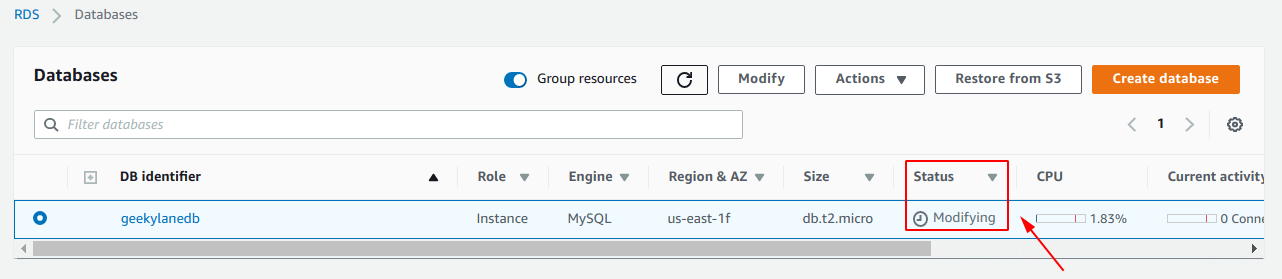
Status = Modifying
After doing the steps for “enabling backups for an RDS instance“, you have to wait for a few minutes to get it to settle, form the image below we can see that the status is currently showing “Modifying“.
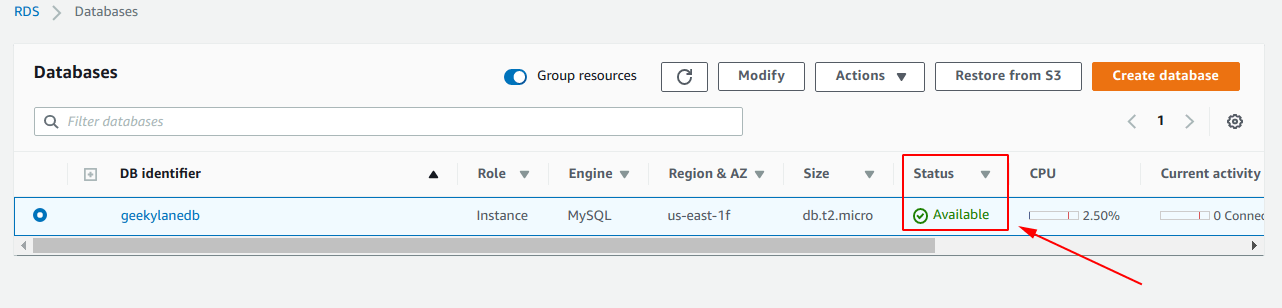
Status = Available
After a few minutes, you will be seeing that the status is now changed to “Available“.
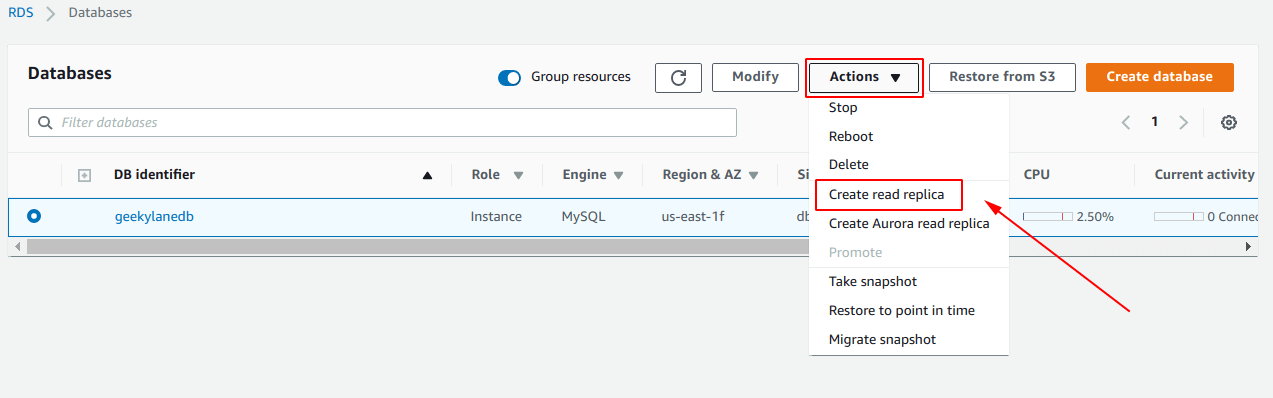
Step 2: Create Read Replica
After successfully doing all the things mentioned above, we can confirm from the picture below that now we have an option as “Create read replica“, it is what we have initially wanted.
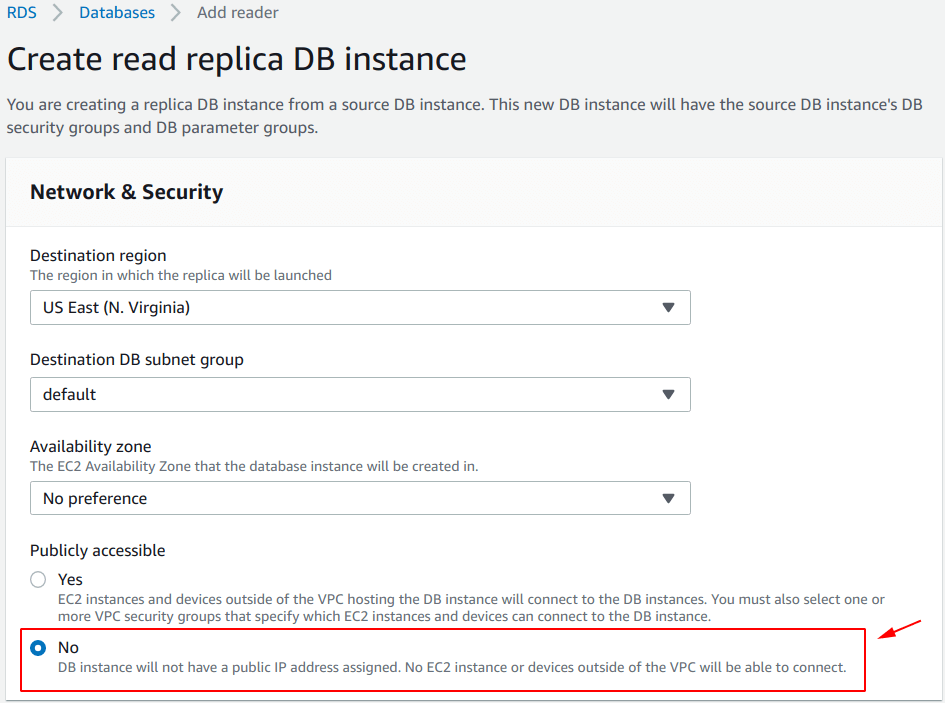
Specifications for the Read Replica DB instance
On this screen, we have to provide details for the Read Replica instance, in our case, we have specified the following details:
Network & Security
- Destination region = US East (N. Virginia)
- Destination DB subnet group = default
- Availability Zone = No preference
- Publicly accessible = No
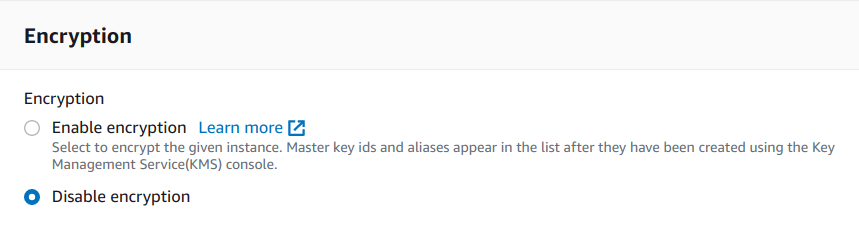
Encryption
As of now, we do not want any kind of encryption for our Read Replica DB instance, so we have selected the “Disable encryption” option.
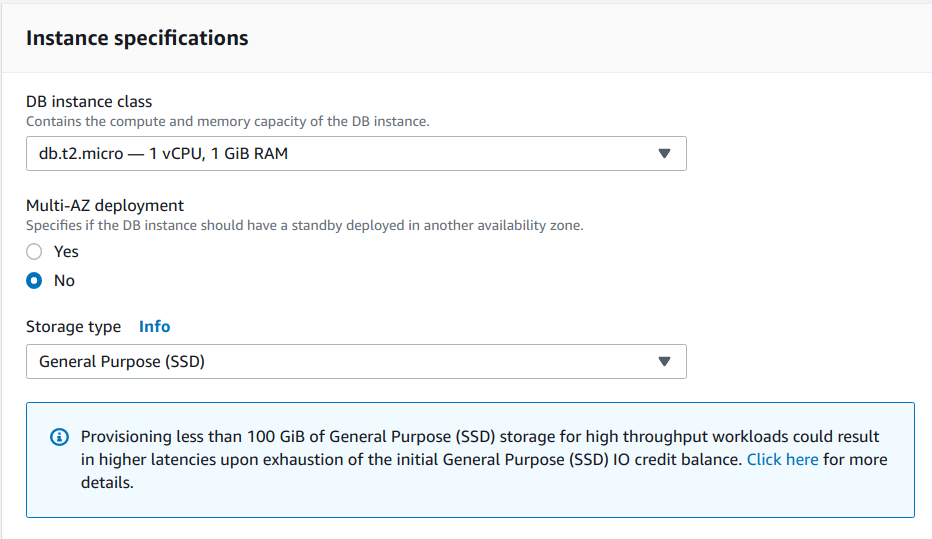
Instance Specifications
We want our Read Replica DB instance to have the following configurations:
- DB instance class = db.t2.micro – 1 vCPU, 1 GiB RAM
- Multi-AZ deployment = No
- Storage type = General Purpose (SSD)
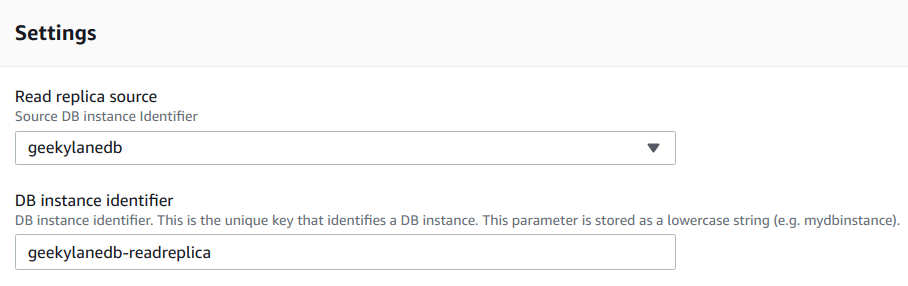
Settings
Also, we have to some other settings as follows:
- Read replica source = geekylanedb
- DB instance identifier = geekylanedb-readreplica
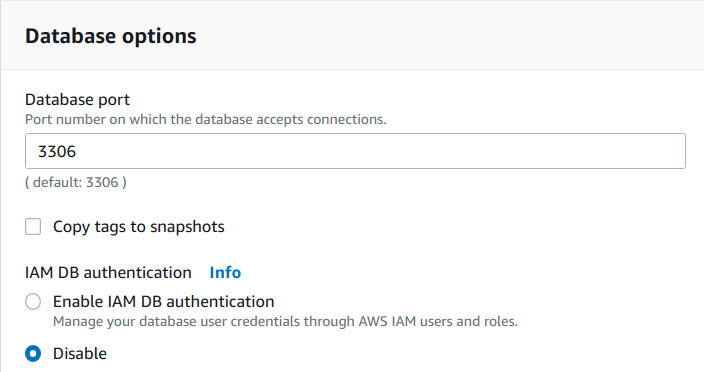
Database Options
Now, we have to provide some details about our database as well:
- Database port = 3306
- IAM DB authentication = Disable
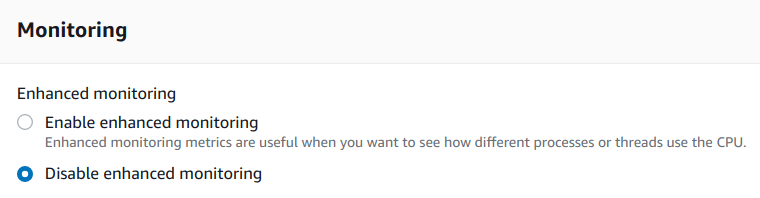
Monitoring
Here, we have to specify whether we want to enable the “Enhanced monitoring” for our “Read Replica DB instance” or not and because we do not want that as of now, so we selected the “Disable enhanced monitoring” option.
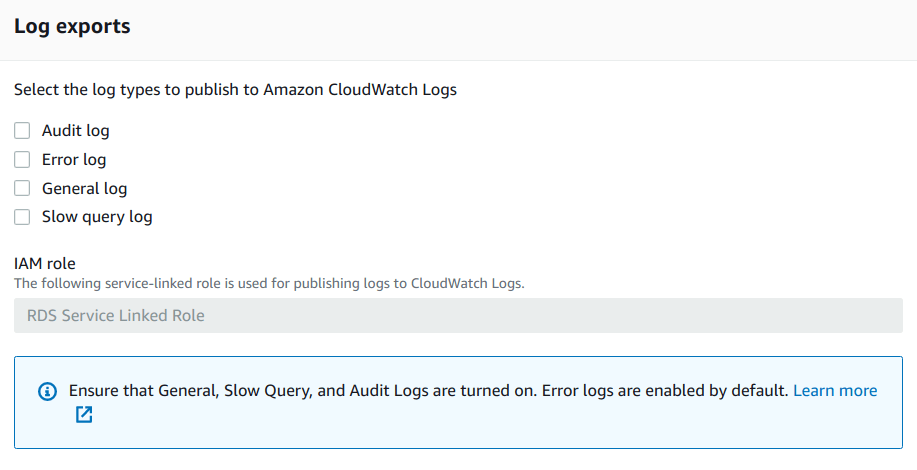
Log Exports
We left it all blank because we do not want any kind of logs to be logged.
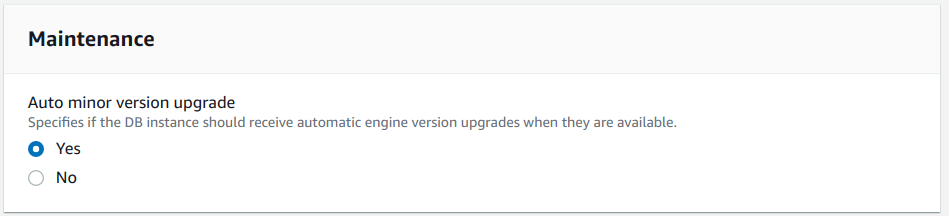
Maintenance – Read Replica of an RDS Instance
Also, we do want the “Auto minor version upgrade” so we selected the “Yes” option.
After doing all the things mentioned above, you will be seeing a button like shown below, simply click on Create read replica button.
It will start the process.

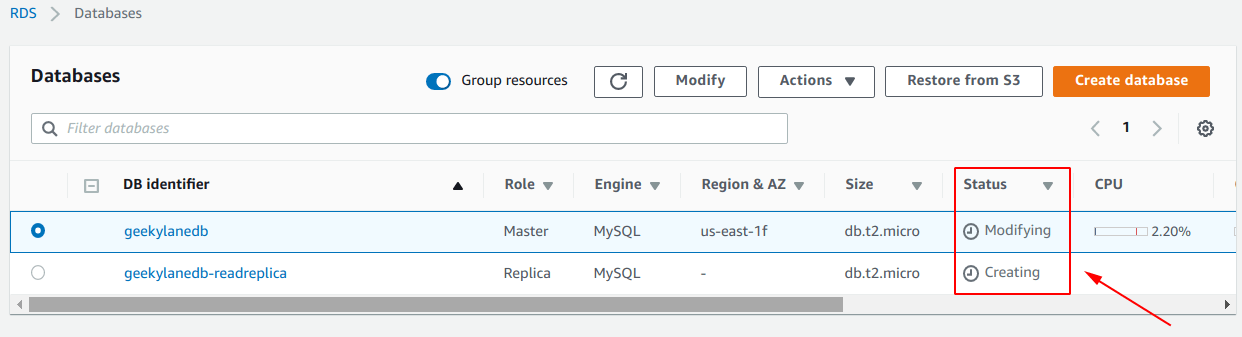
After hitting that, you will be seeing something like shown below, the status of the “geekylanedb-readreplica” instance is now changed to “Creating“. Also, do note that along with the original RDS instance’s status has also changed to “Modifying“.
Note: It will take a few minutes to be completed, so you have to be patient about it.
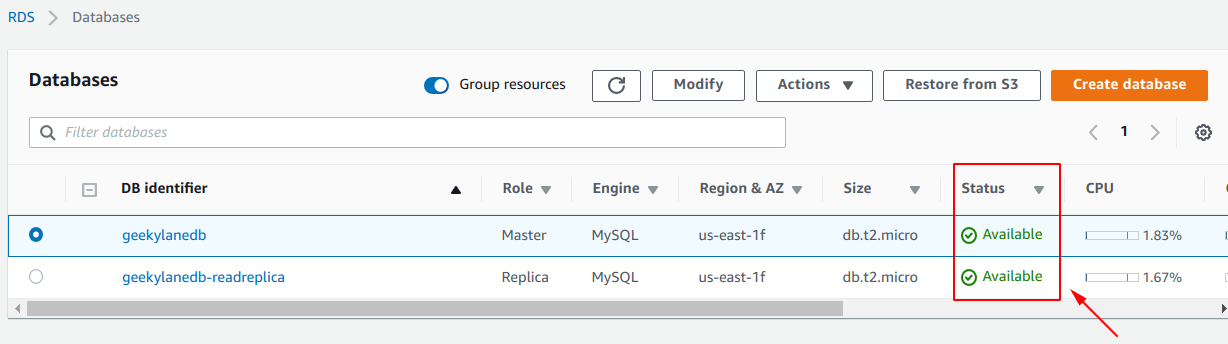
Status = Available again
Finally, from the picture below you can see that both the instances are now available to us.
Note: We can also promote our read replica to be the master, by doing so as shown in the screenshot below.

Step 4: Delete Read Replica DB instance
Now, it is time to delete the Read Replica DB instance we have created in this “Read Replica for an RDS instance” post.
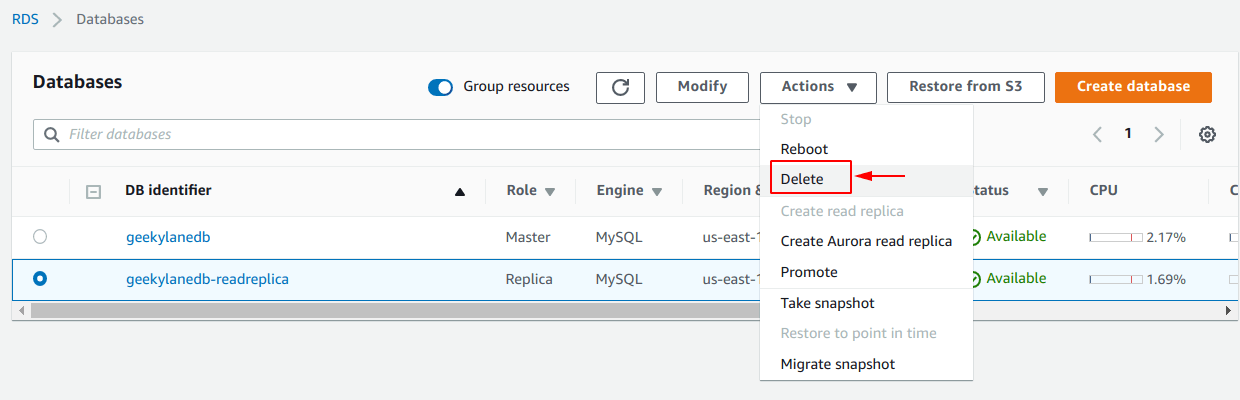
To do the, simply select the instance and go the “Actions” menu as shown below, and select the “Delete” option from there.
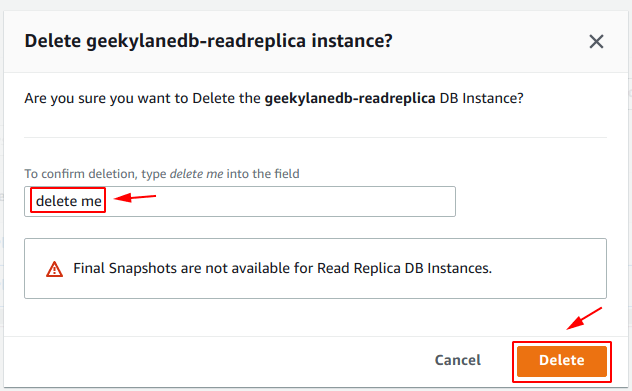
After that, a screen like shown below will get popped up, here you have to type “delete me” and then click on the Delete button, in order to delete the Read Replica DB instance.
Status = Deleting
The status of the instance will get changed to “Deleting“.
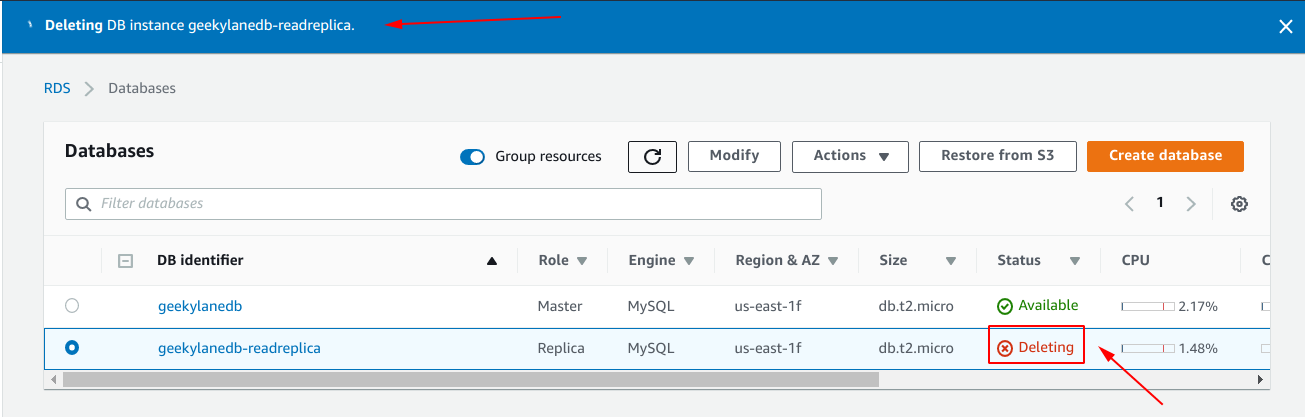
After a few seconds or minutes, you will be seeing something like shown below on your screen.

More on AWS: