One of the important aspects of using “Raspberry Pi” is that one can login to it remotely as well as locally without even connecting a screen/monitor to it. In today’s post we are going to learn about “Raspberry Pi SSH login“.
Before going further make sure you read the following articles first:
- Raspberry Pi headless set up for the first time (Flashing Raspbian OS)
- Giving an IP Address to Raspberry Pi using Ethernet Cable on Windows 10
Now that you have the above mentioned posts, you are goof to go with the flow.
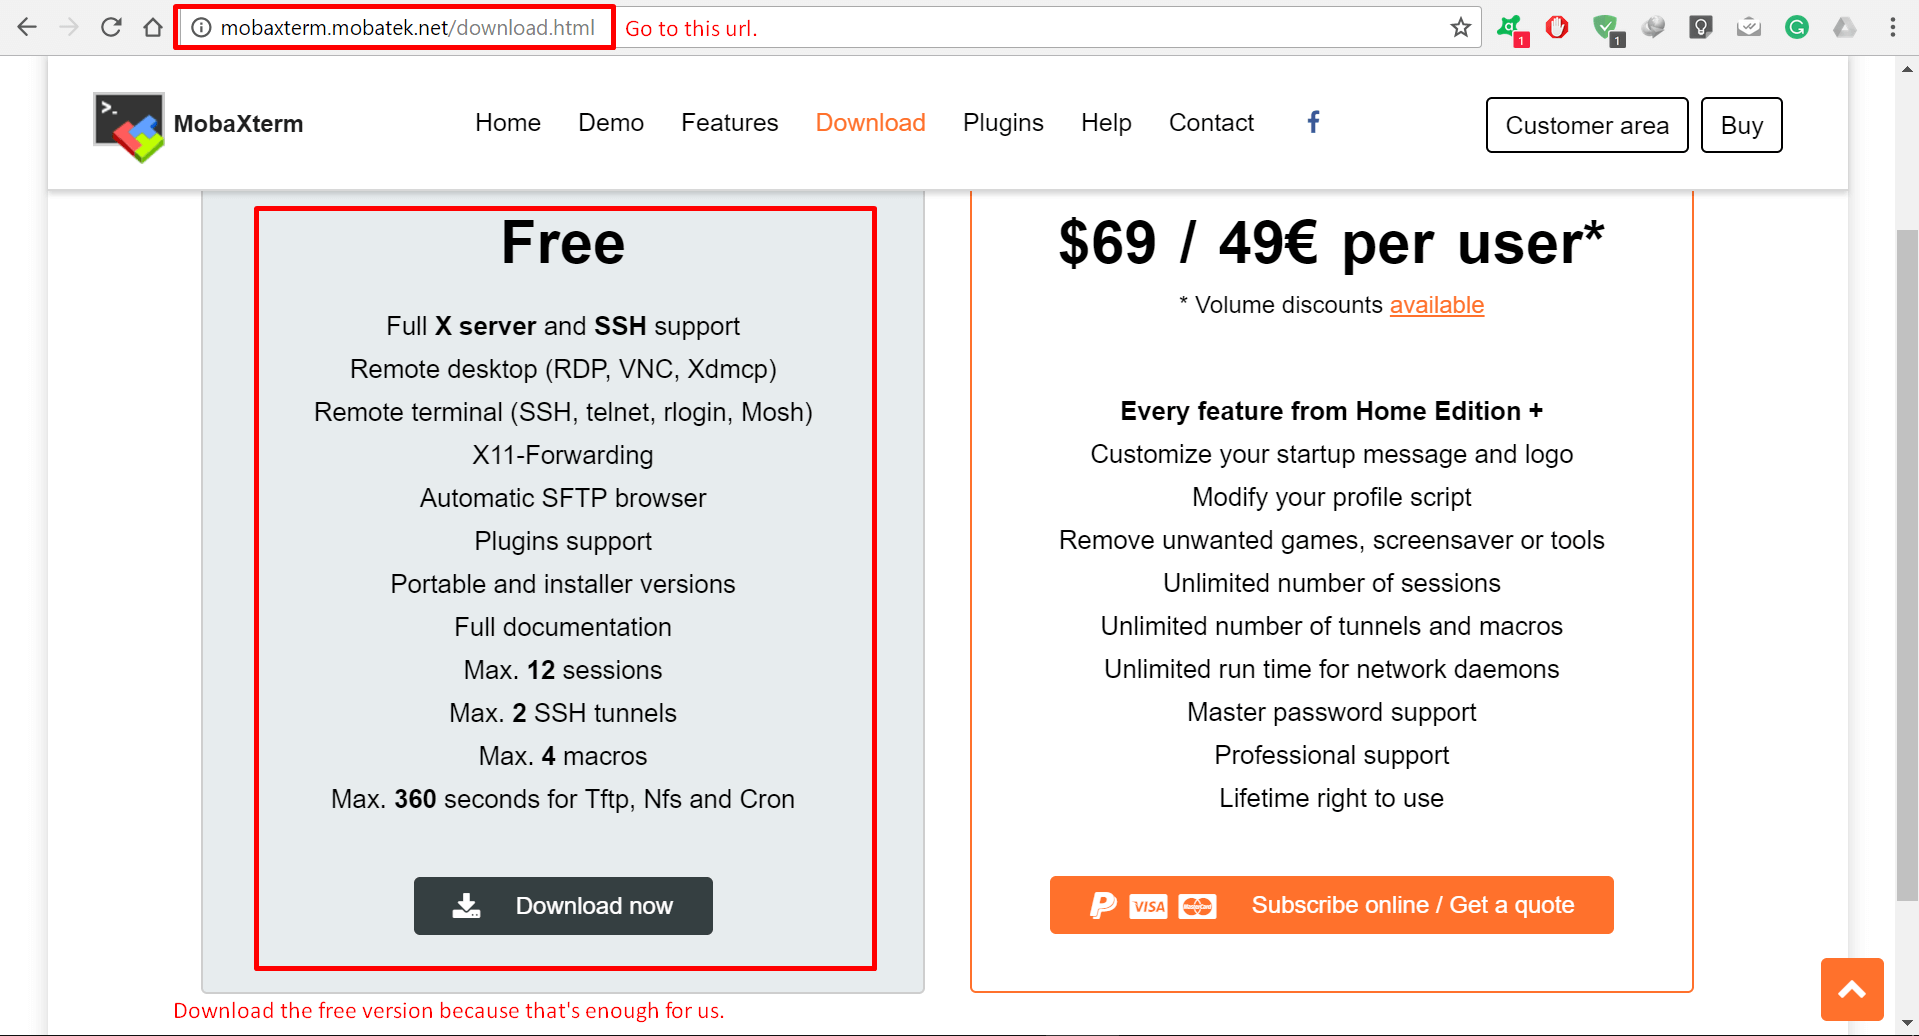
Step 1: First of all, if you are on windows then you have to download the “SSH client“. In our case, we are using “MobaXterm“, go to this URL and download the free version as shown below.
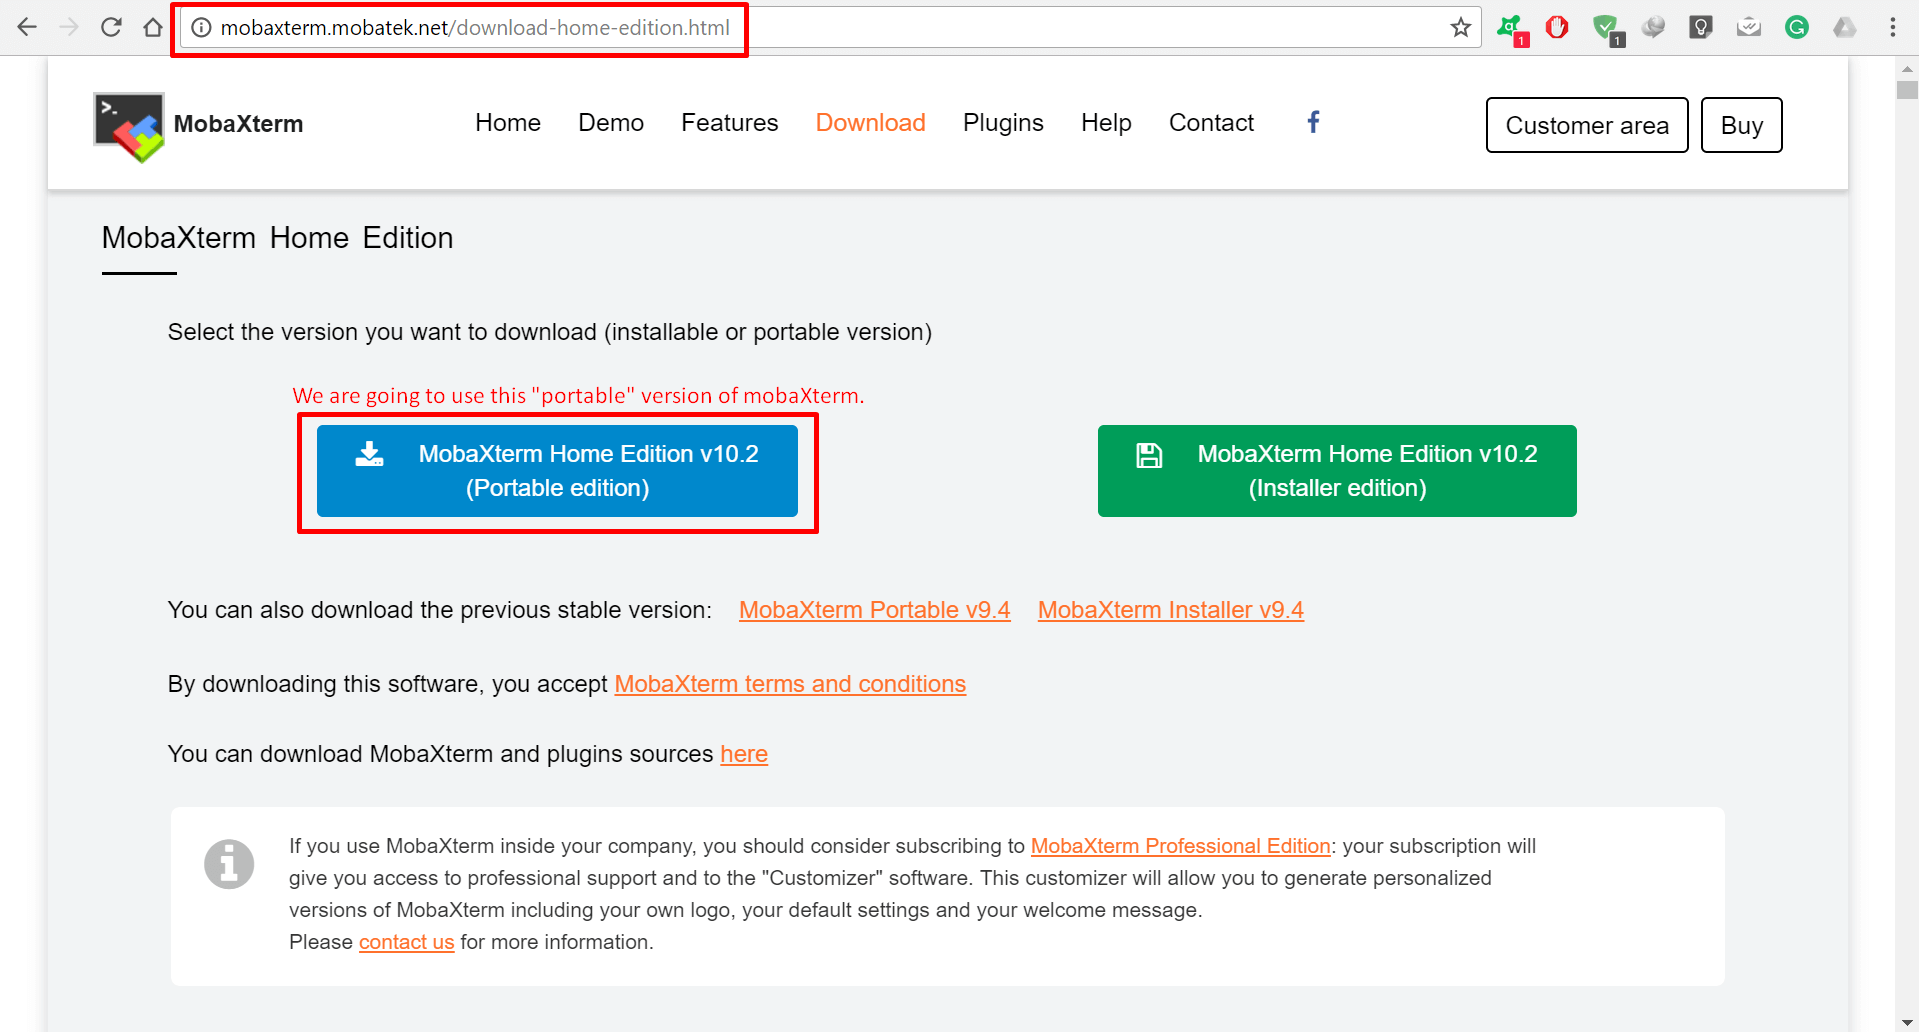
Step 2: In our case, we are using the “Portable Version” of it.
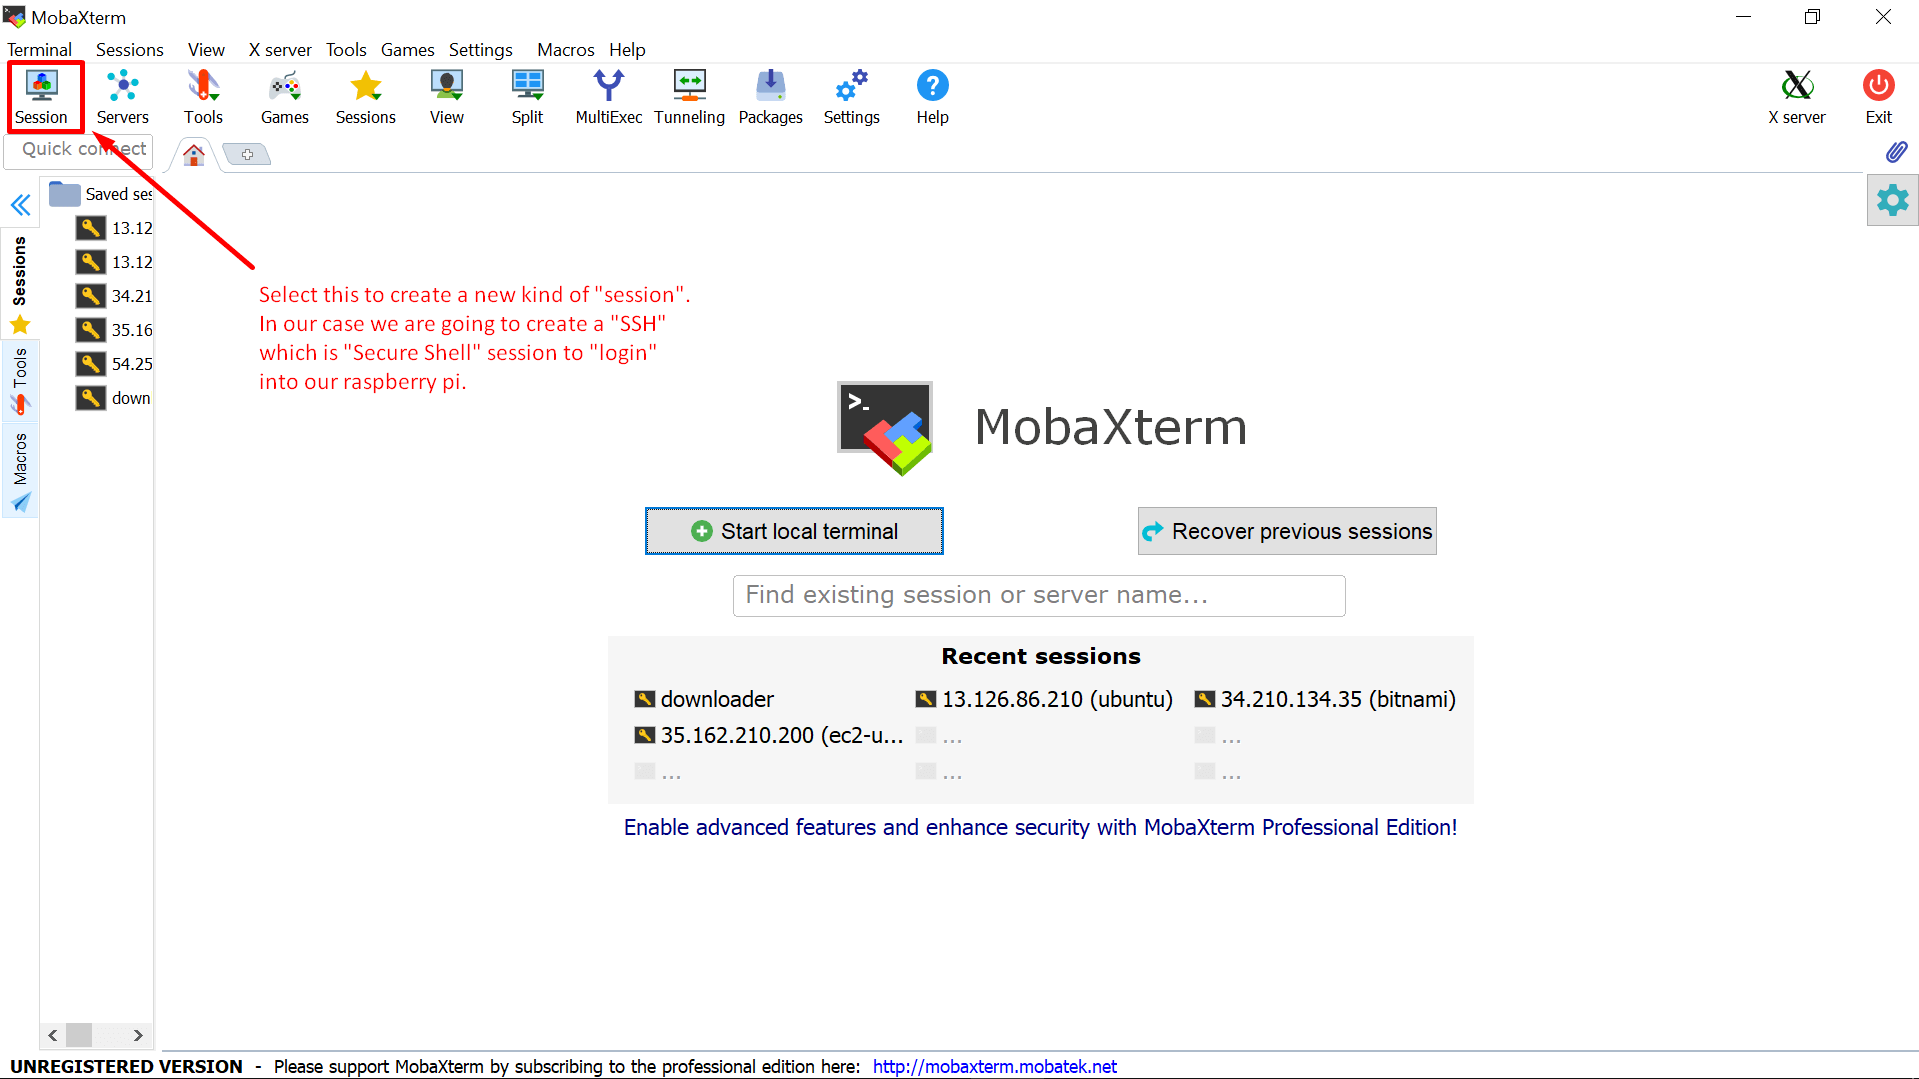
Step 3: Now after the software has been download, “extract it” and “open it“. You will be seeing something as shown in the picture below. From this screen, select the “Session” tab.
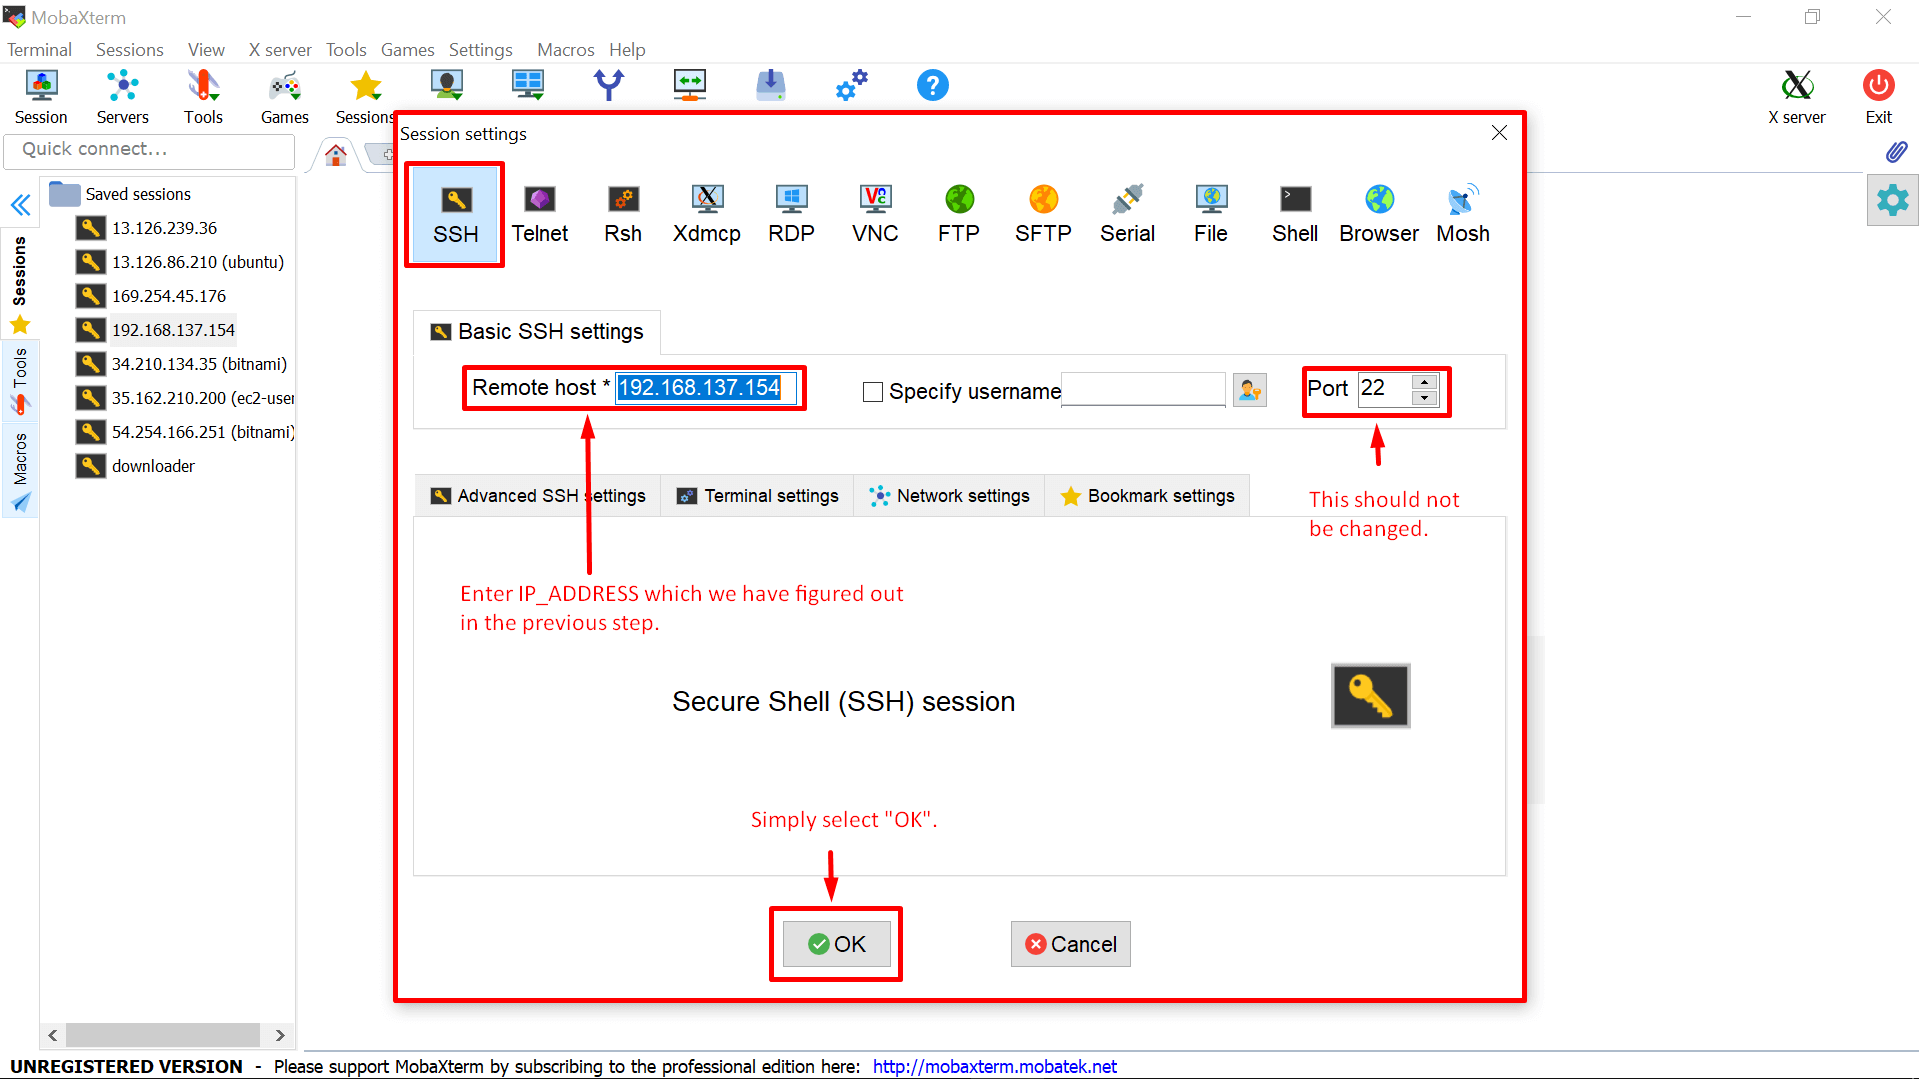
Step 4: This is important, make sure you know “How to give IP Address to Raspberry Pi“, after that you can do as shown below, just replace “192.168.137.154” with the IP Address of your Pi.
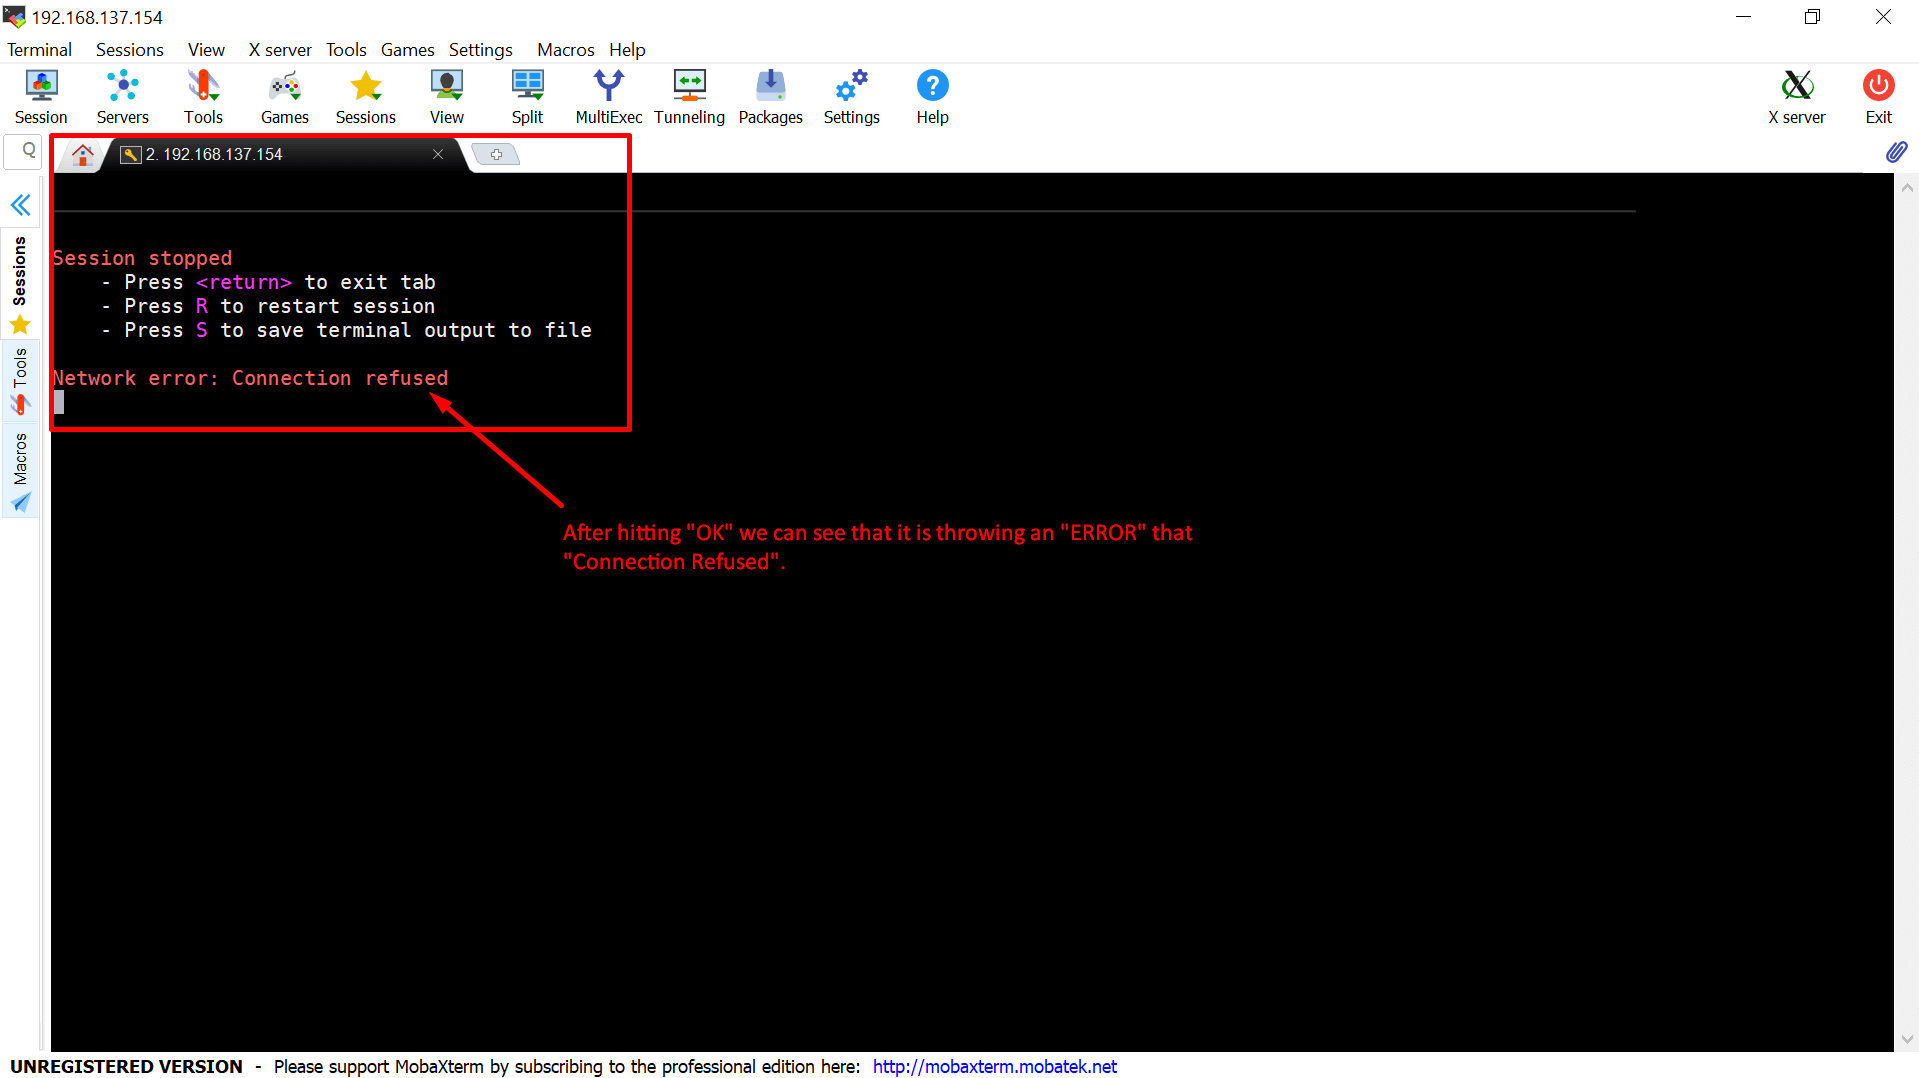
Step 5: After we “hit enter“, we can see from the screenshot below, the SSH login is failed.
Question: Why is it happening?
Answer: In order to login into the Raspberry Pi we have to enable the SSH on it, by creating an “SSH” file in its “
Note: Before going to the
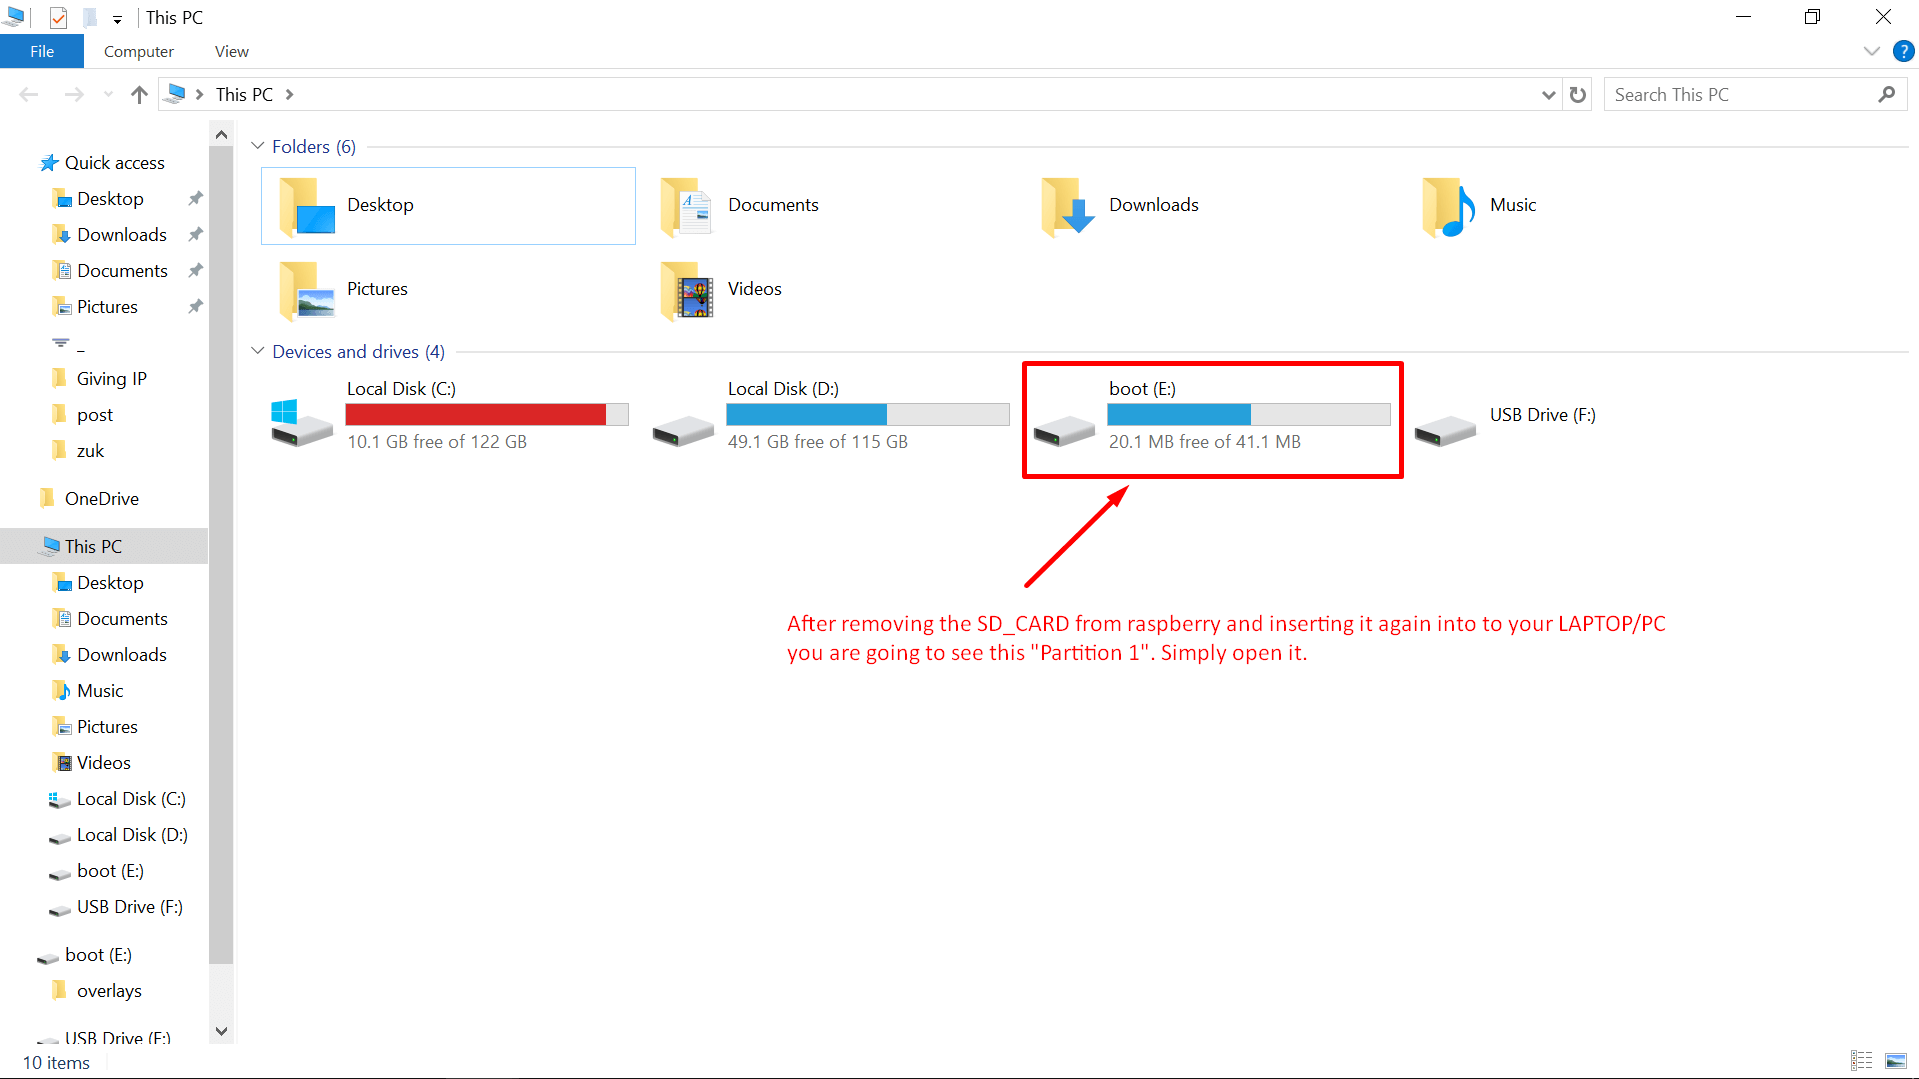
next step, remove the memory card from your Raspberry Pi and plug it into the laptop or computer you own.
Step 6: From the picture below, you can see that there is a “BOOT Partition” and this in particular is our matter of interest.
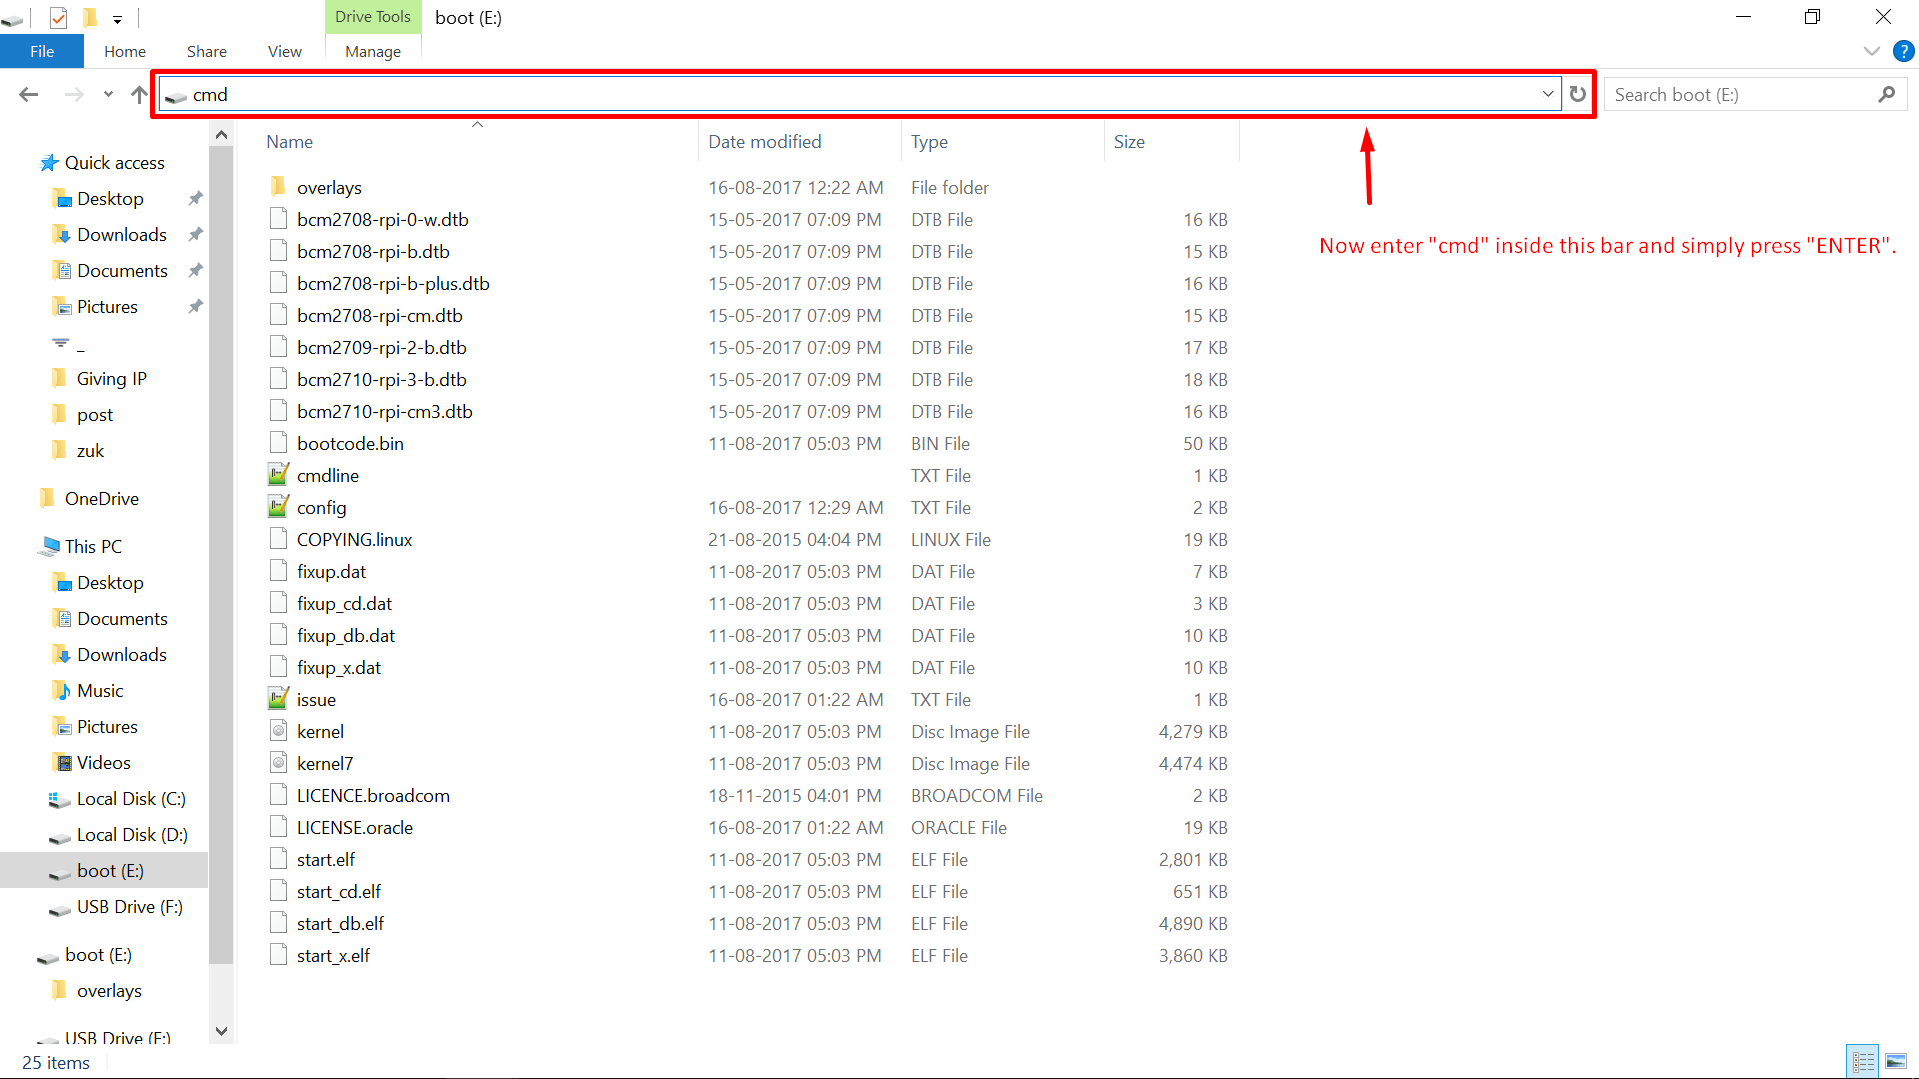
Step 7: Open the “BOOT Partition” and type the “cmd” in the directory navigation in windows as shown below, and then “hit enter“.
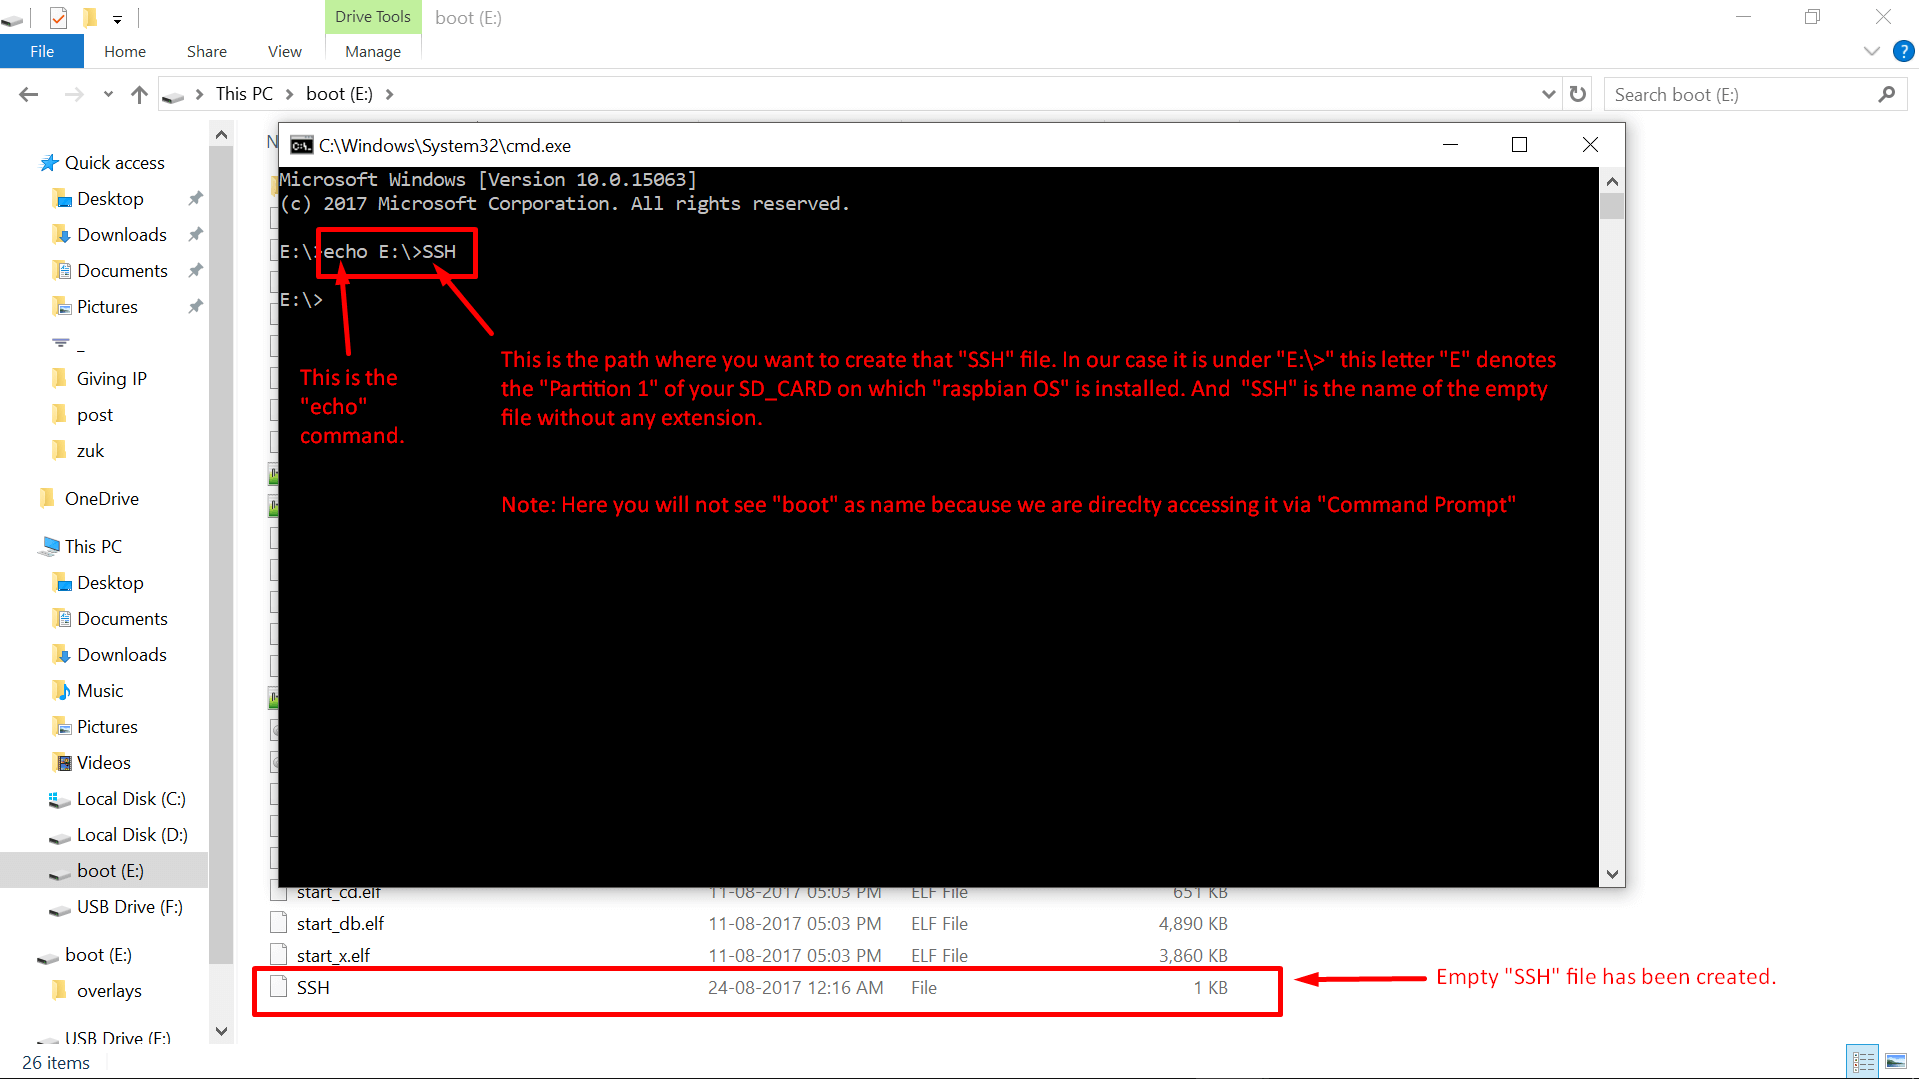
Step 8: You will be dragged into a cmd window after that, you have to create that “SSH File” as shown.
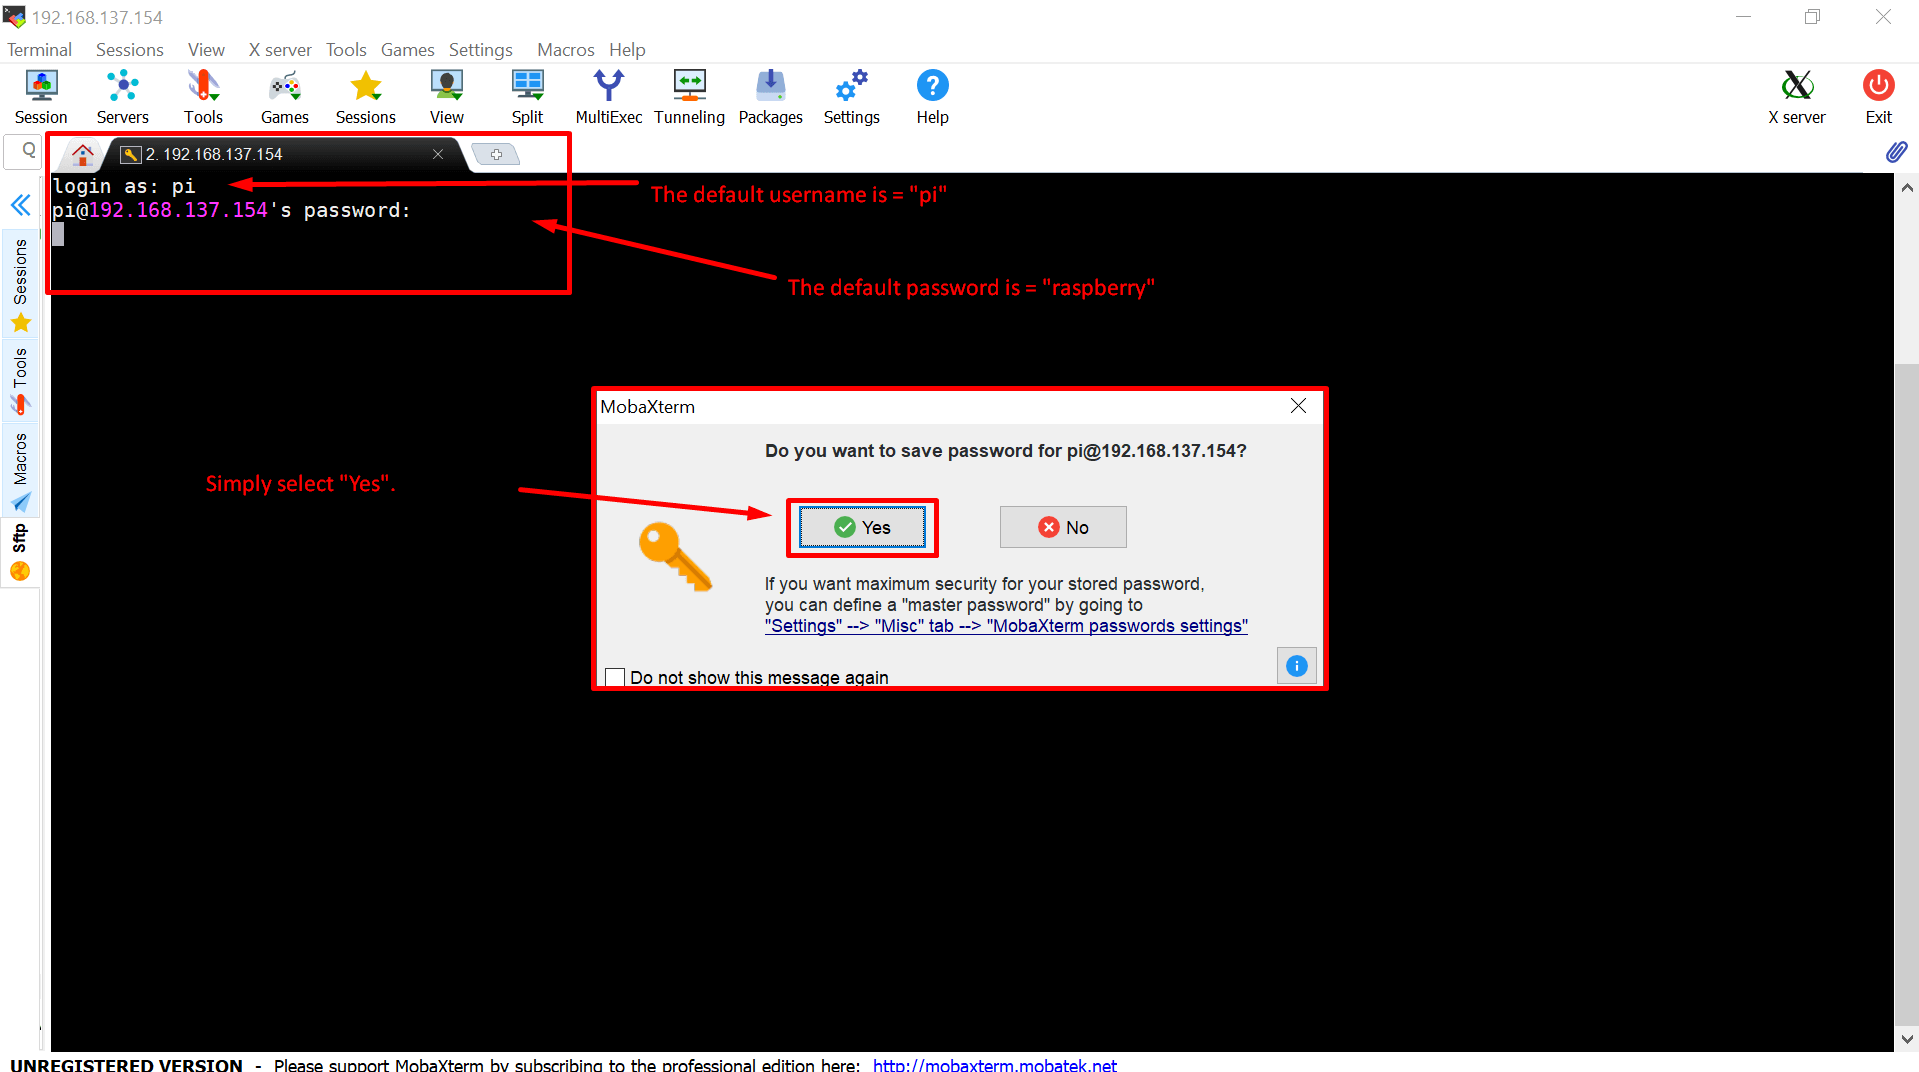
Step 9: Now, after doing all of the steps, if we try to “refresh” in the “MobaXterm” again, from the photo below you can confirm that now we are prompted to save the password for SSH in the client machine.
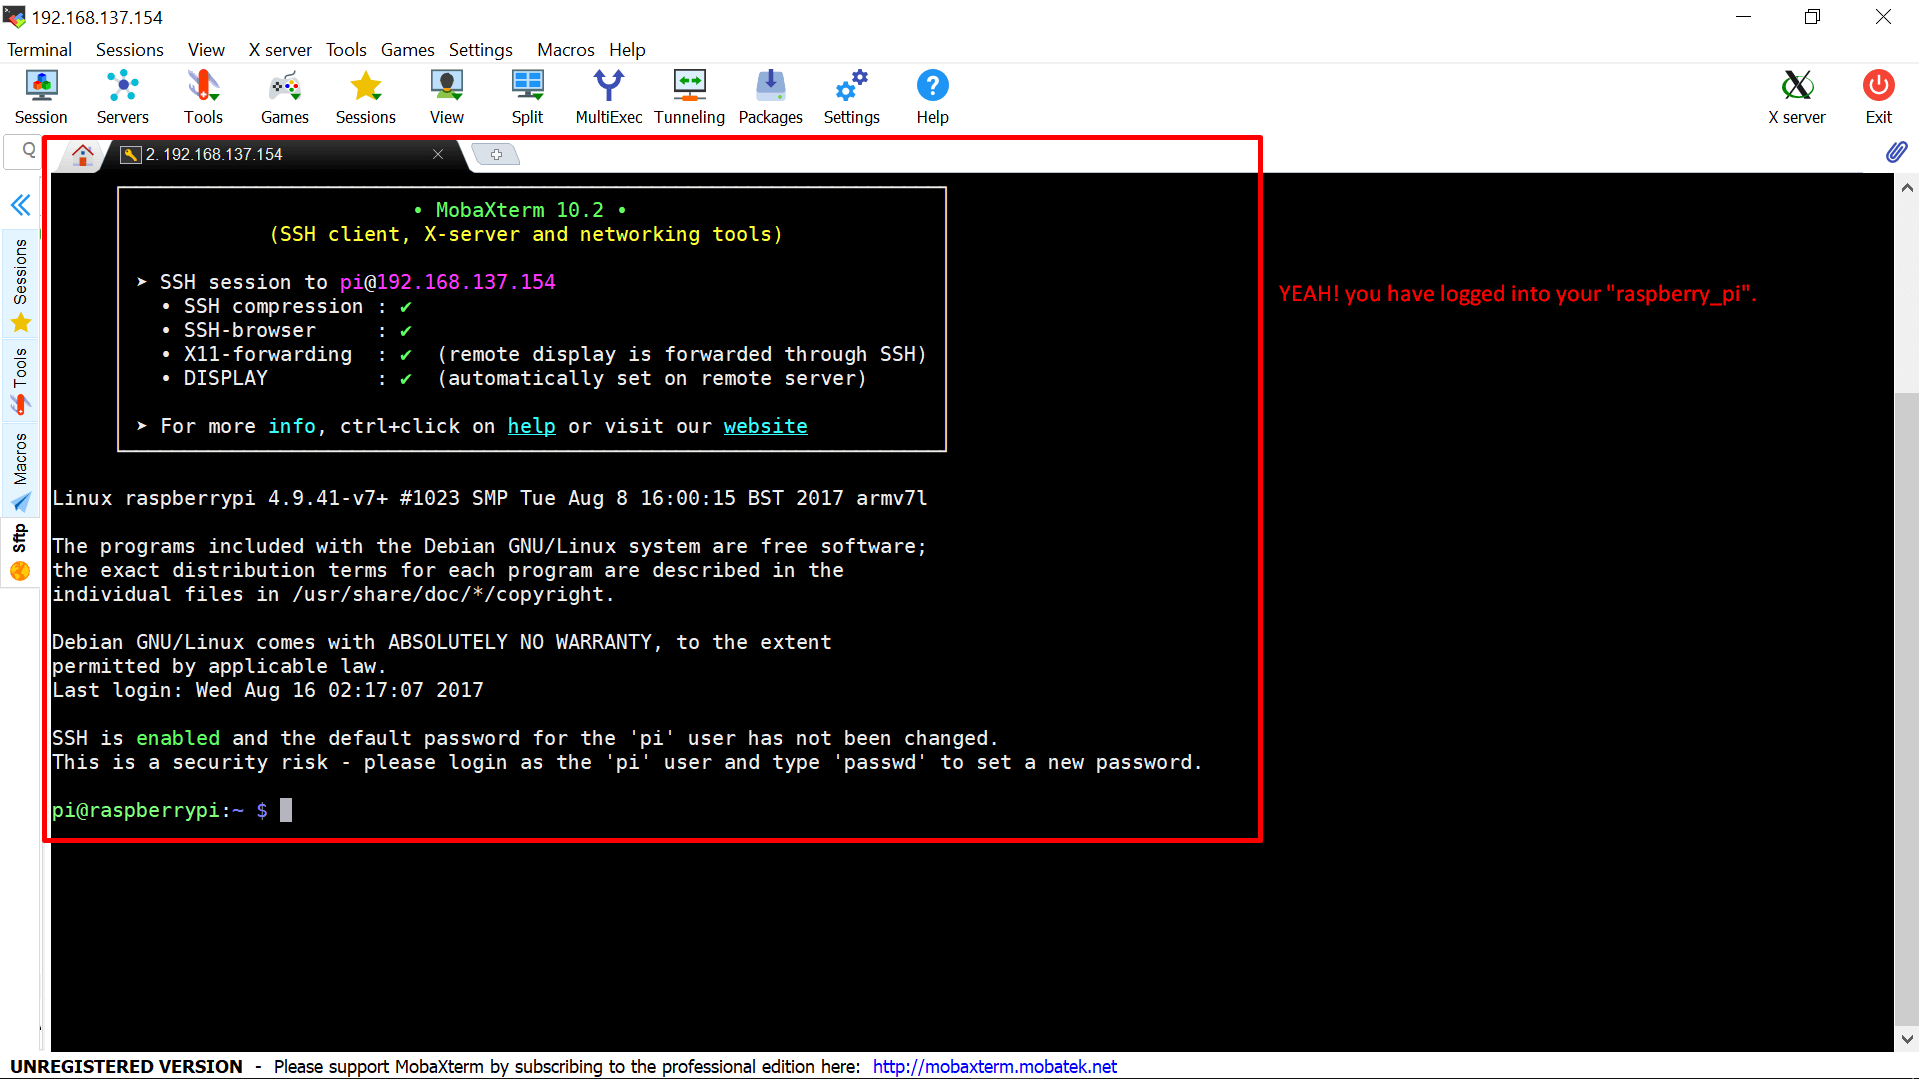
Step 10: Look at the image below, and check it will be similar in your case as well, this shows the successful login into the Raspberry Pi.
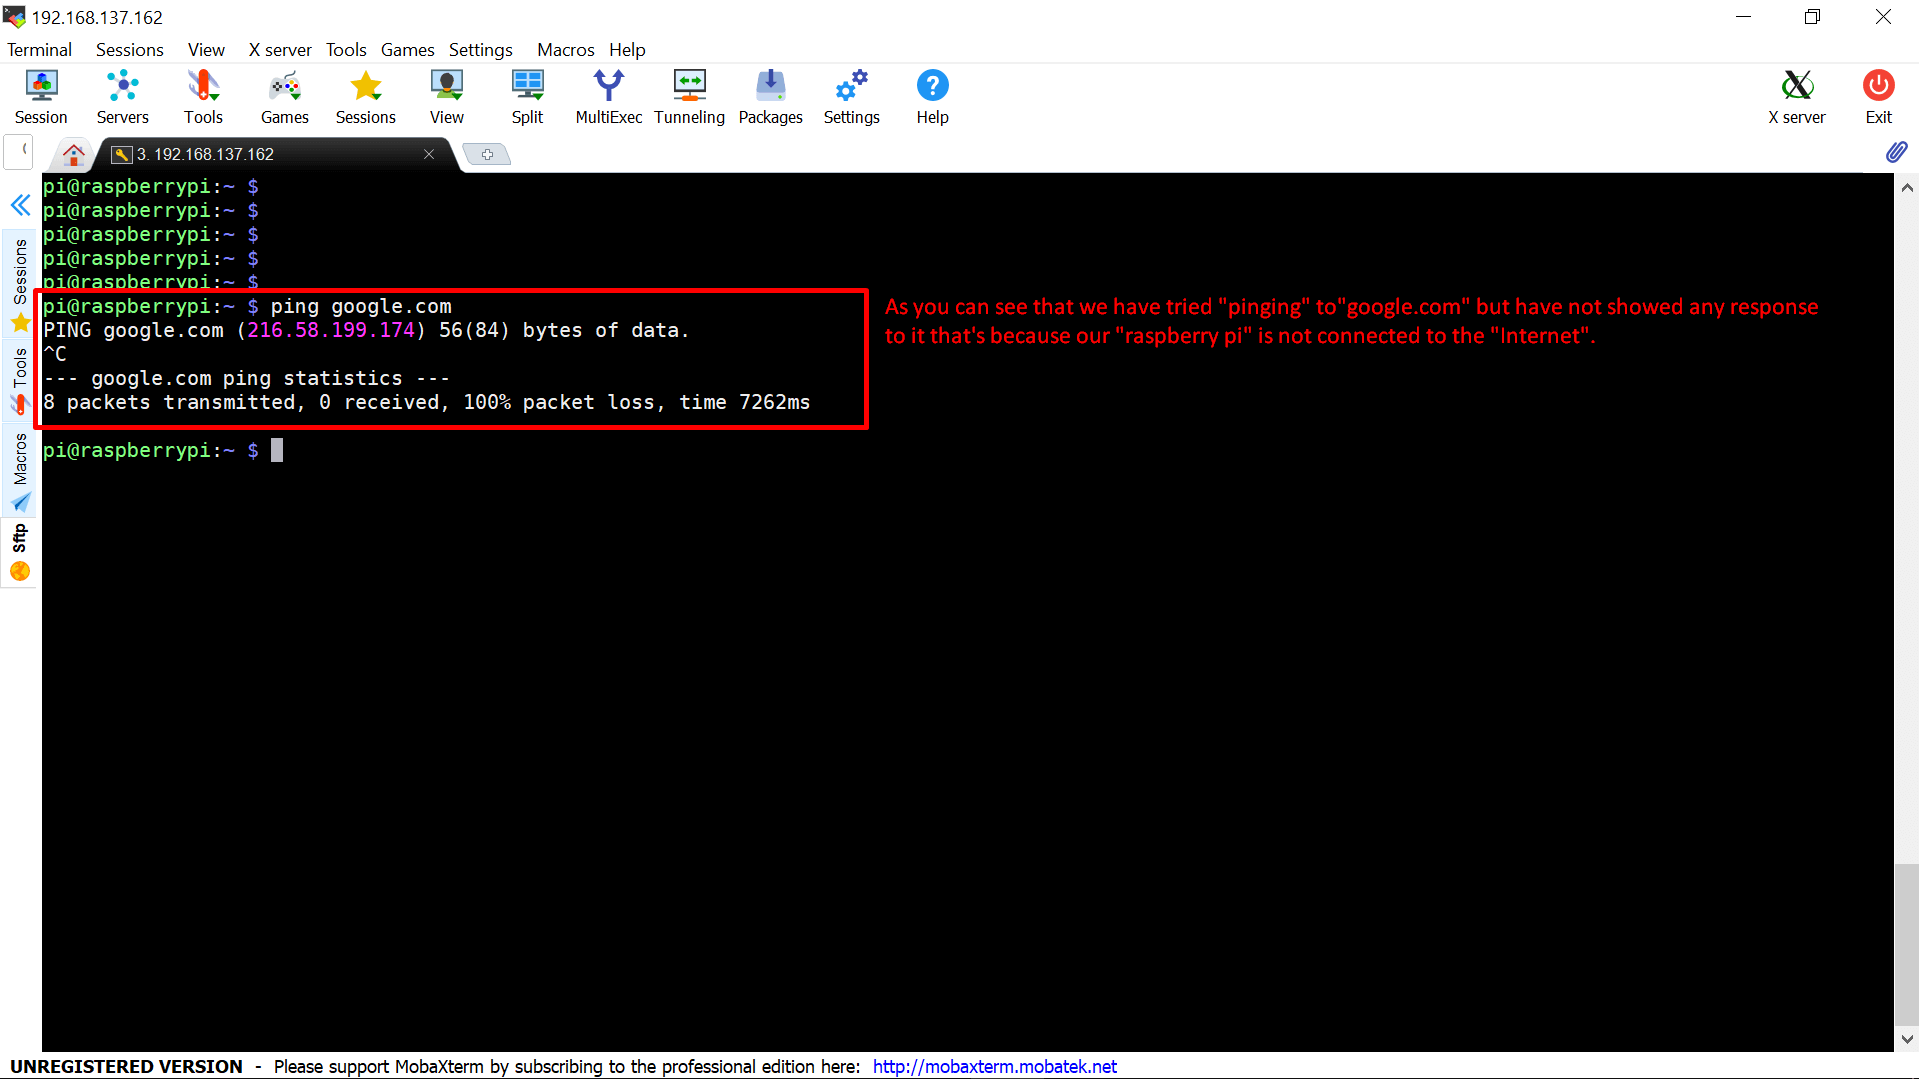
Question: Are we able to access the internet from our Pi at this point of time?
Answer: No, because we are using the Ethernet method for giving the IP Address to our Pi from the windows 10 using a loop-back adaptor.
You’ll be interested: Understanding Tadalafil: A Comprehensive Guide
Step 11: The picture below shows that there is no internet connection available in our Raspberry Pi at this point of time.