Table of Contents
If you are working with Docker containers, you may often think of how to persist the data created inside containers, “docker volumes” is the answer to that.
Before going further, make sure you have read -> Docker Storage
There are basically two options with which we can create docker volumes:
- – v
- – – mount
As the “– – mount” option is recommended as per the docker creators, we are going to learn about the same.
Part 1: Docker volumes, create, inspect, access it from another container, access it on Linux
First of all, we are going to access the special docker area on a docker host for storing the docker volumes.
Note: This can be directly accessible on Linux but not on Docker on MacOS and not on Windows.
We have to change the user from “$” to “#“, that is from a normal user to root user and in order to do that, use the following command:
$ sudo -sNow that we have root level permissions, we can navigate to “/var/lib/docker/volumes/” directory where docker stores its volumes.
# cd /var/lib/docker/volumes/Now, we will look for already present stuff in this directory using the “ls” command:
# lsFrom the output of the “ls” command we can see that currently there is nothing present in this directory, because we have not created anything till now.

Note: The about discussed method to access a volume is not recommended.
Question: So, what is the recommended method that works on all platforms?
Answer: Use the “docker volume <options>” command to do whatever can be done to a docker volume.
Use the following command to see available docker volumes on the host:
$ docker volume lsFrom the output of this command, you can see that there are no volumes at this time.

Now, we are going to create our first volume:
$ docker volume create my-volume1Again, check for the available volumes:
$ docker volume lsFrom the output of the above command, you can see that now it showing one volume available, with a name as “my-volume1” created using the “local” storage driver.
For further metadata of a docker volume, use the following “docker inspect” command:
$ docker inspect my-volume1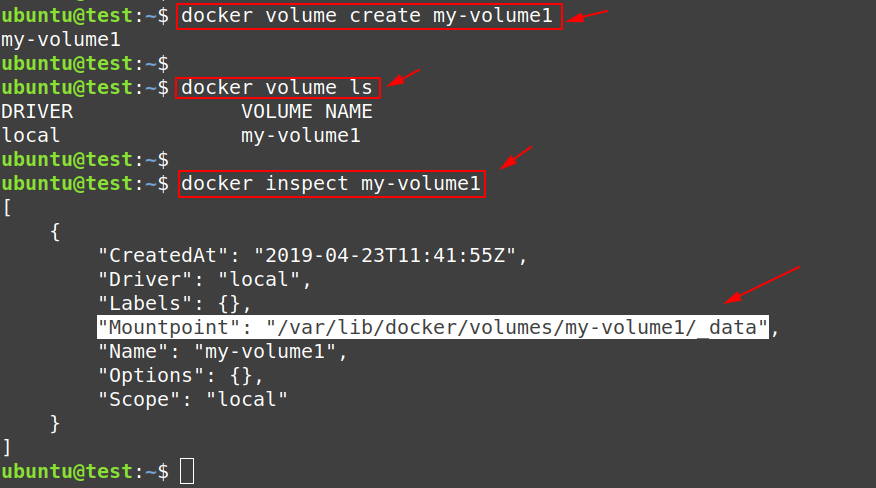
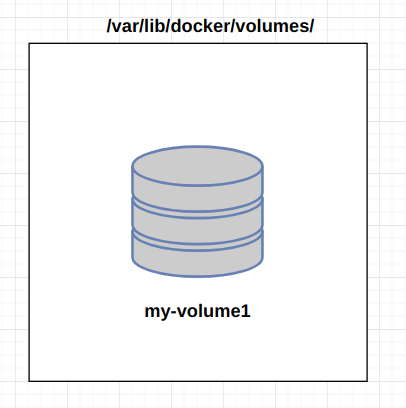
Now we will checking the data inside this “my-volume1” by using the not recommended way again, refer to the picture below.
$ sudo -s# cd /var/lib/docker/volumes/my-volume1/_data/# lsFrom the output of the “ls” command, you can see that there is nothing present inside the “my-volume1” because we haven’t used it with any container.

Question: When accessing the volumes section on Linux by changing to “ROOT (#)” user is not recommended then why we are using it?
Answer: We are still using it because we want to cross-check the status because we are currently in the learning stage of docker volumes, plus when we have an option to explore more, we are going to do it.
Create a docker container using an already created docker volume
Use the following command to create a Docker container:
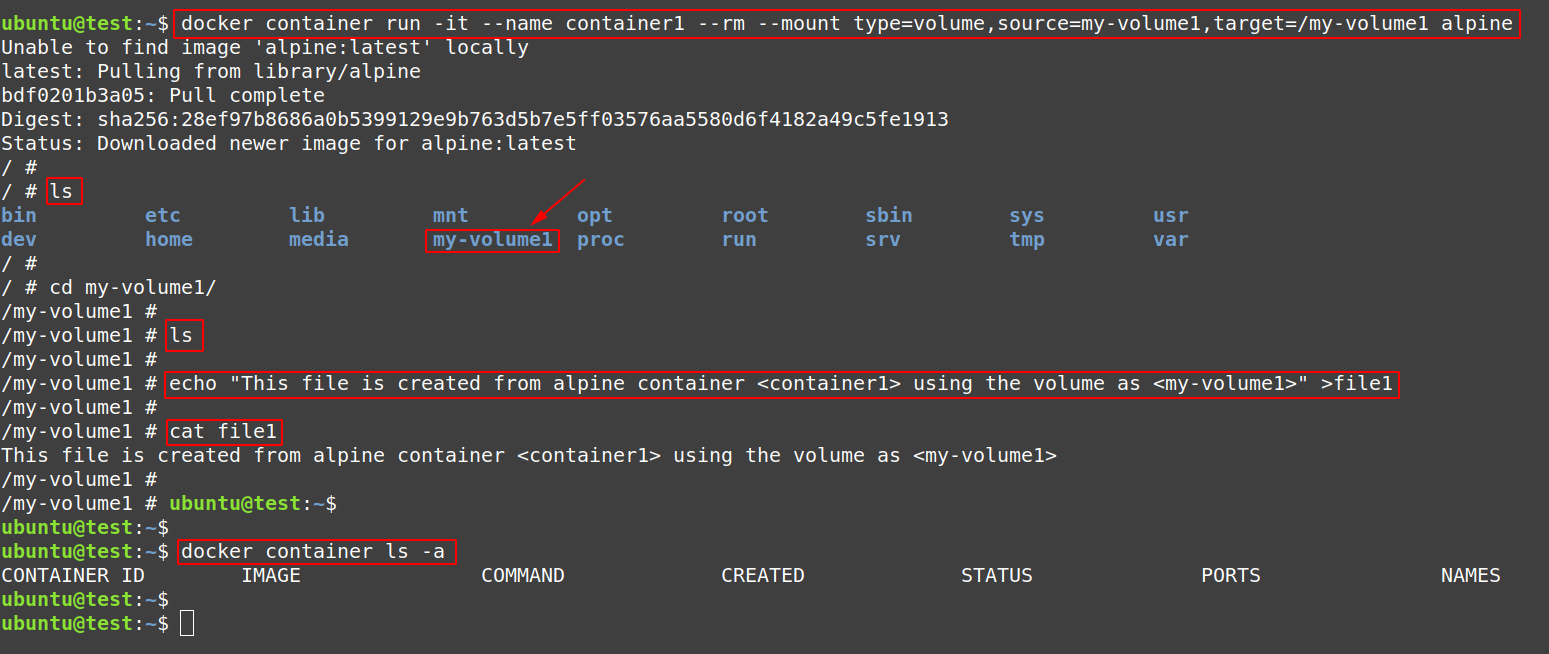
$ docker container run -it --name container1 --rm --mount type=volume,source=my-volume1,target=/my-volume1 alpinedocker container = command name
run = context to the “docker container” command
-it = Run the container in “interactive mode”
–name = Provide a name to the container, we have used “container1”
–rm = Remove the container on “exit” or on “logout” automatically
–mount = Option for specifying storage to a docker container
type = Provide the type of storage, we have specified “volume” as type
source = Provide a name of your volume, we have used “my-volume1” as name
target = Provide a mount point for the volume inside the container, we provided “/my-volume1”
alpine = This is the image from which the container1 is going to be created
After creating the container, we are dropped to an interactive shell, you can refer to the picture below.
With the shell, we can see that inside the “/” root directory there a directory present with a name “my-volume1” which is what we have used for our volume, this means that the volume has been mounted successfully inside the container.
Use the following command to create a file inside that folder, indirectly inside the volume.
But first, we have to change the current directory to “my-volume1” directory:
# cd /my-volume1/Now, run the following command to create a file with a name “file1” using the “echo command“:
# echo "This file is created from alpine container <container1> using the volume as <my-volume1>" >file1Use the “cat” command to check the contents of the “file1” inside the container.
# cat file1From the output of above, you can confirm that the file has been created successfully.
Now, “exit” or “log out” from the container using the keyboard keys combination “CTRL + d“.
You will be dropped down to the “docker engine host’s shell” from there using the “docker container ls -a” we can confirm that no containers are present, the one with name “container1” has been already removed on “exit” because we have created it using the “–rm” option.
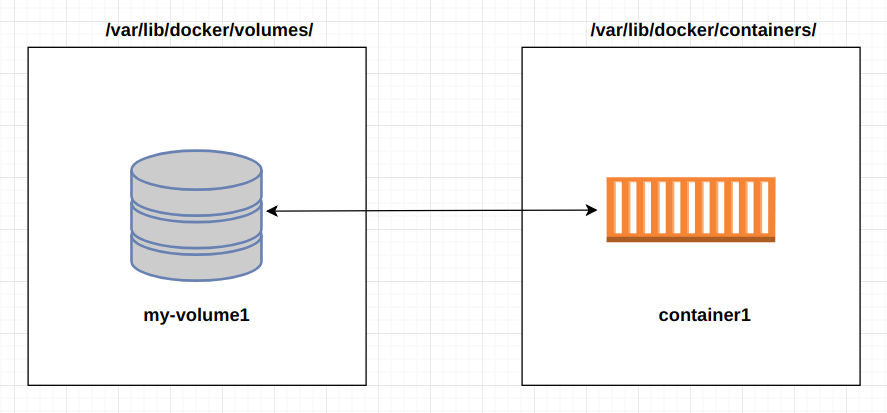
Again, we going to use the not recommended method to access docker volumes on Linux host.
$ docker volume lsFrom the output, our volume “my-volume1” is still there, even after the container previously attached to it has been deleted/removed.
$ sudo -s# cd /var/lib/docker/volumes/my-volume1/_data# ls# cat file1From the output of the above command “cat file1“, we can confirm that the file and its contents still persists, even after the container using it has been removed.
Note: This is why actually “docker volumes” concept exists, in order to persist the data created from a docker container.

To learn more about docker, follow -> Learn Docker
How to check the contents inside a docker volume (The correct way)
The correct way to check the contents inside a docker volume is to use a different container, we are going to see how we can achieve that.
Firstly, check whether the “my-volume1” is there or not:
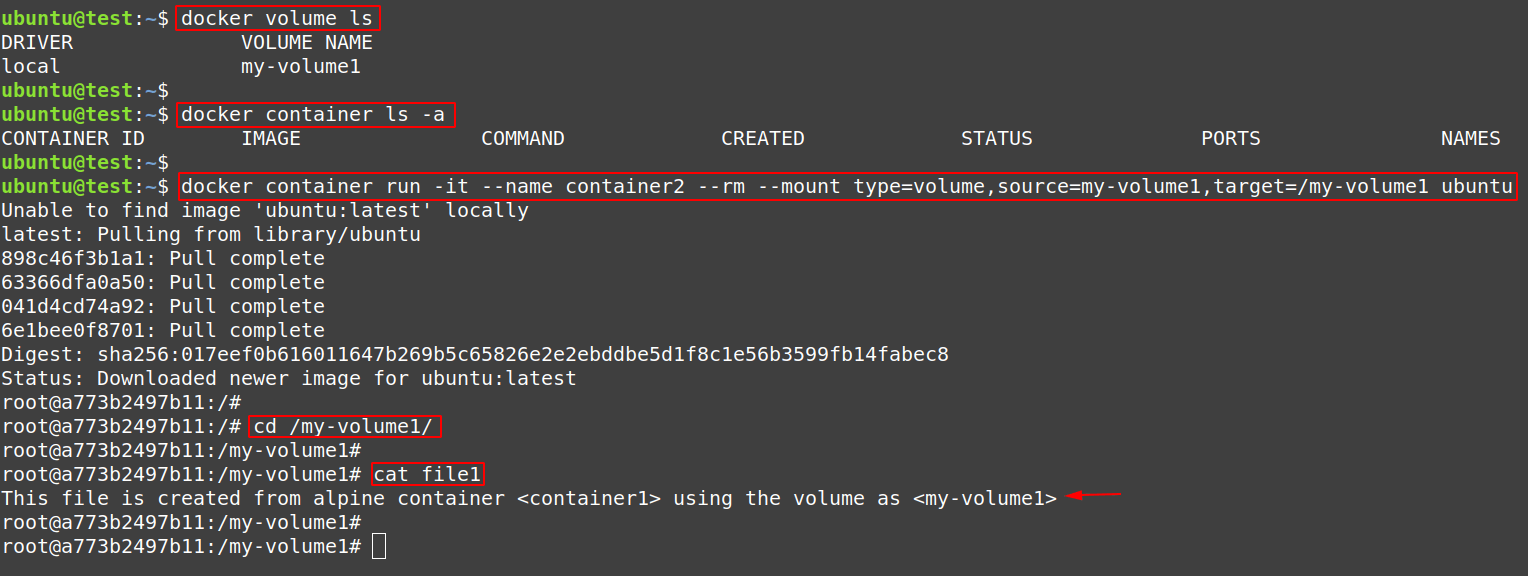
$ docker volume lsFrom the output of above command, yes the “my-volume1” still persists.
Check, whether there are any containers running or not:
$ docker container ls -aFrom the output of the above command, we can confirm that there is a zero number of containers running.
Now, it is time to create a new container in order to view the contents of “my-volume1“, use the following command to do so:
$ docker container run -it --name container2 --rm --mount type=volume,source=my-volume1,target=/my-volume1 ubuntuAfter the execution of the above command, we will be dropped down into a “bash shell” because we are using Ubuntu as a base image.
Now, go to the “my-volume1” directory inside the “/” root of ubuntu container “container2“, to view the contents of “my-volume1“.
# cd /my-volume1/# cat file1From the output of “cat” command, we can see the contents of “file1“.
Hence, we are succeeded in accessing the contents of a docker volume, in a correct and recommend way.
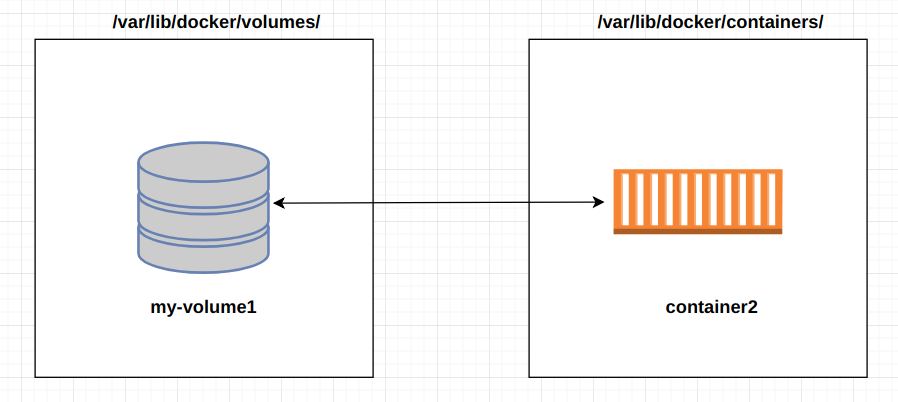
Again, because we have used “–rm” option while created the Ubuntu image based “container2“, it got removed on “exit“, refer to the picture below.

Time to delete our volume “my-volume1“. This can be done using a dedicated option for “docker volume” command:
$ docker volume rm my-volume1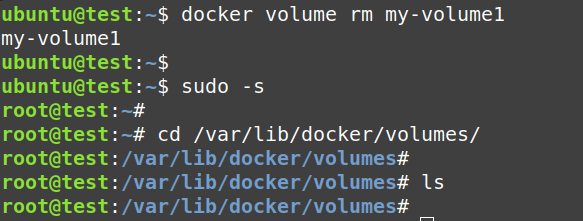
Part 2: Share data between two containers created using the same base image using docker volumes
We can easily share data between two containers using the same base image, using the docker volumes. To achieve that, run the following set of commands:
$ docker container run -it --name container3 --rm --mount type=volume,source=shared-volume,target=/shared-volume alpineInside this “container3“, create a file with name as “file“.
# echo "This file is created from container3">fileNote that, the after the “log out” or “exit” of “container3” it is going to removed automatically.
$ docker container ls -aSo, in order to share the volume “shared-volume“, we are going to create a new container with the name “container4” access its contents.
$ docker container run -it --name container4 --rm --mount type=volume,source=shared-volume,target=/shared-volume alpineNow, check the contents of inside the “shared-volume” directory inside the “/” root of “container4“.
# cat fileFrom the output of above command, we can confirm that the volume sharing has been successful.
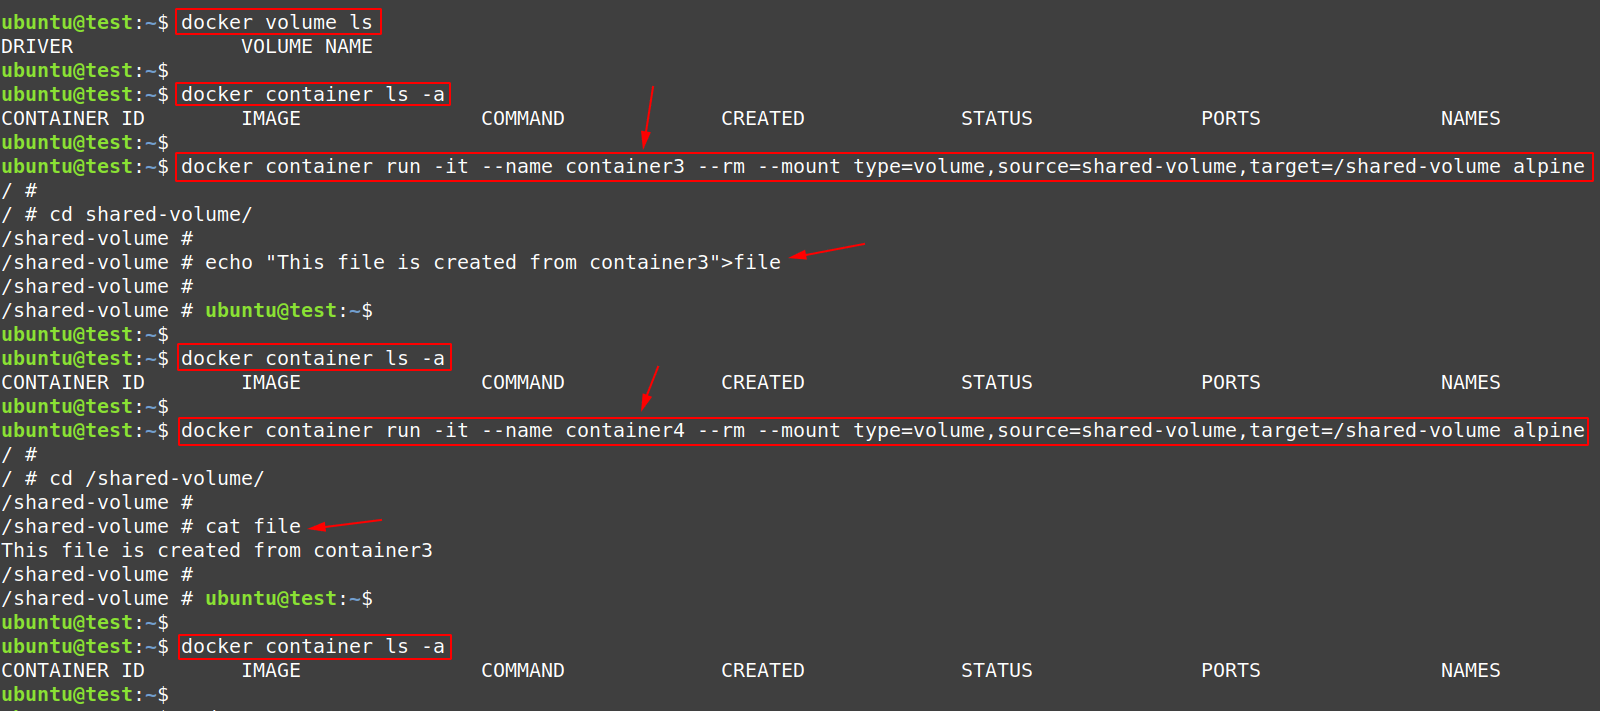
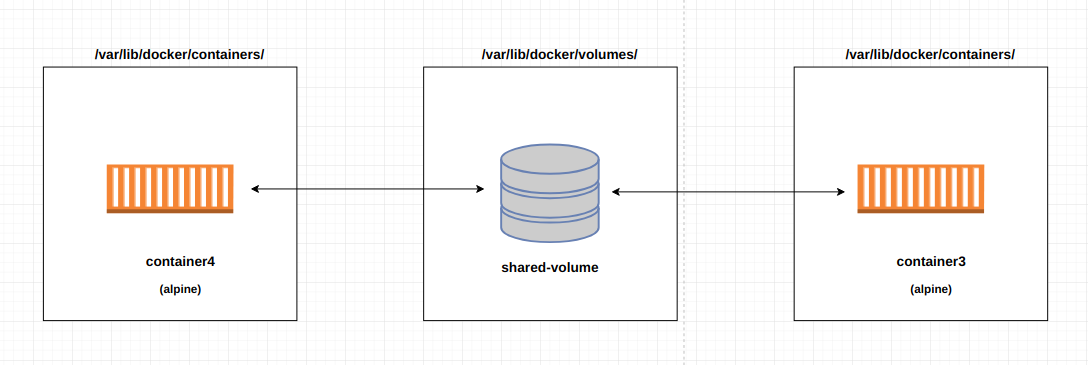
Again, use the not recommended way to cross-check the persistence of data, using the following commands.

Part 3: Share data between two containers created using two different base images using docker volumes
Following is the command to create an alpine based container with a name as “alpine_container“:
$ docker container run -it --name alpine_container --rm --mount type=volume,source=shared-volume,target=/shared-volume alpineTo learn more about docker images, read -> Working with docker images
Following is the command to create an Ubuntu image based container with a name as “ubuntu_container“:
$ docker container run -it --name ubuntu_container --rm --mount type=volume,source=shared-volume,target=/shared-volume alpine

From the picture above, we can see that the file “file” still persists during different image based containers.
Part 4: Populate an Empty docker volume from container data
In this, we are going to populate an empty docker volume from the contents already present inside a docker container.
$ docker container run -it --name web_container --rm --mount type=volume,source=web-volume,target=/usr/share/nginx/html nginxAs a result of the command used above, the volume “web-volume” is going to populated with the contents already present inside “/usr/share/nginx/html” which is directory present inside the “nginx container“.
$ sudo -s# cd /var/lib/docker/volumes/web-volume/_data/# lsThe output of the “ls” is going to confirm that the data present inside the “/usr/share/nginx/html” is now available inside the “web-volume“.

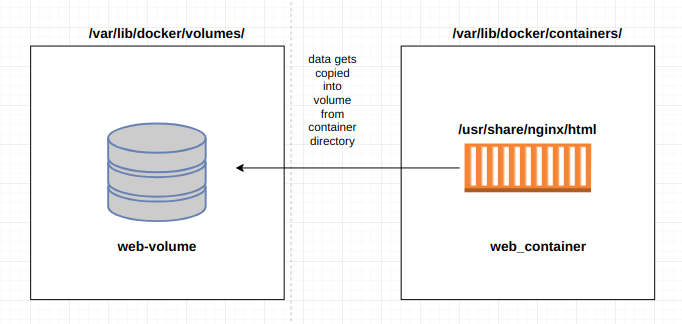
Part 5: Create or Attach a docker volume in read-only mode
$ docker container run -it --name container-read-only --rm --mount type=volume,source=web-volume,target=/shared-volume,readonly alpineWe are using our previously created volume which is “shared-volume” inside which a file named as “file” is already present, we are going to delete it when we are using this volume in “read-only” mode inside “container-read-only” container.
# rm fileThe output of above command, will throw an ERROR as “Read-only file system“.

Conclusion for “docker volumes”
- Always use “– – mount” option while created docker volumes, because it is more specific.
- By default, a docker container always runs in “root user mode“
