Today, we are going to understand about instances and how to create an instance on AWS. Amazon has this product named as Amazon Web Services of shortened to AWS, which provides a lot of services with the help of which one can expand their business online.
Out of many services available on AWS, we are going to learn about “EC2” which comes under “compute“, as you can confirm by looking at the picture below:

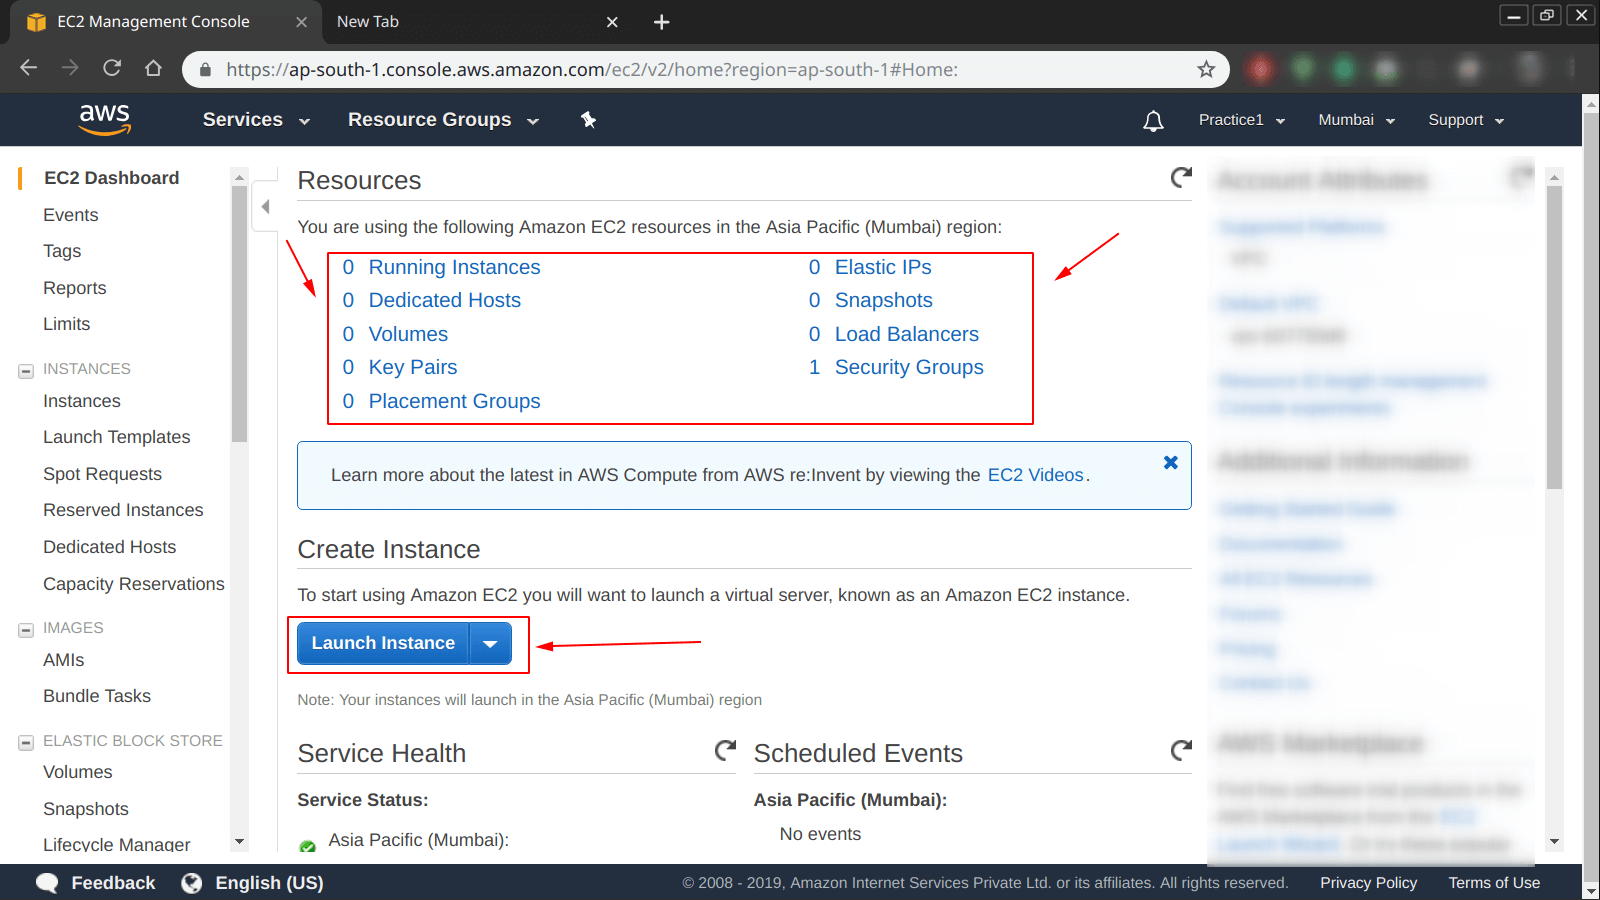
After entering into the “EC2 section” of AWS, we can see something like shown below (Note: Below is a picture of new and freshly created AWS account)
From the picture shown below, you can see that:
Running Instances = 0
Which means that currently we haven’t created any instances on AWS.
Q: What actually is an instances in terms of AWS?
A: The best answer to the question is “When we create an instance on AWS it simply creates a virtual machine on Amazon’s servers” and you can also create and setup credentials in order to log in into it.
Q: How to create an Elastic Compute Cloud instance on AWS?
A: In order to achieve that, you should simply follow the steps shown below:
Step 1: As shown below, “Hit” on the “Launch Instance” button coloured in blue.
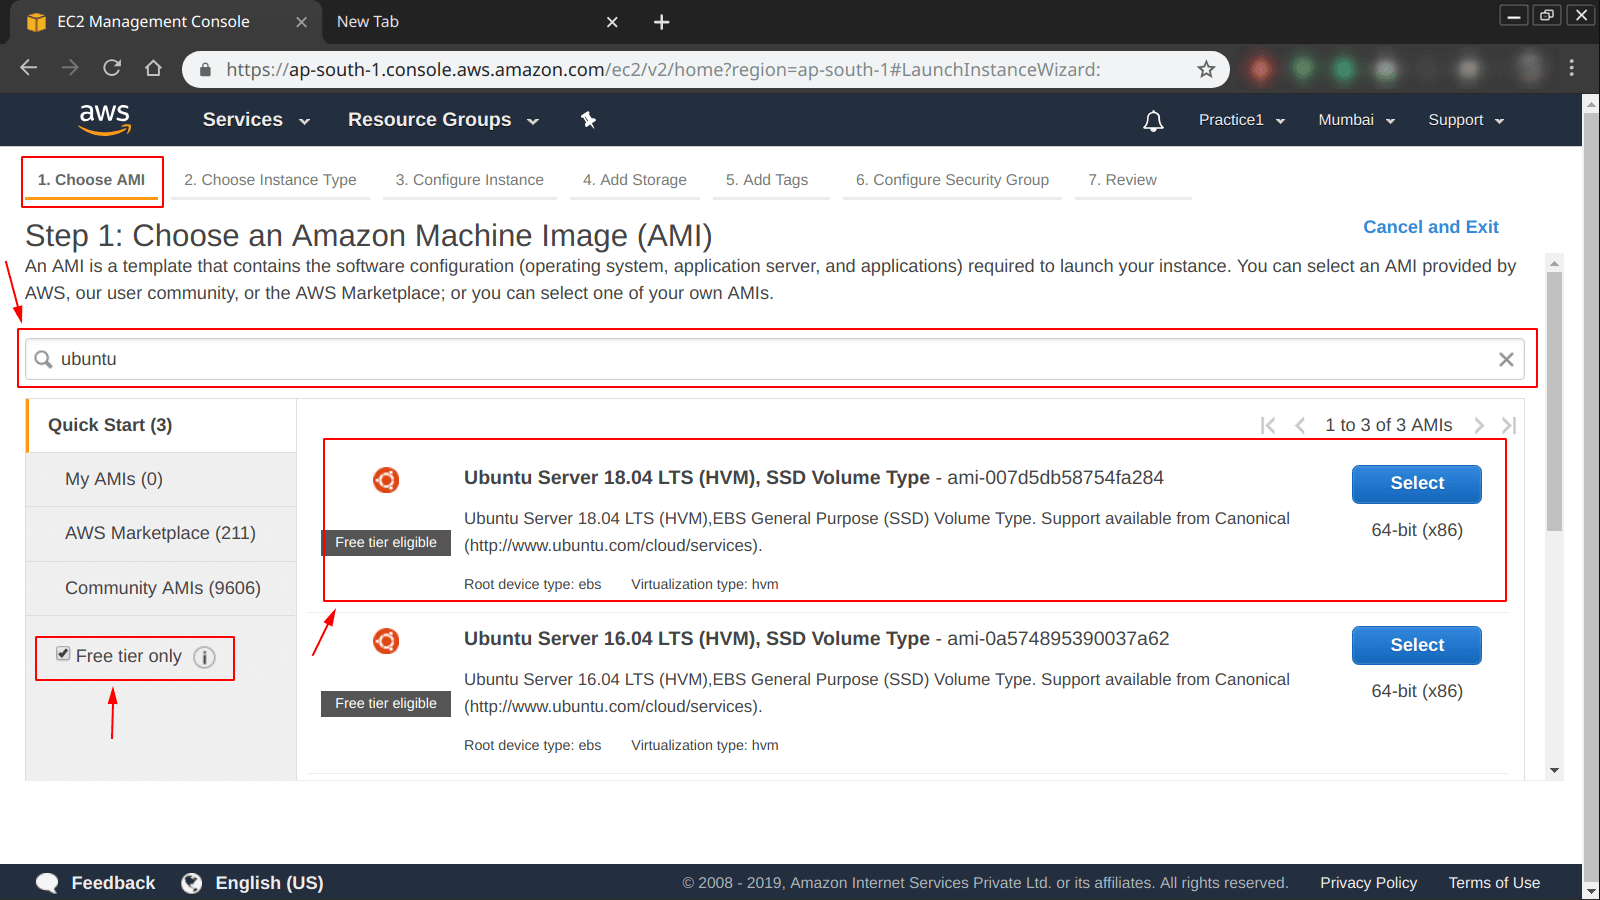
Step 2: After that, you have to select the type of Operating System you want to create an instance of, there are a good number of options available out there. Which include both “paid” and “free tier“.
Note: For this post, we are going to select a “free tier” based “Image (operating system)“.
As shown below, we have select an “Ubuntu 18.04 LTS – Bionic” which comes under “free tier“.
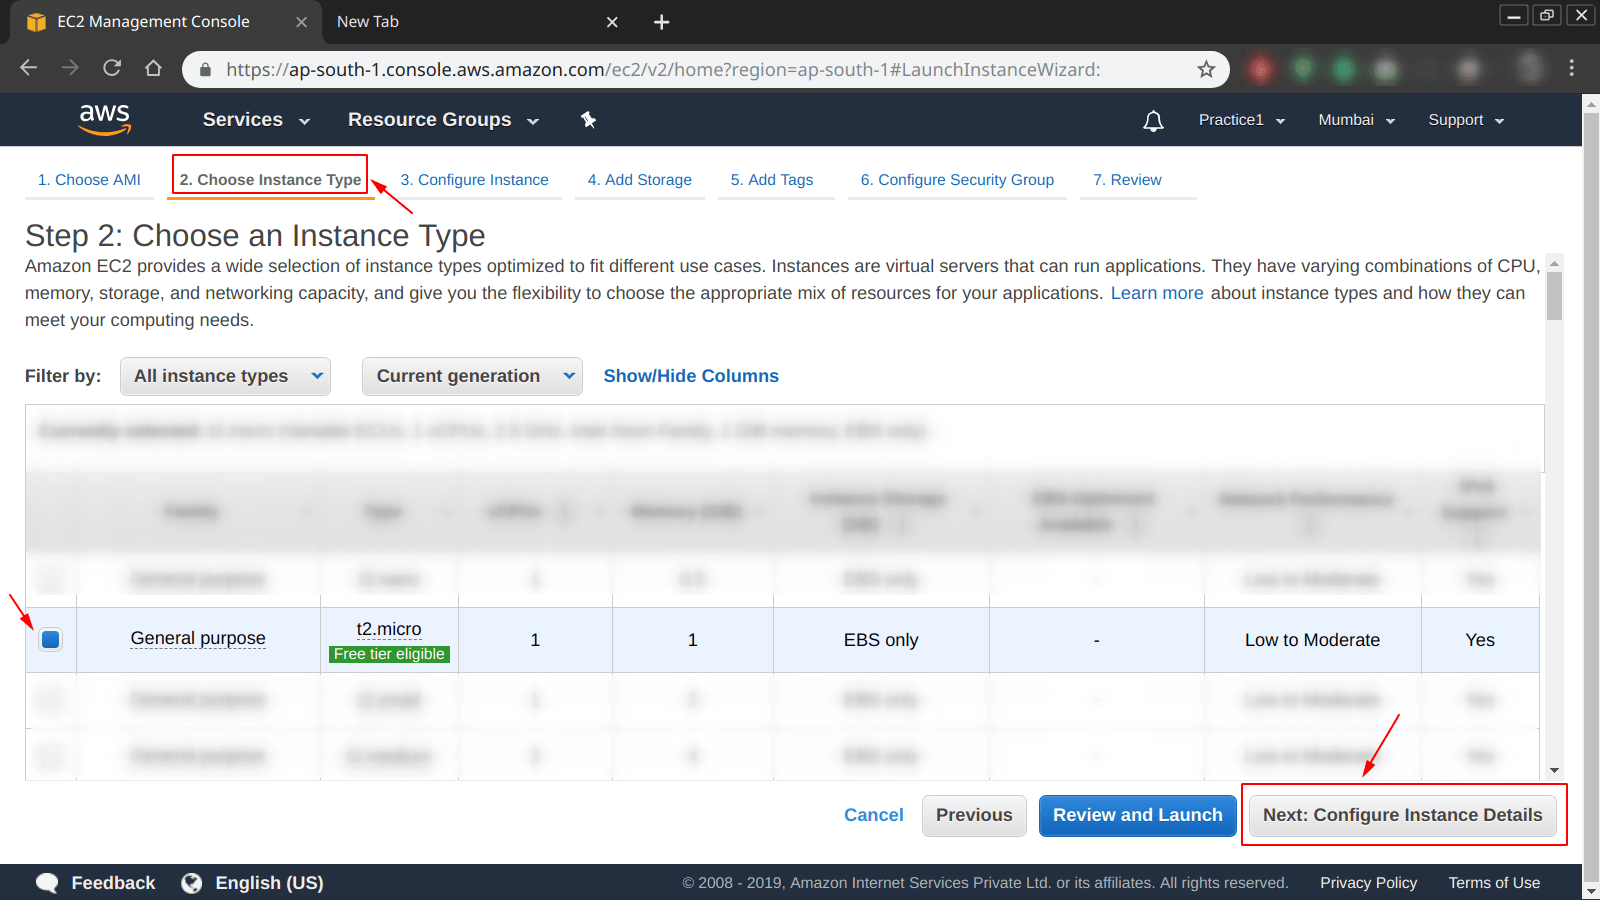
Step 3: Now, we have to “choose an instance type“. Although there are again a lot of options available under “paid” and “free tier“, but for this post only we are going to select the one shown in the picture below:
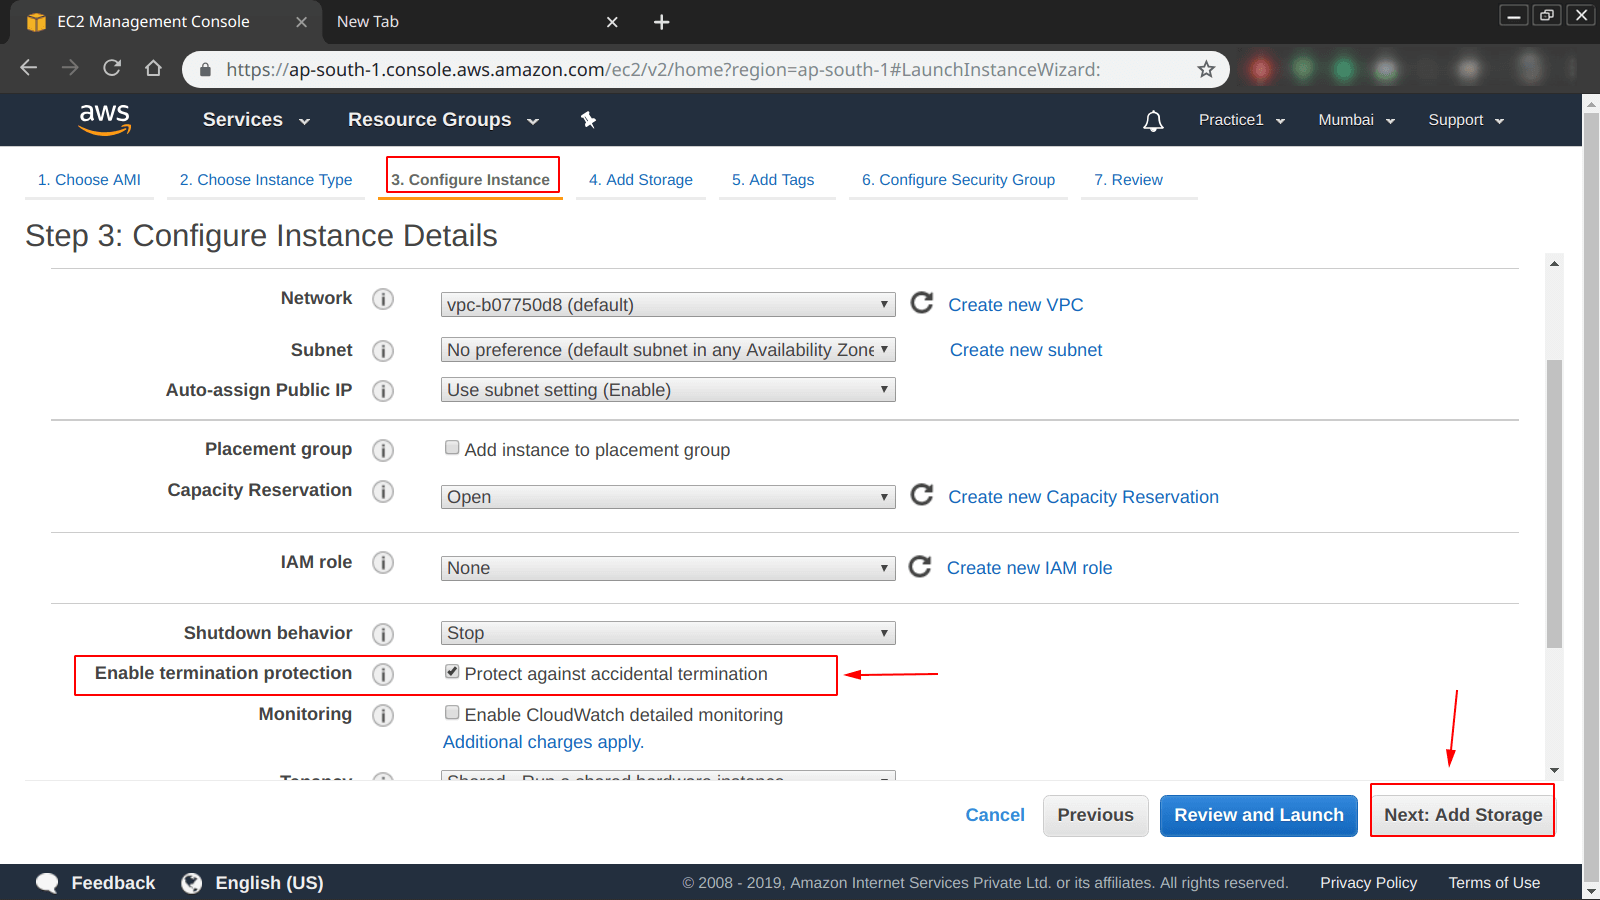
Step 4: Now, we have to “configure instance“. On this page make sure you have used all the default options if you are using a “free tier” account except the one which is “Enable termination protection” and stick to default options because any changes to those will get you charged with some amount.
Step 5: After doing that, we have to “add storage” to our instance, which is nothing but specifying “what kind of storage to use” and “what should be the size of that storage attached“.
Note: There is a lot to learn about each and every step, but we will learning that in later posts.
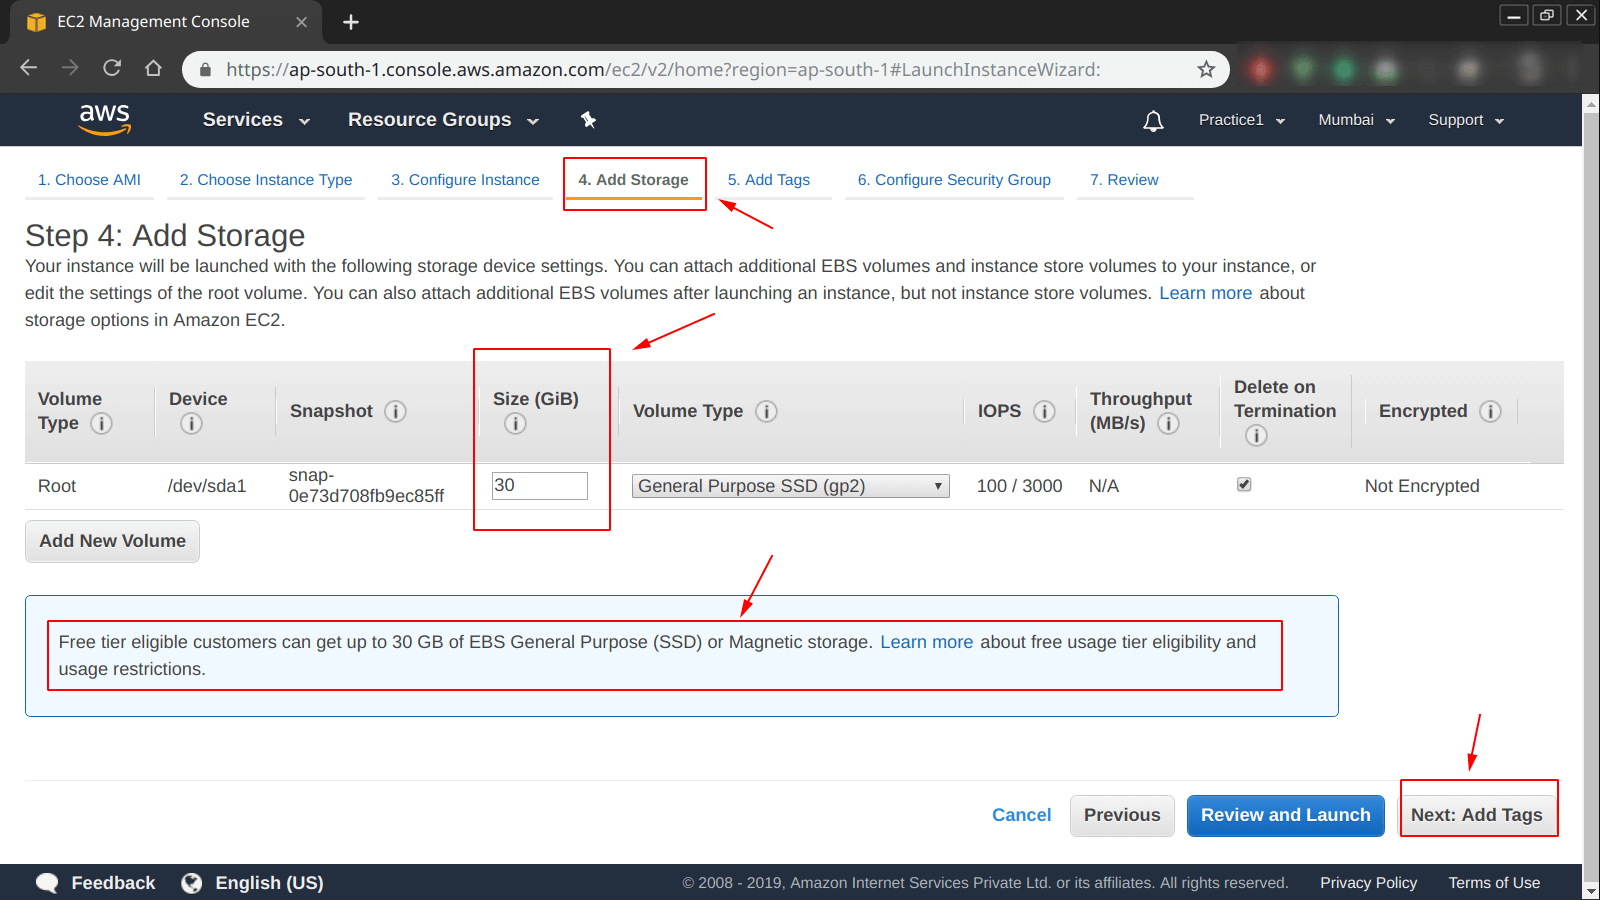
Step 6: Now, time to add some tags to our instance, it helps in identifying what the instance is created for because on production level we might be having more that 50 or 100 instances running on AWS on under some kind cluster.

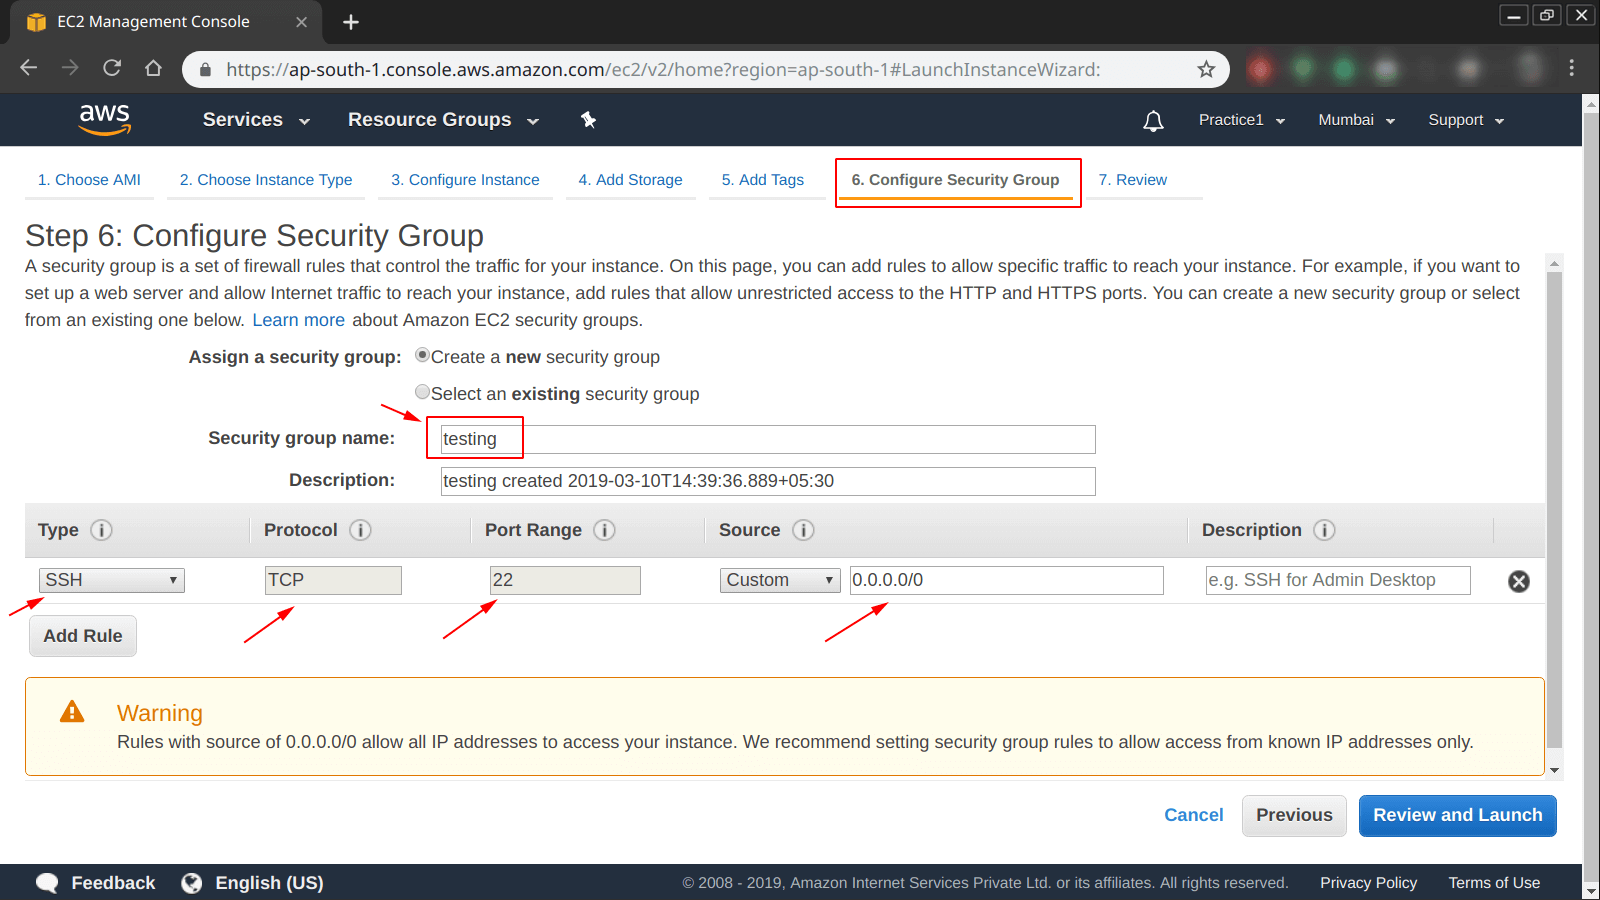
Step 7: Now it is time to open some ports on our instance, to do that we have to
Q: What is a security group on AWS?
A: It is nothing but adding “firewall rules” for our instances running on Amazon Web Services.
From the picture below, you can see that we have opened only “port = 22/tcp” which we are going to use for logging into our instance with the help of provided credentials.
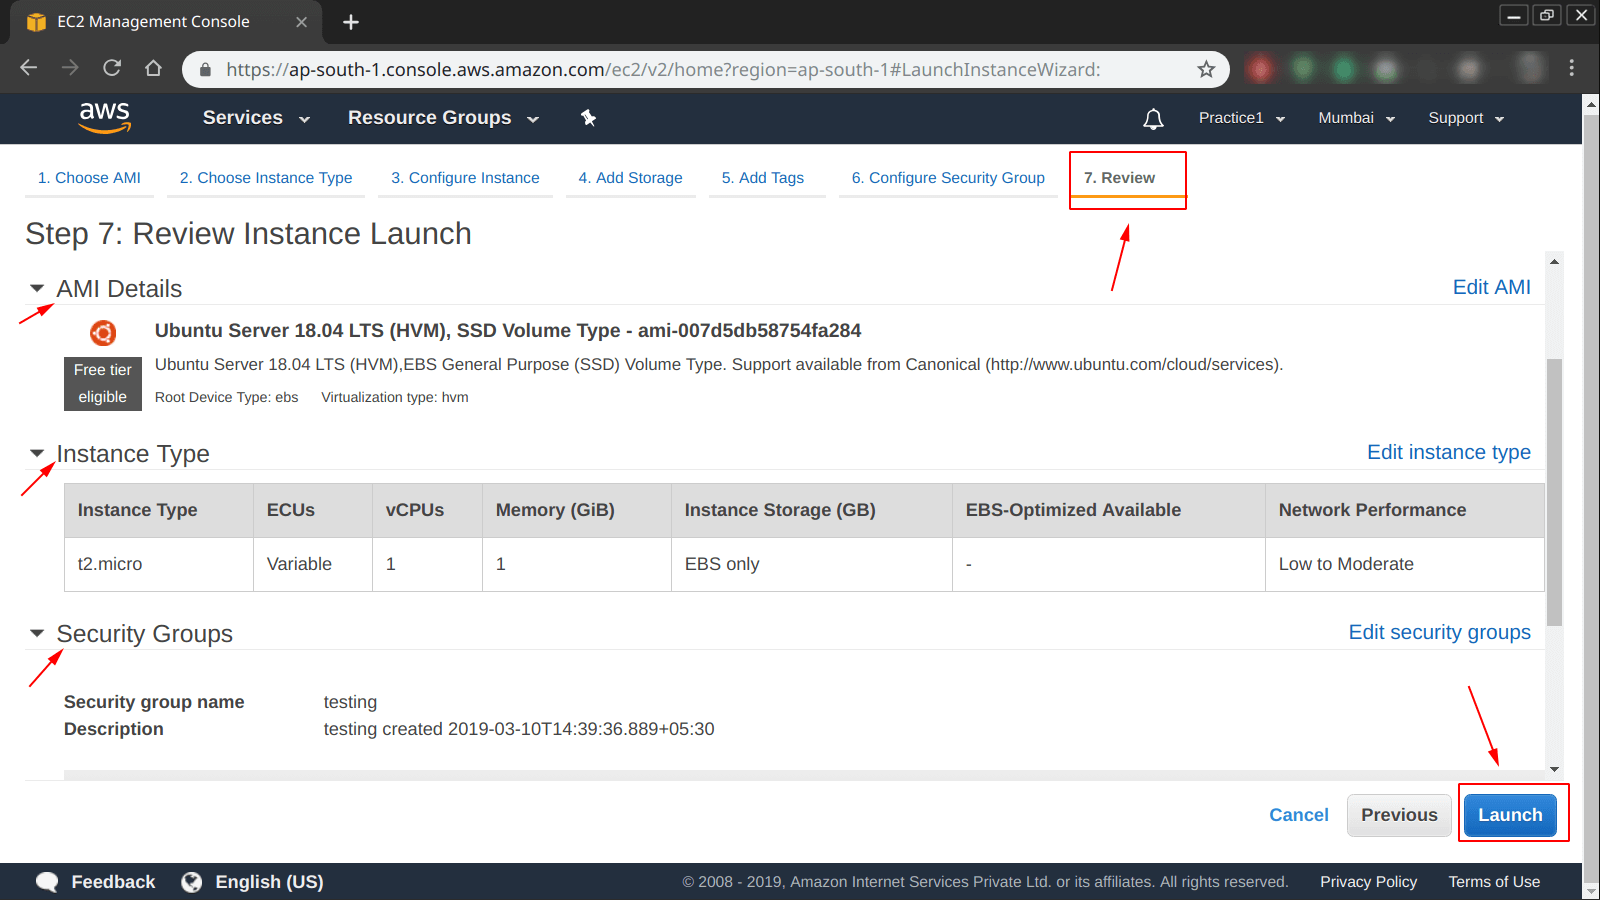
Step 8: It is review time, please do check each and everything on this step, you will see almost everything we have setup so far in the previous steps and if you want to alter something, you can do that with the help appropriate options available on this screen.
Step 9: This is an important step, in order to log in into our instance, we have to create “key” for our instance and use it later for logging in.
Q: What is key here?
A: It is a combination of “Public + Private“, out of which “Public key” is stored on our instance and “Private key” is one which we have to keep with ourselves in order to log in.
Note: You will only able to log in, if both “Public + Private = Original key” matches and completes to original key.
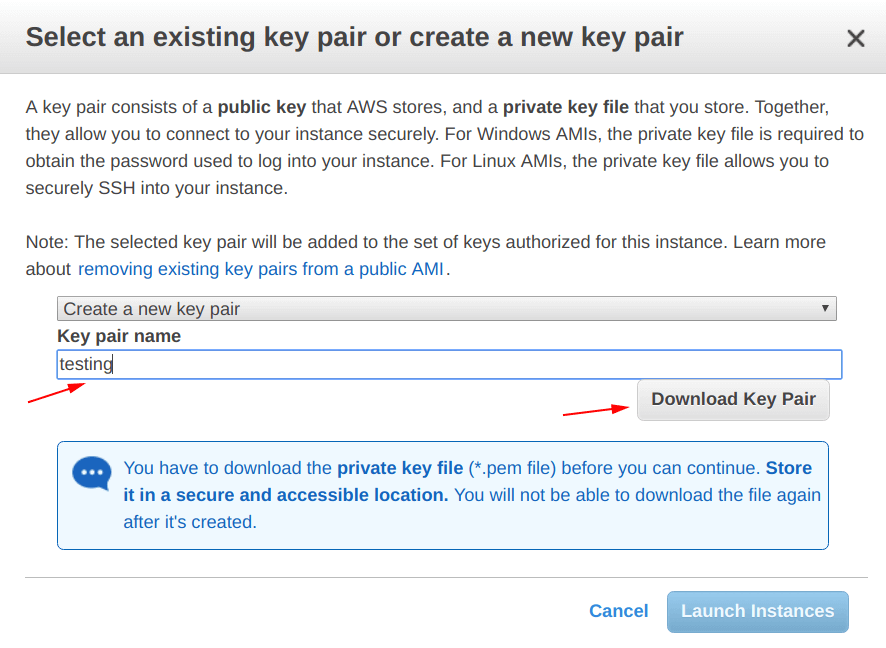
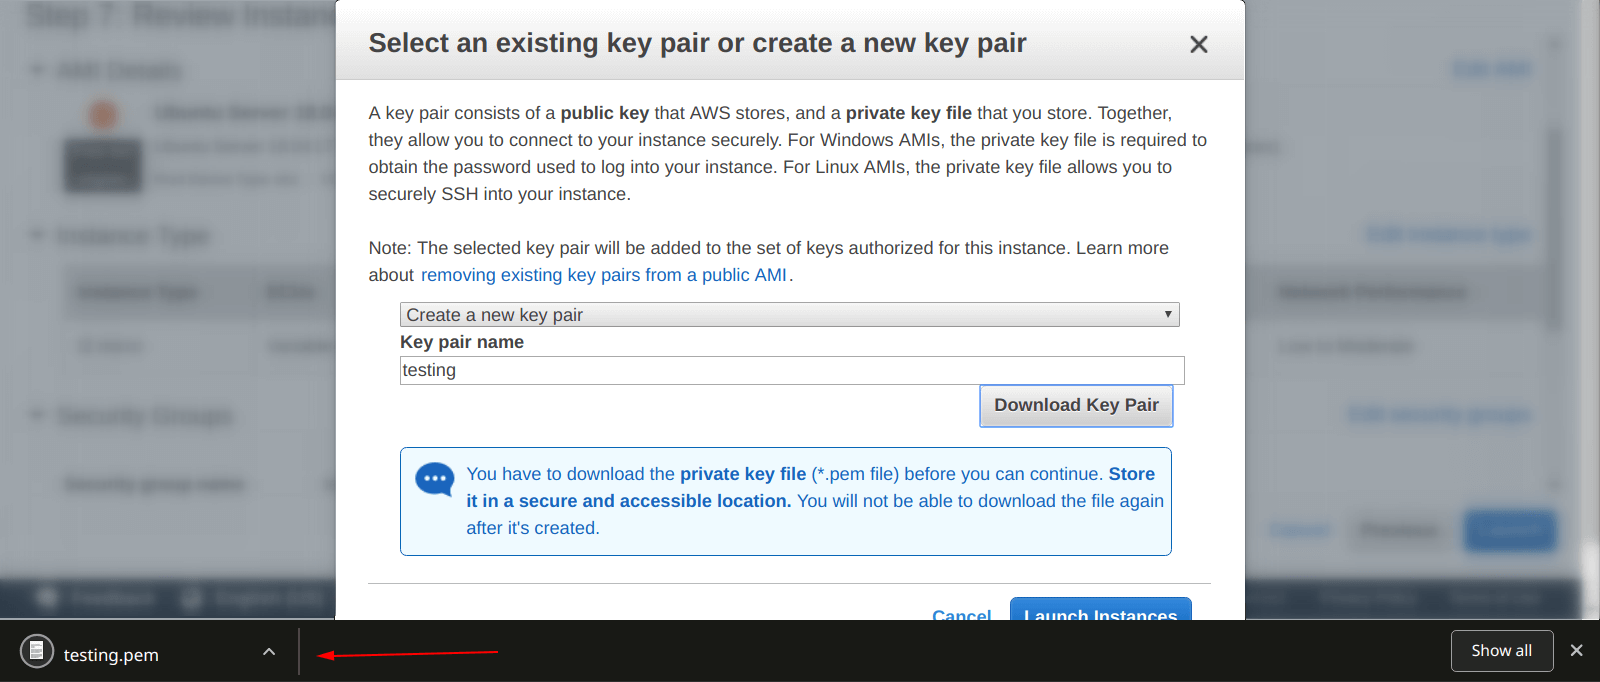
Step 10: From the picture below, you can see that after hitting “Download Key Pair” button, the key is downloaded and for the most cases it is being stored in your “Downloads” folder irrespective of your current OS.
Step 11: Time to check whether our instance is launched or not, hit the “instance id” as shown in the picture below.
Note: This may be something else in your case.

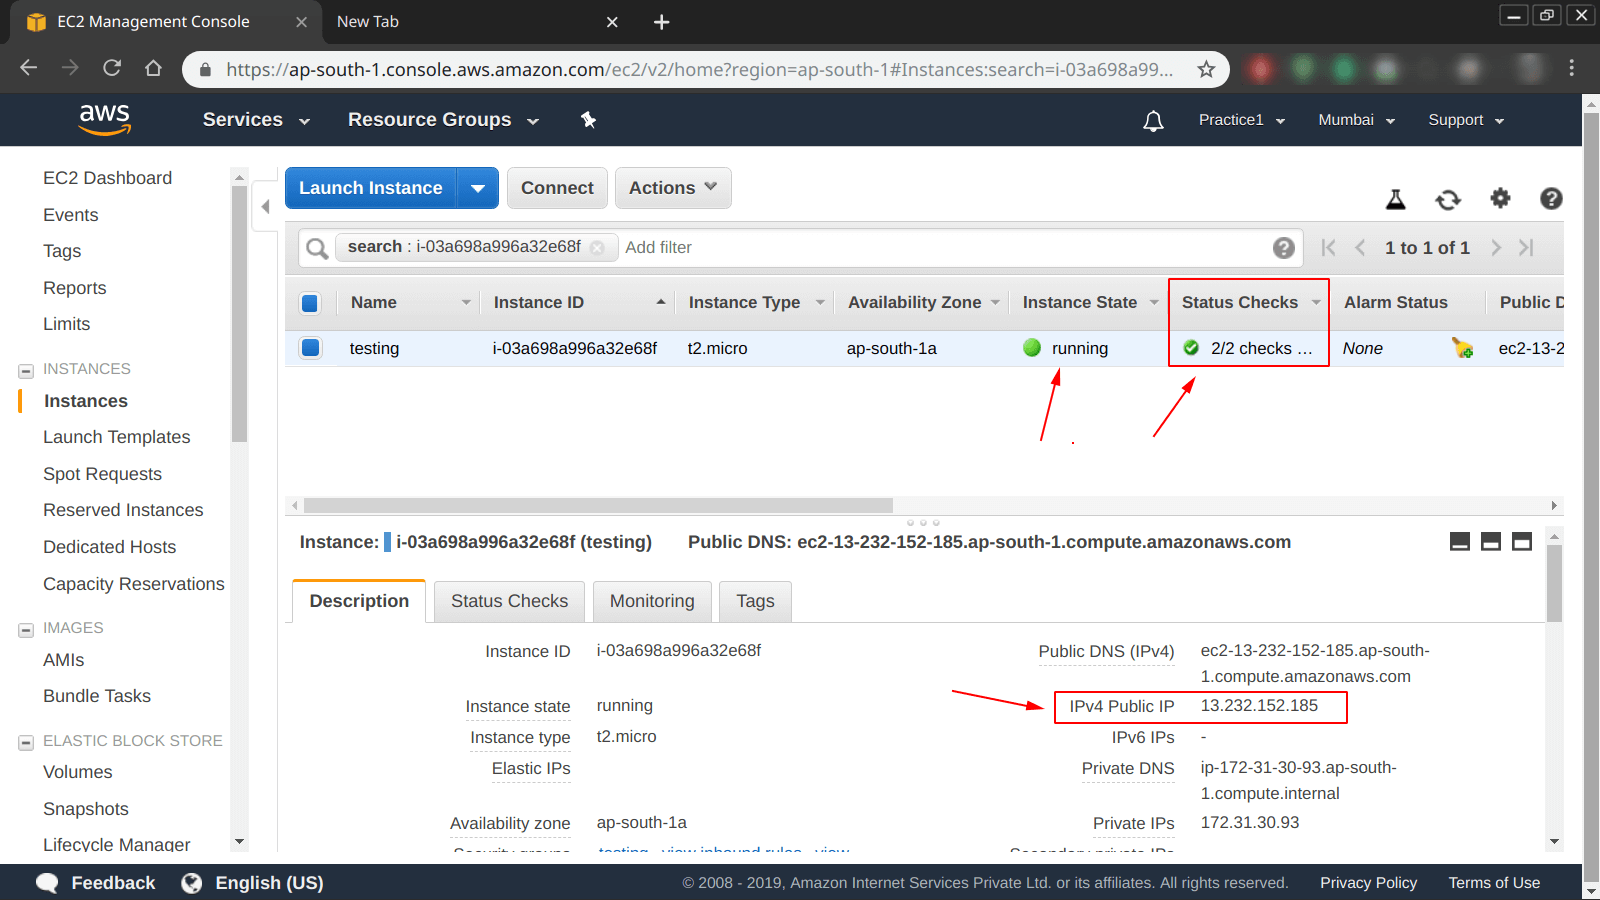
Step 12: Now, let the instance/machine settle and wait until under the “status checks = 2/2 checks” appears.
Note: You can also see that the AWS has also assigned a “Public IP” to our instance and also a “Public DNS”.
Note: By default, Amazon only provides “IPV4” based “Public DNS” and “Public IP”.
Conclusion
In this post, we have learned “how to create an instance on AWS”, there is more to this which we are going to cover in future posts. If you have any concerns you can let us know by commenting in the comment section below.
More on AWS:
